1. บทนำ
ขอบคุณสำหรับการซื้อasing the Pyle PRJG74 Portable Home Theater LED Projector. This device is designed to provide a versatile and immersive viewing experience, supporting 1080p resolution for movies, video games, and presentations. Its compact and lightweight design makes it suitable for various environments, from home entertainment to small office use. This manual provides detailed instructions for setup, operation, maintenance, and troubleshooting to ensure optimal performance and longevity of your projector.
2. คำแนะนำด้านความปลอดภัยที่สำคัญ
Please read and follow all safety instructions carefully before using the projector to prevent fire, electric shock, or injury.
- การระบายอากาศ : ตรวจสอบให้แน่ใจว่ามีการระบายอากาศรอบ ๆ โปรเจ็กเตอร์อย่างเพียงพอ อย่าปิดกั้นช่องระบายอากาศ
- แหล่งพลังงาน: ใช้เฉพาะอะแดปเตอร์แปลงไฟที่ระบุไว้ และเสียบเข้ากับเต้ารับไฟฟ้าที่มีสายดินเท่านั้น
- ความชื้น: Do not expose the projector to rain, moisture, or immerse it in water.
- ความร้อน: หลีกเลี่ยงการวางโปรเจ็กเตอร์ใกล้แหล่งความร้อนหรือแสงแดดโดยตรง
- การทำความสะอาด: Unplug the projector before cleaning. Use a dry, soft cloth. Do not use liquid or aerosol cleaners.
- การบริการ: อย่าพยายามให้บริการผลิตภัณฑ์นี้ด้วยตนเอง ส่งต่อการบริการทั้งหมดไปยังช่างบริการที่ผ่านการรับรอง
- การปกป้องดวงตา: อย่ามองตรงเข้าไปในเลนส์โปรเจ็กเตอร์เมื่อลamp อยู่บนแล้ว
3. อะไรอยู่ในกล่อง
ตรวจสอบว่ามีส่วนประกอบทั้งหมดอยู่ครบเมื่อแกะกล่อง:
- Compact Projector (Pyle PRJG74)
- รีโมทคอนโทรล
- สายไฟ
- เคเบิ้ล AV
4. สินค้าหมดview
Familiarize yourself with the projector's components and ports.
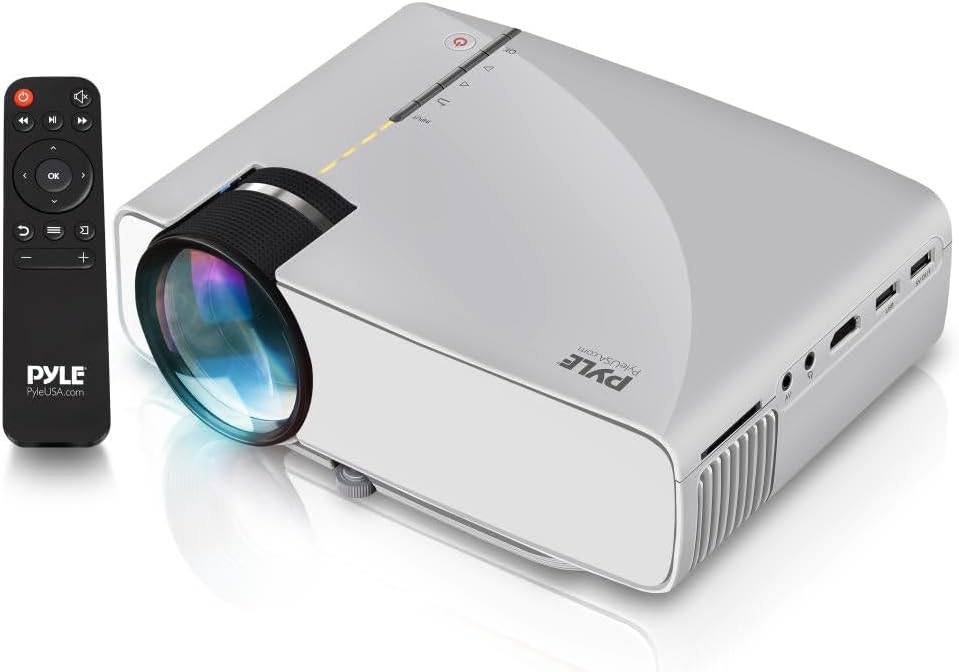
Image: The Pyle PRJG74 projector shown with its included remote control. The projector features a lens on the front, control buttons on top, and various input ports on the side.
4.1 แผงด้านหน้า
- เลนส์ฉายภาพ: ปล่อยภาพออกมา
- วงแหวนโฟกัส: ปรับความคมชัดของภาพ
4.2 แผงด้านบน
- ปุ่มเปิด/ปิด: เปิด/ปิดโปรเจ็กเตอร์
- ปุ่มป้อนแหล่งที่มา: เลือกแหล่งอินพุต
- ปุ่มนำทาง (ขึ้น/ลง/ซ้าย/ขวา/ตกลง): สำหรับการนำทางและเลือกเมนู
4.3 Side/Rear Panels
- พอร์ต HDMI: Connects to HDMI-enabled devices (laptops, gaming consoles, Blu-ray players).
- พอร์ต USB: Connects USB storage devices for media playback.
- ช่องเสียบการ์ด SD: Inserts SD cards for media playback.
- พอร์ต AV: Connects to devices using RCA composite video/audio cables.
- พอร์ต VGA: Connects to computers with VGA output.
- ช่องต่อสัญญาณเสียงออก (3.5 มม.): เชื่อมต่อกับลำโพงภายนอกหรือหูฟัง
- กำลังไฟเข้า: เชื่อมต่อสายไฟ
5. การตั้งค่า
5.1 การจัดวาง
Position the projector on a stable, flat surface or mount it overhead. Ensure the projection path is clear of obstructions. The optimal projection distance and screen size are:
- ขนาดหน้าจอ: Adjustable from 50 to 130 inches.
- ระยะฉายภาพ: Varies based on desired screen size. Refer to the table below for guidance.
| ขนาดหน้าจอ (นิ้ว) | Projection Distance (feet) |
|---|---|
| 50 | ~5.5 |
| 80 | ~8.5 |
| 100 | ~10.5 |
| 130 | ~13.5 |
5.2 การเชื่อมต่อสายไฟ
- เชื่อมต่อสายไฟเข้ากับพอร์ตอินพุตไฟของโปรเจ็กเตอร์
- เสียบปลายอีกด้านของสายไฟเข้ากับเต้ารับไฟฟ้าทั่วไป
5.3 การเชื่อมต่ออุปกรณ์ป้อนข้อมูล
The PRJG74 supports multiple input sources:
- ช่องต่อ HDMI: Connect an HDMI cable from your device (e.g., laptop, game console) to the projector's HDMI port.
- ยูเอสบี/เอสดี: Insert a USB flash drive or SD card into the respective port/slot.
- เอวี: Use the provided AV cable to connect devices with RCA output.
- VGA: Connect a VGA cable from your computer to the projector's VGA port.
5.4 การปรับโฟกัสและคีย์สโตน
- จุดสนใจ: Rotate the focus ring on the front of the projector until the image appears sharp and clear.
- คีย์สโตน: If the projected image appears trapezoidal (wider at the top or bottom), use the keystone correction dial (if available, or digital keystone in menu) to adjust it to a rectangular shape.
6. คู่มือการใช้งาน
6.1 การเปิด/ปิดเครื่อง
- เปิดเครื่อง: Press the Power button on the projector or remote control. The indicator light will turn on.
- หมดแรง: Press the Power button again. Confirm shutdown if prompted.
6.2 การเลือกแหล่งที่มาของอินพุต
After connecting your input device:
- Press the 'Input' button on the projector or remote control.
- Use the navigation buttons to select the desired input source (HDMI, USB, SD, AV, VGA).
- กด 'ตกลง' เพื่อยืนยันการเลือกของคุณ
6.3 การนำทางเมนู
Use the 'Menu' button on the remote or projector to access settings. Navigate using the arrow keys and 'OK' to select. Common settings include:
- การตั้งค่ารูปภาพ: Brightness, Contrast, Color, Aspect Ratio.
- การตั้งค่าเสียง: Volume, Audio Mode.
- การตั้งเวลา: ตั้งเวลาปิดเครื่อง
- การตั้งค่าตัวเลือก: Language, Factory Reset.
6.4 การเล่นสื่อ (USB/SD)
When a USB drive or SD card is inserted and selected as the input source, the projector will display a media browser. You can play various file types including:
- วีดีโอ: MP4, AVI, MKV, etc.
- เสียง: MP3, WMA, AAC ฯลฯ
- ภาพ: JPEG, BMP, PNG, etc.
- ข้อความ: TXT.
นำทางผ่านโฟลเดอร์และ files using the remote control and press 'OK' to play or view.
7. การบำรุงรักษา
การบำรุงรักษาอย่างสม่ำเสมอจะช่วยให้โปรเจคเตอร์ทำงานได้อย่างมีประสิทธิภาพสูงสุดและยืดอายุการใช้งาน
7.1 การทำความสะอาดเลนส์
Use a soft, lint-free cloth specifically designed for optical lenses. Gently wipe the lens to remove dust or smudges. Avoid using abrasive materials or harsh chemicals.
7.2 การทำความสะอาดตัวโปรเจ็กเตอร์
Wipe the exterior of the projector with a soft, dry cloth. For stubborn dirt, a slightly damp สามารถใช้ผ้าชุบน้ำเช็ดได้ ตามด้วยผ้าแห้งอีกผืน ตรวจสอบให้แน่ใจว่าไม่มีของเหลวเข้าไปในช่องระบายอากาศ
7.3 การระบายอากาศ
Periodically check the ventilation openings for dust accumulation. Use a soft brush or compressed air to gently clear any blockages. Proper airflow is crucial for preventing overheating.
8 การแก้ไขปัญหา
หากคุณพบปัญหา โปรดดูปัญหาทั่วไปและวิธีแก้ไขต่อไปนี้:
| ปัญหา | สาเหตุที่เป็นไปได้ | สารละลาย |
|---|---|---|
| ไม่มีภาพแสดง | เลือกแหล่งสัญญาณเข้าไม่ถูกต้อง; การเชื่อมต่อสายเคเบิลหลวม; อุปกรณ์ไม่ได้เปิดใช้งาน | Select the correct input source. Check all cable connections. Ensure the source device is powered on. |
| ภาพเบลอ | ไม่ได้ปรับโฟกัส; โปรเจ็กเตอร์อยู่ใกล้/ไกลจากจอมากเกินไป | Adjust the focus ring. Reposition the projector according to recommended distances. |
| รูปภาพเป็นรูปสี่เหลี่ยมคางหมู | โปรเจ็กเตอร์ไม่ตั้งฉากกับจอภาพ | Adjust the keystone correction dial or digital keystone setting. |
| ไม่มีเสียง | Volume too low; audio cable not connected; source device audio settings. | Increase projector volume. Check audio cable connections. Adjust audio output settings on the source device. |
| รีโมตคอนโทรลไม่ทำงาน | Batteries dead or incorrectly inserted; obstruction between remote and projector. | Replace batteries. Ensure clear line of sight to the projector's IR receiver. |
9. ข้อมูลจำเพาะ
Key technical specifications for the Pyle PRJG74 Projector:
- แบบอย่าง: พีอาร์เจจี74
- ความละเอียดการแสดงผล: 1920 x 1080 (1080p Support)
- ขนาดจอฉายภาพ: 50" to 130" inches
- เทคโนโลยีการเชื่อมต่อ: HDMI, USB, VGA, AV, Mini SD
- แหล่งกำเนิดแสง: นำ
- น้ำหนักสินค้า: 2.06 ปอนด์
- ขนาดสินค้า : 7.9 x 5.7 x 3 นิ้ว
- คุณสมบัติพิเศษ: Lightweight, Portable, Built-in Dual Stereo Speaker
- คำแนะนำการใช้: Home Theater, Gaming, Presentations
10. การรับประกันและการสนับสนุน
ผลิตภัณฑ์ของ Pyle ได้รับการออกแบบและผลิตตามมาตรฐานคุณภาพสูงสุด สำหรับข้อมูลการรับประกัน การสนับสนุนทางเทคนิค หรือสอบถามเกี่ยวกับการบริการ โปรดดูบัตรรับประกันที่แนบมากับผลิตภัณฑ์ของคุณ หรือเยี่ยมชมเว็บไซต์อย่างเป็นทางการของ Pyle webไซต์ โปรดเก็บใบเสร็จรับเงินไว้เป็นหลักฐานการซื้อ
การสนับสนุนทางออนไลน์: For additional resources, FAQs, and contact information, please visit www.pyleusa.com.


