1. บทนำ
The PROZOR 192KHz Digital to Analog Audio Converter is designed to convert digital PCM audio signals from coaxial or Toslink inputs into analog L/R RCA and 3.5mm jack audio outputs simultaneously. This device allows you to connect modern digital audio sources to older analog audio systems, enhancing your listening experience with clear, high-fidelity sound.
Key features include a built-in volume control knob for precise output adjustment, support for a 192kHz 24-bit sampling rate, and an aluminum alloy casing for durability and heat resistance. The gold-plated input and output interfaces minimize signal transmission loss.
2. เนื้อหาบรรจุภัณฑ์
โปรดตรวจสอบว่าสินค้าทั้งหมดมีอยู่ในแพ็คเกจของคุณ:
- PROZOR 192KHz DAC Digital to Analog Audio Converter Unit
- Optical Cable (1m / 3ft)
- สายไฟ USB (5.5 มม.)
- คู่มือการใช้งาน

Figure 2.1: Package contents including the converter, optical cable, USB power cable, and user manual.
3. สินค้าหมดview
Familiarize yourself with the various components and ports of your PROZOR DAC converter.

Figure 3.1: The PROZOR 192KHz DAC converter unit shown with its optical and USB power cables.
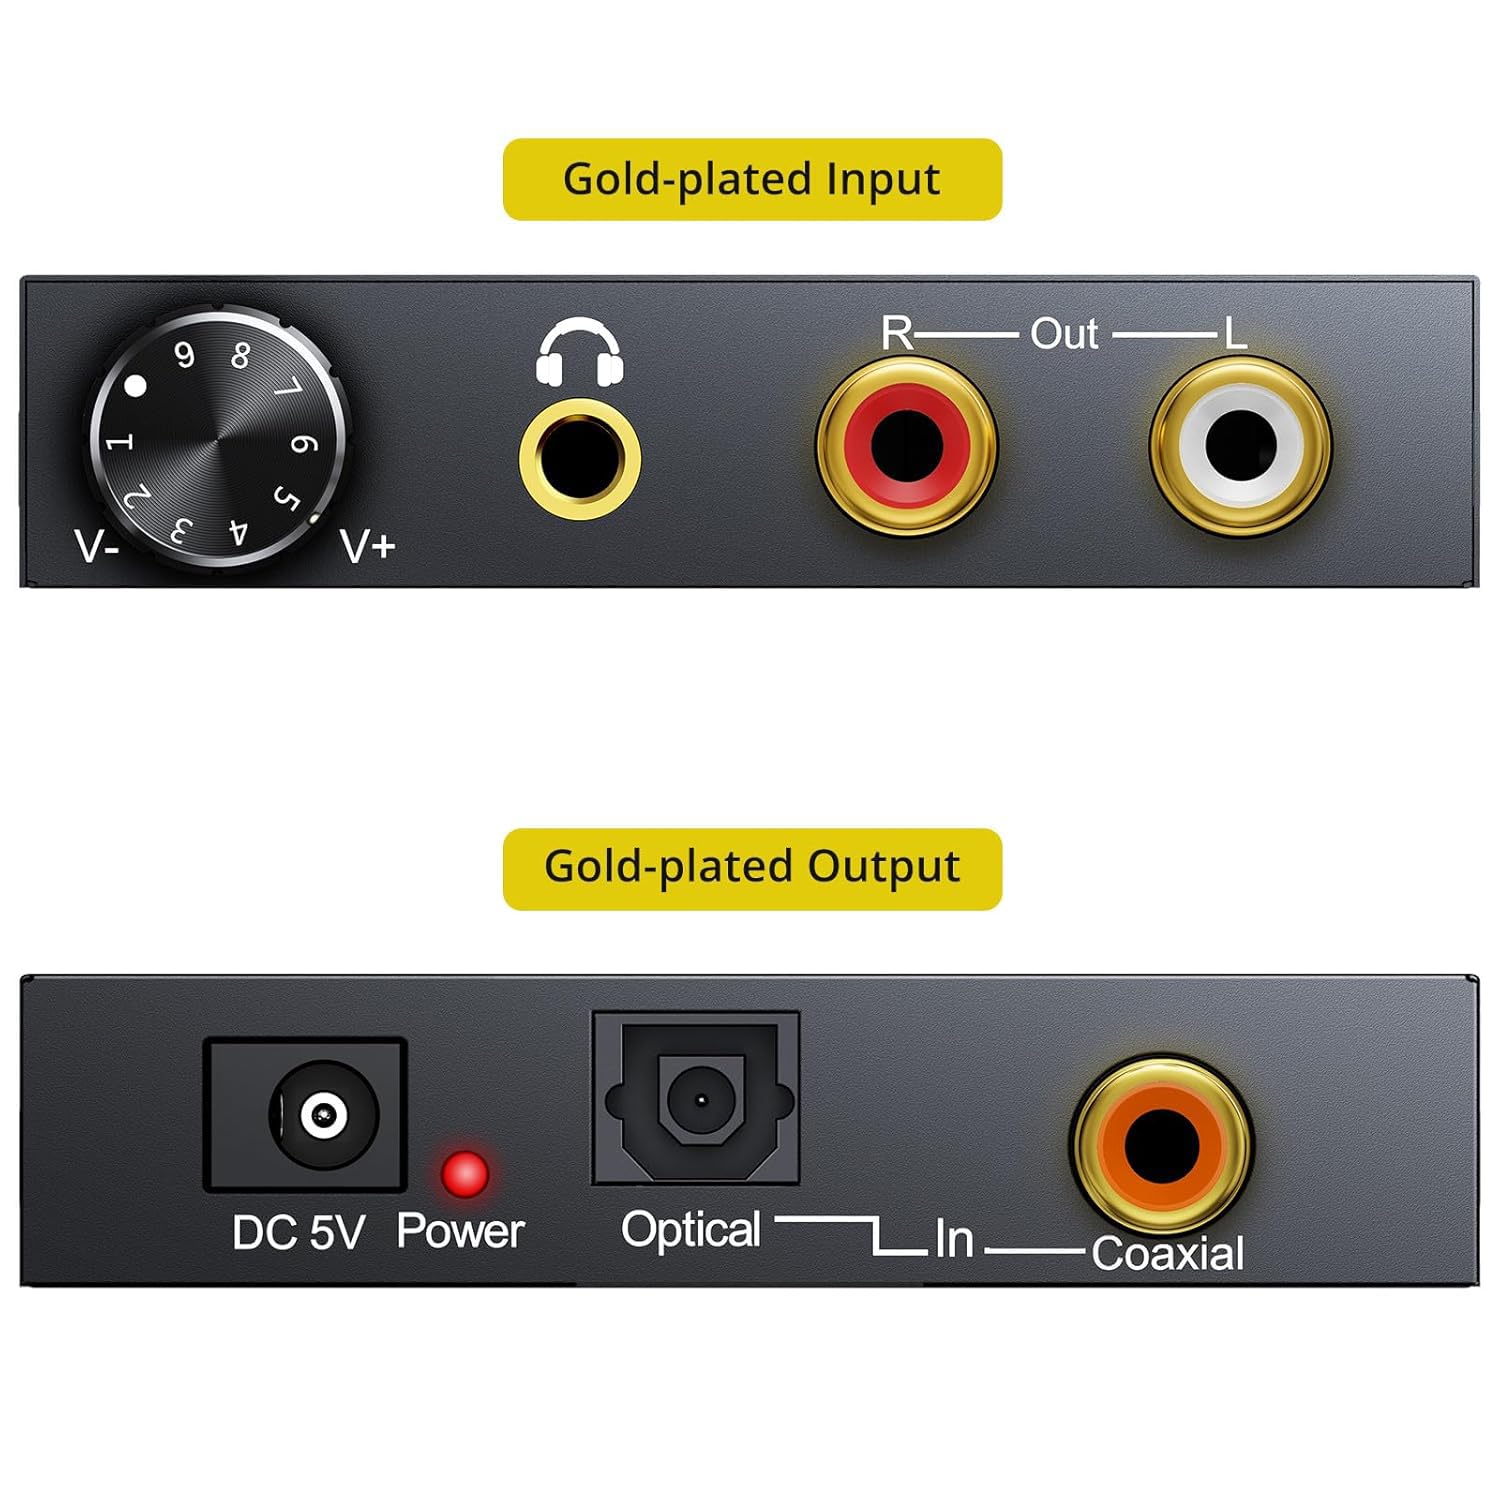
รูปที่ 3.2: รายละเอียด view of the converter's front panel (volume knob, 3.5mm jack, RCA L/R outputs) and rear panel (DC 5V power, Optical input, Coaxial input).

Figure 3.3: Dimensions of the PROZOR 192KHz DAC Converter: 7.0cm (2.75in) length, 6.1cm (2.40in) width, 1.5cm (0.59in) height.
4. การตั้งค่าและการเชื่อมต่อ
Follow these steps to correctly set up your PROZOR 192KHz DAC converter:
- การเชื่อมต่อไฟฟ้า: Connect the provided USB power cable to the DC 5V input port on the converter. Plug the other end of the USB cable into a 5V 1A USB power adapter (not included) or a USB port on your TV/device.
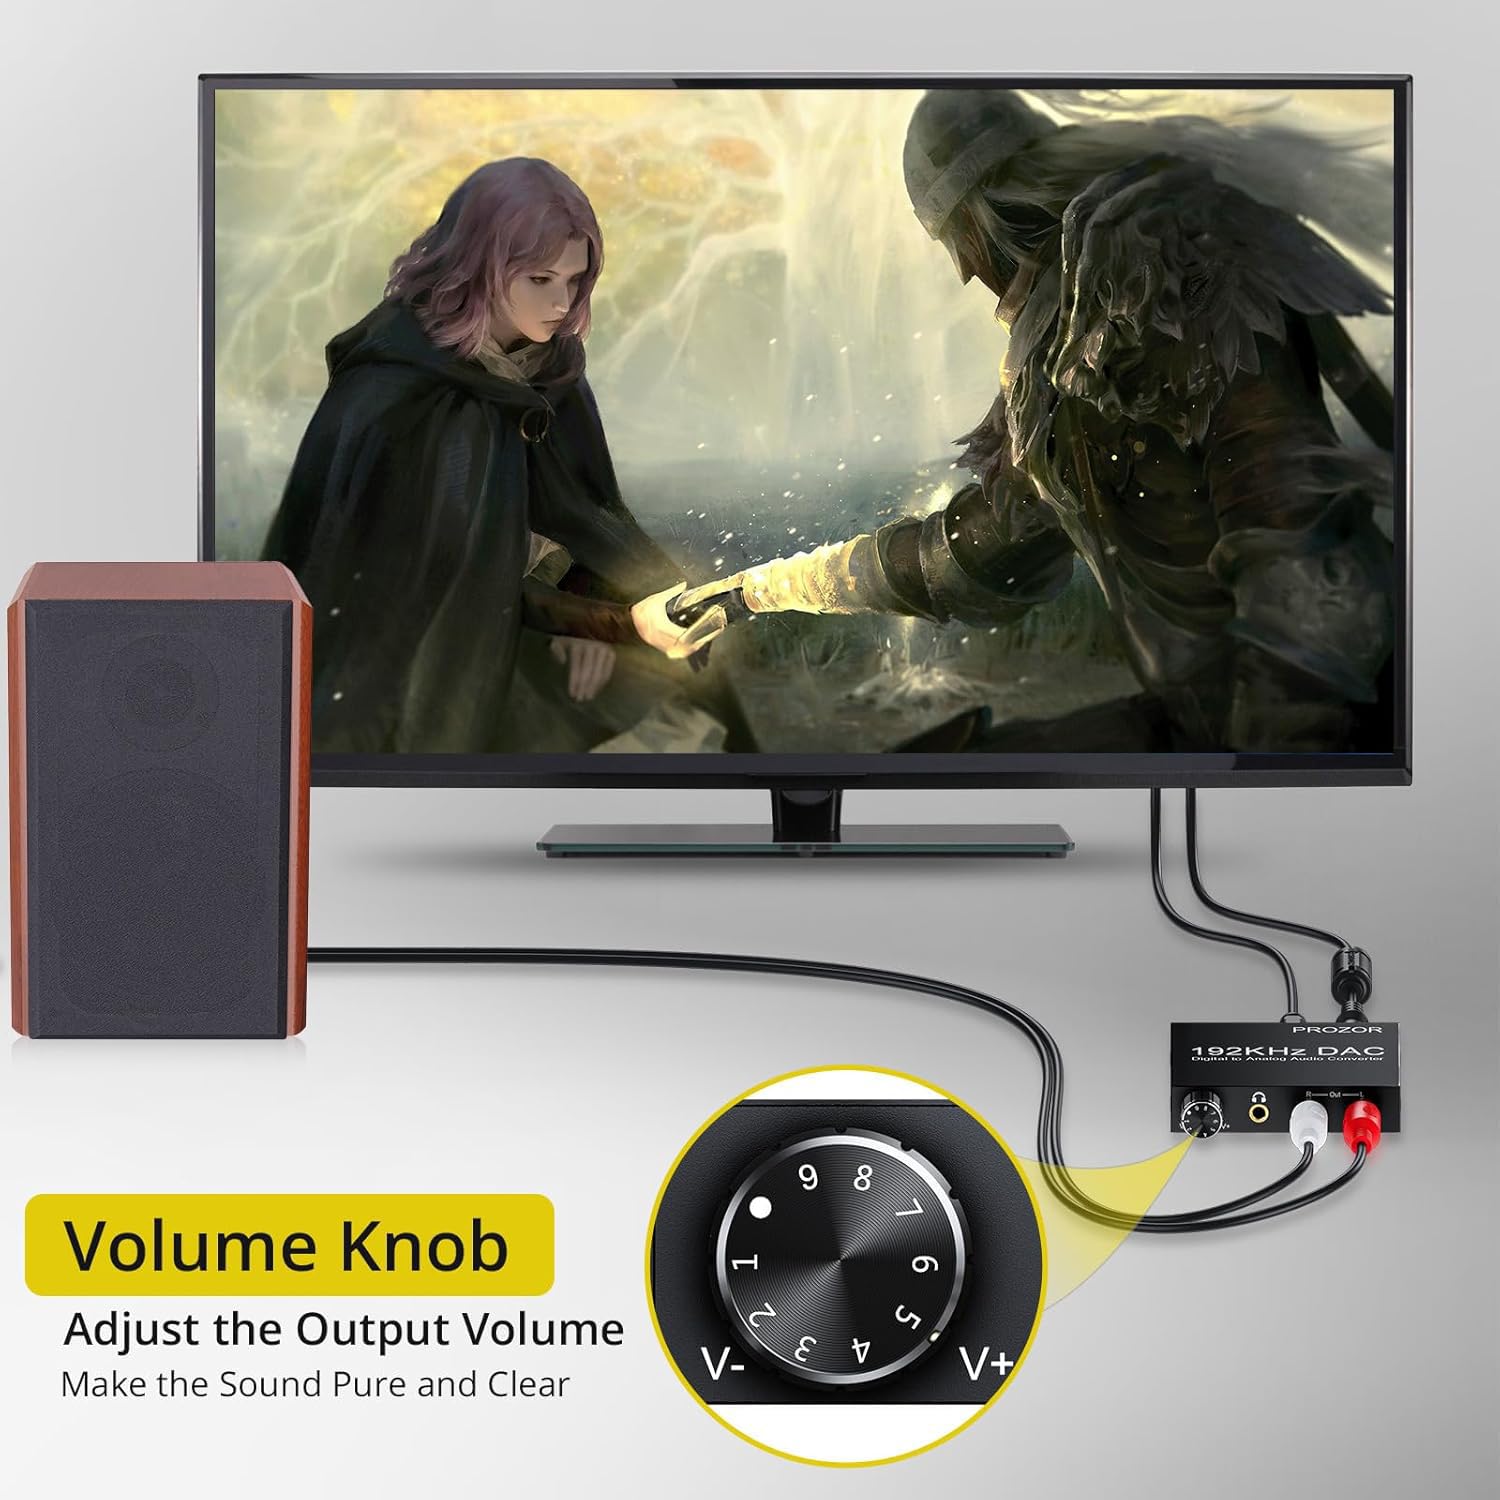
Figure 4.1: Connect the USB power cable to the converter. Ensure a stable 5V 1A power supply.
- อินพุตเสียงดิจิตอล: Connect your digital audio source (e.g., TV, Blu-ray player, game console) to the converter using either an Optical (Toslink) cable or a Coaxial cable.
- For Optical connection, insert the optical cable into the "Optical In" port on the converter and the optical output port on your source device.
- For Coaxial connection, insert the coaxial cable into the "Coaxial In" port on the converter and the coaxial output port on your source device.
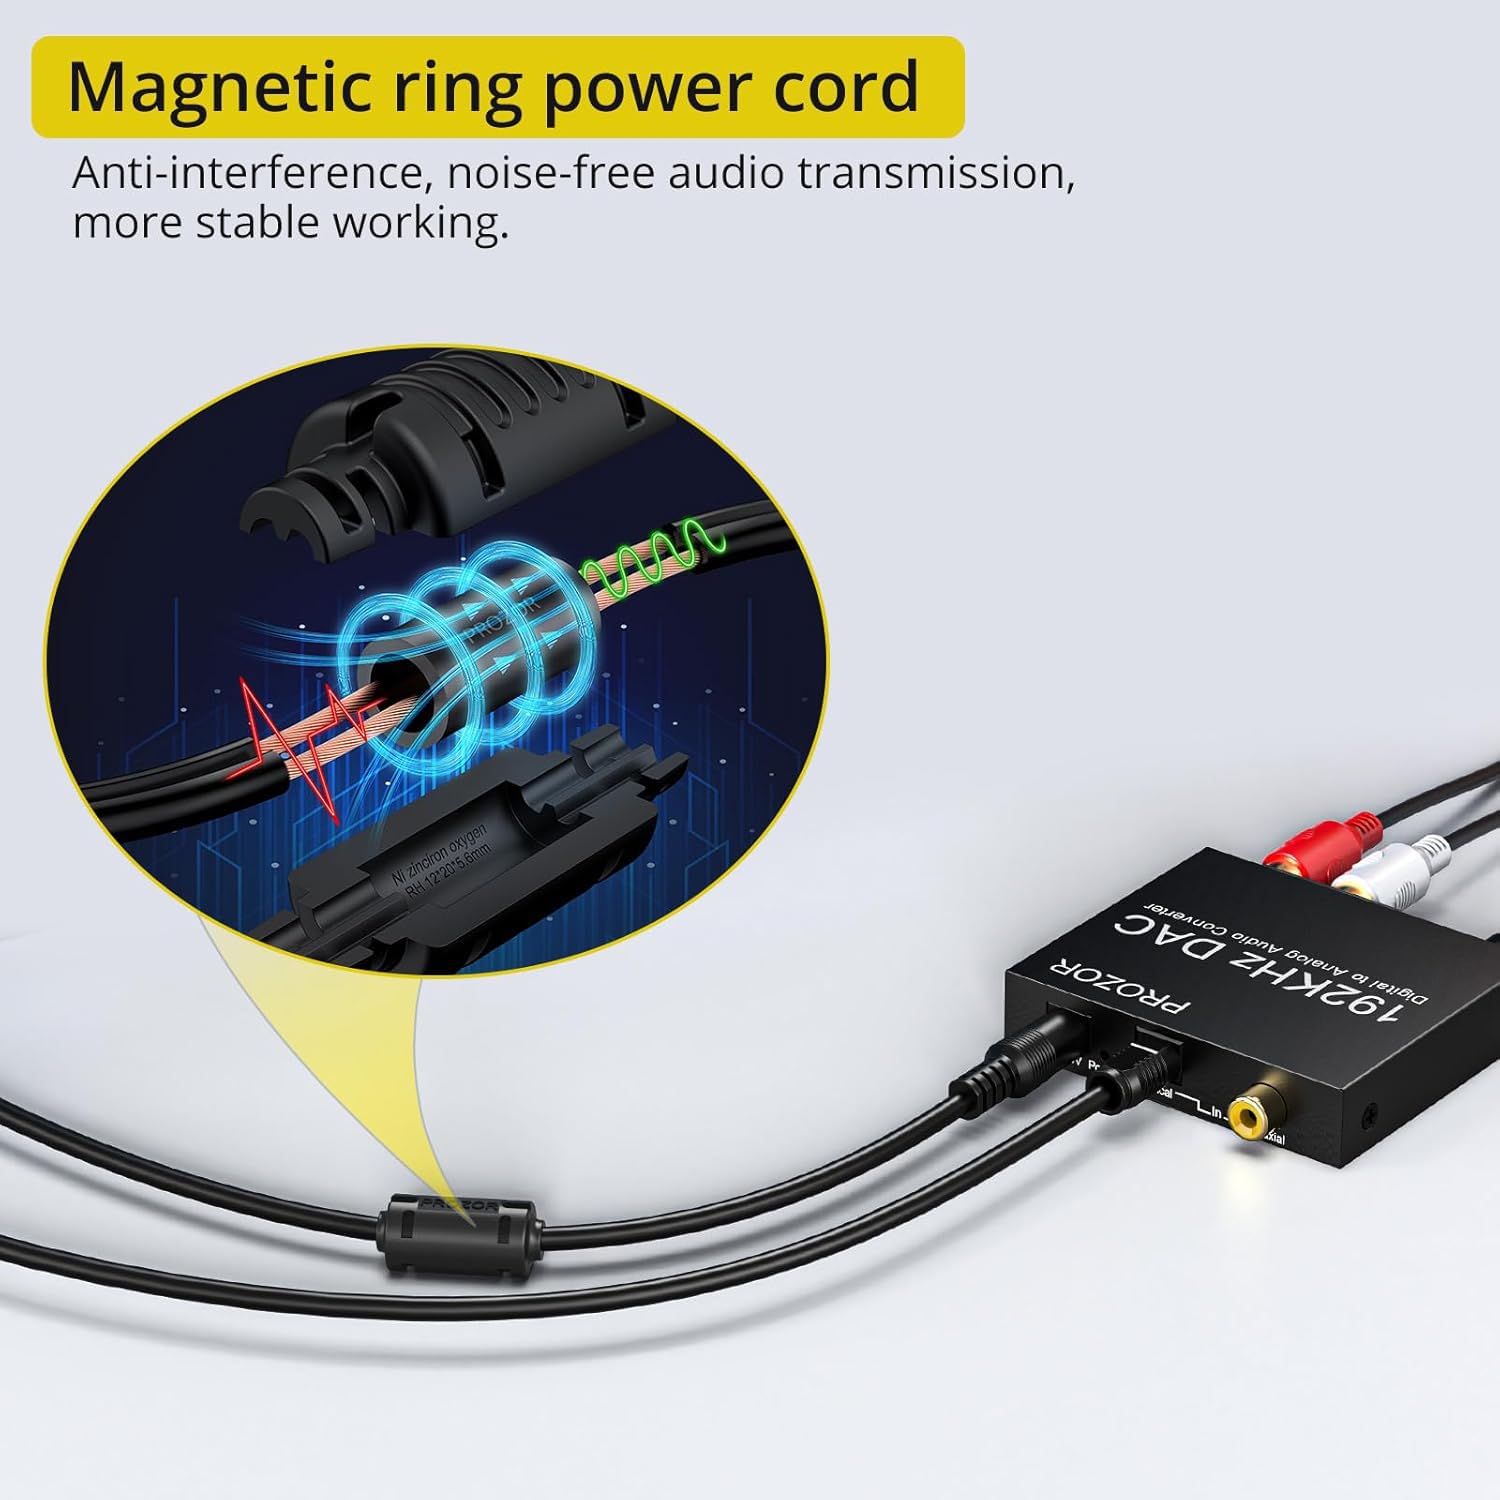
Figure 4.2: The converter can receive digital audio from devices like TV boxes, Blu-ray players, game consoles, and HDTVs.
- เอาต์พุตเสียงอะนาล็อก: Connect your analog audio receiving device (e.g., amplifier, headphones, speakers) to the converter.
- For RCA output, connect RCA L/R cables from the "R-Out" and "L-Out" ports on the converter to your ampลำโพงขยายหรือลำโพงแอคทีฟ
- For 3.5mm jack output, connect headphones or a 3.5mm audio cable to the headphone jack on the converter.
- TV Audio Output Settings (Crucial): The converter supports PCM/LPCM 2.0 channel audio. It does not support 5.1CH, Dolby, or DTS formats. You MUST set your TV's digital audio output to PCM/LPCM.

Figure 4.3: Ensure your TV audio output is set to PCM/LPCM for proper functionality.
Typical PCM setting path (may vary by TV model):
- Menu → Settings → Sound → Expert Settings → Audio Format → PCM
- Menu → All Settings → Sound → Sound Out → Optical → Digital Sound Out → PCM

Figure 4.4: Visual guide for setting TV audio output to PCM format.
5. คู่มือการใช้งาน
Once all connections are made and your TV audio output is correctly configured to PCM, the converter is ready for use.
- การปรับระดับเสียง: Use the volume control knob on the front of the converter to adjust the output volume for both the 3.5mm headphone jack and the L/R RCA outputs simultaneously. Rotate clockwise to increase volume (V+) and counter-clockwise to decrease volume (V-).

Figure 5.1: The volume knob allows precise control over the audio output level.
- เอาต์พุตพร้อมกัน: The converter provides simultaneous audio output through both the L/R RCA ports and the 3.5mm headphone jack. This allows you to connect multiple audio devices if needed.
- ปิดเสียงอัตโนมัติ: The device features a 24-bit SPDIF incoming bit stream on L/R channels to eliminate noise when no signal input is present, and it automatically mutes during non-audio input signals.
6 การแก้ไขปัญหา
- ไม่มีเอาต์พุตเสียง:
- ตรวจสอบให้แน่ใจว่าสายเคเบิลทั้งหมดเชื่อมต่อกับพอร์ตที่เกี่ยวข้องอย่างแน่นหนา
- Verify that the power cable is connected and the converter is receiving power (check for any indicator lights).
- Crucially, check your TV's audio output settings. It MUST be set to PCM/LPCM. Refer to Section 4, Step 4 for detailed instructions.
- Confirm that your audio receiving device (amplifier, headphones) is powered on and set to the correct input.
- เสียงฮัมหรือเสียงรบกวน:
- Ensure the power supply is stable (5V 1A). Avoid using power adapters that do not meet this specification.
- If powering via a USB port on a computer or TV, try a different USB port, especially a USB 3.0 port if available, as some USB 2.0 ports may introduce noise.
- ตรวจสอบการเชื่อมต่อที่หลวมหรือสายเคเบิลเสียหาย
- อลูมิเนียม casing and magnetic ring power cord are designed to reduce interference, but external electrical interference can still occur. Try relocating the converter away from other electronic devices.
- Left/Right Channels Reversed (Rare):
- If you experience reversed left and right audio channels, ensure your RCA cables are connected correctly (red to R, white to L). If the issue persists, you may need to reverse the L/R connections at your receiving device or headphones as a workaround.
7. ข้อมูลจำเพาะ
| คุณสมบัติ | รายละเอียด |
|---|---|
| ยี่ห้อ | ผู้ให้บริการ |
| หมายเลขรุ่น | เอฟบีเอ_4330141664 |
| ขนาดสินค้า | 2.76 x 2.36 x 0.79 นิ้ว |
| น้ำหนักสินค้า | 8.11 ออนซ์ |
| อินพุตเสียง | เสียงดิจิตอลโคแอกเซียลหรือ Toslink |
| เอาท์พุทเสียง | L/R RCA, 3.5mm Jack |
| Sampหลิงอัตราสนับสนุน | 32กิโลเฮิร์ตซ์, 44.1กิโลเฮิร์ตซ์, 48กิโลเฮิร์ตซ์, 96กิโลเฮิร์ตซ์, 192กิโลเฮิร์ตซ์ |
| Bit Rate Support | 24-bit SPDIF incoming bit stream |
| แหล่งจ่ายไฟ | DC 5V 1A (via USB cable, adapter not included) |
| Casinวัสดุ g | โลหะผสมอลูมิเนียม |
8. วิดีโอผลิตภัณฑ์
Watch these official product videos for visual guidance on setup and functionality.
PROZOR 192KHz DAC | Upgrade Volume Adjustable
วิดีโอนี้มีเนื้อหาเกี่ยวกับview of the PROZOR 192KHz DAC converter, highlighting its features including volume adjustment and various connection options. It demonstrates the product's design and how it integrates into an audio setup.
AUTOUTLET 192kHz Optical to RCA Converter with 3ft Cable
This video demonstrates the setup and use of a 192kHz optical to RCA converter, similar in function to the PROZOR model. It shows how to connect the optical cable from a TV and output to RCA for external speakers, including the necessary TV audio settings.
ตัวแปลงเสียงดิจิตอลเป็นอนาล็อก
This video illustrates the basic functionality of a digital to analog audio converter, showing the connection of digital input and analog output to an audio system. It provides a general visual guide for users unfamiliar with such devices.
9. การรับประกันและการสนับสนุน
For detailed warranty information, technical support, or service inquiries, please refer to the official PROZOR product documentation included in your package or visit the PROZOR official webไซต์นี้ โปรดเก็บใบเสร็จรับเงินที่ซื้อไว้เพื่อใช้เรียกร้องการรับประกัน


