1. บทนำ
This user manual provides comprehensive instructions for the setup, operation, maintenance, and troubleshooting of your CipherLab 1500P HP 1D Corded Barcode Scanner. Please read this manual thoroughly before using the device to ensure proper functionality and to maximize its lifespan. Keep this manual for future reference.
2. สินค้าหมดview
The CipherLab 1500P HP is a high-performance 1D corded barcode scanner designed for efficient data capture. It comes with a USB cable for connectivity and an autosense stand for hands-free operation.
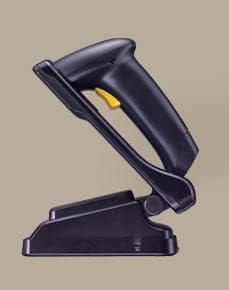
รูปที่ 2.1: CipherLab 1500P HP barcode scanner placed in its autosense stand. The scanner is black with a yellow trigger button, and the stand is also black, providing a stable base for the scanner.
เนื้อหาแพ็คเกจ:
- CipherLab 1500P HP Barcode Scanner
- สายเชื่อมต่อ USB
- Autosense Stand
- This User Manual (or link to digital version)
3. การตั้งค่า
- แกะอุปกรณ์ออกจากกล่อง: Carefully remove the barcode scanner, USB cable, and autosense stand from their packaging.
- เชื่อมต่อสาย USB:
- Locate the USB port on the base of the barcode scanner.
- Insert the smaller end of the USB cable into the scanner's port.
- Insert the larger USB-A end of the cable into an available USB port on your host computer or point-of-sale (POS) system.
- การติดตั้งไดรเวอร์ (Plug & Play): The CipherLab 1500P HP is typically a plug-and-play device. Your operating system should automatically detect and install the necessary drivers. Wait for the installation to complete (usually indicated by a notification).
- Position the Autosense Stand: Place the autosense stand on a stable, flat surface. The stand is designed to hold the scanner in an optimal position for hands-free scanning.
- Place Scanner in Stand: Gently place the barcode scanner into the autosense stand. Ensure it is securely seated. The scanner will automatically switch to presentation mode when placed in the stand, allowing it to detect and scan barcodes without pressing the trigger.
- ทดสอบการเชื่อมต่อ: Open a text editor (e.g., Notepad, WordPad) or a compatible application on your computer. Scan a known barcode. The scanned data should appear in the text editor, confirming successful setup.
4. คู่มือการใช้งาน
โหมดพกพา:
- Remove the scanner from the autosense stand.
- หันหน้าต่างสแกนไปที่บาร์โค้ดที่คุณต้องการสแกน
- Press and hold the yellow trigger button. A red scanning line will emit from the scanner.
- Position the scanner so the red line crosses the entire barcode.
- Once the barcode is successfully read, the scanner will emit an audible beep and/or a visual indicator (e.g., LED flash). The data will be transmitted to your connected device.
- ปล่อยปุ่มไกปืน
Autosense (Presentation) Mode:
- Ensure the scanner is securely placed in the autosense stand.
- Hold the barcode in front of the scanner's window.
- The scanner will automatically detect the barcode and activate its scanning engine.
- Once the barcode is successfully read, the scanner will emit an audible beep and/or a visual indicator. The data will be transmitted to your connected device.
เคล็ดลับการสแกน:
- Ensure the barcode is clean and not damaged.
- Adjust the distance between the scanner and the barcode for optimal reading.
- Avoid scanning at extreme angles; try to keep the scanner perpendicular to the barcode.
- สำหรับพื้นผิวสะท้อนแสง ให้ลองเอียงเครื่องสแกนเล็กน้อยเพื่อหลีกเลี่ยงแสงสะท้อน
5. การบำรุงรักษา
- การทำความสะอาด:
- Regularly clean the scanning window with a soft, lint-free cloth.
- สำหรับสิ่งสกปรกฝังแน่น ให้เช็ดออกเล็กน้อยampชุบผ้าด้วยน้ำหรือน้ำยาทำความสะอาดอ่อนๆ ที่ไม่ทำให้เกิดรอยขีดข่วน ห้ามฉีดน้ำยาทำความสะอาดลงบนเครื่องสแกนโดยตรง
- Avoid using harsh chemicals, solvents, or abrasive materials, as these can damage the scanner's surface or internal components.
- พื้นที่จัดเก็บ: เก็บเครื่องสแกนเนอร์ไว้ในที่แห้งและเย็น หลีกเลี่ยงแสงแดดโดยตรงและอุณหภูมิที่สูงหรือต่ำเกินไป
- การดูแลสายเคเบิล: ควรหลีกเลี่ยงการงอหรือบิดสาย USB มากเกินไป เพราะอาจทำให้สายไฟภายในเสียหายได้
- การดูแลยืน: Keep the autosense stand clean and free of obstructions to ensure the scanner can be placed and removed smoothly.
6 การแก้ไขปัญหา
| ปัญหา | สาเหตุที่เป็นไปได้ | สารละลาย |
|---|---|---|
| เครื่องสแกนไม่สามารถอ่านบาร์โค้ดได้ |
|
|
| ไม่มีการส่งข้อมูลไปยังคอมพิวเตอร์ |
|
|
| เครื่องสแกนส่งเสียงบี๊บแต่ไม่มีข้อมูล |
|
|
7. ข้อมูลจำเพาะ
| คุณสมบัติ | รายละเอียด |
|---|---|
| แบบอย่าง | 1500P HP (33-A1500PCBKU001) |
| พิมพ์ | 1D Corded Barcode Scanner |
| การเชื่อมต่อ | ยูเอสบี |
| อุปกรณ์เสริมที่รวมอยู่ด้วย | USB Cable, Autosense Stand |
| ผู้ผลิต | ไซเฟอร์แล็บ |
| ASIN | B01MDRIJRS |
| วันที่พร้อมใช้งานครั้งแรก | 24 มกราคม 2024 |
8. การรับประกันและการสนับสนุน
For specific warranty information regarding your CipherLab 1500P HP barcode scanner, please refer to the warranty card included with your product or contact your point of purchase. Warranty terms may vary by region and reseller.
For technical support, driver downloads, or additional product documentation, please visit the official CipherLab website or contact their customer support directly. You may need your product model number (33-A1500PCBKU001) and serial number for support inquiries.
CipherLab Official Webเว็บไซต์: www.cipherlab.com