1. บทนำ
This manual provides essential information for the safe and efficient operation of your American DJ 3D Vision Hexagonal Flat Panel Display, model 3DV100. Please read these instructions thoroughly before installation and use to ensure proper functionality and to prevent damage.
2. คำแนะนำด้านความปลอดภัย
- ความปลอดภัยทางไฟฟ้า: Always connect the unit to a grounded power outlet. Ensure the power supply voltage matches the unit's requirements. Disconnect power before any service or maintenance.
- การติดตั้ง: Mount the unit securely to a stable surface or truss system. Ensure proper ventilation around the unit to prevent overheating.
- การจัดการ: Avoid dropping or subjecting the unit to severe impact. Do not expose the unit to rain or moisture.
- การดำเนินการ: Do not operate the unit if the power cord is damaged or if the unit shows signs of malfunction. Refer all servicing to qualified personnel.
3. สินค้าหมดview
The American DJ 3D Vision 3DV100 is a hexagonal flat panel display designed to create dynamic 3D LED effects. Its modular design allows for various configurations, making it suitable for diverse stagอีและแอปพลิเคชันกิจกรรม
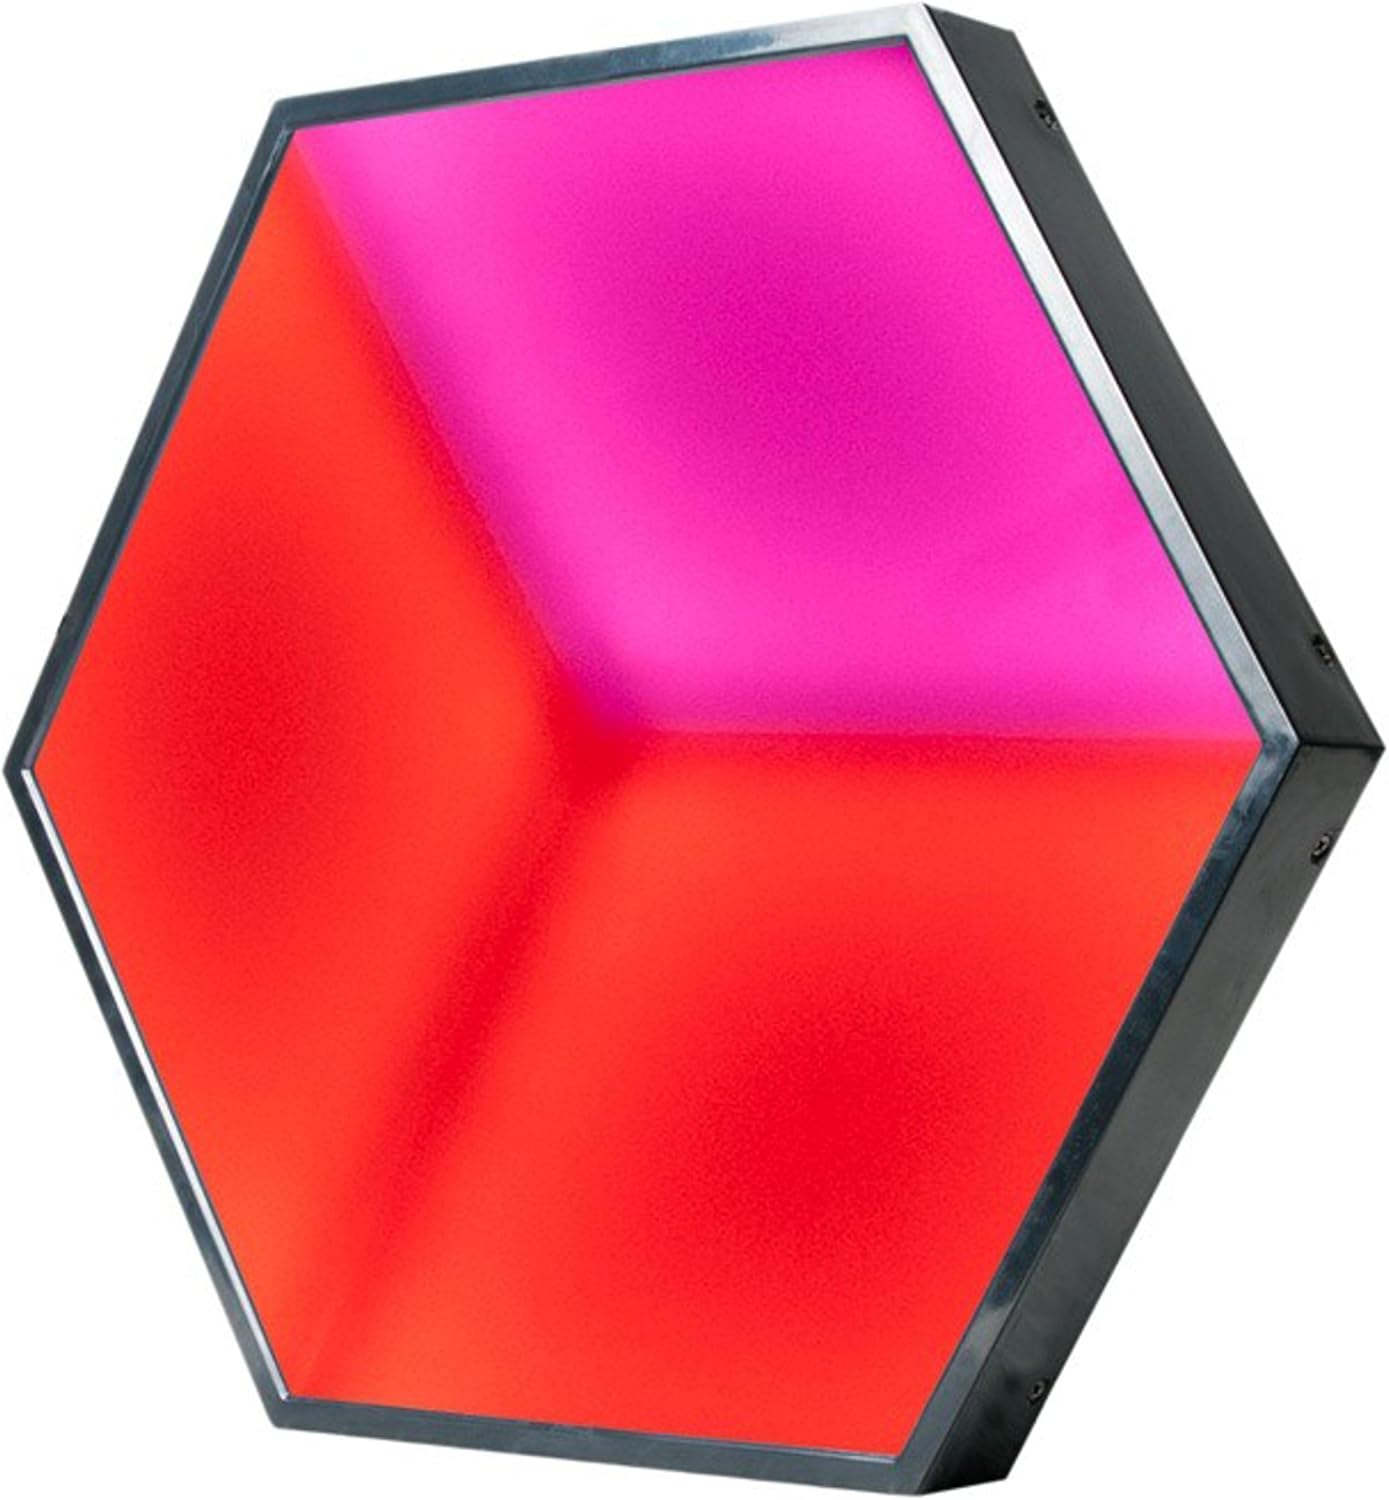
รูปที่ 3.1 : ด้านหน้า view of the American DJ 3D Vision Hexagonal Flat Panel Display, showcasing its illuminated surface with red and pink hues.
3.1 คุณสมบัติหลัก
- 3D LED effect panel for visual depth.
- Modular connecting system for flexible configurations.
- Ethercon data input and output for reliable signal transmission.

รูปที่ 3.2: ด้านหลัง view of the 3DV100 panel, showing the signal input/output and power connections.

รูปที่ 3.3: ตัวอย่างample arrangement of multiple 3D Vision panels demonstrating their modular capability to form larger displays.
4. การตั้งค่า
4.1 การแกะกล่อง
Carefully remove the 3DV100 panel from its packaging. Inspect the unit for any signs of damage during transit. Retain the packaging for future storage or transport.
4.2 การติดตั้ง
The hexagonal design allows for creative mounting. Secure each panel using appropriate hardware (not included) to a stable structure such as a wall or truss. Ensure all mounting points are robust and capable of supporting the unit's weight.
4.3 การเชื่อมต่อไฟฟ้า
- Connect the power cable to the 'POWER IN' port on the rear of the unit.
- เสียบปลายอีกด้านของสายไฟเข้ากับเต้ารับไฟฟ้าที่มีสายดินที่เหมาะสม
- For daisy-chaining power to multiple units, connect a power link cable from the 'POWER OUT' port of one unit to the 'POWER IN' port of the next. Observe maximum power load limits for linked units.
4.4 การเชื่อมต่อข้อมูล
The 3DV100 uses Ethercon connections for data input and output, typically for DMX or similar control signals.
- Connect your DMX controller or signal source to the 'SIGNAL IN' Ethercon port of the first 3DV100 panel.
- To connect multiple panels, use an Ethercon cable from the 'SIGNAL OUT' port of the first panel to the 'SIGNAL IN' port of the next panel in the chain.
- Ensure all Ethercon cables are securely locked into place.
5. คู่มือการใช้งาน
5.1 เปิด/ปิดเครื่อง
Once all connections are made, apply power to the unit. The panel will typically illuminate with a default pattern or color. To power off, disconnect the main power supply.
โหมดควบคุม 5.2
The 3DV100 is designed to be controlled via an external DMX controller. Refer to your DMX controller's manual for specific programming instructions. The unit will respond to DMX signals received through its 'SIGNAL IN' port, allowing for control over color, patterns, and intensity.
Specific DMX channel assignments and internal program options (if available) are detailed in the full technical specifications document, which can be obtained from the manufacturer's webเว็บไซต์.
6. การบำรุงรักษา
6.1 การทำความสะอาด
To maintain optimal performance and appearance, clean the exterior of the unit periodically. Use a soft, lint-free cloth. For stubborn dirt, a slightly damp cloth with mild soap can be used, followed by a dry cloth. Do not use abrasive cleaners or solvents.
6.2 พื้นที่จัดเก็บ
When not in use, store the 3DV100 in a dry, dust-free environment, preferably in its original packaging or a protective case.
7 การแก้ไขปัญหา
- ไม่มีไฟฟ้า: Check the power cable connection at both the unit and the power outlet. Verify the power outlet is functional.
- ไม่มีเอาท์พุตแสง: Ensure the unit is receiving power. Check DMX signal connections and verify the DMX controller is sending a signal. Confirm the DMX address is correctly set on the unit.
- Incorrect Colors/Patterns: Verify DMX addressing and channel assignments. Ensure the DMX signal is clean and not interrupted.
- การทำงานเป็นระยะ: Check all power and data cable connections for looseness or damage.
If issues persist after performing these checks, contact qualified service personnel.
8. ข้อมูลจำเพาะ
| คุณสมบัติ | รายละเอียด |
|---|---|
| แบบอย่าง | 3DV100 |
| ขนาด (กว้าง x ยาว x สูง) | 17 x 15.25 x 4.5 นิ้ว (43.18 x 38.74 x 11.43 ซม.) |
| น้ำหนัก | 8 ปอนด์ (3.63 กก.) |
| การเชื่อมต่อข้อมูล | Ethercon In/Out |
| การเชื่อมต่อพลังงาน | Power In/Out (Daisy-chainable) |
| ประเภทผล | 3D LED Effect Panel |
| วันที่พร้อมใช้งานครั้งแรก | วันที่ 19 กันยายน 2016 |
9. การรับประกันและการสนับสนุน
For warranty information and technical support, please refer to the official ADJ website or contact your authorized ADJ dealer. Keep your purchase receipt as proof of purchase for any warranty claims.


