1. บทนำ
The KitchenAid KSMPSA Pasta Roller Attachment is designed to work with your KitchenAid Stand Mixer to simplify the process of making fresh, homemade pasta sheets. This attachment allows you to roll 6-inch wide pasta sheets with adjustable thickness, providing a foundation for various pasta types.

Image: KitchenAid Stand Mixer with the KSMPSA Pasta Roller Attachment actively rolling a sheet of pasta dough.
2. คำแนะนำด้านความปลอดภัยที่สำคัญ
- Always ensure the stand mixer is unplugged before attaching or removing the pasta roller.
- Keep fingers and utensils away from the rollers during operation to prevent injury.
- Do not immerse the pasta roller in water or other liquids for cleaning. Refer to the cleaning instructions.
- Use only with KitchenAid Stand Mixers.
- ดูแลเด็กอย่างใกล้ชิดเมื่อใช้งานเครื่อง
3. สิ่งที่รวมอยู่
Your KitchenAid KSMPSA Pasta Roller Attachment package includes:
- (1) Pasta Roller Attachment
- (1) แปรงทำความสะอาด
4. การตั้งค่าและการเชื่อมต่อ
- ตรวจสอบให้แน่ใจว่าปิดเครื่อง: Unplug your KitchenAid Stand Mixer from the electrical outlet.
- ถอดฝาครอบดุมล้อ: Loosen the attachment knob on the mixer's power hub by turning it counter-clockwise. Remove the hub cover.
- แทรกสิ่งที่แนบมา: Insert the shaft of the pasta roller attachment into the power hub, ensuring the power shaft of the attachment fits into the square hub socket.
- การแนบที่ปลอดภัย: Rotate the attachment back and forth if necessary until it fits securely into the power hub. Tighten the attachment knob by turning it clockwise until the attachment is completely secured to the mixer.
- Prepare Mixer: Place a bowl under the pasta roller to catch the pasta sheets.
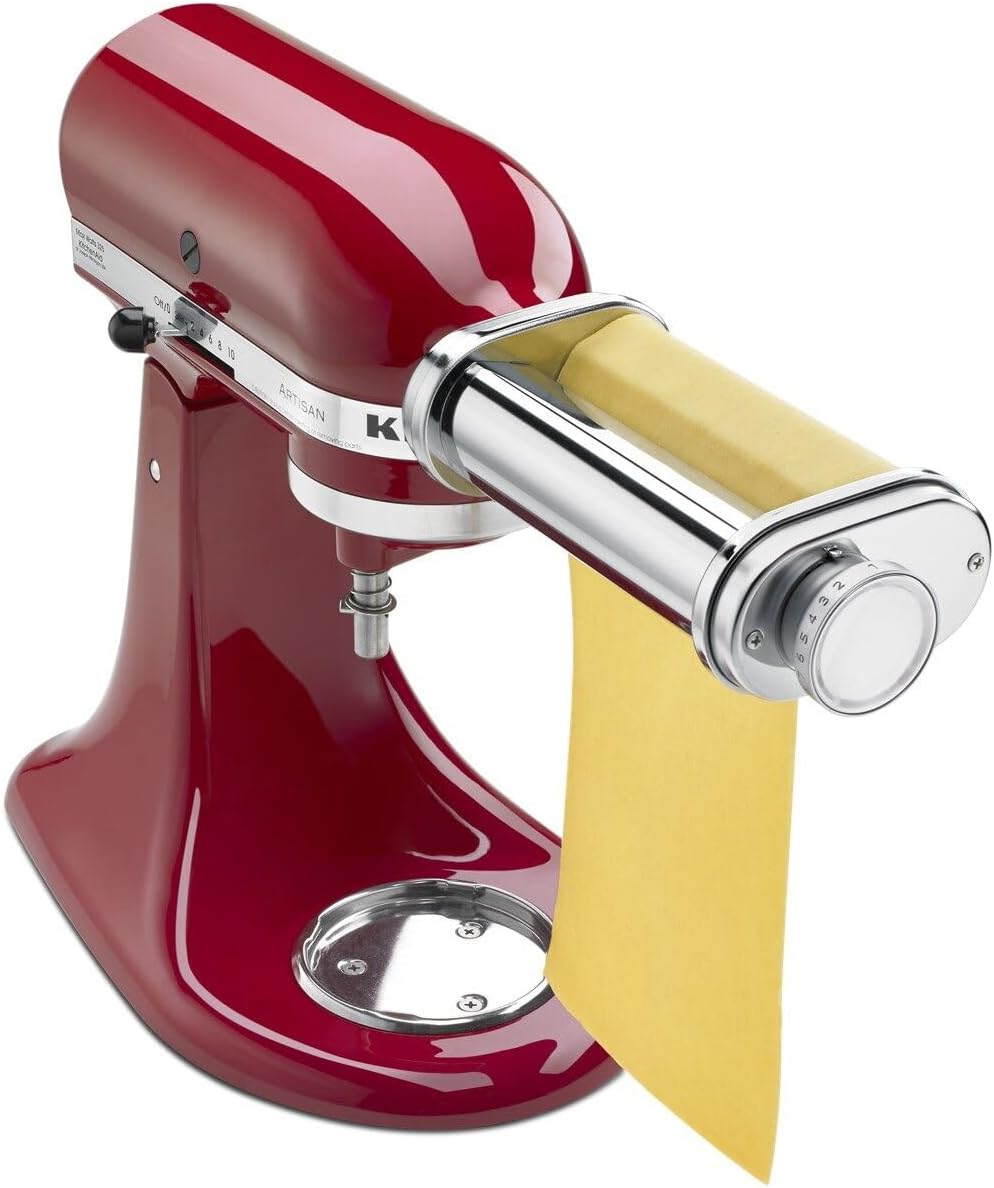
Image: The KitchenAid KSMPSA Pasta Roller Attachment correctly installed on a KitchenAid Stand Mixer.
Video: Official KitchenAid product video demonstrating the installation and basic operation of the pasta roller attachment.
5. คู่มือการใช้งาน
The pasta roller features 8 thickness settings to achieve your desired pasta sheet consistency. Always start with the thickest setting (1) and gradually decrease the thickness.
- เตรียมแป้ง: Ensure your pasta dough is well-kneaded and rested. Flatten a portion of the dough into a rectangle that is slightly narrower than the pasta roller (approximately 5-6 inches wide).
- Set Thickness: Set the pasta roller to the thickest setting (1).
- เปิดเครื่อง: Plug in the stand mixer and turn it to speed 2.
- ผ่านครั้งแรก: Feed the flattened dough into the pasta roller. Guide the dough with your hands as it passes through.
- Fold and Repeat: Fold the pasta sheet in half or thirds, then feed it through the thickest setting again. Repeat this process 2-3 times until the dough is smooth and pliable.
- Decrease Thickness: Gradually decrease the thickness setting one step at a time (e.g., from 1 to 2, then 2 to 3, and so on). Feed the pasta sheet through each setting once or twice until you reach your desired thickness. For thin pasta, settings 6-8 are typically used.
- จัดการอย่างระมัดระวัง: As the pasta sheets become thinner, they will also become longer. Handle them gently to prevent tearing.

Image: A user demonstrating the feeding of pasta dough into the KitchenAid Pasta Roller Attachment.

Image: Detail of the thickness adjustment dial on the pasta roller, indicating 8 available settings.
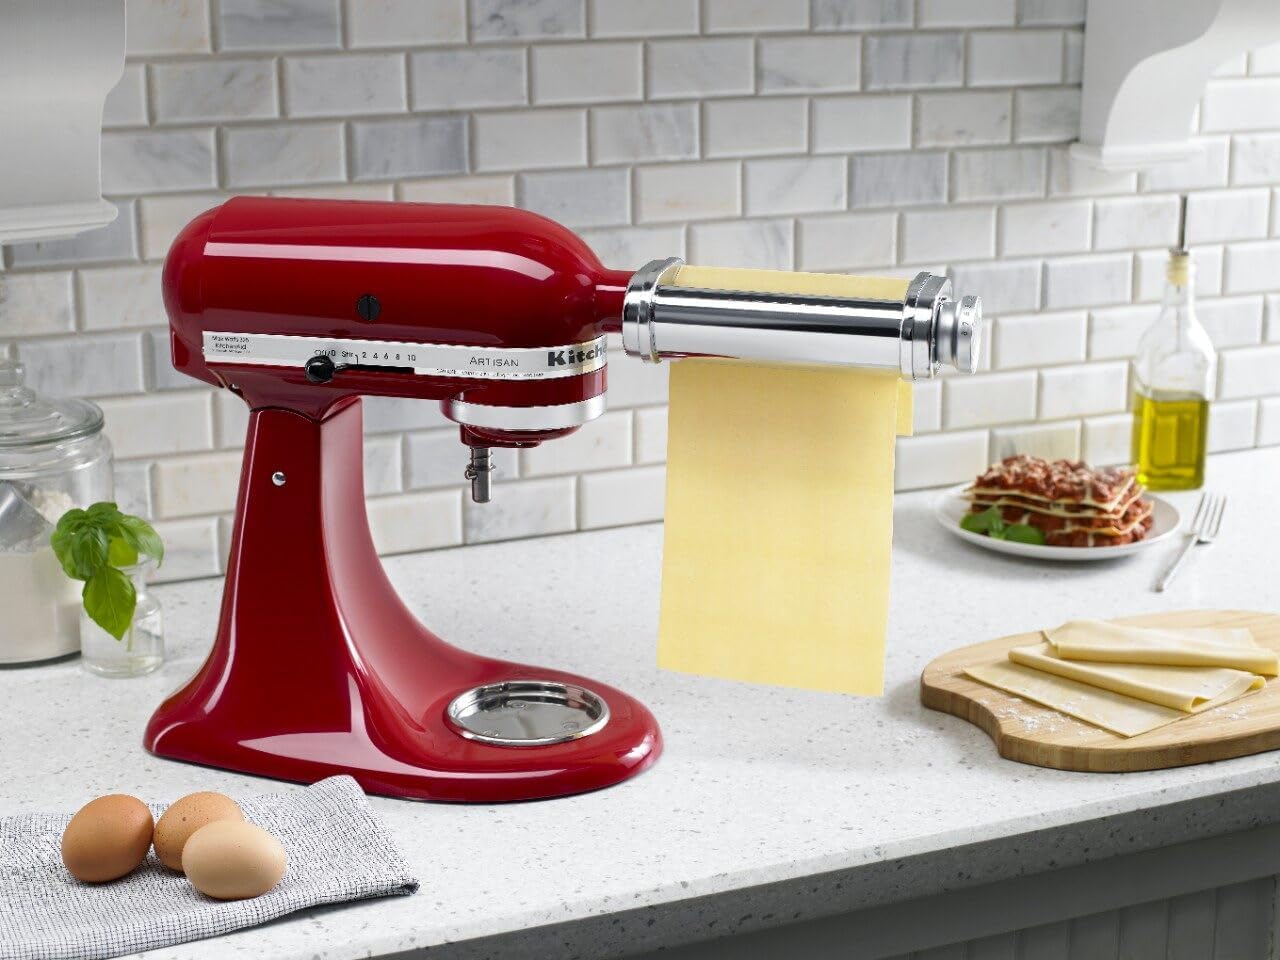
Image: Multiple sheets of fresh pasta dough, rolled to an even thickness, displayed on a countertop.
6. การบำรุงรักษาและการทำความสะอาด
Proper cleaning ensures the longevity and performance of your pasta roller attachment.
- ห้ามซัก: The pasta roller attachment is ไม่สามารถล้างในเครื่องล้างจานได้ และควร NOT be immersed in water or other liquids. This can damage the internal mechanisms and lead to rusting.
- ปล่อยให้แห้ง: After use, allow the attachment to air dry for approximately 30 minutes to an hour. This allows any residual dough to dry and harden, making it easier to remove.
- การทำความสะอาดแปรง: Use the provided cleaning brush to remove any dried dough or flour from the rollers and crevices. A toothpick or small, stiff brush can also be used for stubborn bits.
- เช็ดภายนอก: Wipe the exterior of the attachment with a soft, damp ผ้า. ตรวจสอบให้แน่ใจว่าแห้งสนิทก่อนจัดเก็บ
- พื้นที่จัดเก็บ: Store the attachment in a dry place.
7 การแก้ไขปัญหา
| ปัญหา | สาเหตุที่เป็นไปได้ | สารละลาย |
|---|---|---|
| Dough sticks to rollers. | Dough is too sticky or not floured enough. | Add more flour to the dough or lightly dust the dough surface with flour before feeding. Ensure dough is not too wet. |
| Pasta sheets tear easily. | Dough is too dry or rolled too thin too quickly. | If dough is dry, lightly mist with water. Ensure you gradually decrease thickness settings, allowing the dough to stretch. |
| Attachment not fitting securely. | Attachment not aligned with power hub. | Ensure the mixer is unplugged. Re-insert the attachment, rotating slightly until the shaft aligns with the square hub socket. Tighten the knob firmly. |
8. ข้อมูลจำเพาะ
| คุณสมบัติ | รายละเอียด |
|---|---|
| หมายเลขรุ่น | กสท |
| วัสดุ | สแตนเลส |
| ขนาดสินค้า (กว้าง x ยาว x สูง) | 9.7" x 3.8" x 2.2" |
| น้ำหนักสินค้า | 2.4 ปอนด์ |
| จำนวนการตั้งค่าความหนา | 8 |
| โหมดการทำงาน | คู่มือ (ขับเคลื่อนด้วยเครื่องผสมแบบตั้งโต๊ะ) |
| ปลอดภัยสำหรับเครื่องล้างจาน | ไม่ (แนะนำให้ซักด้วยมือ) |
| จำเป็นต้องประกอบ | ใช่ |
9. การรับประกันและการสนับสนุน
This KitchenAid KSMPSA Pasta Roller Attachment comes with a รับประกันจำกัด 1 ปี จากผู้ผลิต
For technical support, warranty claims, or replacement parts, please refer to the contact information provided in your original product packaging or visit the official KitchenAid webเว็บไซต์.
คุณยังสามารถเยี่ยมชม ร้านค้า KitchenAid บน Amazon สำหรับข้อมูลและผลิตภัณฑ์เพิ่มเติม


