1. บทนำ
This manual provides detailed instructions for the safe and effective operation of the Mastech MS8260A Digital Multimeter. The MS8260A is a versatile instrument designed for various electrical measurements, including AC/DC voltage, AC/DC current, resistance, diode check, continuity test, and transistor check. It also features a non-contact voltagฟังก์ชันการตรวจจับอี
Key features of the MS8260A include:
- แบบไม่สัมผัส voltagการตรวจจับอี
- Automatic power-off function to conserve battery life
- การแจ้งสถานะแบตเตอรี่ต่ำ
2. ข้อมูลด้านความปลอดภัย
To ensure safe operation and service of the meter, please read all instructions carefully before use. Failure to observe safety warnings can result in electric shock, fire, or damage to the meter.
- ถอดสายทดสอบออกจากวงจรทุกครั้งก่อนเปลี่ยนฟังก์ชันการทำงาน
- ห้ามใช้เกินปริมาณที่กำหนดtage ตามเครื่องหมายบนมิเตอร์ ระหว่างขั้วหรือระหว่างขั้วใดๆ กับกราวด์
- ใช้ความระมัดระวังเมื่อทำงานกับ voltages สูงกว่า 30V AC RMS, 42V peak หรือ 60V DC ปริมาตรเหล่านี้tagอาจทำให้เกิดอันตรายจากการช็อตได้
- Before measuring current, ensure the meter's fuses are intact and the test leads are connected correctly.
- ควรเปลี่ยนแบตเตอรี่ทันทีเมื่อไฟแสดงสถานะแบตเตอรี่ต่ำปรากฏขึ้น เพื่อให้ได้ค่าการวัดที่แม่นยำ
- ห้ามใช้งานมิเตอร์หากพบว่าชำรุดเสียหาย หรือหากฝาครอบเปิดอยู่
- ปฏิบัติตามรหัสความปลอดภัยท้องถิ่นและระดับประเทศ
3. ส่วนประกอบผลิตภัณฑ์
The Mastech MS8260A Digital Multimeter consists of the main unit and essential accessories.
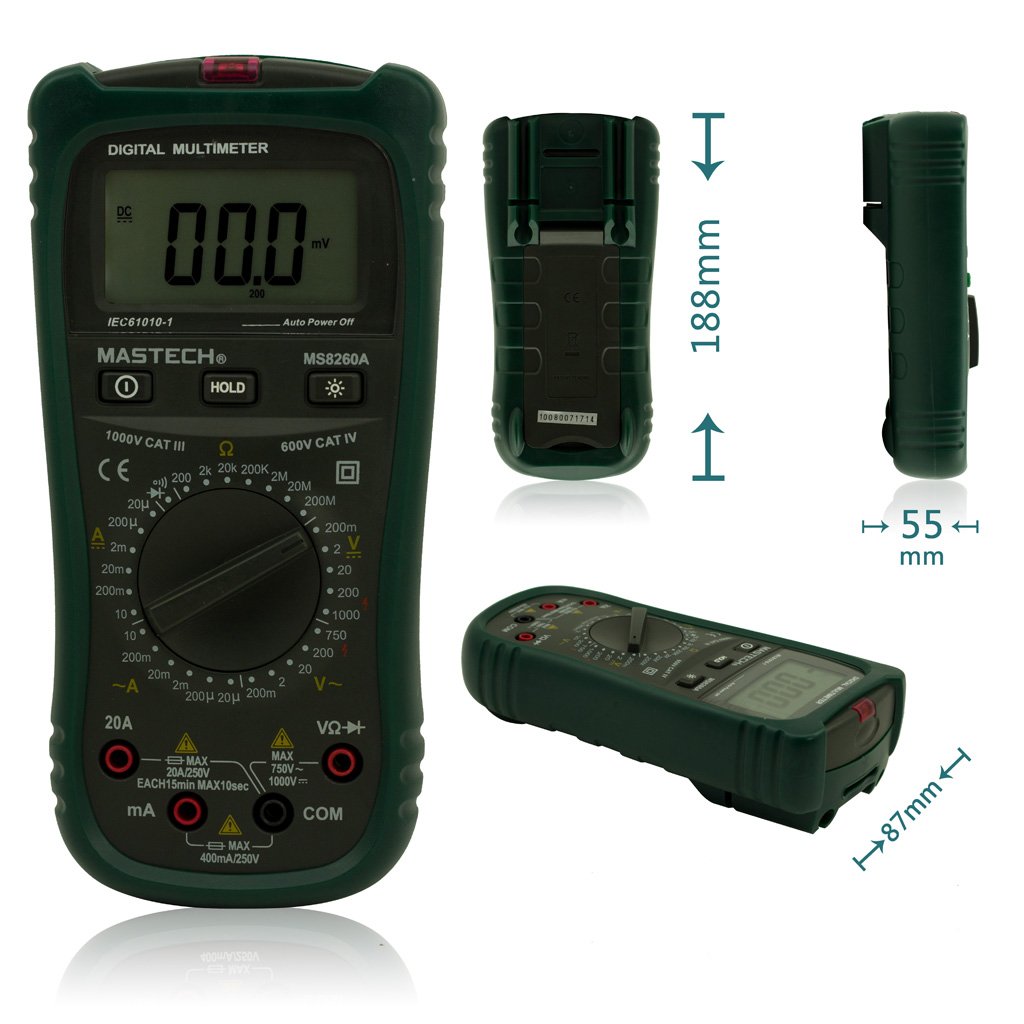
รูปที่ 1 : ด้านหน้า View of Mastech MS8260A Digital Multimeter with Dimensions
This image displays the Mastech MS8260A Digital Multimeter from the front, highlighting its LCD screen, rotary function switch, and input terminals. Key dimensions are indicated: 188mm height, 87mm depth, and 55mm width. The display shows '00.0 mV' and 'Auto Power Off' text. The rotary switch is set to 'mV' range. The input jacks are labeled 'VΩHz', 'mA', and 'COM'.
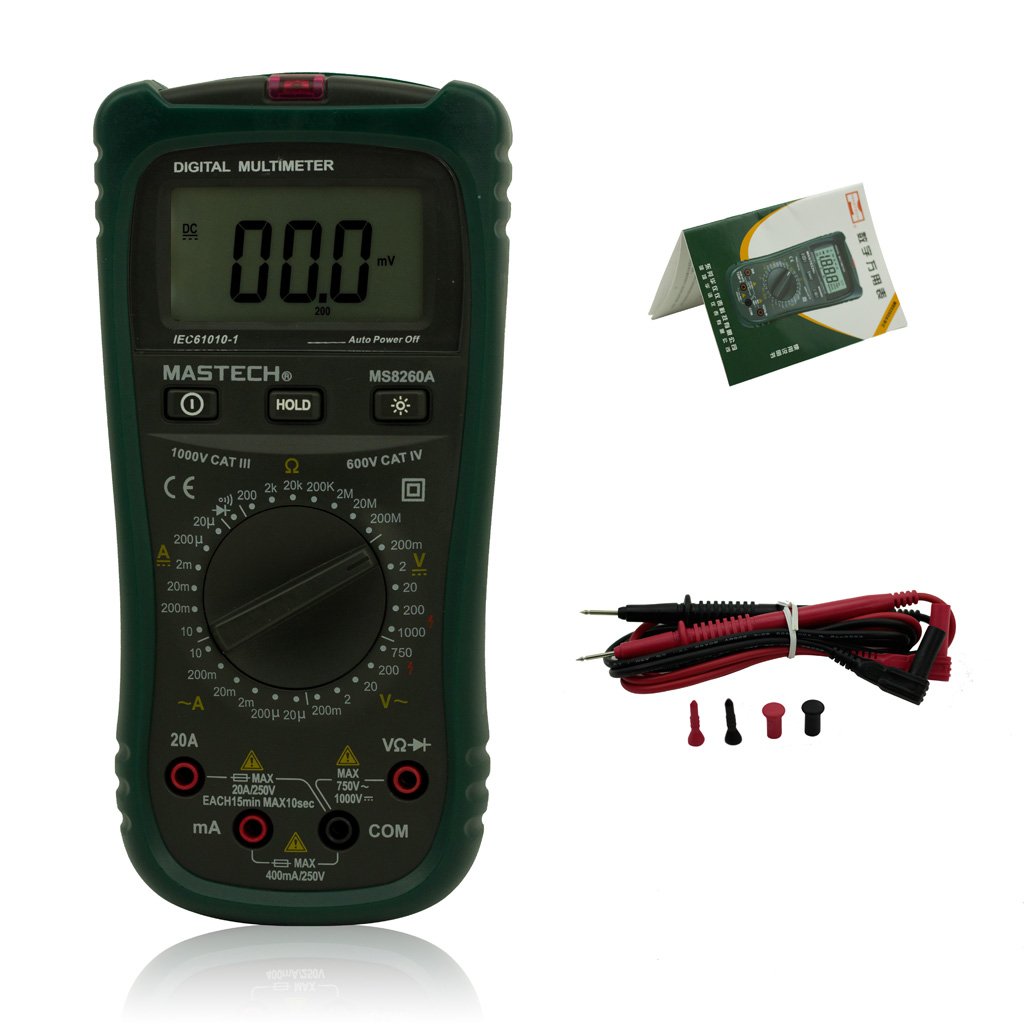
Figure 2: Mastech MS8260A Digital Multimeter and Accessories
This image shows the Mastech MS8260A Digital Multimeter accompanied by its standard accessories. These include a pair of red and black test leads with protective caps, and a printed user manual. The multimeter itself is shown from the front, similar to the main product view.
3.1 คุณสมบัติของหน่วยหลัก
- จอแสดงผล LCD: แสดงค่าการวัด หน่วย และตัวบ่งชี้ฟังก์ชัน
- สวิตช์โรตารี่: เลือกฟังก์ชันและช่วงการวัดที่ต้องการ
- แจ็คอินพุต: Terminals for connecting test leads (VΩHz, mA, COM).
- ปุ่มถือ: หยุดการแสดงค่าปัจจุบันบนหน้าจอ
- ปุ่มแบ็คไลท์: Activates the display backlight for improved visibility in low light.
- แบบไม่สัมผัส Voltage (NCV) Sensor: ตรวจจับปริมาณ ACtagอีโดยไม่ต้องมีการสัมผัสโดยตรง
3.2 อุปกรณ์เสริมที่มีให้
- สายทดสอบ (สีแดงและสีดำ)
- คู่มือการใช้งาน
4. การตั้งค่าเริ่มต้น
4.1 การติดตั้งแบตเตอรี่
The Mastech MS8260A Digital Multimeter requires one 9V 6F22 battery for operation. Batteries are not included with the product.
- ตรวจสอบให้แน่ใจว่ามัลติมิเตอร์ปิดอยู่ และถอดสายวัดทั้งหมดออก
- ค้นหาฝาครอบช่องใส่แบตเตอรี่ที่ด้านหลังของเครื่อง
- ใช้ไขควงถอดสกรูที่ยึดฝาครอบแบตเตอรี่ออก
- ถอดฝาครอบออกอย่างระมัดระวัง
- Connect a new 9V 6F22 battery to the battery clips, observing correct polarity.
- ใส่แบตเตอรี่ลงในช่องใส่
- ใส่ฝาปิดช่องใส่แบตเตอรี่และขันให้แน่นด้วยสกรู
5. คู่มือการใช้งาน
Before taking any measurements, ensure the test leads are properly connected to the meter and the circuit under test.
5.1 การเชื่อมต่อสายทดสอบ
- เชื่อมต่อ .เสมอ สีดำ การทดสอบนำไปสู่ คอม แจ็คอินพุต (ทั่วไป)
- สำหรับเล่มtage, resistance, diode, continuity, and transistor measurements, connect the สีแดง การทดสอบนำไปสู่ VΩเฮิร์ตซ์ แจ็คอินพุต
- For current measurements (mA or 20A), connect the สีแดง test lead to the appropriate current input jack (mA or 20เอ).
5.2 การเลือกฟังก์ชัน
Turn the rotary switch to the desired measurement function and range. The meter will display the reading on the LCD.
5.2.1 DC ฉบับที่tagการวัด (V–)
- ตั้งสวิตช์หมุนไปที่ DC Vol ที่ต้องการtagช่วง (เช่น 200mV, 2V, 20V, 200V, 1000V)
- เชื่อมต่อสายทดสอบแบบขนานกับวงจรหรือส่วนประกอบที่ต้องการวัด
- อ่านเล่มที่tagค่า e บนจอแสดงผล
5.2.2 AC โวลtagการวัด (V∼)
- ตั้งสวิตช์หมุนไปที่ AC Vol. ที่ต้องการtage range (e.g., 2V, 20V, 200V, 750V).
- ต่อสายทดสอบแบบขนานเข้ากับแรงดันไฟฟ้ากระแสสลับtagแหล่งที่มา
- อ่านเล่มที่tagค่า e บนจอแสดงผล
5.2.3 การวัดกระแสไฟฟ้ากระแสตรง (แอมป์)
- Set the rotary switch to the desired DC Current range (e.g., 20µA, 200µA, 2mA, 20mA, 200mA, 20A).
- สำคัญ: Disconnect power to the circuit. Break the circuit and connect the meter in series with the load.
- จ่ายไฟฟ้าเข้าสู่วงจร
- อ่านค่าปัจจุบันบนจอแสดงผล
5.2.4 AC Current Measurement (A∼)
- Set the rotary switch to the desired AC Current range (e.g., 20µA, 200µA, 2mA, 20mA, 200mA, 20A).
- สำคัญ: Disconnect power to the circuit. Break the circuit and connect the meter in series with the load.
- จ่ายไฟฟ้าเข้าสู่วงจร
- อ่านค่าปัจจุบันบนจอแสดงผล
5.2.5 การวัดค่าความต้านทาน (โอห์ม)
- Set the rotary switch to the desired Resistance range (e.g., 200Ω, 2kΩ, 20kΩ, 200kΩ, 2MΩ, 20MΩ).
- ตรวจสอบให้แน่ใจว่าวงจรถูกตัดพลังงานก่อนที่จะวัดความต้านทาน
- เชื่อมต่อสายทดสอบข้ามส่วนประกอบที่ต้องการวัด
- อ่านค่าความต้านทานบนจอแสดงผล
5.2.6 Diode Test (→|)
- Set the rotary switch to the Diode Test position.
- ต่อสายทดสอบสีแดงเข้ากับขั้วบวก และสายทดสอบสีดำเข้ากับขั้วลบของไดโอด
- จอแสดงผลจะแสดงปริมาตรไปข้างหน้าtage drop. สลับขั้วสายไฟ หน้าจอควรแสดง 'OL' (Open Loop) สำหรับไดโอดที่ดี
5.2.7 การทดสอบความต่อเนื่อง (♫)
- Set the rotary switch to the Continuity Test position.
- เชื่อมต่อสายทดสอบข้ามวงจรหรือส่วนประกอบ
- ถ้าค่าความต้านทานต่ำกว่าประมาณ 50 โอห์ม เสียงกริ่งจะดังขึ้น ซึ่งแสดงว่ามีการเชื่อมต่อกัน
5.2.8 การทดสอบทรานซิสเตอร์ (hFE)
- ตั้งสวิตช์หมุนไปที่ตำแหน่ง hFE
- Insert the transistor's emitter, base, and collector leads into the appropriate sockets on the meter's hFE test socket.
- The display will show the hFE value (DC current gain).
5.2.9 ไม่สัมผัส Voltagการตรวจจับ e (NCV)
- Set the rotary switch to the NCV position.
- Move the top front part of the meter (where the NCV sensor is located) close to the conductor suspected of having AC voltage.
- ถ้า AC voltage greater than 110V is detected, the meter will emit an audible beep and the NCV indicator light will illuminate.
6. การบำรุงรักษา
6.1 การทำความสะอาด
เช็ดเคสด้วยโฆษณาamp ผ้าและผงซักฟอกอ่อนๆ ห้ามใช้สารกัดกร่อนหรือตัวทำละลาย ตรวจสอบให้แน่ใจว่ามิเตอร์แห้งสนิทก่อนใช้งาน
6.2 การเปลี่ยนแบตเตอรี่
When the low battery indicator appears on the display, replace the 9V 6F22 battery as described in Section 4.1. Prompt battery replacement ensures accurate measurements and proper meter function.
6.3 การเปลี่ยนฟิวส์
If the meter fails to measure current, the fuse may be blown. Refer to the specifications for the correct fuse type and rating. Fuse replacement should only be performed by qualified personnel.
7 การแก้ไขปัญหา
- ไม่มีจอแสดงผลหรือจอแสดงผลจางๆ: ตรวจสอบการติดตั้งแบตเตอรี่และเปลี่ยนหากจำเป็น
- การอ่านค่าที่ไม่ถูกต้อง: Ensure test leads are properly connected, the correct function/range is selected, and the battery is not low.
- ไม่มีการวัดค่าในขณะนี้: Check the fuse. Ensure the meter is connected in series with the circuit.
- แสดงข้อความ 'OL' (Overload): ค่าที่วัดได้เกินช่วงที่เลือกไว้ โปรดเลือกช่วงที่สูงกว่า
8. ข้อมูลจำเพาะ
| ข้อมูลจำเพาะ | ค่า |
|---|---|
| ยี่ห้อ | Mastech |
| หมายเลขรุ่น | MS8260A |
| ประเภทการวัด | มัลติมิเตอร์แบบดิจิตอล |
| แหล่งพลังงาน | 9V 6F22 Battery |
| น้ำหนักสินค้า | 454 กรัม |
| การรับรอง | CE |
| รวมแบตเตอรี่ | เลขที่ |
9. ข้อมูลการรับประกัน
Please refer to the warranty card included with your product or contact Mastech customer support for detailed warranty terms and conditions. Warranty coverage typically applies to defects in materials and workmanship under normal use.
10. การสนับสนุนลูกค้า
For technical assistance, troubleshooting, or service inquiries, please contact Mastech customer support. Refer to the official Mastech webโปรดตรวจสอบเว็บไซต์หรือบรรจุภัณฑ์ของผลิตภัณฑ์เพื่อดูข้อมูลติดต่อล่าสุด
คุณสามารถเยี่ยมชม Mastech Store on Amazon สำหรับข้อมูลผลิตภัณฑ์เพิ่มเติม


