สินค้าเกินview
This manual provides instructions for the replacement tail cap designed for Streamlight Stinger series flashlights. This component is essential for maintaining the functionality and integrity of your flashlight.
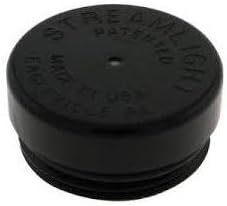
ภาพที่ 1: ด้านบน view of the Streamlight PolyStinger replacement tail cap, showing the textured surface and brand markings.
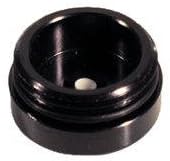
ภาพที่ 2: ภายใน view of the Streamlight PolyStinger replacement tail cap, showing the threaded interior and contact point.
การติดตั้งและการตั้งค่า
The replacement tail cap is designed for easy installation. Ensure your flashlight is turned off and disconnected from any power source before proceeding.
- การตระเตรียม: Ensure the flashlight body and the new tail cap are clean and free of debris.
- Removal of Old Tail Cap: Unscrew the existing tail cap from the rear of your Streamlight Stinger series flashlight by turning it counter-clockwise.
- การตรวจสอบ: Inspect the threads on the flashlight body for any damage or dirt. Clean if necessary.
- Installation of New Tail Cap: Align the new replacement tail cap with the threads on the flashlight body. Carefully screw it on by turning clockwise.
- กระชับ: Hand-tighten the tail cap until it is snug. Do not overtighten, as this may damage the threads or the internal components.
คำแนะนำการใช้งาน
Once the tail cap is securely installed, the flashlight should operate as normal. The tail cap typically houses the power switch or provides a secure end for the battery compartment.
- เปิด/ปิดเครื่อง: Refer to your specific Streamlight Stinger flashlight model's manual for detailed instructions on operating the power switch, which may be integrated into the tail cap or located elsewhere on the flashlight body.
- การเข้าถึงแบตเตอรี่: The tail cap provides access to the battery compartment. Unscrew the tail cap to insert or replace batteries as per your flashlight's specifications.
การซ่อมบำรุง
Proper maintenance ensures the longevity and optimal performance of your tail cap and flashlight.
- การทำความสะอาด: Periodically clean the threads of the tail cap and the flashlight body with a clean, dry cloth to prevent dirt and debris buildup.
- การหล่อลื่น: If your flashlight's original tail cap had an O-ring for water resistance, ensure the new tail cap also has one. Lightly lubricate the O-ring with silicone grease to maintain its seal and prevent wear.
- การตรวจสอบ: Regularly inspect the tail cap for any signs of wear, cracks, or damage. Replace if necessary to maintain water resistance and functionality.
การแก้ไขปัญหา
If you encounter issues after replacing the tail cap, consider the following common solutions:
- ไฟฉายเปิดไม่ติด:
- ตรวจสอบให้แน่ใจว่าฝาปิดท้ายแน่นสนิท ฝาปิดท้ายที่หลวมอาจทำให้การสัมผัสทางไฟฟ้าหยุดชะงักได้
- Check the batteries. Ensure they are correctly inserted and have sufficient charge.
- Inspect the contact points inside the tail cap and on the flashlight body for dirt or corrosion. Clean if necessary.
- การทำงานเป็นระยะ:
- Re-tighten the tail cap.
- Check for any debris or foreign objects obstructing the electrical contacts.
- น้ำเข้า:
- Ensure the O-ring (if present) is properly seated and not damaged.
- ตรวจสอบให้แน่ใจว่าฝาปิดท้ายขันแน่นสนิทแล้ว
ข้อมูลจำเพาะ
| คุณสมบัติ | รายละเอียด |
|---|---|
| ยี่ห้อ | สตรีมไลท์ |
| หมายเลขรุ่น | 760057 |
| วัสดุ | พลาสติก |
| สี | สีดำ |
| ความเข้ากันได้ | Streamlight Stinger series flashlights |
| คุณสมบัติพิเศษ | ทนทาน |
การรับประกันและการสนับสนุน
Specific warranty information for this replacement tail cap is not provided in this manual. For details regarding warranty coverage, technical support, or service, please refer to the official Streamlight website or contact Streamlight customer service directly.
You can typically find contact information and warranty policies on the manufacturer's official webเว็บไซต์: www.streamlight.com


