การแนะนำ
This manual provides detailed instructions for the setup, operation, and maintenance of your NETGEAR Unite Pro 4G LTE Mobile WiFi Hotspot, model AC-781S. This device offers portable internet connectivity, allowing multiple devices to share a 4G LTE connection.
การตั้งค่า
เนื้อหาแพ็คเกจ
ตรวจสอบว่าแพ็คเกจของคุณมีรายการต่อไปนี้:
- NETGEAR Unite Pro 4G LTE Mobile WiFi Hotspot (Model AC-781S)
- เครื่องชาร์จ
- แบตเตอรี่ลิเธียมไอออน
การใส่ซิมการ์ดและแบตเตอรี่
To begin using your hotspot, you must first insert a compatible SIM card and the battery.
- ถอดฝาหลังของอุปกรณ์ออกอย่างระมัดระวัง
- Locate the SIM card slot. Insert your Mini SIM card into the designated slot, ensuring proper orientation.
- Insert the provided Lithium Ion battery into its compartment.
- ใส่ฝาหลังกลับเข้าไปโดยให้แน่ใจว่าล็อคเข้าที่อย่างแน่นหนา

ภาพ: ด้านหน้า view of the NETGEAR Unite Pro Hotspot, showing the touchscreen display with network information.
การเปิดเครื่อง
Press and hold the Power button located on the device until the screen illuminates and the NETGEAR logo appears. The device will then initiate its startup sequence.
การใช้งานอุปกรณ์
Navigating the Touchscreen Display
The NETGEAR Unite Pro features a touchscreen display for easy navigation. Use your finger to tap on icons and swipe through menus to access various settings and information.
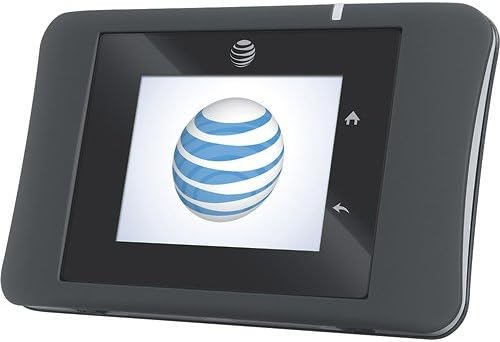
ภาพ: ด้านหน้า view of the NETGEAR Unite Pro Hotspot, displaying the AT&T logo during startup.
การเชื่อมต่อกับ Wi-Fi
To connect your devices to the hotspot:
- On the hotspot's display, locate the Wi-Fi network name (SSID) and password.
- On your client device (e.g., smartphone, laptop), search for available Wi-Fi networks.
- Select the hotspot's SSID from the list and enter the password when prompted.
การจัดการอุปกรณ์ที่เชื่อมต่อ
The Unite Pro can support connectivity for up to 15 devices simultaneously. You can view connected devices and manage network access through the device's web อินเทอร์เฟซ
คุณสมบัติขั้นสูง
- เพิ่มพลังแบตเตอรี่: The device can act as a power bank to charge other USB-powered devices. Connect your device to the hotspot's USB port using a compatible cable.
- WPS (การตั้งค่าป้องกัน Wi-Fi): Use the WPS button on the device for quick and secure connection to compatible Wi-Fi devices without manually entering the password.
- Web อินเทอร์เฟซ: For advanced settings, such as changing Wi-Fi name/password, parental controls, or APN settings, access the device's web อินเทอร์เฟซโดยการพิมพ์
192.168.1.1เข้าไปใน web browser while connected to the hotspot's Wi-Fi network.
การซ่อมบำรุง
การชาร์จอุปกรณ์
To charge your NETGEAR Unite Pro, connect the provided charger to the Micro USB port located on the bottom edge of the device. The battery indicator on the screen will show charging status.

ภาพ: ด้านล่าง view of the hotspot, highlighting the Micro USB charging port and external accessory connectors.
อายุการใช้งานแบตเตอรี่
The device is equipped with a Lithium Ion battery designed for extended use. Expect up to 16 hours of active use and up to 472 hours of standby time, depending on network conditions and usage patterns.
การทำความสะอาด
Use a soft, dry cloth to clean the exterior of the device. Avoid using liquid cleaners or abrasive materials, as these may damage the device.
การแก้ไขปัญหา
If you encounter issues with your NETGEAR Unite Pro, consider the following:
- ไม่มีการเชื่อมต่ออินเทอร์เน็ต: Ensure the SIM card is correctly inserted and activated with your service provider. Check the signal strength indicator on the device screen. Verify that the Access Point Name (APN) settings are correctly configured via the web อินเทอร์เฟซ
- ความเร็วช้า: Check the number of connected devices. Too many devices or heavy usage can reduce speeds. Ensure you have good signal strength.
- อุปกรณ์ไม่ได้เปิดเครื่อง: Ensure the battery is charged. Connect the device to the charger and attempt to power it on again.
- Random Restarts: This could indicate a faulty unit or battery. Ensure the battery is properly seated. If the issue persists, contact customer support.
ข้อมูลจำเพาะ
| คุณสมบัติ | รายละเอียด |
|---|---|
| ขนาดสินค้า | 2.23 x 0.77 x 3.64 นิ้ว |
| น้ำหนักสินค้า | 4.4 ออนซ์ |
| หมายเลขรุ่นสินค้า | AC-781S |
| แบตเตอรี่ | ต้องใช้แบตเตอรี่ลิเธียมไอออน 1 ก้อน (รวมอยู่ด้วย) |
| OS | Google Android (internal system) |
| ความถี่ | 5 GHz (Dual-Band support) |
| เทคโนโลยีการสื่อสารไร้สาย | 4G, Wi-Fi (802.11b, 802.11g, 802.11n) |
| คุณสมบัติพิเศษ | ดับบลิวพีเอส |
| ความละเอียดการแสดงผล | 240 x 320 พิกเซล |
| อินพุตอินเทอร์เฟซมนุษย์ | หน้าจอสัมผัสพร้อมรองรับสไตลัส |
| ฟอร์มแฟกเตอร์ | Candy Bar |
| สี | สีดำ |
| เวลาสนทนาทางโทรศัพท์ | 600 นาที |
| เวลาสแตนด์บายโทรศัพท์ (พร้อมข้อมูล) | 472 ชั่วโมง |
| ผู้ผลิต | AT&T (Original Carrier) / NETGEAR (Brand) |
| วันที่พร้อมใช้งานครั้งแรก | วันที่ 20 ธันวาคม 2013 |
ข้อมูลการรับประกันและการสนับสนุน
For warranty details, technical support, and additional resources, please refer to the documentation included with your product or visit the official NETGEAR support webไซต์นี้ โปรดเก็บหลักฐานการซื้อไว้เพื่อใช้ยืนยันการรับประกัน


