1. บทนำ
The Solis Vac Pro 569 Vacuum Sealing Machine is designed to extend the freshness and shelf life of your food by removing air and sealing it in airtight bags or containers. This process significantly reduces food spoilage, prevents freezer burn, and preserves flavors and nutrients. It is suitable for a wide variety of foods, including dry, moist, and delicate items, and can also be used for non-food items like jewelry or documents.
With its powerful vacuum pump and versatile sealing options, the Solis Vac Pro 569 offers a convenient and efficient solution for food preservation in your home.
2. คำแนะนำด้านความปลอดภัยที่สำคัญ
โปรดอ่านคำแนะนำทั้งหมดอย่างละเอียดก่อนใช้งานเครื่องใช้ไฟฟ้า การไม่ปฏิบัติตามคำแนะนำด้านความปลอดภัยเหล่านี้อาจส่งผลให้เกิดไฟฟ้าช็อต ไฟไหม้ หรือบาดเจ็บสาหัสได้
- ควรตรวจสอบให้แน่ใจเสมอว่าเครื่องใช้ไฟฟ้าเชื่อมต่อกับเต้ารับไฟฟ้าที่มีสายดินและมีแรงดันไฟฟ้าที่ถูกต้องtagอี (240 โวลต์)
- ห้ามจุ่มเครื่อง สายไฟ หรือเสียบปลั๊กในน้ำหรือของเหลวอื่นๆ
- เก็บอุปกรณ์ให้พ้นจากมือเด็กและสัตว์เลี้ยง
- Do not operate the appliance with a damaged cord or plug, or if it has malfunctioned or been damaged in any way. Contact authorized service personnel for repair.
- Avoid touching hot sealing strips immediately after use. Allow them to cool down.
- Use only vacuum bags and accessories specifically designed for vacuum sealing machines.
- When vacuum sealing moist foods, ensure the drip tray is properly installed and emptied regularly to prevent liquid from entering the machine's vacuum chamber.
- Do not attempt to vacuum seal items with sharp edges that could puncture the bag.
- ถอดปลั๊กเครื่องออกจากเต้าเสียบเมื่อไม่ใช้งานและก่อนทำความสะอาด
3. สินค้าหมดview
Familiarize yourself with the components of your Solis Vac Pro 569 Vacuum Sealing Machine:
- แผงควบคุม: Touch-sensitive buttons for various functions (Vacuum, Seal, Pulse, Cancel).
- แถบปิดผนึก: Heats up to create an airtight seal on vacuum bags.
- ห้องสุญญากาศ: บริเวณที่อากาศถูกระบายออกจากถุง
- ถาดรองน้ำหยด: Removable tray to collect excess moisture from moist foods.
- Hose Port: Connection point for the vacuum hose to seal external containers.
- ตัวล็อคฝาปิด: Securely lock the lid during operation.

Image: The Solis Vac Pro 569 machine actively vacuum sealing a bag containing multiple chicken pieces, demonstrating its primary function.
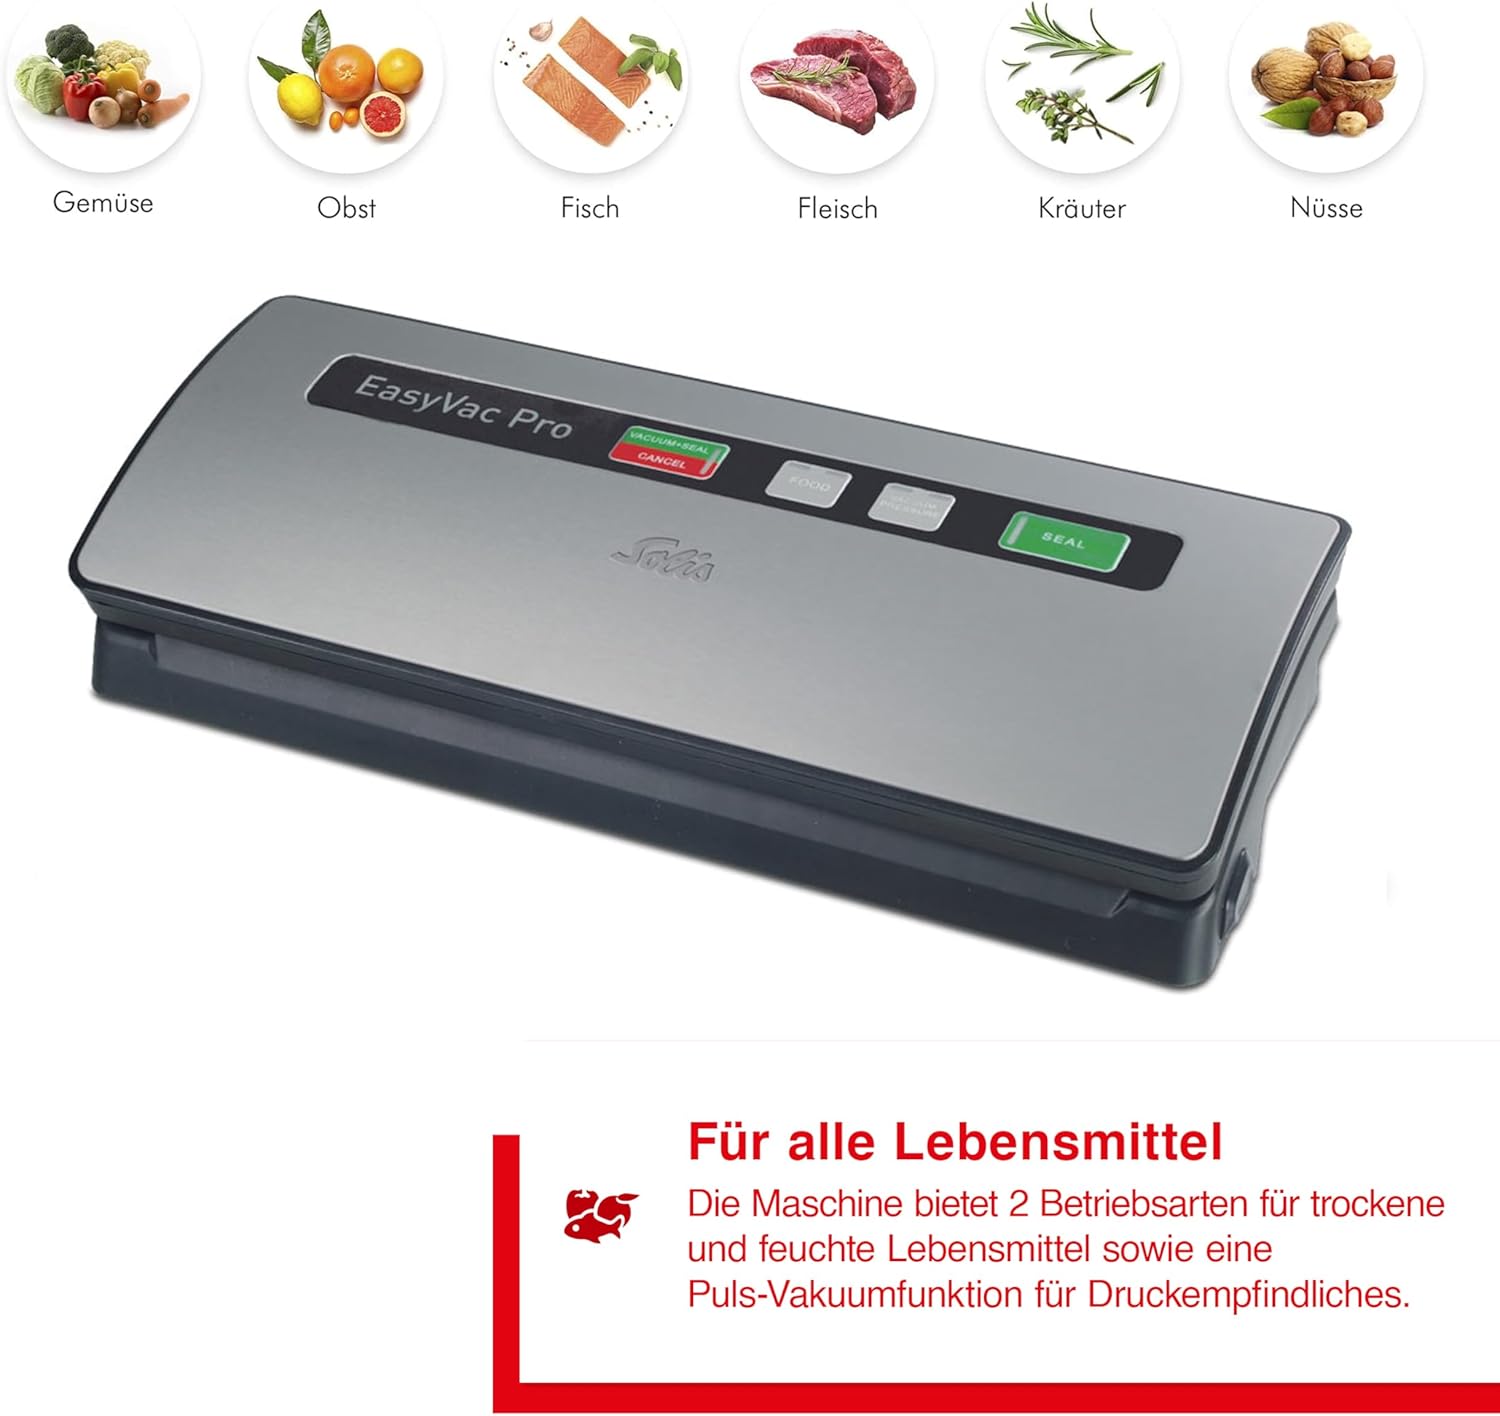
Image: The Solis Vac Pro 569 machine displayed with illustrative icons above it, indicating its versatility for vacuum sealing different food categories such as vegetables, fruits, fish, meat, herbs, and nuts.
4. การตั้งค่า
- การแกะกล่อง: Carefully remove the vacuum sealer from its packaging. Retain the packaging for future storage or transport.
- การทำความสะอาดเบื้องต้น: Before first use, wipe down the exterior of the machine with a damp ผ้า. ตรวจสอบให้แน่ใจว่าแถบปิดผนึกและห้องสุญญากาศสะอาดและแห้ง
- การจัดวาง: Place the appliance on a flat, stable, and dry surface. Ensure there is sufficient space around the machine for proper ventilation and operation.
- การเชื่อมต่อไฟฟ้า: Plug the power cord into a suitable 240 Volt grounded electrical outlet.
5. คู่มือการใช้งาน
5.1 Basic Vacuum Sealing (Dry Foods)
- เตรียมกระเป๋า: Place the food item into a vacuum sealer bag, leaving at least 5-7 cm of space between the food and the open end of the bag. Ensure the inside of the bag's open end is clean and dry.
- ตำแหน่งการวางกระเป๋า: Open the lid of the vacuum sealer. Place the open end of the bag flat into the vacuum chamber, ensuring it lies smoothly over the sealing strip and within the drip tray area.
- ปิดฝา: Firmly press down on both sides of the lid until the latches click into place, indicating the lid is securely locked.
- Start Vacuuming and Sealing: Press the "VACUUM & SEAL" button on the control panel. The machine will automatically remove air from the bag and then proceed to seal it.
- ติดตามความคืบหน้า: The indicator lights will show the progress of the vacuuming and sealing process.
- ปล่อยและถอดออก: Once the process is complete and the indicator lights turn off, press the "CANCEL" button (if applicable) or wait for the machine to automatically release the vacuum. Open the lid by pressing the release buttons (if present) or lifting the latches, and remove the sealed bag.
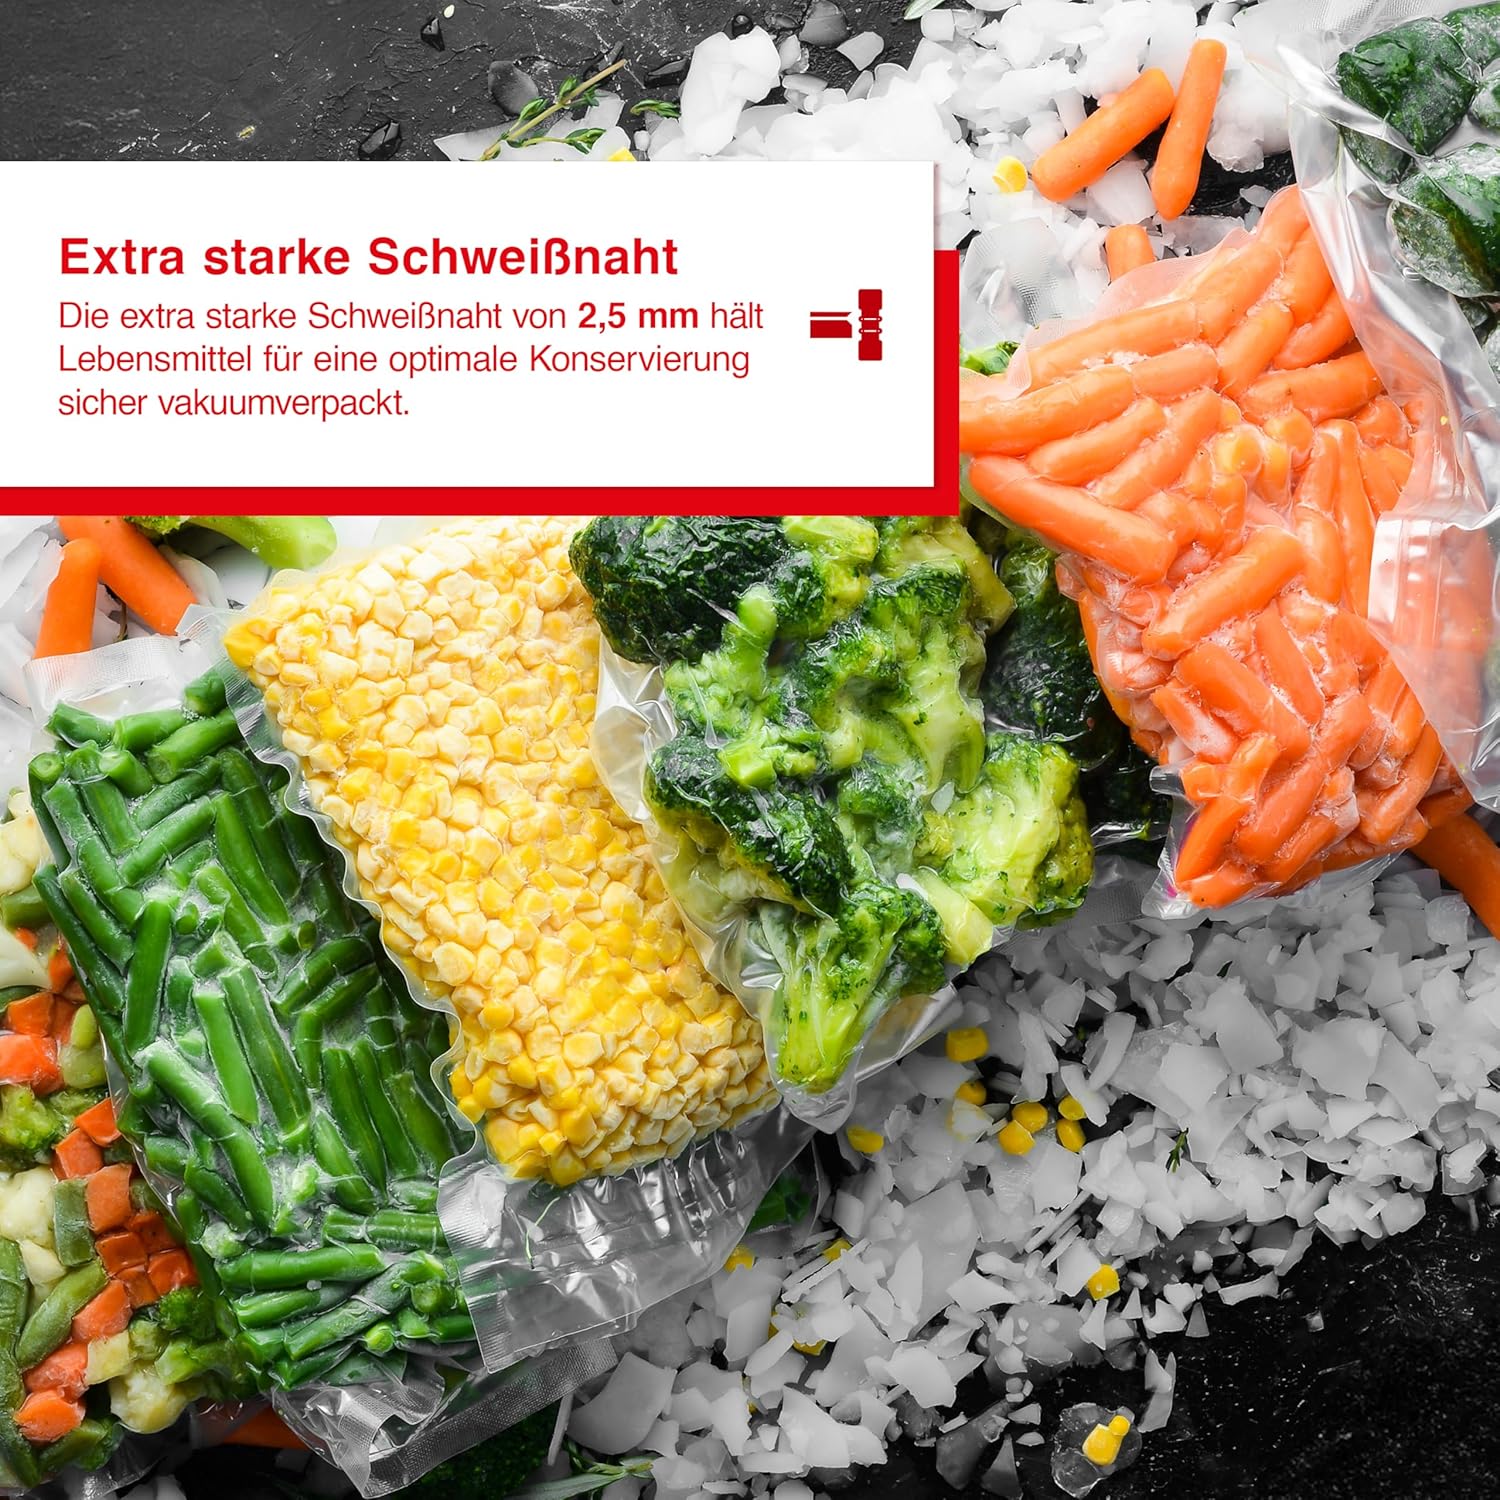
Image: A close-up of various vacuum-sealed frozen vegetables, such as carrots, broccoli, corn, and green beans, resting on ice. This image emphasizes the robust 2.5 mm seal, ensuring optimal preservation.
5.2 Vacuum Sealing Moist or Delicate Foods
For moist foods, ensure the drip tray is clean and properly inserted. For delicate or pressure-sensitive foods, use the Pulse function.
- Prepare and Position: Place the food in the bag as described in 5.1. Ensure no liquid is near the sealing area.
- Use Pulse Function (for delicate items): Instead of "VACUUM & SEAL", press the "PULSE" button repeatedly to control the vacuum pressure manually. Observe the bag and food to prevent crushing.
- Seal Manually: Once the desired vacuum level is reached, press the "SEAL" button to initiate the sealing process. The machine will then create a seal.
- ปล่อยและถอดออก: After sealing, release the lid and remove the bag.

Image: The Solis Vac Pro 569 machine positioned on a kitchen counter, with two fresh salmon fillets and a lemon wedge on a wooden cutting board nearby. This setup demonstrates the machine's powerful vacuum pump, ideal for preserving delicate items like fish.
5.3 Sealing Only (Without Vacuum)
This function is useful for creating custom-sized bags from rolls or sealing bags without removing air.
- ตำแหน่งการวางกระเป๋า: Place the open end of the bag or film roll over the sealing strip.
- ปิดฝา: ปิดฝาให้แน่น
- Initiate Seal: Press the "SEAL" button. The machine will heat the sealing strip to create a seal.
- ถอดถุง: Once the sealing process is complete, open the lid and remove the sealed bag.
5.4 Using the Vacuum Hose for Containers
The Solis Vac Pro 569 can also vacuum seal compatible external containers (sold separately) using the included vacuum hose.
- เตรียมภาชนะ: Place food into a compatible vacuum container and secure its lid according to the container's instructions.
- เชื่อมต่อท่อ: Insert one end of the vacuum hose into the hose port on the Solis Vac Pro 569. Connect the other end to the vacuum port on the container's lid.
- เริ่มการดูดฝุ่น: Press the "VACUUM" button (or "VACUUM & SEAL" if it initiates vacuum first). The machine will begin to remove air from the container.
- การตัดการเชื่อมต่อ: Once the vacuum is complete (the machine may stop automatically or you may need to press "CANCEL"), disconnect the hose from both the machine and the container.
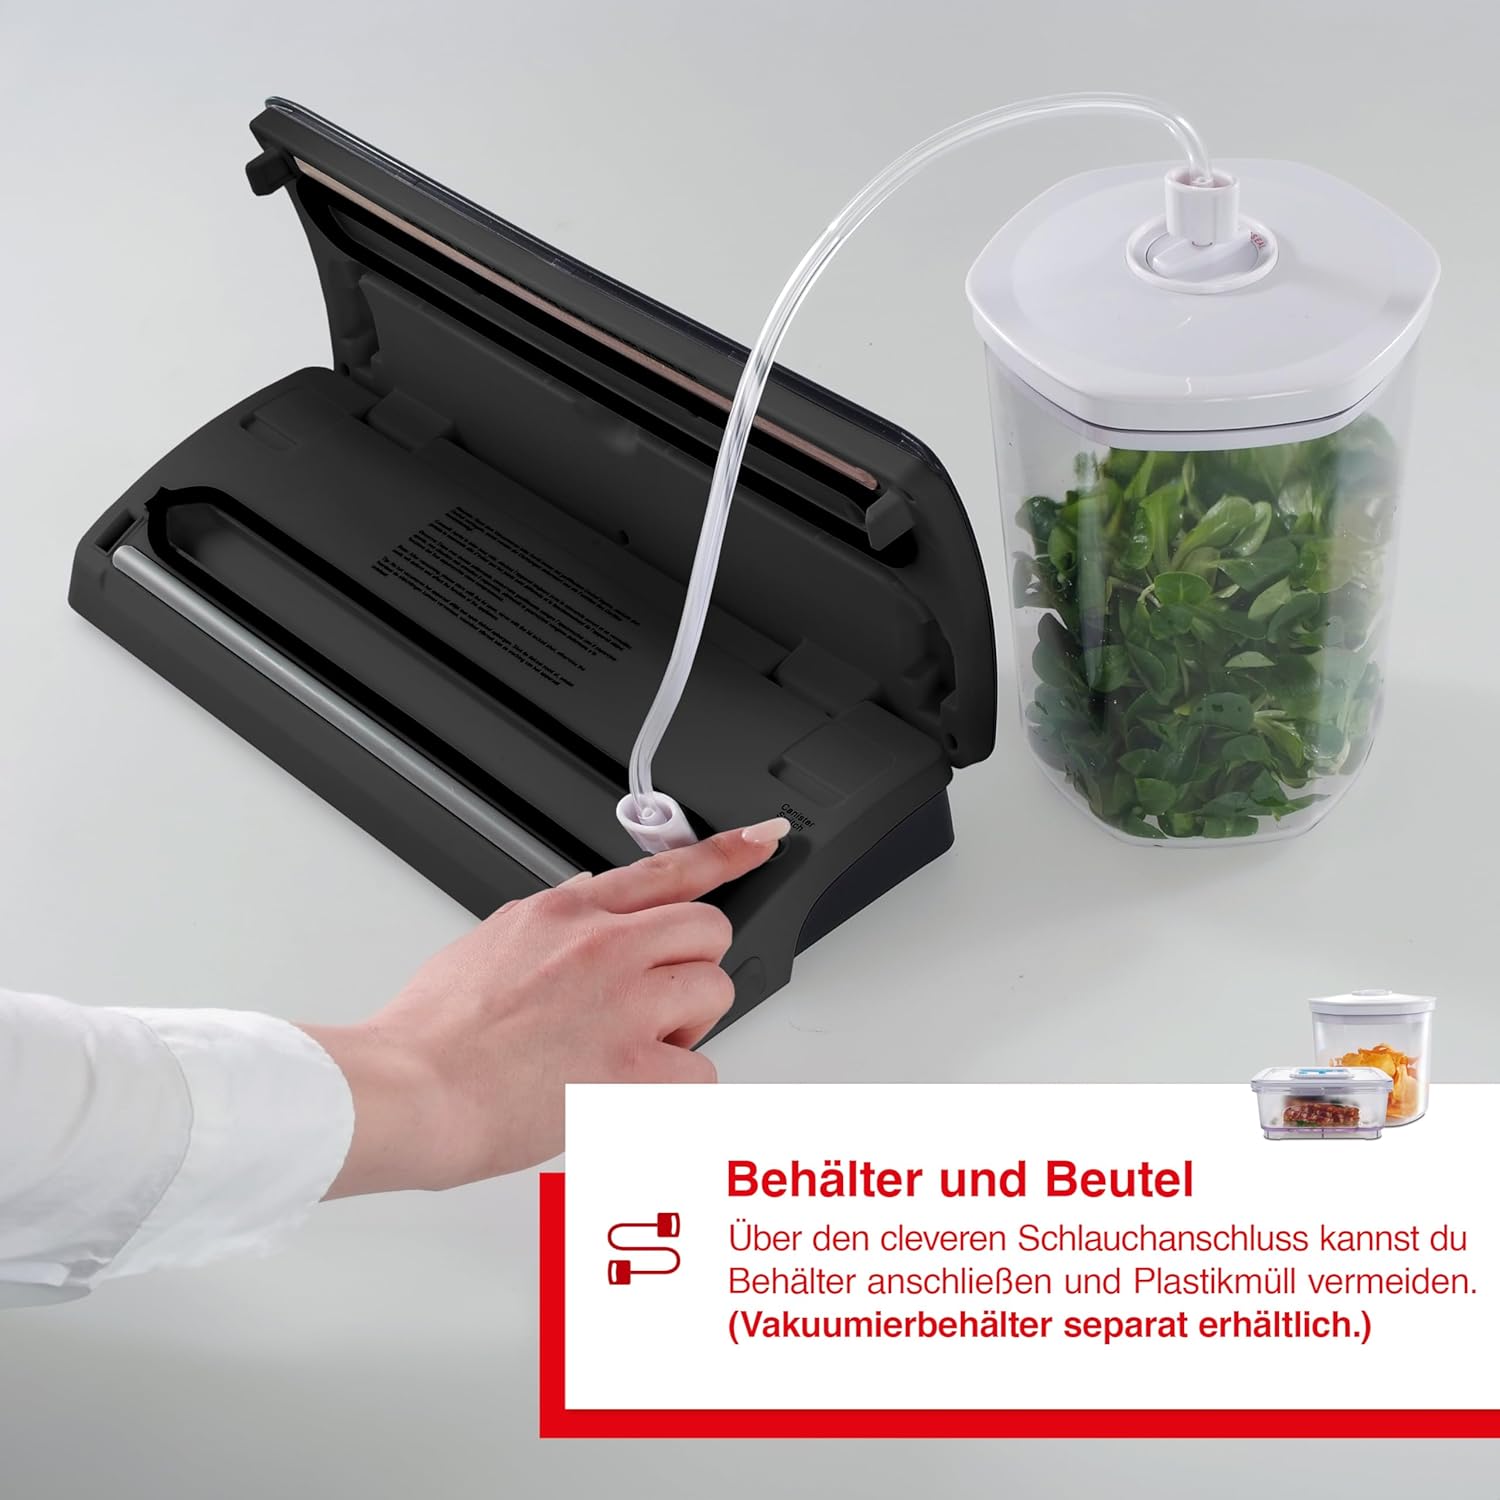
Image: The Solis Vac Pro 569 machine with its lid open, revealing the internal components. A vacuum hose is clearly connected to the machine's port and extends to a transparent vacuum container, which is filled with fresh herbs, illustrating the machine's ability to vacuum seal external containers.
6. การบำรุงรักษาและการทำความสะอาด
การทำความสะอาดอย่างสม่ำเสมอจะช่วยให้เครื่องซีลสุญญากาศทำงานได้อย่างมีประสิทธิภาพสูงสุดและยืดอายุการใช้งาน
- ควรถอดปลั๊กเครื่องทุกครั้งก่อนทำความสะอาด
- การทำความสะอาดแถบซีล: Allow the sealing strip to cool completely. Wipe it gently with a soft, damp cloth to remove any food residue. Do not use abrasive cleaners or scouring pads.
- การทำความสะอาดถาดรองน้ำหยด: The drip tray is removable for easy cleaning. Wash it with warm, soapy water, rinse thoroughly, and dry completely before reinserting.
- การทำความสะอาดภายนอก: เช็ดภายนอกเครื่องด้วยผ้าชุบน้ำหมาดๆamp cloth. For stubborn stains, a mild detergent can be used. Dry thoroughly.
- พื้นที่จัดเก็บ: Store the appliance in a clean, dry place. It is recommended to store the lid unlatched to prevent compression of the sealing gaskets, which can affect performance over time.
7 การแก้ไขปัญหา
| ปัญหา | สาเหตุที่เป็นไปได้ | สารละลาย |
|---|---|---|
| เครื่องไม่เปิดขึ้น | ไม่ได้เสียบปลั๊ก; มีปัญหาที่เต้ารับไฟฟ้า; สายไฟ/ปลั๊กชำรุด | Ensure plug is fully inserted. Test outlet with another appliance. Do not use if cord/plug is damaged; contact service. |
| เครื่องดูดฝุ่นแต่ไม่สามารถปิดผนึกได้ | Sealing strip not heating; bag not positioned correctly; moisture in sealing area. | Check if sealing strip is clean and dry. Reposition bag. Ensure no moisture is present in the sealing area. |
| Machine does not vacuum properly. | Lid not latched securely; bag not positioned correctly; bag has a hole; vacuum gasket dirty/damaged. | Ensure lid is fully latched. Reposition bag. Check bag for punctures. Clean or inspect vacuum gasket for damage. |
| Vacuum seal loses over time. | Bag puncture; improper seal; food spoilage. | Check bag for small holes. Ensure a complete, strong seal was made. Verify food was fresh before sealing. |
8. ข้อมูลจำเพาะทางเทคนิค
- หมายเลขรุ่น: Typ 569 / 922.13
- ยี่ห้อ: โซลิส
- สี: โลหะ
- วัสดุ: โลหะ
- พลัง: 120 วัตต์
- เล่มที่tage: 240 โวลต์
- ขนาด (ยาว x กว้าง x สูง): 36.5 x 14.2 x 7.01 ซม. (ประมาณ 37 x 14.4 x 7.4 ซม.)
- น้ำหนัก: 1.45 กิโลกรัม
- โหมดการทำงาน: อัตโนมัติ
- ปิดเครื่องอัตโนมัติ: ใช่

Image: The Solis Vac Pro 569 machine with clear dimensional markings (length, width, height) and an illustration of its included accessories, which are a vacuum hose and 18 vacuum bags.
9. การรับประกันและการสนับสนุน
Solis products are manufactured to high-quality standards. For information regarding warranty coverage, please refer to the warranty card included with your product or visit the official Solis website. In case of technical issues or questions not covered in this manual, please contact Solis customer support.
หากต้องการความช่วยเหลือเพิ่มเติม โปรดไปที่ Solis Brand Store on Amazon or the official Solis webเว็บไซต์.


