1. บทนำ
This instruction manual provides essential information for the installation, operation, and maintenance of your DB Electrical ADR0139 Alternator. Please read this manual thoroughly before proceeding with installation or use to ensure proper function and safety. This alternator is designed as a direct replacement for specified Honda and Acura models.
2. สินค้าหมดview
The DB Electrical ADR0139 is a new aftermarket alternator designed to meet OEM specifications, providing reliable electrical power for your vehicle's systems. It features a Delco CS130D family design, operating at 12 volts and producing 105 amps.

รูปที่ 2.1 : ด้านหน้า view of the DB Electrical ADR0139 Alternator, showing the pulley and main housing.
3. ความเข้ากันได้ของยานพาหนะ
This alternator is compatible with the following vehicle models and years:
- Acura CL: 1997, 1998, 1999 (3.0L V6 models)
- Honda Accord: 1998, 1999, 2000, 2001, 2002 (3.0L V6 models, including EX and LX trims)
Please verify your vehicle's specific requirements and existing part numbers against the specifications provided in Section 4 to ensure proper fitment.
4. ข้อมูลจำเพาะทางเทคนิค
| คุณสมบัติ | ข้อมูลจำเพาะ |
|---|---|
| Alternator Family | Delco CS130D |
| เล่มที่tage | 12 โวลต์ |
| Ampอีเรจ | 105 Amps |
| เงื่อนไข | New Aftermarket |
| Regulator Clock Position | 2:00 น. |
| ที่ตั้งพัดลม | ภายใน |
| Regulator Location | ภายใน |
| Terminal ID 2 | B+ |
| Terminal 2 Size | M6x1.00 |
| ขั้ว | เชิงลบ |
| หมายเลขรุ่น | 400-12146 |
| น้ำหนักสินค้า | 11.44 ปอนด์ |
| ขนาดสินค้า | 5.71 x 4.78 x 4.2 นิ้ว |
ใช้แทนหมายเลขชิ้นส่วน OEM:
- AC Delco Tools: 321-1765
- Arrowhead: ADR0139
- Bosch: AL1277N, AL1277X
- Delco: 10463963, 10464417, 10480228, 10480453, 321-1765
- Denso: 210-5233
- Honda: 31100-P8A-A01, 31100P8A-A01, 31100-P8A-A02, 31100P8A-A02, 31100-P8C-A02, 31100P8C-A02
- J&N Electrical Products: 400-12146
- JANNCO: 400-12146R
- เลสเตอร์: 8220
5. ข้อมูลด้านความปลอดภัย
Always observe the following safety precautions when working on your vehicle's electrical system:
- Disconnect the negative battery terminal before beginning any work on the electrical system to prevent electrical shock or short circuits.
- สวมอุปกรณ์ป้องกันส่วนบุคคลที่เหมาะสม รวมถึงแว่นตานิรภัยและถุงมือ
- ตรวจสอบให้แน่ใจว่ารถอยู่บนพื้นผิวที่มั่นคงและเรียบเสมอกัน และได้รับการรองรับอย่างเหมาะสมด้วยขาตั้งยกรถหากจำเป็นต้องยกขึ้น
- Allow the engine to cool completely before working on engine components.
- ปรึกษาช่างเทคนิคยานยนต์ที่มีคุณสมบัติเหมาะสมหากคุณไม่แน่ใจเกี่ยวกับขั้นตอนใดๆ ของกระบวนการติดตั้ง
6. คู่มือการติดตั้ง
Replacing an alternator can be complex. Professional installation is recommended. If you choose to proceed yourself, follow these general steps. Specific procedures may vary by vehicle model; consult your vehicle's service manual for detailed instructions.
6.1. Tools and Preparation
- Socket set and wrenches (metric)
- Serpentine belt tool or pry bar
- ประแจขั้วแบตเตอรี่
- Wire brush for cleaning terminals
- แว่นตานิรภัยและถุงมือ
- ถอดสายแบตเตอรี่ขั้วลบออก
- Locate the alternator and identify all electrical connections and mounting bolts.
6.2. การถอดเครื่องกำเนิดไฟฟ้ากระแสสลับเก่า
- Relieve tension on the serpentine belt and remove it from the alternator pulley.
- Disconnect the main power wire (B+) from the alternator. This is typically a large gauge wire secured with a nut.
- Disconnect any other electrical connectors (e.g., regulator plug) from the alternator.
- Remove the mounting bolts securing the alternator to the engine bracket. Note their positions.
- Carefully remove the old alternator from the engine bay. This may require maneuvering around other components.

รูปที่ 6.1: ด้านหลัง view of the alternator, highlighting the B+ terminal and electrical connector.
6.3 การติดตั้งเครื่องกำเนิดไฟฟ้ากระแสสลับตัวใหม่
- Position the new DB Electrical ADR0139 Alternator into the engine bay and align it with the mounting brackets.
- Install the mounting bolts and tighten them to the manufacturer's specifications. Do not overtighten.
- Reconnect all electrical connectors, ensuring they are secure and free from corrosion. Clean terminals with a wire brush if necessary.
- Reconnect the main power wire (B+) and tighten its nut securely.
- Route the serpentine belt back onto the alternator pulley and apply tension according to your vehicle's specifications. Ensure the belt is properly seated on all pulleys.
- ต่อสายแบตเตอรี่ขั้วลบกลับเข้าไปอีกครั้ง
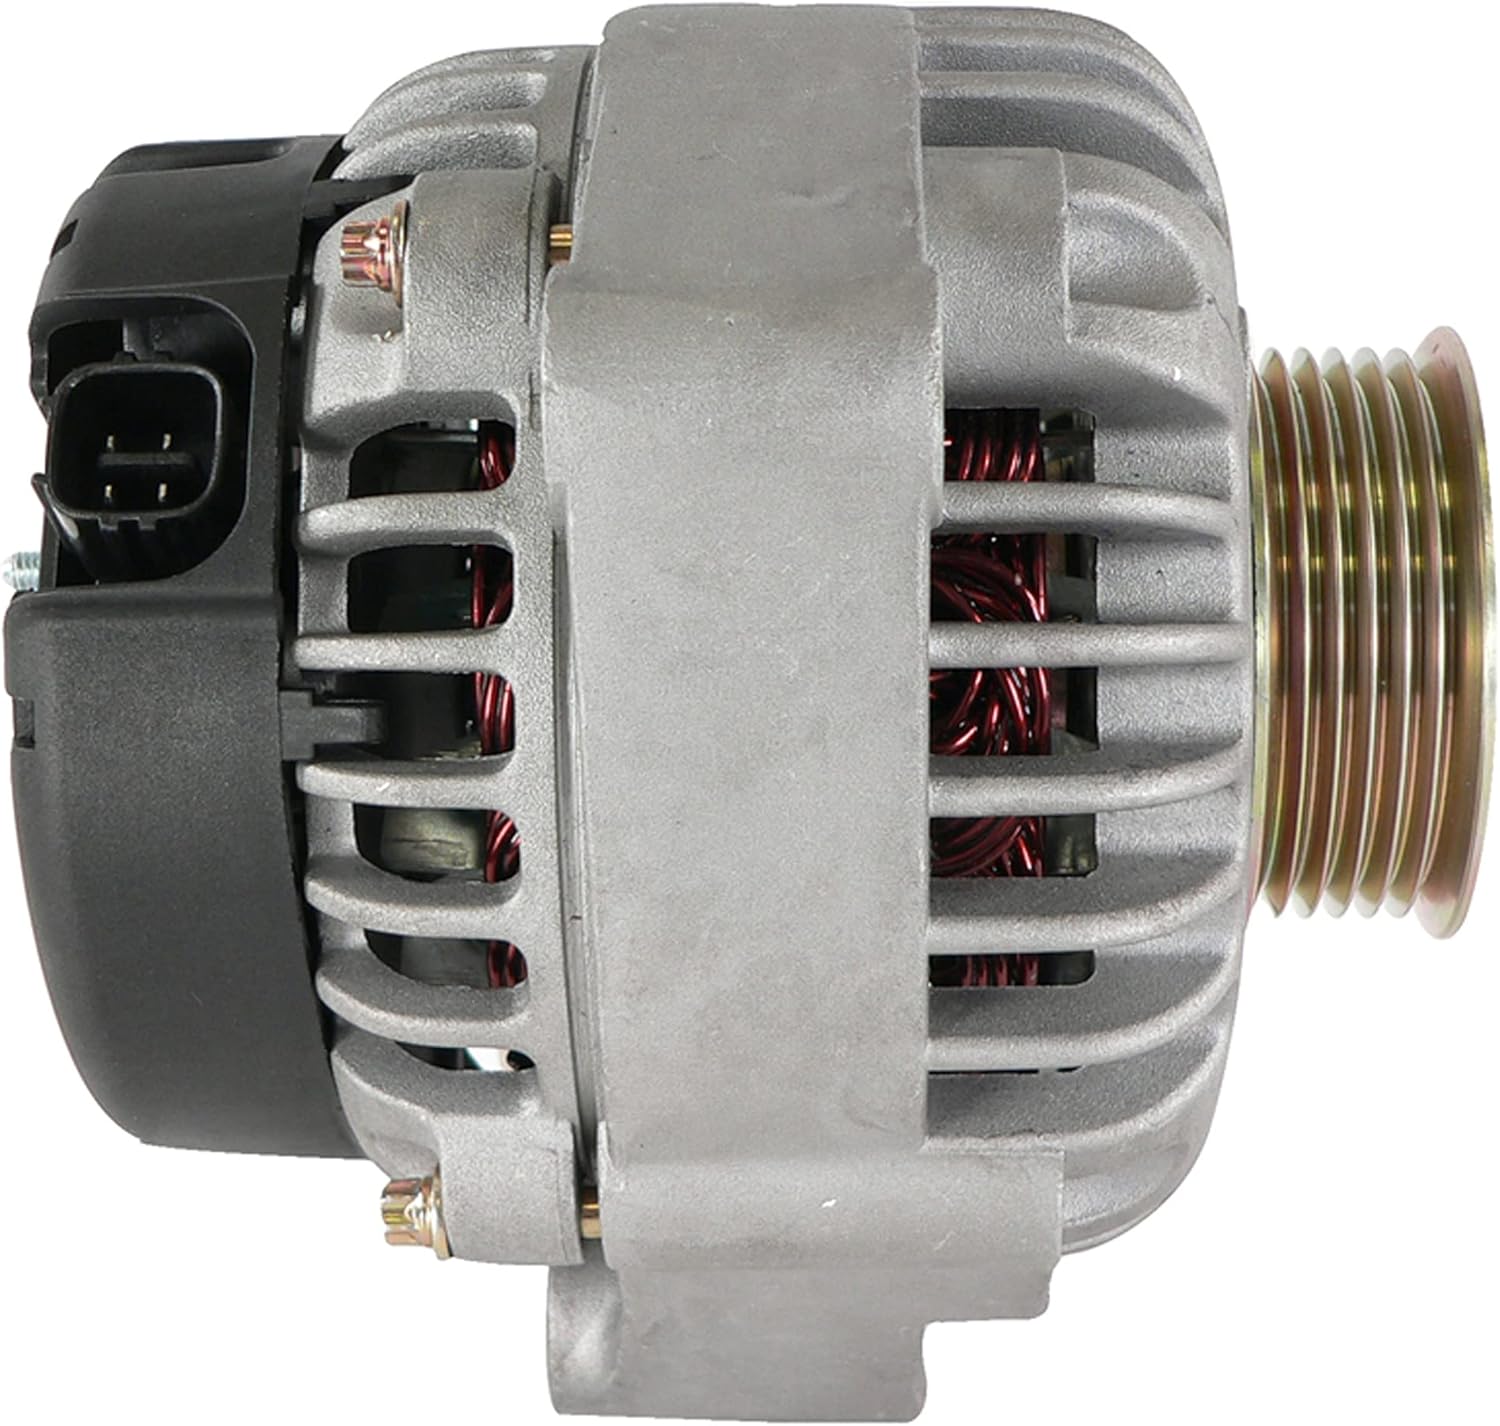
รูปที่ 6.2: ด้านข้าง view of the alternator, showing mounting points and overall dimensions.
7. การดำเนินการ
After installation, start the vehicle and observe the dashboard warning lights. The battery light should turn off shortly after the engine starts. Check the vehicle's voltage gauge (if equipped) or use a multimeter to verify that the charging system is operating correctly, typically between 13.5V and 14.8V at idle.
A slight whine may be audible immediately after installation, which often dissipates after a short period of operation as the new components settle. If the battery light remains on or flickers, or if abnormal noises persist, refer to the Troubleshooting section.
8. การบำรุงรักษา
The DB Electrical ADR0139 Alternator is designed for long-term, maintenance-free operation. However, regular vehicle maintenance practices contribute to its longevity:
- Periodically inspect the serpentine belt for wear, cracks, or proper tension. A worn or loose belt can affect alternator performance.
- Ensure battery terminals are clean and tight to maintain good electrical conductivity.
- Avoid exposing the alternator to excessive moisture or contaminants.
9 การแก้ไขปัญหา
| อาการ | สาเหตุที่เป็นไปได้ | สารละลาย |
|---|---|---|
| Battery light remains on after starting | Loose or corroded battery/alternator connections, faulty belt, internal alternator issue. | Check all connections for tightness and corrosion. Inspect serpentine belt. Test alternator output with a multimeter. |
| ไฟหน้าหรือไฟภายในรถหรี่ลง | ปริมาณต่ำtage output from alternator, weak battery. | Test battery and alternator output. Ensure proper belt tension. |
| Grinding or whining noise from alternator | Bearing failure, loose pulley, improper belt tension. | Verify belt tension. If noise persists, professional inspection is recommended. (Note: A slight whine may be normal initially). |
| แบตเตอรี่ไม่ชาร์จ | Alternator failure, wiring issue, blown fuse. | Check fuses related to charging system. Test alternator output. Inspect wiring harness. |
หากขั้นตอนการแก้ไขปัญหาไม่สามารถแก้ไขปัญหาได้ ขอแนะนำให้ขอความช่วยเหลือจากช่างเทคนิคยานยนต์ที่ผ่านการรับรอง
10. การรับประกันและการสนับสนุน
The DB Electrical ADR0139 Alternator comes with a รับประกัน 1 ปี นับจากวันที่ซื้อ การรับประกันนี้ครอบคลุมถึงความบกพร่องของวัสดุและฝีมือการผลิตภายใต้การใช้งานและการบริการตามปกติ
If you experience any issues with your product within the warranty period, please contact DB Electrical customer support. They will assist you with troubleshooting or arranging a replacement if necessary.
For warranty claims or technical assistance, please refer to the contact information provided by DB Electrical at the point of purchase or on their official webเว็บไซต์.
11. ข้อมูลการติดต่อ
For further assistance or inquiries, please visit the official DB Electrical webเว็บไซต์หรือติดต่อฝ่ายบริการลูกค้าของพวกเขา
ดีบี อิเล็คทริค
Kingsport, Tennessee, USA
Note: Always refer to the latest contact details available on the manufacturer's official channels.


