1. บทนำ
ขอบคุณสำหรับการซื้อasing the Lanzar Max Pro 1800 Watt Mono Block Amplifier, Model MAXP1200. This manual provides essential information for the proper installation, operation, and maintenance of your amplifier. To ensure optimal performance and safety, please read this manual thoroughly before attempting to install or operate the unit. Keep this manual for future reference.
2. ข้อมูลด้านความปลอดภัย
โปรดปฏิบัติตามข้อควรระวังด้านความปลอดภัยต่อไปนี้เสมอ เพื่อป้องกันการบาดเจ็บหรือความเสียหาย amplifier and connected components.
- ความปลอดภัยทางไฟฟ้า: Ensure all power connections are made correctly and securely. Disconnect the vehicle's battery before making any power connections to avoid electrical shorts. Use appropriate gauge wiring for power and ground connections as specified in the installation section.
- การระบายอากาศ : ติดตั้ง amplifier in a location that allows for adequate air circulation. Do not cover the amplifier or install it in an enclosed space where heat cannot dissipate. Overheating can lead to amplifier shutdown or damage.
- การติดตั้งโดยมืออาชีพ: If you are unsure about any aspect of the installation, it is recommended to seek assistance from a qualified car audio professional.
- การสัมผัสความชื้น: อย่าเปิดเผย ampอย่านำเครื่องขยายเสียงไปสัมผัสกับความชื้นหรือน้ำ เพราะอาจทำให้เกิดไฟฟ้าช็อตหรือทำให้เครื่องเสียหายได้
- การติดตั้งที่ปลอดภัย: ติดตั้ง amplifier securely to prevent it from becoming a projectile in the event of a sudden stop or accident.
3. สินค้าหมดview
The Lanzar MAXP1200 is a high-performance mono block amplifier designed to deliver powerful and clear bass to your car audio system. Featuring 1800 watts of peak power, this amplifier is optimized for driving subwoofers.
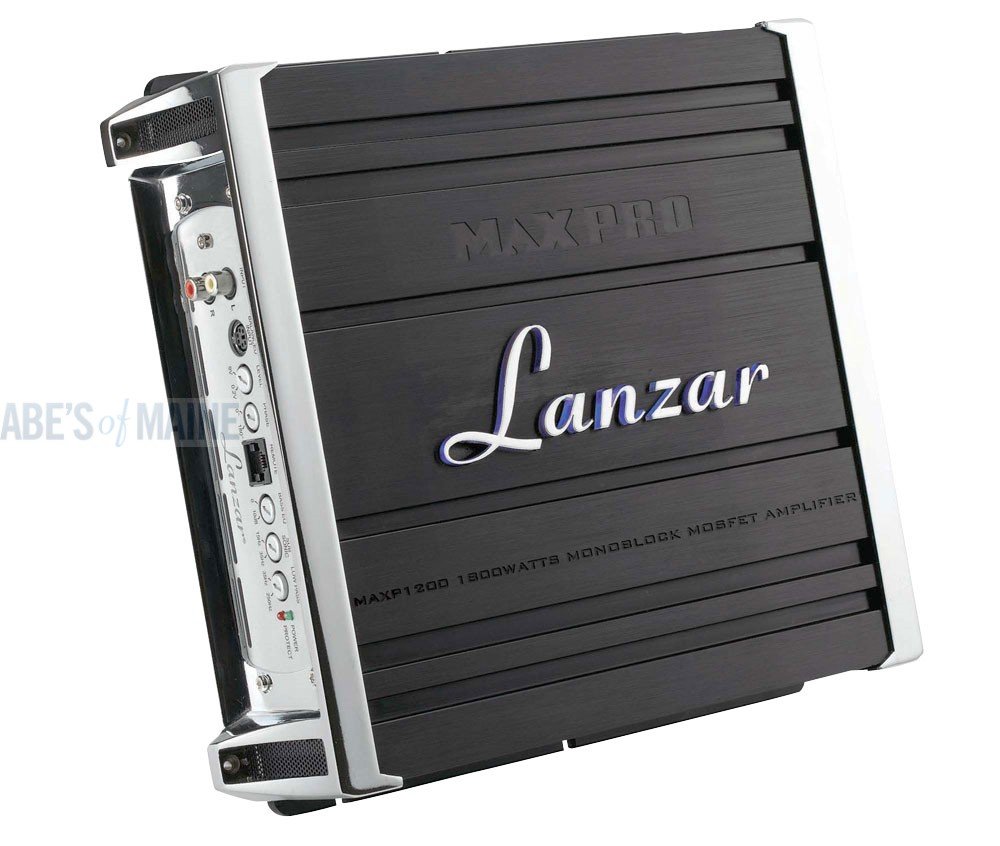
Figure 3.1: Lanzar Max Pro 1800 Watt Mono Block Amplifier (Model MAXP1200). This image shows the amplifier's main body with its black ribbed heatsink design and the silver-colored side panel where the input and control terminals are located. The "Lanzar" logo is prominently displayed on the top surface.
คุณสมบัติหลัก:
- Mono Block Design for dedicated subwoofer power.
- High Power Output: Up to 1800 Watts.
- MOSFET Power Supply for efficient operation.
- Variable Low Pass Crossover.
- Variable Bass Boost.
- Thermal, Overload, and Short Protection Circuitry.
การระบุส่วนประกอบ:
Refer to Figure 3.1 for a visual representation of the amplifier's components.
- อาร์ซีเออินพุต: For connecting the audio signal from your head unit.
- Gain Control: ปรับความไวในการรับสัญญาณให้ตรงกับสัญญาณเอาต์พุตของชุดเครื่องเสียงในรถของคุณ
- Low Pass Filter (LPF) Control: Sets the upper frequency limit for the ampเอาท์พุตของลิไฟเออร์
- การควบคุมเสียงเบส: Increases the output level at a specific bass frequency.
- Power/Protect Indicators: LEDs that show the amplifier's operational status.
- ขั้วไฟฟ้า: Connections for +12V, Ground, and Remote Turn-On.
- ขั้วต่อลำโพง: Output connections for your subwoofer(s).
4. การตั้งค่าและการติดตั้ง
การติดตั้งที่ถูกต้องเป็นสิ่งสำคัญต่อประสิทธิภาพและอายุการใช้งานยาวนานของคุณ ampชีวิต.
4.1 การตรวจสอบก่อนการติดตั้ง:
- Ensure the vehicle's electrical system can support the ampความต้องการพลังงานของเครื่องขยายสัญญาณ
- Disconnect the negative terminal of the vehicle's battery before starting any wiring.
- Gather all necessary tools and wiring accessories (power wire, ground wire, remote wire, RCA cables, speaker wire, fuse holder, fuse).
4.2 การติดตั้ง Ampเครื่องฟอก:
การ amplifier is designed for surface mount installation. Choose a mounting location that is:
- Secure and stable, preventing movement during vehicle operation.
- Well-ventilated, allowing heat to dissipate effectively. Avoid enclosed spaces like under carpets or in tight compartments.
- Away from direct sunlight or heat sources.
- Protected from moisture and excessive dust.
Use appropriate screws to secure the amplifier to the chosen surface. Ensure no existing wiring or fuel lines are damaged during drilling.
4.3 การเชื่อมต่อสายไฟ:
- กำลังไฟ (+12V) การเชื่อมต่อ: Run a power cable (e.g., 4-gauge or larger) directly from the positive terminal of the vehicle's battery to the amplifier's +12V terminal. Install an in-line fuse holder with an appropriate fuse (refer to specifications for fuse rating) within 18 inches (45 cm) of the battery.
- การต่อสายดิน (GND): เชื่อมต่อสายดินที่มีขนาดเส้นผ่านศูนย์กลางเท่ากับสายไฟจาก... amplifier's GND terminal to a clean, unpainted metal surface of the vehicle's chassis. Ensure a solid electrical connection by scraping away any paint or rust. The ground point should be as short as possible, ideally less than 3 feet (1 meter).
- การเชื่อมต่อระยะไกล (REM): Connect a remote turn-on wire (e.g., 18-gauge) from the ampเชื่อมต่อขั้ว REM ของแอมพลิฟายเออร์เข้ากับเอาต์พุตควบคุมระยะไกลของชุดเครื่องเสียงในรถของคุณ สายไฟนี้จะเปลี่ยน... ampเปิดและปิดเครื่องเสียงพร้อมกับชุดเครื่องเสียงหลักของคุณ
- RCA Input Connection: Connect RCA cables from the pre-amp outputs of your head unit to the RCA inputs on the ampชีวิต.
- การเชื่อมต่อเอาท์พุตของลำโพง: เชื่อมต่อซับวูฟเฟอร์ของคุณเข้ากับ amplifier's speaker terminals. Pay close attention to polarity (+ to + and - to -). For multiple subwoofers, ensure proper wiring for the desired impedance load.
5. การดำเนินงาน Ampชีวิต
5.1 การเปิดเครื่องครั้งแรก:
Once all connections are made and double-checked, reconnect the vehicle's battery. Turn on your head unit. The amplifier's "Power" indicator light should illuminate, indicating it is receiving power and is operational. If the "Protect" light illuminates, refer to the Troubleshooting section.
5.2 Adjusting Controls:
- Gain Control: This is not a volume control. It matches the ampความไวอินพุตของเครื่องขยายเสียงต่อปริมาตรเอาต์พุตtage of your head unit. Start with the gain set to minimum. Play a familiar track with a strong bass signal at about 75% of your head unit's maximum volume. Slowly increase the ampเพิ่มเกนของแอมป์จนกว่าจะได้ยินเสียงผิดเพี้ยน จากนั้นลดลงเล็กน้อย
- ฟิลเตอร์กรองความถี่ต่ำ (LPF): Adjust this control to filter out frequencies above the desired range for your subwoofer. A common starting point is between 80Hz and 120Hz, depending on your subwoofer and other speakers.
- เพิ่มเสียงเบส: Use this control sparingly. Excessive bass boost can lead to distortion and potential damage to your subwoofer. Start at minimum and increase only if more bass impact is desired, ensuring the sound remains clean.
6. การบำรุงรักษา
การบำรุงรักษาอย่างสม่ำเสมอจะช่วยให้มั่นใจได้ถึงอายุการใช้งานและประสิทธิภาพการทำงานของอุปกรณ์ของคุณ ampชีวิต.
- การทำความสะอาด: เช็ดทำความสะอาดเป็นระยะ amplifier's exterior with a soft, dry cloth to remove dust and dirt. Do not use harsh chemicals or abrasive cleaners. Ensure the cooling fins are free of obstructions.
- ตรวจสอบการเชื่อมต่อ: Occasionally inspect all wiring connections (power, ground, remote, RCA, speaker) to ensure they are secure and free from corrosion. Loose connections can cause performance issues or damage.
- การระบายอากาศ : ให้แน่ใจว่า amplifier's mounting location remains well-ventilated. Clear any objects that might obstruct airflow around the unit.
7 การแก้ไขปัญหา
หากคุณประสบปัญหากับ .ของคุณ amplifier, consult the following table before contacting technical support.
| ปัญหา | สาเหตุที่เป็นไปได้ | สารละลาย |
|---|---|---|
| No Power (Power LED Off) | ฟิวส์ขาด; การเชื่อมต่อไฟ/สายดิน/สายรีโมทหลวม; สายไฟชำรุด | ตรวจสอบ amplifier fuse and in-line battery fuse. Verify all power, ground, and remote connections are secure and have proper voltage. |
| Protect LED On | Overheating; Speaker short circuit; Low impedance load; DC offset. | อนุญาต amplifier to cool down. Check speaker wiring for shorts. Verify speaker impedance matches amplifier's minimum rating. Disconnect RCA inputs to check for DC offset. |
| ไม่มีเสียงออก | No input signal; Gain set too low; Speaker wires disconnected/shorted; Head unit settings. | Check RCA connections from head unit. Increase gain. Inspect speaker wiring. Ensure head unit's subwoofer output is enabled and volume is up. |
| เสียงผิดเพี้ยน | Gain set too high; Improper LPF setting; Poor ground connection; Damaged speaker. | Reduce gain. Adjust LPF. Check ground connection for cleanliness and security. Inspect speaker for damage. |
8. ข้อมูลจำเพาะ
The following are the general specifications for the Lanzar Max Pro 1800 Watt Mono Block Amplifier (Model MAXP1200):
| คุณสมบัติ | รายละเอียด |
|---|---|
| ยี่ห้อ | โยน |
| หมายเลขรุ่น | MAXP1200 |
| ขนาดสินค้า (กว้าง x ยาว x สูง) | 38.1 x 32.2 x 11.1 เซนติเมตร (15 x 12.67 x 4.38 นิ้ว) |
| น้ำหนักสินค้า | 3.98 กก. (8.77 ปอนด์) |
| ประเภทการติดตั้ง | การติดตั้งบนพื้นผิว |
| ผู้ผลิต | Xtensive Car Audio |
| ASIN | B003OUI5VO |
| ยูพีซี | 068888899864 |
หมายเหตุ: ข้อมูลจำเพาะอาจมีการเปลี่ยนแปลงโดยไม่ต้องแจ้งให้ทราบล่วงหน้าเพื่อการปรับปรุงผลิตภัณฑ์
9. การรับประกันและการสนับสนุน
Lanzar products are designed and manufactured to the highest quality standards. For information regarding warranty coverage, terms, and conditions, please refer to the warranty card included with your product or visit the official Lanzar webเว็บไซต์.
For technical assistance, troubleshooting beyond this manual, or service inquiries, please contact Lanzar customer support. Contact information can typically be found on the product packaging or the official Lanzar website. Please have your model number (MAXP1200) and purchase details ready when contacting support.


