1. บทนำ
This manual provides comprehensive instructions for the safe and efficient operation of your JVC DR-MV150 DVD Video Recorder VHS Hi-Fi Stereo. Please read this manual thoroughly before using the unit and retain it for future reference. The DR-MV150 combines a DVD recorder and a VHS VCR into a single unit, offering versatile playback and recording capabilities for various media formats.
2. ข้อมูลด้านความปลอดภัย
- แหล่งพลังงาน: Connect the unit only to the specified power supply. Ensure the voltage ตรงตามข้อกำหนดของหน่วย
- การระบายอากาศ : อย่าปิดกั้นช่องระบายอากาศ ควรเว้นพื้นที่รอบตัวเครื่องให้เพียงพอเพื่อให้อากาศถ่ายเทได้สะดวก เพื่อป้องกันความร้อนสูงเกินไป
- ความชื้น: Do not expose the unit to rain, moisture, or excessive humidity. Avoid placing objects filled with liquids, such as vases, on the unit.
- การทำความสะอาด: ถอดสายไฟออกก่อนทำความสะอาด ใช้ผ้านุ่มและแห้ง ห้ามใช้น้ำยาทำความสะอาดชนิดน้ำหรือสเปรย์
- การบริการ: อย่าพยายามซ่อมบำรุงเครื่องนี้ด้วยตนเอง แนะนำให้ช่างผู้ชำนาญการเป็นผู้ซ่อมบำรุงทุกครั้ง
- การจัดวาง: วางเครื่องบนพื้นผิวที่มั่นคงและเรียบ หลีกเลี่ยงการวางใกล้แหล่งความร้อนหรือโดนแสงแดดโดยตรง
3. เนื้อหาบรรจุภัณฑ์
ตรวจสอบว่ามีรายการทั้งหมดอยู่ในแพ็คเกจ:
- JVC DR-MV150 DVD Video Recorder VHS Hi-Fi Stereo Unit
- รีโมทคอนโทรล
- สายไฟ
- สาย HDMI
- สายสัญญาณเสียง/วิดีโอ RCA
- คู่มือการใช้งาน (เอกสารนี้)

This image displays the JVC DR-MV150 DVD Video Recorder, its remote control, power cable, HDMI cable, RCA cables, and the included instruction manual, illustrating the complete package contents.
4. การตั้งค่า
4.1 การเชื่อมต่อตัวเครื่อง
Follow these steps to connect your DR-MV150 to your television and other audio/video equipment.
- การเชื่อมต่อไฟฟ้า: Connect the supplied power cable to the AC IN port on the rear of the unit and then to a wall outlet.
- การเชื่อมต่อวิดีโอ (HDMI): For the best picture quality, connect an HDMI cable from the HDMI OUTPUT port on the rear of the DR-MV150 to an HDMI input on your television. This connection supports 1080p up-conversion.
- Video Connection (RCA): Alternatively, or for older televisions, connect the yellow video cable from the VIDEO OUT port on the DR-MV150 to the VIDEO IN port on your television. Connect the red and white audio cables from the AUDIO OUT (R/L) ports to the corresponding AUDIO IN (R/L) ports on your television or audio receiver.
- การเชื่อมต่อเสาอากาศ/สายเคเบิล: Connect your antenna or cable TV line to the ANTENNA IN port on the rear of the unit.
- External Device Connection (Front A/V Input): For connecting external devices like camcorders, use the front panel DV IN or analog audio/video input ports.
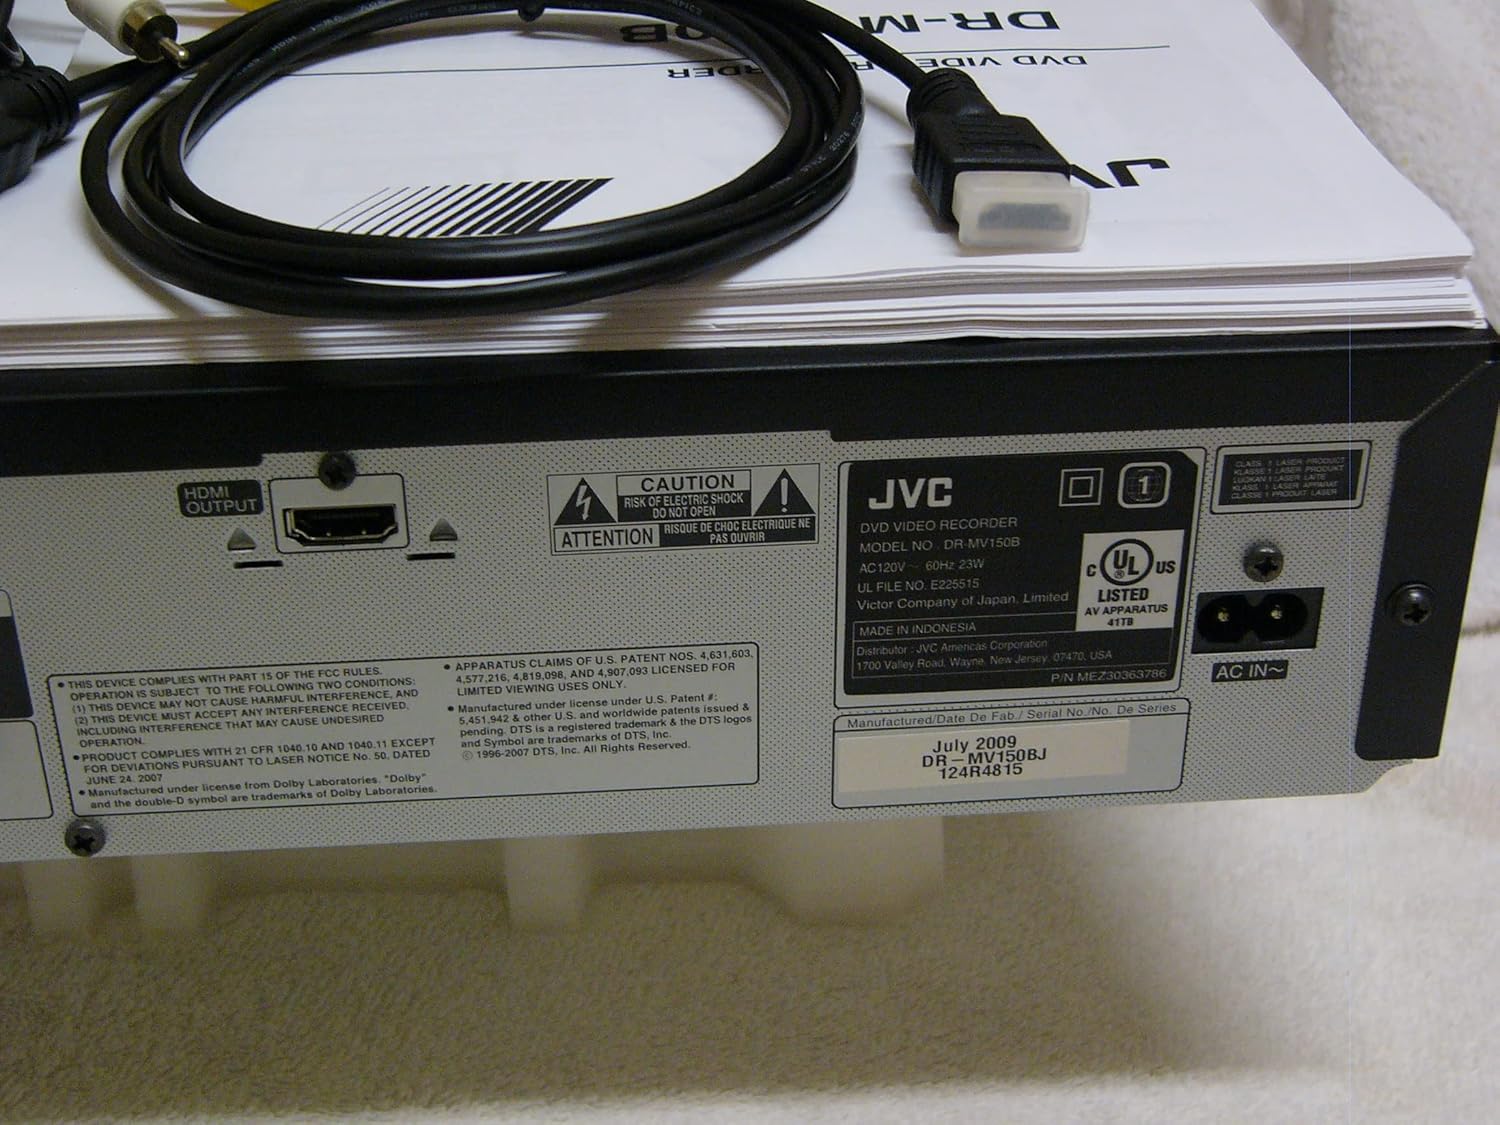
The rear panel of the JVC DR-MV150, displaying the HDMI OUTPUT port for high-definition connection, the AC IN power input, and various regulatory and manufacturing labels.

รายละเอียด view of the front panel of the JVC DR-MV150, highlighting the DV IN port and the analog audio (white, red) and video (yellow) input jacks, typically used for connecting external devices like camcorders.
4.2 การติดตั้งแบตเตอรี่รีโมทคอนโทรล
Insert two AAA batteries into the remote control, ensuring correct polarity (+/-). The remote control is essential for accessing all functions of the DR-MV150.

This image features the remote control for the JVC DR-MV150, alongside an HDMI cable and a set of RCA audio/video cables, which are essential for connecting and operating the device.
5. คู่มือการใช้งาน
5.1 การเล่นขั้นพื้นฐาน
- การเล่นดีวีดี: Open the DVD tray, place a DVD disc (DVD-R/RW, CD, SVCD, VCD, CD-R/RW) with the label side up, and close the tray. The unit should automatically begin playback or display a menu.
- การเล่นวิดีโอ VHS: Insert a VHS tape into the VCR slot. The unit will typically begin playback automatically.

This image focuses on the DVD tray section of the JVC DR-MV150, labeled 'Super MULTI' indicating its multi-format compatibility. Below the tray are various control buttons for DVD operation, along with logos for DivX, DTS, Dolby Digital Recording, and DVD Video.
5.2 การบันทึก
The DR-MV150 supports recording to various DVD formats (DVD-RAM, DVD-RW, DVD-R, +RW, +R) and VHS Hi-Fi tapes.
- การบันทึกลงดีวีดี: Insert a recordable DVD disc. Select the input source (e.g., TV tuner, external A/V input). Press the RECORD button on the unit or remote.
- บันทึกลง VHS: Insert a VHS tape. Select the input source. Press the RECORD button.
- การทำงานพร้อมกัน: The unit allows for simultaneous DVD playback while recording to VHS, or vice-versa, depending on the source and destination.
- Finalizing Discs: After recording to a DVD-R, DVD+R, or DVD-RW (VR mode), the disc may need to be finalized to be playable on other DVD players. Refer to the on-screen menu for the finalizing option.
คุณสมบัติขั้นสูง 5.3 ประการ
- 1080p Up-conversion: When connected via HDMI, the unit can upscale standard definition content to 1080p resolution for improved picture quality on compatible displays.
- การสแกนแบบก้าวหน้า: Provides a smoother, flicker-free image, especially beneficial for fast-moving scenes.
- ATSC Tuner: The integrated ATSC tuner allows reception of over-the-air digital television broadcasts.
6. การบำรุงรักษา
6.1 การทำความสะอาดหน่วย
- ภายนอก: เช็ดพื้นผิวภายนอกด้วยผ้านุ่มและแห้ง สำหรับรอยฝังแน่น ให้เช็ดเบาๆampen the cloth with water and then wipe dry. Avoid abrasive cleaners or solvents.
- Disc Tray/VCR Slot: Keep the disc tray and VCR slot free of dust and debris. Do not insert foreign objects.
6.2 การดูแลทั่วไป
- Avoid exposing the unit to extreme temperatures or direct sunlight.
- ห้ามวางของหนักทับตัวเครื่อง
- Handle discs and tapes carefully to prevent scratches or damage.
7 การแก้ไขปัญหา
If you encounter issues with your DR-MV150, refer to the following common troubleshooting steps:
- ไม่มีไฟฟ้า: Ensure the power cable is securely connected to both the unit and a working wall outlet.
- ไม่มีภาพ/เสียง: Verify all audio and video cables (HDMI, RCA) are correctly connected to the appropriate input/output ports on both the DR-MV150 and your television/receiver. Ensure the correct input source is selected on your television.
- Disc Not Playing/Recording: Check that the disc is clean, free of scratches, and inserted correctly (label side up). Ensure the disc format is supported by the unit. For recording, ensure the disc is recordable and not full or finalized (if applicable).
- VHS Tape Issues: Ensure the tape is inserted correctly and not damaged.
- รีโมทคอนโทรลไม่ทำงาน: Check the batteries in the remote control and ensure there are no obstructions between the remote and the unit's sensor.
- หน่วยไม่ตอบสนอง: Try unplugging the unit from the power outlet for a few minutes, then plug it back in to reset it.
If problems persist after attempting these steps, contact JVC customer support or a qualified service technician.
8. ข้อมูลจำเพาะ
| คุณสมบัติ | ข้อมูลจำเพาะ |
|---|---|
| ชื่อรุ่น | DR-MV150 |
| ขนาดสินค้า | 19 x 15 x 7 นิ้ว |
| น้ำหนักสินค้า | 12.4 ปอนด์ |
| ประเภทสื่อ | CD, DVD, SVCD, VCD, VHS |
| Recordable Formats | VHS Hi-Fi, DVD-RAM, DVD-RW, DVD-R, +RW, +R |
| คุณสมบัติพิเศษ | การสแกนแบบก้าวหน้า |
| ปณิธาน | 1920x1080 (HDMI output with 1080p up-conversion) |
| ประเภทขั้วต่อ | HDMI, RCA (Audio/Video) |
| เทคโนโลยีการเชื่อมต่อ | HDMI |
| โหมดเอาต์พุตเสียง | สเตอริโอ |
| จูนเนอร์แบบรวม | ATSC/QAM Tuner |
| แบตเตอรี่ (รีโมท) | ต้องใช้แบตเตอรี่ AAA 2 ก้อน |
| ผู้ผลิต | เจวีซี |
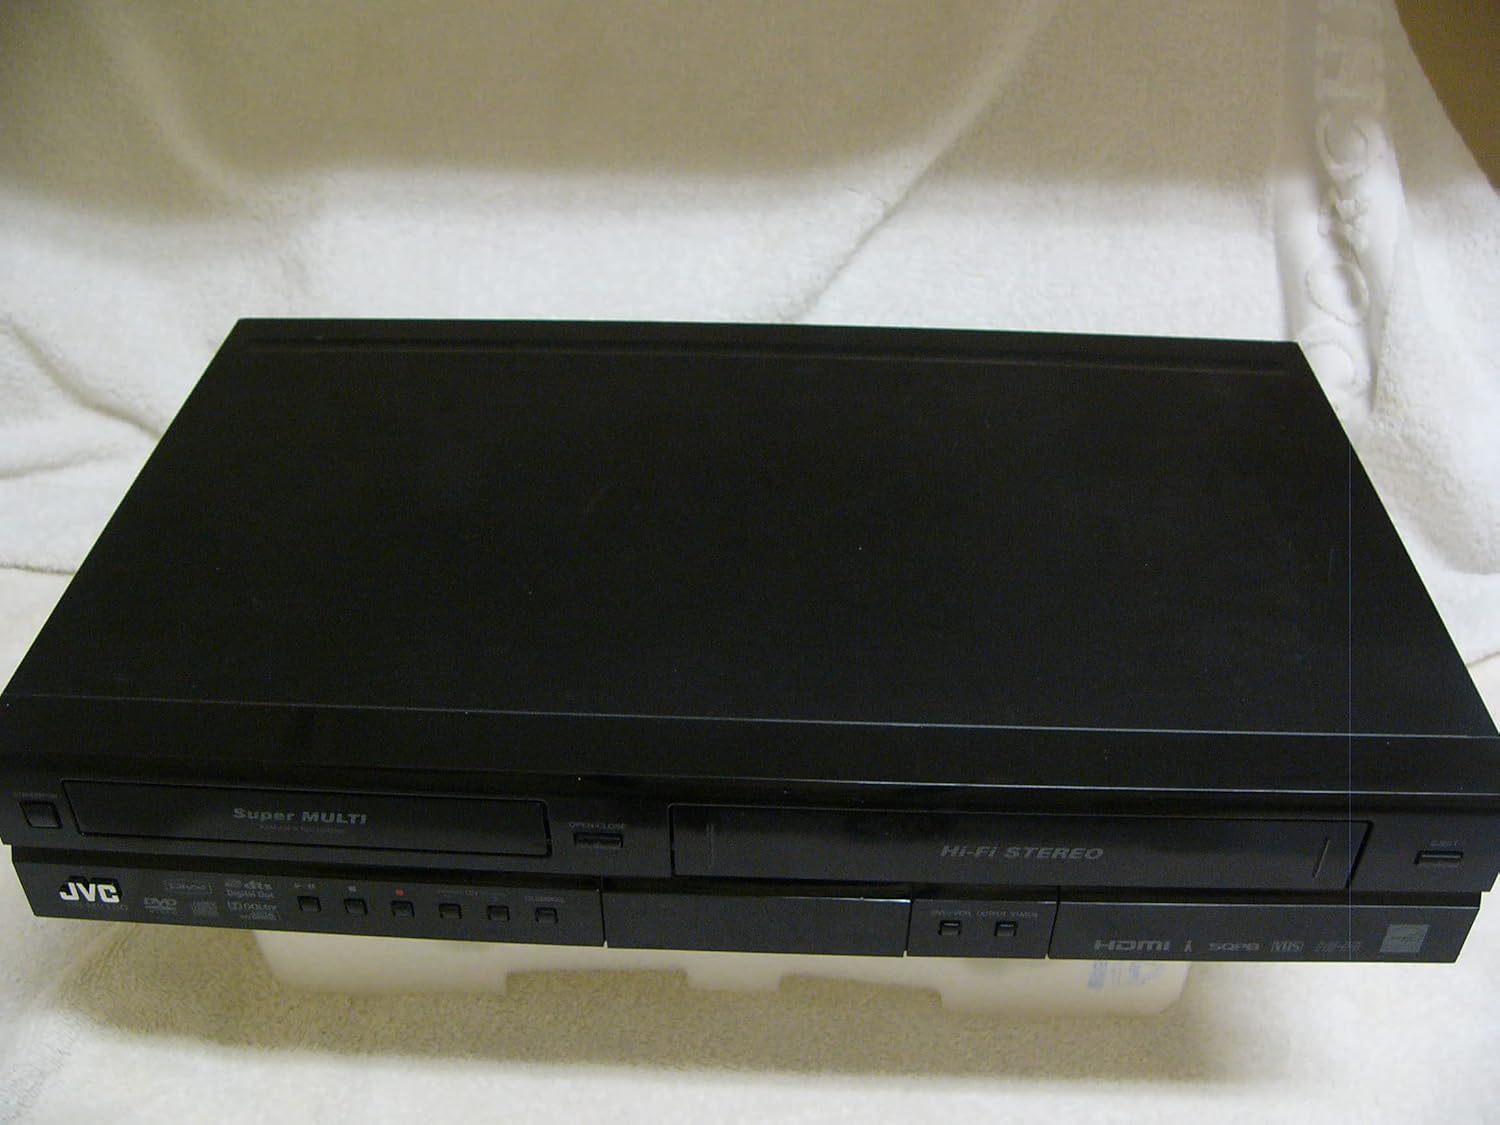
A top-down perspective of the JVC DR-MV150 unit, showcasing its sleek black design and dual-deck configuration for both DVD and VHS media.
9. การรับประกันและการสนับสนุน
For warranty information, please refer to the documentation included with your purchase or visit the official JVC website. JVC offers various protection plans for extended coverage. For technical support or service inquiries, please contact JVC customer service.
- แผนคุ้มครอง 2 ปี: มีให้เลือกใช้สำหรับการครอบคลุมแบบขยายเวลา
- แผนคุ้มครอง 3 ปี: มีให้เลือกใช้สำหรับการครอบคลุมแบบขยายเวลา
- การปกป้องที่สมบูรณ์: แผนรายเดือนที่ครอบคลุมการซื้อที่เข้าเงื่อนไขในอดีตและอนาคต
Please note that protection plans are separate from the manufacturer's warranty and provide additional coverage options.


