การแนะนำ
The Celestron NexStar 5SE is a powerful, feature-rich telescope designed for observing celestial objects. It combines advanced Schmidt-Cassegrain optics with a fully automated GoTo mount, making it suitable for both beginners and experienced users. This manual provides essential information for setting up, operating, and maintaining your telescope to ensure optimal performance and enjoyment of the night sky.

Image: The Celestron NexStar 5SE Computerized Telescope, featuring its distinctive orange optical tube, black computerized mount, and included accessories like the 25mm Plössl eyepiece and StarPointer finderscope.
มีอะไรอยู่ในกล่อง
เมื่อแกะกล่อง ให้แน่ใจว่ามีส่วนประกอบทั้งหมดดังต่อไปนี้:
- หลอดแสง
- Single Fork Arm Mount and Tripod
- ถาดอุปกรณ์เสริม
- กล้องค้นหาตัวชี้ดาว
- Built-In Wedge
- NexStar+ แฮนด์คอนโทรล
- 25mm eyepiece
- เส้นทแยงมุม
การตั้งค่า
Setting up your NexStar 5SE is a straightforward process that requires no tools. Follow these steps to prepare your telescope for observation.
1. Tripod and Mount Assembly
The tripod and single fork arm mount come pre-assembled. Extend the tripod legs to a stable height and secure them. Attach the accessory tray to the center spreader for convenient storage of eyepieces and other small items.
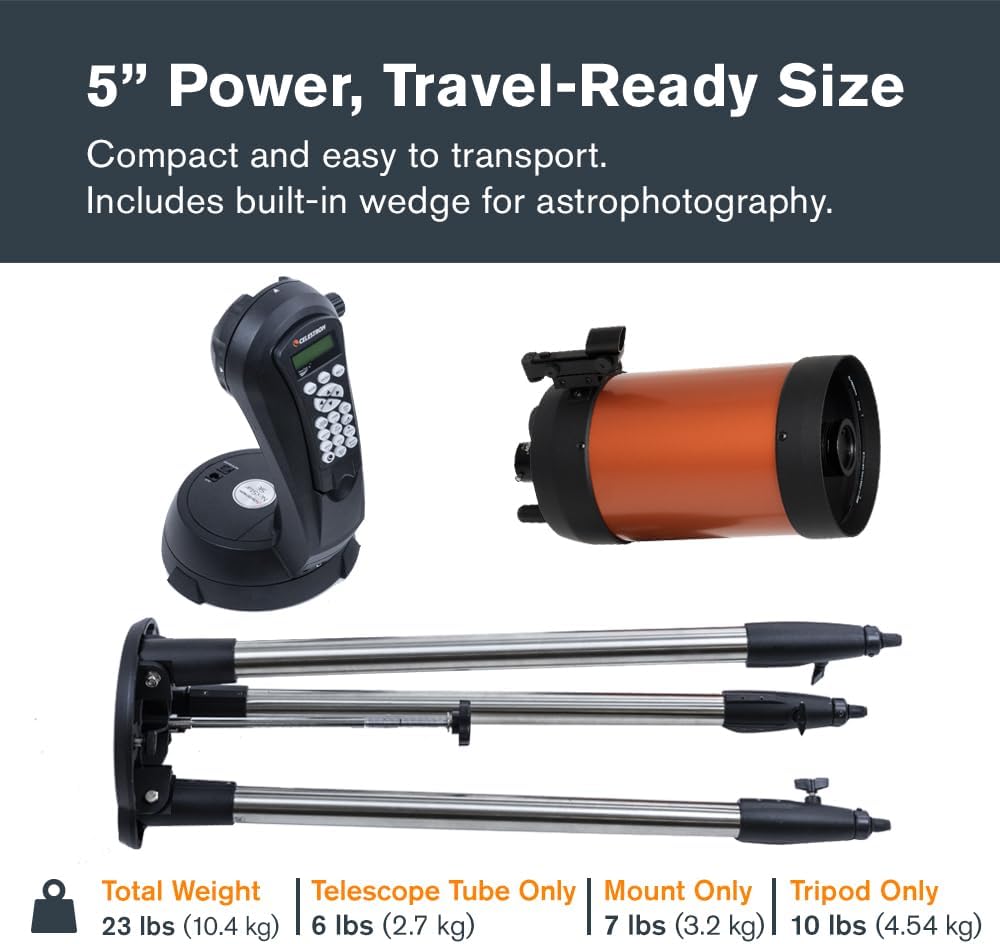
Image: Components of the Celestron NexStar 5SE, including the optical tube, mount, and tripod, illustrating its compact and travel-ready size when disassembled.
2. Attaching the Optical Tube
Carefully attach the optical tube to the single fork arm mount. Ensure it is securely fastened to prevent movement during observation. The telescope features a built-in wedge, which can be used for polar alignment, especially beneficial for astrophotography.
3. Installing Eyepiece and Star Diagonal
Insert the Star Diagonal into the visual back of the optical tube. Then, insert the 25mm eyepiece into the Star Diagonal. This eyepiece provides 50x magnification, suitable for initial observations.

Image: A 25mm Plössl eyepiece shown against a backdrop of the Moon, indicating its 50x magnification capability for detailed lunar views.
4. Powering the Telescope
The NexStar 5SE requires 8 AA batteries (not included) or a 12V AC adapter (not included), or any of Celestron’s PowerTank external power sources. Install the batteries into the internal battery compartment or connect an external power source. The internal battery compartment helps prevent cord wrap during use.
5. Attaching the StarPointer Finderscope
Attach the StarPointer finderscope to the optical tube. This will assist in initial alignment and accurately locating objects.
การใช้งานกล้องโทรทรรศน์
The NexStar 5SE features a fully automated GoTo system and SkyAlign technology for effortless celestial navigation.
1. การเปิดเครื่องครั้งแรกและการควบคุมด้วยมือ
Turn on the telescope using the power switch. The NexStar+ hand control will illuminate and display prompts. This hand control features a double-line, 16-character liquid crystal display with backlit LED buttons for easy operation.
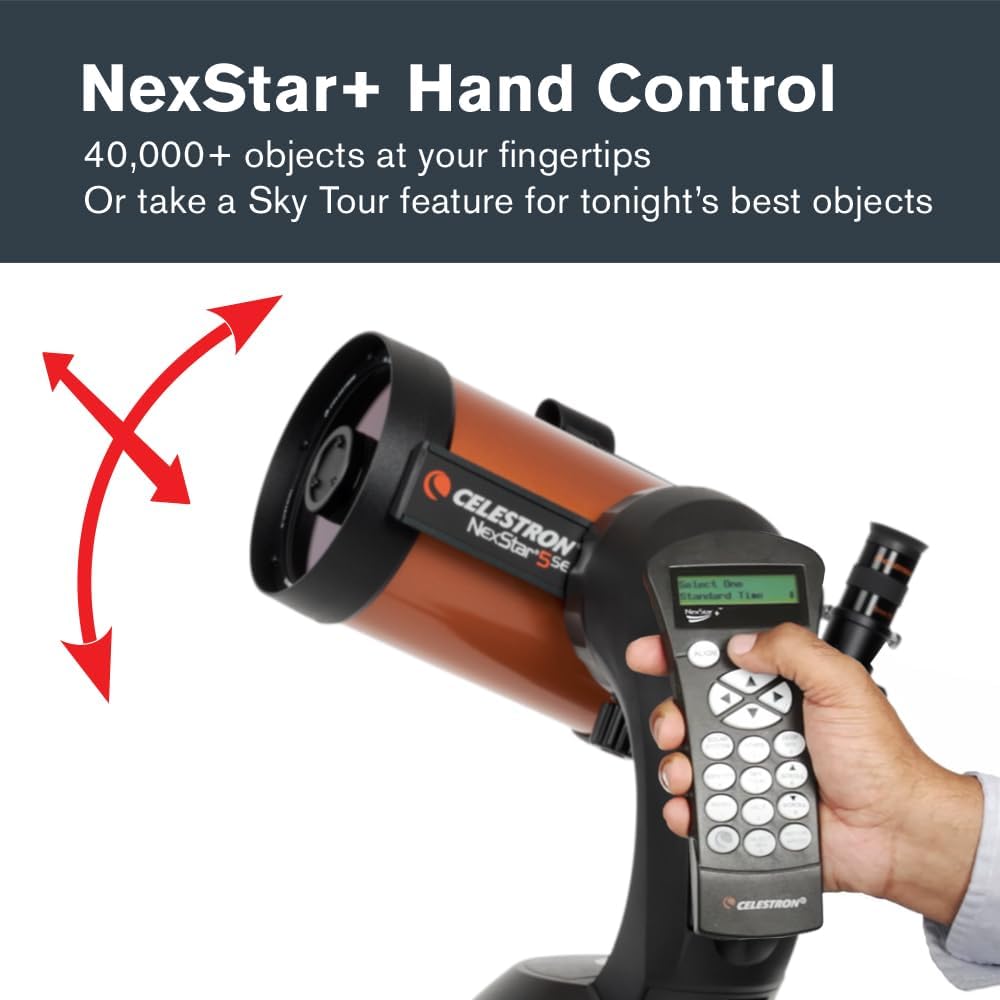
Image: A hand operating the NexStar+ Hand Control, which features a digital display and an array of buttons for navigating the telescope's computerized functions.
2. SkyAlign Technology
SkyAlign is Celestron's revolutionary alignment technology that simplifies the setup process. To align the telescope:
- Center any three bright stars or planets in the eyepiece. You do not need to know their names.
- The system will automatically calculate your position and align the telescope in minutes.

Image: A graphic illustrating Celestron's SkyAlign technology, showing three stars forming a triangle with the text "Easy as 1-2-3! No Astronomy Knowledge Required".
3. GoTo Functionality
Once aligned, use the NexStar+ hand control to select from a database of over 40,000 celestial objects. The computerized mount will then automatically locate and track your chosen target with precision, eliminating the need for star charts or manual tracking.

Image: The NexStar+ Hand Control displaying "Solar System Saturn" on its screen, next to an image of Saturn, demonstrating its object-finding capability.
4. Astrophotography Features
The built-in wedge allows for polar alignment, which is crucial for longer exposures and more accurate tracking during astrophotography. The telescope also includes a camera control feature and shutter release cable, enabling you to remotely take a series of timed exposures using your digital SLR camera.
การซ่อมบำรุง
Proper maintenance ensures the longevity and performance of your telescope.
- การทำความสะอาดเลนส์: Use only specialized optical cleaning solutions and cloths to clean lenses and mirrors. Avoid touching optical surfaces with bare hands.
- การดูแลแบตเตอรี่ If using AA batteries, ensure they are fresh for optimal performance. Remove batteries if the telescope will not be used for an extended period to prevent leakage. Consider using a rechargeable Celestron Power Tank for longer observation sessions.
- พื้นที่จัดเก็บ: Store the telescope in a dry, dust-free environment. Use dust caps for the optical tube and eyepieces when not in use.
การแก้ไขปัญหา
If you encounter issues with your telescope, refer to the following common solutions:
- ปัญหาการจัดตำแหน่ง: Ensure the telescope is level and pointing generally north before starting SkyAlign. Verify that the correct time, date, and location settings are entered into the hand control.
- ปัญหาไฟฟ้า: Check battery levels or external power connections. Ensure the power switch is fully engaged.
- การตอบสนองของมอเตอร์: If motors are unresponsive, check all cable connections to the hand control and mount.
- ไม่ชัดเจน Views: Ensure eyepieces are clean and properly seated. Adjust the focus knob slowly for a sharp image. Allow the telescope to acclimate to the ambient temperature to reduce thermal currents affecting image quality.
For further assistance, Celestron offers US-based technical support. You can also find product updates and additional resources online.
ข้อมูลจำเพาะ
| ขนาดสินค้า | 32 x 34 x 52 นิ้ว |
| น้ำหนักสินค้า | 17.6 ปอนด์ |
| หมายเลขรุ่นสินค้า | 11036 |
| ยี่ห้อ | เซเลสตรอน |
| ชื่อรุ่น | กล้องโทรทรรศน์คอมพิวเตอร์ NexStar 5SE |
| ความยาวหลอดแสง | 330 มิลลิเมตร |
| คำอธิบายเลนส์ช่องมองภาพ | 25mm eyepiece |
| เส้นผ่านศูนย์กลางเลนส์วัตถุ | 127 มิลลิเมตร |
| คำอธิบายเกี่ยวกับฐานติดตั้งกล้องโทรทรรศน์ | Computerized Altitude-Azimuth Single Fork Arm |
| ประเภทโฟกัส | โฟกัสแบบแมนนวล |
| แหล่งพลังงาน | 8-AA batteries, 12v AC adapter, or Celestron PowerTank (none included) |
| ไฟน์เดอร์สโคป | StarPointer™ red dot finderscope |
วิดีโอผลิตภัณฑ์อย่างเป็นทางการ
Celestron NexStar SE Telescopes Overview
วิดีโอ: เจ้าหน้าที่ผ่านview of the Celestron NexStar SE series of telescopes, highlighting key features and benefits for users interested in computerized astronomy.
การรับประกันและการสนับสนุน
The Celestron NexStar 5SE is backed by Celestron’s 2-Year Warranty. Customers also receive unlimited access to technical support from Celestron's US-based experts. For warranty claims or technical assistance, please refer to the contact information provided in your product packaging or visit the official Celestron webเว็บไซต์.
เอกสารที่เกี่ยวข้อง - NexStar 5SE
 |
คู่มือการใช้งานกล้องโทรทรรศน์ Celestron NexStar SE รุ่น #11068 และ #11069 - สำรวจจักรวาล คู่มือการใช้งานฉบับสมบูรณ์สำหรับกล้องโทรทรรศน์ Celestron NexStar SE (รุ่น #11068 และ #11069) ครอบคลุมรายละเอียดการประกอบ การใช้งาน การปรับตั้ง และการบำรุงรักษา เหมาะสำหรับนักดาราศาสตร์ทุกระดับ |
 |
คู่มือการใช้งานกล้องโทรทรรศน์ Celestron NexStar 6SE และ 8SE: คู่มือของคุณสู่ห้วงอวกาศ คู่มือการใช้งานฉบับสมบูรณ์สำหรับกล้องโทรทรรศน์แบบคอมพิวเตอร์ Celestron NexStar 6SE และ 8SE เรียนรู้การประกอบ การใช้งาน การปรับตั้ง และเทคนิคการสังเกตการณ์ทางดาราศาสตร์สำหรับนักดาราศาสตร์สมัครเล่น |
 |
คู่มือการตั้งค่าอย่างรวดเร็วสำหรับ Celestron NexStar SE A step-by-step guide for setting up and aligning your Celestron NexStar SE telescope, covering tripod assembly, finder scope alignment, and hand control operation. |
 |
คู่มือการตั้งค่าอย่างรวดเร็วสำหรับ Celestron NexStar SE คู่มือฉบับสมบูรณ์สำหรับการติดตั้งและปรับตั้งกล้องโทรทรรศน์ Celestron NexStar 6SE หรือ 8SE ของคุณ ครอบคลุมทุกขั้นตอนตั้งแต่การประกอบไปจนถึงการปรับตั้งเบื้องต้นเพื่อให้ได้ผลลัพธ์ที่ดีที่สุด viewการไอเอ็นจี |
 |
คู่มือการใช้งานกล้องโทรทรรศน์ Celestron Astro Fi สำรวจท้องฟ้ายามค่ำคืนด้วยกล้องโทรทรรศน์ Celestron Astro Fi (รุ่น #22204) คู่มือการใช้งานอย่างละเอียดนี้ให้คำแนะนำที่ชัดเจนและทีละขั้นตอนเกี่ยวกับการประกอบ การจัดวางตำแหน่ง และการใช้งานผ่านแอป SkyPortal และการถ่ายภาพดาราศาสตร์บนสมาร์ทโฟน เหมาะสำหรับผู้เริ่มต้นและผู้ที่ชื่นชอบการสำรวจความมหัศจรรย์ของท้องฟ้า |
 |
คู่มือการถ่ายภาพดาราศาสตร์ของ Celestron คู่มือการถ่ายภาพดาราศาสตร์โดยใช้กล้องโทรทรรศน์ Celestron ครอบคลุมเทคนิคต่างๆ ตั้งแต่การถ่ายภาพแบบดิจิทัลไปจนถึงการถ่ายภาพแบบโฟกัสหลักด้วยกล้อง DSLR และกล้อง CCD |