1. บทนำ
The Phoenix DEI 508D Proximity Radar Motion Sensor is designed to enhance the security of your vehicle by detecting motion both inside and outside the vehicle. This dual-zone sensor provides an early warning system, triggering your car alarm upon detecting unauthorized proximity or intrusion. This manual provides detailed instructions for installation, operation, and maintenance to ensure optimal performance and longevity of your sensor.
2. ข้อมูลด้านความปลอดภัย
- Always disconnect the vehicle's battery before beginning any electrical installation to prevent short circuits or electrical shock.
- Ensure all wiring connections are secure and properly insulated to prevent fire hazards or system malfunctions.
- Do not attempt to modify the sensor's internal components. Unauthorized modifications can void the warranty and pose safety risks.
- Consult a professional automotive technician if you are unsure about any installation steps.
- Keep the sensor away from excessive moisture, heat, and direct sunlight to prevent damage.
3. เนื้อหาบรรจุภัณฑ์
เมื่อเปิดบรรจุภัณฑ์ ตรวจสอบว่าส่วนประกอบทั้งหมดอยู่ครบและไม่ได้รับความเสียหาย:
- DEI 508D Proximity Radar Motion Sensor Unit
- ชุดสายไฟ
- คู่มือการติดตั้ง (คู่มือนี้)
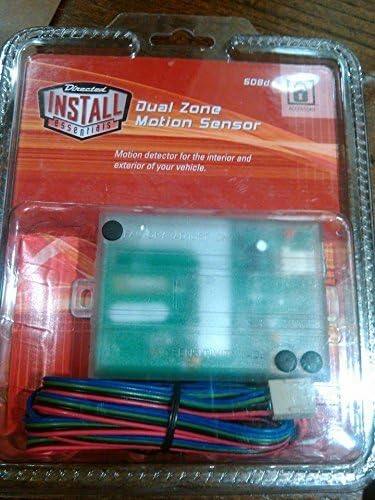
Figure 3.1: The Phoenix DEI 508D Proximity Radar Motion Sensor shown in its clear retail packaging, displaying the main sensor unit with its green circuit board visible, and a bundled wiring harness with multiple colored wires (red, black, blue, green, purple) connected to a white connector. The packaging also features the 'Directed INSTALL essentials' logo and text indicating 'Dual Zone Motion Sensor' and 'Motion detector for the interior and exterior of your vehicle.'
4. การตั้งค่าและการติดตั้ง
4.1 รายการตรวจสอบก่อนการติดตั้ง
- ตรวจสอบให้แน่ใจว่าได้ถอดแบตเตอรี่รถยนต์ออกแล้ว
- Gather necessary tools: wire strippers, crimpers, electrical tape, zip ties, multimeter.
- Identify a suitable mounting location for the sensor.
4.2 แผนผังสายไฟและการเชื่อมต่อ
The DEI 508D sensor typically connects to your existing car alarm system. Refer to your car alarm's manual for specific input requirements. Common connections are:
- สายสีแดง: +12V Constant Power. Connect to a fused constant 12V source.
- สายสีดำ: Ground. Connect to a solid chassis ground point.
- สายสีน้ำเงิน: Zone 1 Output (Warn-Away). Connect to the alarm's warn-away or pre-warn input. This output is typically a negative pulse.
- ลวดสีเขียว: Zone 2 Output (Full Trigger). Connect to the alarm's full trigger input. This output is typically a negative pulse.
- สายไฟสีม่วง: Ignition Input. Connect to a switched 12V source that is active when the ignition is ON. This wire is used to disable the sensor when the vehicle is running.
4.3 การติดตั้งเซนเซอร์
Choose a central location within the vehicle's cabin, such as under the dashboard, center console, or behind the glove compartment. The sensor should be mounted securely and away from direct metal obstructions that could interfere with its radar field. Ensure the sensor is level and not obstructed by large metal objects or wiring harnesses.
- Use zip ties or double-sided automotive tape to secure the sensor firmly.
- Avoid mounting near large speakers or other devices that emit strong electromagnetic fields.
- Test the sensor's coverage after mounting to ensure optimal detection zones.
5. คู่มือการใช้งาน
The DEI 508D sensor operates automatically once properly installed and connected to your car alarm system. It creates two distinct detection zones: an outer
เอกสารที่เกี่ยวข้อง - DEI-508D
 |
คู่มือการใช้งานล็อคอิเล็กทรอนิกส์ Phoenix DS2500E Series คู่มือการใช้งานฉบับสมบูรณ์สำหรับล็อคอิเล็กทรอนิกส์ Phoenix DS2500E Series ครอบคลุมการตั้งค่า การจัดการรหัส การควบคุมแบบคู่ คุณสมบัติการแจ้งเตือน และการเปลี่ยนแบตเตอรี่ |
 |
ประสิทธิภาพของ Phoenix Solution LGR Ampคู่มือสำหรับเจ้าของเครื่องขยายสัญญาณและคำแนะนำในการติดตั้ง คู่มือสำหรับเจ้าของ การติดตั้ง การใช้งาน และคำแนะนำการบริการสำหรับ Therma-Stor Phoenix Solution LGR Performance Ampเครื่องขยายสัญญาณ (PN 4026600) เรียนรู้เกี่ยวกับคุณลักษณะ การตั้งค่า การบำรุงรักษา และการรับประกัน |
 |
คู่มือเจ้าของเครื่องลดความชื้น Phoenix 250 MAX LGR และคำแนะนำในการบริการ คู่มือฉบับสมบูรณ์สำหรับเครื่องลดความชื้น Phoenix 250 MAX LGR จาก Therma-Stor ครอบคลุมการติดตั้ง การใช้งาน การบำรุงรักษา การแก้ไขปัญหา ข้อมูลจำเพาะ และการรับประกันสำหรับอุปกรณ์ฟื้นฟูกำลังสูงนี้ |
 |
ประสิทธิภาพของ Phoenix Solution LGR Ampคู่มือการเป็นเจ้าของเครื่องชาร์จแบตเตอรี่ คู่มือการใช้งานสำหรับเครื่องทำความเย็น Therma-Stor Phoenix Solution LGR Performance Ampเครื่องขยายเสียง ครอบคลุมการติดตั้ง การใช้งาน การบำรุงรักษา ข้อมูลจำเพาะ การแก้ไขปัญหา และข้อมูลการรับประกัน |
 |
คู่มือการใช้งานเครื่องลดความชื้น Phoenix 200 MAX LGR: คำแนะนำในการติดตั้ง การใช้งาน และการบำรุงรักษา คู่มือการใช้งานฉบับสมบูรณ์สำหรับเครื่องลดความชื้นความจุสูง Phoenix 200 MAX LGR ครอบคลุมการติดตั้ง การใช้งาน การบำรุงรักษา การแก้ไขปัญหา และข้อมูลการรับประกันจาก Therma-Stor |
 |
คู่มือเจ้าของเครื่องลดความชื้น Phoenix 200 HT LGR | การติดตั้ง การใช้งาน การบริการ คู่มือเจ้าของฉบับสมบูรณ์สำหรับเครื่องลดความชื้น Phoenix 200 HT LGR จาก Therma-Stor ครอบคลุมรายละเอียดเฉพาะ การใช้งาน การบำรุงรักษา การแก้ไขปัญหา การบริการ อะไหล่ และการรับประกันสำหรับอุปกรณ์ฟื้นฟูประสิทธิภาพสูงนี้ |