1. บทนำ
คู่มือนี้ให้คำแนะนำโดยละเอียดเกี่ยวกับการติดตั้ง การใช้งาน และการบำรุงรักษาที่ถูกต้องสำหรับ Lanzar VIBE211 Vibe 360 Watt 2 Channel Mosfet ของคุณ Ampโปรดอ่านคู่มือนี้อย่างละเอียดก่อนพยายามติดตั้งหรือใช้งาน ampใช้เครื่องขยายเสียงเพื่อให้มั่นใจถึงประสิทธิภาพและความปลอดภัยสูงสุด
2. ข้อมูลด้านความปลอดภัย
ปฏิบัติตามข้อควรระวังด้านความปลอดภัยต่อไปนี้เสมอระหว่างการติดตั้งและการใช้งาน:
- ถอดขั้วลบของแบตเตอรี่รถยนต์ออกก่อนทำการเชื่อมต่อสายไฟใดๆ
- ตรวจสอบให้แน่ใจว่าสายไฟทั้งหมดได้รับการเดินสายและยึดอย่างถูกต้องเพื่อป้องกันความเสียหายหรือไฟฟ้าลัดวงจร
- ใช้สายไฟขนาดที่เหมาะสมสำหรับการเชื่อมต่อไฟฟ้าและกราวด์ตามที่ระบุไว้ในส่วนการติดตั้ง
- ติดตั้ง ampควรวางเครื่องขยายเสียงไว้ในที่ปลอดภัยในบริเวณที่มีการระบายอากาศเพียงพอ และป้องกันจากความชื้นและความร้อนสูงเกินไป
- ห้ามใช้งาน ampหากเครื่องขยายเสียงชำรุดหรือทำงานผิดปกติ ให้ดูที่ส่วนการแก้ไขปัญหาหรือขอความช่วยเหลือจากผู้เชี่ยวชาญ
3. สินค้าหมดview
Lanzar VIBE211 เป็นทรานซิสเตอร์แบบ Mosfet 2 แชนแนล ampแอมป์ขยายเสียงที่ออกแบบมาสำหรับระบบเสียงในรถยนต์ มีดีไซน์แบบบริดจ์ ทำให้สามารถกำหนดค่าได้อย่างยืดหยุ่น และใช้แหล่งจ่ายไฟ Mosfet แบบควบคุมเพื่อประสิทธิภาพที่เสถียร คุณสมบัติหลัก ได้แก่ การควบคุมครอสโอเวอร์ความถี่สูง/ต่ำแบบปรับได้ และการควบคุมเสียงเบสซับวูฟเฟอร์แบบรีโมท
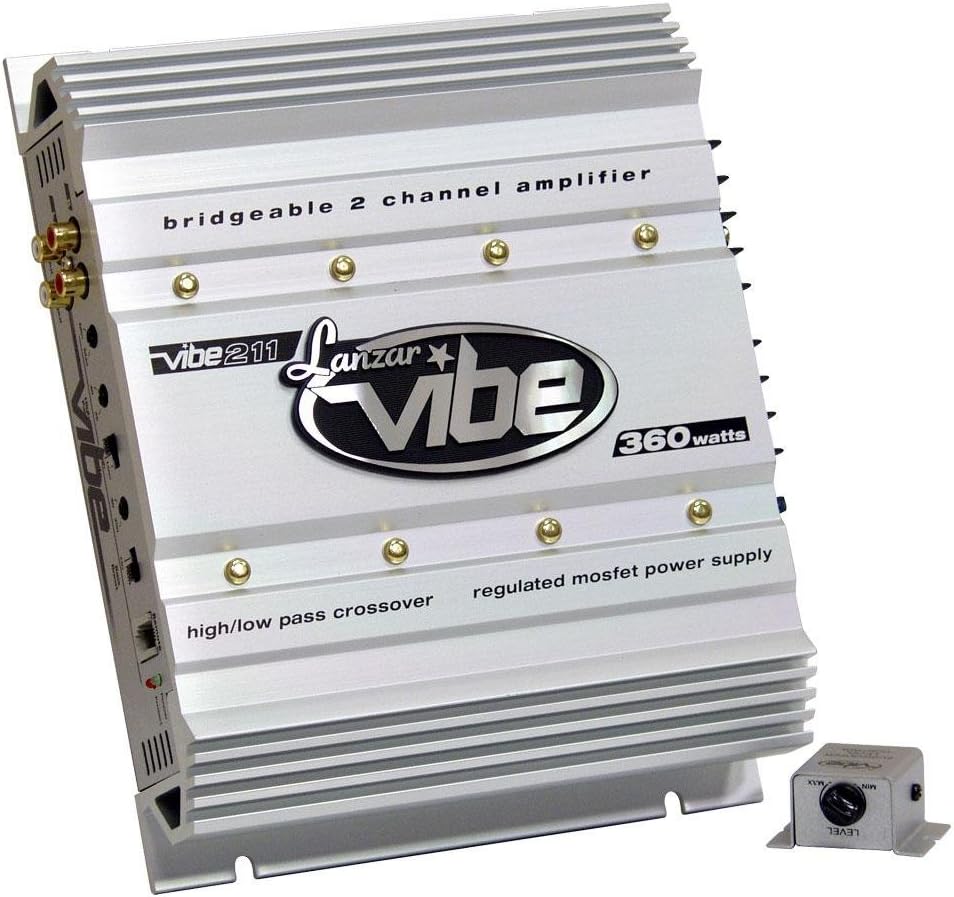
มุมเอียง view ของแอมป์กีตาร์ Lanzar VIBE211 Vibe 360 วัตต์ 2 แชนแนล Mosfet สีเงิน Ampเครื่องแสดงasinด้วยดีไซน์ฮีทซิงค์แบบมีครีบ ช่องเสียบ RCA และแผงควบคุม ampแอมพลิฟายเออร์มีข้อความระบุว่า 'สามารถเชื่อมต่อแบบบริดจ์ได้ 2 แชนแนล' ampมีการระบุชื่อแอมป์ว่า 'Lanzar vibe', '360 วัตต์', 'ตัวกรองความถี่สูง/ต่ำ' และ 'แหล่งจ่ายไฟแบบ MOSFET ควบคุม' นอกจากนี้ยังมีตัวควบคุมระดับเสียงเบสแบบแยกส่วนขนาดเล็กปรากฏอยู่ด้านหน้า
4. การตั้งค่าและการติดตั้ง
4.1 การติดตั้ง Ampชีวิต
เลือกตำแหน่งติดตั้งที่มั่นคงและมีอากาศถ่ายเทสะดวกโดยรอบ ampแผ่นระบายความร้อนของแอมพลิฟายเออร์ หลีกเลี่ยงการติดตั้งในที่ที่มีแสงแดดส่องโดยตรงหรือบริเวณที่มีความชื้นสูง ใช้ฮาร์ดแวร์สำหรับติดตั้งที่ให้มาเพื่อยึดให้แน่น ampติดเครื่องขยายเสียงเข้ากับพื้นผิวที่แข็งแรงอย่างมั่นคง
4.2 การเชื่อมต่อสายไฟ
ตรวจสอบให้แน่ใจว่าการเชื่อมต่อทั้งหมดแน่นหนาและหุ้มฉนวนอย่างเหมาะสมเพื่อป้องกันไฟฟ้าลัดวงจร
- กำลังไฟ (B+): ต่อสายไฟขนาดใหญ่ (เช่น 8 AWG หรือใหญ่กว่า) จากขั้วบวกของแบตเตอรี่รถยนต์โดยตรงไปยัง... ampขั้ว B+ ของเครื่องขยายเสียง ติดตั้งฟิวส์ที่เหมาะสม (15A) ภายในระยะ 18 นิ้วจากแบตเตอรี่
- กราวด์ (GND): ต่อสายไฟขนาดใหญ่ที่มีขนาดเท่ากับสายไฟหลักจาก ampนำขั้ว GND ของเครื่องขยายเสียงไปแตะกับพื้นผิวโลหะที่สะอาดและไม่ทาสีของตัวถังรถ ตรวจสอบให้แน่ใจว่ามีการเชื่อมต่อทางไฟฟ้าที่ดี
- รีโมท (REM): ต่อสายไฟขนาดเล็กกว่า (เช่น 18 AWG) จาก ampขั้วต่อ REM ของเครื่องขยายเสียงเข้ากับเอาต์พุตเปิดเครื่องระยะไกลของชุดเครื่องเสียงหลักของคุณ สายนี้จะเปลี่ยน ampเปิดและปิดเครื่องขยายเสียงพร้อมกับเครื่องเสียงของคุณ
- อินพุต RCA: เชื่อมต่อสายสัญญาณเสียง RCA จากพอร์ตพรีแอมป์ของเครื่องเล่นในรถของคุณamp ส่งออกไปยัง ampช่องต่อ RCA สีทองของแอมพลิฟายเออร์ ampแอมพลิฟายเออร์นี้มีช่องต่อ Line Out สำหรับช่องซ้ายและขวา เพื่อเชื่อมต่อแบบอนุกรมกับอุปกรณ์อื่น ampลิตเตอร์
- เอาท์พุตของลำโพง: เชื่อมต่อลำโพงของคุณเข้ากับ... ampขั้วต่อลำโพงของเครื่องขยายเสียง สังเกตขั้วให้ถูกต้อง (+ ต่อกับ + และ - ต่อกับ -) ampแอมป์ตัวนี้มีเสถียรภาพในระบบสเตอริโอที่ 2 โอห์ม และสามารถต่อแบบบริดจ์ได้ที่ 4 โอห์ม
- การควบคุมเสียงเบสซับวูฟเฟอร์ระยะไกล: เชื่อมต่อชุดควบคุมเสียงเบสระยะไกลเข้ากับพอร์ตที่กำหนดไว้บน ampเครื่องขยายเสียง ติดตั้งชุดควบคุมในตำแหน่งที่เข้าถึงได้ง่ายเพื่อให้ปรับแต่งได้สะดวก
5. คู่มือการใช้งาน
5.1 การเพิ่มพลังเริ่มต้น
หลังจากต่อสายทุกอย่างเสร็จแล้ว ให้ต่อขั้วลบของแบตเตอรี่รถยนต์กลับเข้าไป จากนั้นเปิดเครื่องเล่นในรถ ampเครื่องขยายเสียงมีวงจรเปิด/ปิดแบบนุ่มนวลเพื่อป้องกันเสียงดังป๊อปและคลิก ไฟแสดงสถานะการป้องกันไฟดับจะสว่างขึ้นเพื่อแสดงสถานะการทำงาน
5.2 การปรับปุ่มควบคุมระดับสัญญาณอินพุต
การ ampแอมพลิฟายเออร์มีปุ่มควบคุมระดับอินพุตแบบปรับได้ เริ่มจาก... ampตั้งระดับอินพุตของแอมพลิฟายเออร์ไว้ที่ระดับต่ำสุด เล่นเพลงที่คุ้นเคยผ่านชุดเครื่องเสียงในรถของคุณที่ระดับเสียงประมาณ 75% ของระดับเสียงสูงสุด ค่อยๆ เพิ่มระดับเสียงขึ้น ampปรับระดับอินพุตของแอมพลิฟายเออร์จนกว่าคุณจะได้ยินเสียงผิดเพี้ยนเล็กน้อย จากนั้นลดระดับลงเล็กน้อย วิธีนี้จะช่วยให้มั่นใจได้ว่า ampเครื่องขยายเสียงรับสัญญาณได้อย่างเหมาะสมโดยไม่มีการตัดสัญญาณ
5.3 การตั้งค่าครอสโอเวอร์
การ ampแอมพลิฟายเออร์นี้มีระบบควบคุมครอสโอเวอร์แบบปรับได้ทั้งความถี่สูงและต่ำ ช่วยให้คุณสามารถกรองความถี่เฉพาะไปยังลำโพงหรือซับวูฟเฟอร์ของคุณได้
- ตัวกรองความถี่สูง (HPF): ใช้สำหรับลำโพงแบบฟูลเรนจ์เพื่อป้องกันไม่ให้ความถี่ต่ำเข้าถึงลำโพง ทำให้เสียงคมชัดขึ้น
- ตัวกรองความถี่ต่ำ (LPF): ใช้สำหรับซับวูฟเฟอร์เพื่อให้เฉพาะความถี่ต่ำผ่านไปได้ ช่วยเพิ่มประสิทธิภาพเสียงเบส
ปรับปุ่มควบคุมเหล่านี้ให้ตรงกับลักษณะการตอบสนองความถี่ของลำโพงและซับวูฟเฟอร์ของคุณ
5.4 วงจรเพิ่มเสียงเบส
วงจรเพิ่มเสียงเบสในตัวช่วยเพิ่มระดับเสียงเบสในความถี่เฉพาะ ควรใช้คุณสมบัตินี้อย่างระมัดระวังและปรับตามความต้องการ หลีกเลี่ยงการเพิ่มเสียงมากเกินไปซึ่งอาจทำให้เสียงผิดเพี้ยนหรือลำโพงเสียหายได้
5.5 การทำงานในโหมดบริดจ์
การ ampสามารถต่อบริดจ์แอมป์ที่ 4 โอห์ม เพื่อรวมกำลังของทั้งสองช่องสัญญาณเข้าเป็นกำลังขับเดียวที่สูงขึ้น โดยทั่วไปใช้สำหรับขับซับวูฟเฟอร์ โปรดดูแผนผังการเดินสายไฟสำหรับคำแนะนำเฉพาะเกี่ยวกับการต่อบริดจ์ ampชีวิต.
6. การบำรุงรักษา
แลนซาร์ VIBE211 ampเครื่องขยายเสียงต้องการการบำรุงรักษาเพียงเล็กน้อย ตรวจสอบการเชื่อมต่อสายไฟเป็นระยะว่าแน่นหนาและไม่มีสนิมหรือไม่ รักษา... ampควรทำความสะอาดฮีทซิงค์ของแอมป์ให้ปราศจากฝุ่นและสิ่งสกปรก เพื่อให้การระบายความร้อนเป็นไปอย่างเหมาะสม ใช้ผ้าแห้งนุ่มๆ เช็ดทำความสะอาดภายนอก
7 การแก้ไขปัญหา
หากคุณประสบปัญหาเกี่ยวกับ ampหากคุณต้องการเครื่องขยายเสียง โปรดดูตารางต่อไปนี้ก่อนขอรับบริการจากช่างผู้เชี่ยวชาญ:
| ปัญหา | สาเหตุที่เป็นไปได้ | สารละลาย |
|---|---|---|
| ไม่มีไฟฟ้า / ไม่มีเสียง | ฟิวส์ขาด; สายไฟ/สายดิน/สายรีโมทหลวม; ชุดควบคุมหลักเสีย | ตรวจสอบและเปลี่ยนฟิวส์ ตรวจสอบการเชื่อมต่อไฟ สายดิน และสายรีโมททั้งหมด ทดสอบการทำงานของชุดควบคุมหลัก |
| เสียงผิดเพี้ยน | ระดับสัญญาณเข้าสูงเกินไป; ค่าความต้านทานของลำโพงต่ำเกินไป; ลำโพงชำรุด | ปรับระดับสัญญาณเข้า; ตรวจสอบค่าความต้านทานของลำโพง (2 โอห์มในโหมดสเตอริโอ, 4 โอห์มในโหมดบริดจ์); ตรวจสอบลำโพงว่ามีรอยชำรุดหรือไม่ |
| Ampเครื่องขยายสัญญาณเข้าสู่โหมดการป้องกัน | ความร้อนสูงเกินไป; ไฟฟ้าลัดวงจรในสายลำโพง; ระดับเสียงต่ำtage. | ตรวจสอบให้แน่ใจว่ามีการระบายอากาศที่เพียงพอ ตรวจสอบสายลำโพงว่ามีการลัดวงจรหรือไม่ ตรวจสอบระดับแบตเตอรี่tagระบบอิเล็กทรอนิกส์และระบบชาร์จไฟ |
| ไม่มีเสียงเบสจากซับวูฟเฟอร์ | ไม่ได้เปิดใช้งาน LPF หรือตั้งค่าไว้สูงเกินไป; ปัญหาเฟส; การควบคุมเสียงเบสระยะไกลตั้งค่าไว้ที่ต่ำสุด | ปรับการตั้งค่า LPF; ตรวจสอบเฟสของซับวูฟเฟอร์; เพิ่มระดับการควบคุมเสียงเบสจากรีโมท |
8. ข้อมูลจำเพาะ
ข้อมูลจำเพาะทางเทคนิคสำหรับ Lanzar VIBE211 ampเครื่องฟอก:
- กำลังขับ (RMS ที่ 4 โอห์ม): 2 x 90 วัตต์
- กำลังขับ (สูงสุดที่ 4 โอห์ม): 2 x 180 วัตต์
- กำลังขับ (สูงสุดเมื่อต่อแบบบริดจ์ที่ 4 โอห์ม): 1 x 360 วัตต์
- กำลังขับ (RMS ที่ 2 โอห์ม): 2 x 150 วัตต์
- Amplifier ประเภท: มอสเฟต 2 แชนแนล
- การตอบสนองความถี่: 15 เฮิรตซ์ - 35 กิโลเฮิร์ตซ์
- อัตราส่วนสัญญาณต่อเสียงรบกวน (S/N): 90 เดซิเบล
- คะแนนฟิวส์: 15A
- ขนาด (กว้าง x สูง x ยาว): 10.25 นิ้ว x 2 นิ้ว x 8 นิ้ว
- การควบคุมระดับอินพุต: ตัวแปร
- ครอสโอเวอร์คอนโทรล: ตัวกรองความถี่สูง/ต่ำแบบปรับได้
- ความเสถียร: เสถียรที่ 2 โอห์ม (สเตอริโอ) สามารถต่อแบบบริดจ์ได้ที่ 4 โอห์ม
- วงจรป้องกัน: ไฟแสดงสถานะ LED ระบบป้องกันไฟเกินขั้นสูง
- คุณสมบัติเพิ่มเติม: รีโมทควบคุมเสียงเบสซับวูฟเฟอร์, วงจรครอสโอเวอร์อิเล็กทรอนิกส์, วงจรเพิ่มเสียงเบส, ระบบเปิด/ปิดแบบนุ่มนวล
9. การรับประกันและการสนับสนุน
9.1 ข้อมูลการรับประกัน
แลนซาร์ VIBE211 ampเครื่องขยายเสียงมาพร้อมกับ 1 ปี การรับประกันมีข้อจำกัดนับจากวันที่ซื้อ การรับประกันนี้ครอบคลุมถึงข้อบกพร่องในวัสดุและฝีมือการผลิตภายใต้การใช้งานปกติ โปรดเก็บหลักฐานการซื้อไว้เพื่อใช้ในการเรียกร้องการรับประกัน การรับประกันไม่ครอบคลุมถึงความเสียหายที่เกิดจากการติดตั้งที่ไม่ถูกต้อง อุบัติเหตุ การใช้งานผิดวิธี การใช้ในทางที่ผิด ความประมาท หรือการดัดแปลงโดยไม่ได้รับอนุญาต
9.2 การสนับสนุนลูกค้า
หากต้องการความช่วยเหลือด้านเทคนิค การแก้ไขปัญหาที่อยู่นอกเหนือคู่มือนี้ หรือบริการรับประกัน โปรดติดต่อฝ่ายบริการลูกค้าของ Lanzar โปรดดูเอกสารทางการของ Lanzar webเพื่อตรวจสอบข้อมูลติดต่อล่าสุดได้จากเว็บไซต์หรือบรรจุภัณฑ์ของผลิตภัณฑ์


