
1. บทนำ
The Next Cine800S GoogleTV Projector is designed to provide a versatile and immersive home entertainment experience. This manual offers essential information for the safe and efficient setup, operation, and maintenance of your projector. Please read this manual thoroughly before using the device.
2. ข้อมูลด้านความปลอดภัย
- แหล่งจ่ายไฟ: ใช้เฉพาะอะแดปเตอร์แปลงไฟที่ระบุไว้เท่านั้น ตรวจสอบให้แน่ใจว่าสายไฟไม่ชำรุดหรือถูกหนีบ
- การระบายอากาศ : อย่าปิดกั้นช่องระบายอากาศ เว้นระยะห่างที่เหมาะสมรอบโปรเจ็กเตอร์เพื่อให้มีการไหลเวียนของอากาศที่ดี ป้องกันความร้อนสูงเกินไป
- การจัดวาง: วางโปรเจ็กเตอร์บนพื้นผิวที่มั่นคงและเรียบ หลีกเลี่ยงการวางในที่ที่มีแสงแดดส่องโดยตรง ใกล้แหล่งความร้อน หรือในสภาพแวดล้อมที่มีความชื้นสูงหรือมีฝุ่นละอองมาก
- การทำความสะอาด: ถอดปลั๊กไฟก่อนทำความสะอาด ใช้ผ้านุ่มและแห้ง ห้ามใช้น้ำยาทำความสะอาดชนิดน้ำหรือสเปรย์
- การดูแลเลนส์: Avoid touching the projector lens directly. Use a soft, lint-free cloth specifically designed for optical lenses if cleaning is necessary.
- การบริการ: อย่าพยายามซ่อมโปรเจคเตอร์ด้วยตนเอง โปรดส่งซ่อมโดยช่างผู้ชำนาญการเท่านั้น
3. สินค้าหมดview
The Next Cine800S is a Full HD LED projector featuring Google TV. Below are key components and features.

รูปที่ 3.1 : ด้านหน้า view of the Next Cine800S GoogleTV Projector, highlighting its design and key features like 800 ANSI Lumens and Google TV integration.
3.1. คุณสมบัติหลัก
- ความละเอียดการแสดงผล: Full HD 1920x1080, supporting screen sizes from 40 to 200 inches.
- ความสว่าง: 800 ANSI ลูเมน
- การประมวลผลวิดีโอ: Supports 4Kx2K @ 60fps encode/decode.
- Focus & Keystone: Automatic or Manual Focus, Automatic Keystone Correction.
- ระบบปฏิบัติการ: Google TV with Android 14.
- บริการสตรีมมิ่ง: Netflix L1, Prime Video, YouTube, Disney+ with L1 DRM Certification.
- การเชื่อมต่อไร้สาย: Wi-Fi 802.11 a/b/g/n/ac (2.4G & 5G) and Bluetooth 5.0.
- หน่วยความจำ: 2GB LPDDR4 RAM / 8GB eMMC Storage.
- เสียง: Integrated 12W (4W) Speaker.
- ระบบออปติคอล: Dust-Sealed Optical Mechanism.
- มิเรอร์หน้าจอ: Air Screen and Google Cast for iOS & Android devices.
3.2. พอร์ตและการเชื่อมต่อ
Identify the various input and output ports on your projector.
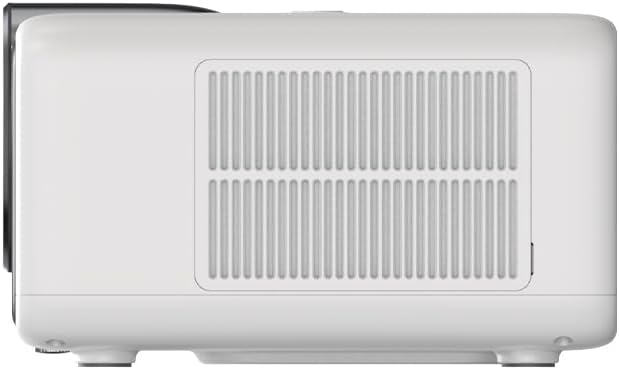
Figure 3.2: Rear panel of the projector, displaying available ports. Note: Actual ports may vary slightly by region or production batch. This model typically includes HDMI, USB, and a 2.5mm Audio Jack.
- ช่องต่อ HDMI: Connect to external video sources such as Blu-ray players, gaming consoles, or computers.
- ยูเอสบี: สำหรับเชื่อมต่ออุปกรณ์จัดเก็บข้อมูล USB เพื่อเล่นสื่อ files.
- แจ็คเสียงขนาด 2.5 มม.: สำหรับเชื่อมต่ออุปกรณ์เสียงภายนอก เช่น หูฟังหรือลำโพง
4. การตั้งค่า
4.1. การแกะกล่องและการตรวจสอบเบื้องต้น
- ถอดโปรเจ็กเตอร์และอุปกรณ์เสริมทั้งหมดออกจากบรรจุภัณฑ์อย่างระมัดระวัง
- Check for any signs of damage during transit. If damage is found, contact your retailer immediately.
- ตรวจสอบให้แน่ใจว่ามีอุปกรณ์เสริมทั้งหมดตามรายการครบถ้วน
4.2. การจัดวางโปรเจ็กเตอร์
การจัดวางตำแหน่งที่เหมาะสมเป็นสิ่งสำคัญอย่างยิ่งเพื่อให้ได้ผลลัพธ์ที่ดีที่สุด viewการสร้างประสบการณ์

รูปที่ 4.1: อดีตample of projector placement and adjustable screen sizes (40" to 200").
- ระยะทาง: Position the projector at a suitable distance from the screen or wall to achieve your desired screen size (40 to 200 inches).
- ความสูง: Place the projector on a stable surface or mount it to project the image at the desired height.
- การติดตั้ง: The projector includes a mounting point on its base. Ensure any tripod or mount used is compatible with the projector's screw size and weight. Note that some standard tripod screws may not fit.
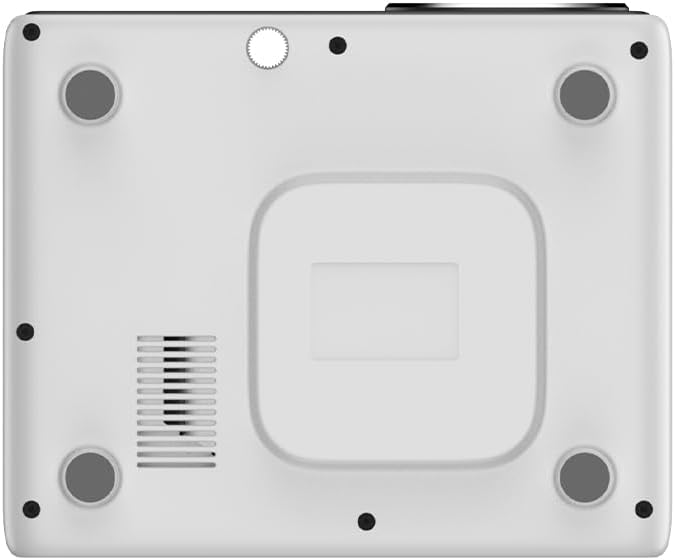
รูปที่ 4.2: ด้านล่าง view of the projector, indicating the mounting point and ventilation grilles.
4.3. การเชื่อมต่อไฟฟ้า
- ต่ออะแดปเตอร์แปลงไฟเข้ากับพอร์ตจ่ายไฟของโปรเจ็กเตอร์
- เสียบอะแดปเตอร์จ่ายไฟเข้ากับเต้ารับไฟฟ้าที่เหมาะสม
- กดปุ่มเปิด/ปิดบนโปรเจ็กเตอร์หรือรีโมทคอนโทรลเพื่อเปิดเครื่อง
4.4. การตั้งค่าเริ่มต้นและการเชื่อมต่อเครือข่าย
- Upon first power-on, the projector will guide you through the initial Google TV setup process.
- Follow the on-screen instructions to select your language, connect to a Wi-Fi network (2.4G or 5G), and log in with your Google account.
- The projector features automatic focus and keystone correction. If the image is not perfectly clear or rectangular, you can access manual adjustment options in the settings menu.
5. คู่มือการใช้งาน
5.1. การใช้งาน Google TV
The projector runs on Google TV, providing a user-friendly interface for accessing content.

Figure 5.1: The Google TV interface on the Next Cine800S Projector, showing recommended content and installed applications.
- Use the remote control to navigate through menus, select apps, and control playback.
- The home screen provides personalized recommendations and quick access to your favorite streaming services.
5.2. แอปพลิเคชันสตรีมมิ่ง
Access popular streaming platforms directly from your projector.

Figure 5.2: Supported streaming applications and Google Play Store access.
- Pre-installed apps include Netflix, Prime Video, YouTube, and Disney+.
- ดาวน์โหลดแอปพลิเคชันเพิ่มเติมจาก Google Play Store
- Ensure you are logged into your respective service accounts to access content.
5.3. การเชื่อมต่ออุปกรณ์ภายนอก
- ช่องต่อ HDMI: Connect your device to an HDMI port. The projector will automatically detect the input or you can manually select it from the input source menu.
- ยูเอสบี: Insert a USB drive into the USB port. The media player application will typically launch automatically, allowing you to browse and play supported media files (JPG, PNG, BMP, JPEG, MP3, M4A, MP2, WAV, FLAC, MP4, MOV, TS, DAT, F4V, 3GP).
5.4. การมิเรอร์หน้าจอ
The projector supports Air Screen and Google Cast for mirroring content from your iOS or Android devices.
- ตรวจสอบให้แน่ใจว่าอุปกรณ์เคลื่อนที่และโปรเจ็กเตอร์ของคุณเชื่อมต่อกับเครือข่าย Wi-Fi เดียวกัน
- On your mobile device, open the screen mirroring function (e.g., 'Screen Cast', 'Smart View', 'AirPlay')
- เลือกโปรเจ็กเตอร์จากรายการอุปกรณ์ที่มีอยู่
6. การบำรุงรักษา
การบำรุงรักษาอย่างสม่ำเสมอจะช่วยให้โปรเจคเตอร์ทำงานได้อย่างมีประสิทธิภาพสูงสุดและยืดอายุการใช้งาน
6.1. การทำความสะอาดเลนส์

Figure 6.1: Close-up of the projector lens, which requires careful cleaning.
- Use a soft, lint-free cloth or a lens cleaning brush to gently remove dust from the lens surface.
- For stubborn smudges, use a specialized lens cleaning solution applied to a microfiber cloth, not directly to the lens.
- Avoid abrasive materials or excessive force, which can scratch the lens.
6.2. Cleaning Ventilation Ports
- Periodically check the ventilation grilles for dust accumulation.
- Use a soft brush or a vacuum cleaner with a brush attachment to gently clean the grilles.
- อย่าใส่วัตถุใด ๆ เข้าไปในช่องระบายอากาศ
6.3. การอัปเดตซอฟต์แวร์
- Ensure your projector is connected to the internet.
- Navigate to the system settings to check for and install available software updates. Updates can improve performance and add new features.
7 การแก้ไขปัญหา
ส่วนนี้จะกล่าวถึงปัญหาทั่วไปที่คุณอาจพบเจอขณะใช้งานโปรเจคเตอร์
| ปัญหา | สาเหตุที่เป็นไปได้ | สารละลาย |
|---|---|---|
| ไม่มีไฟฟ้า | สายไฟหลุด เต้ารับไฟฟ้ามีปัญหา | ตรวจสอบการเสียบสายไฟ ลองเสียบเข้ากับปลั๊กไฟอื่นดู |
| ไม่มีรูปภาพ | Input source not selected, device not connected, lens cap on | Ensure input source is correctly selected. Check HDMI/USB connections. Remove lens cap. |
| ภาพเบลอ | ไม่ได้ปรับโฟกัส | Adjust focus manually using the projector's focus ring or through the settings menu if automatic focus is not sufficient. |
| Image is distorted/trapezoidal | Keystone not adjusted, projector not perpendicular to screen | The projector has automatic keystone correction. If the image is still distorted, access the manual keystone correction settings to fine-tune the image. |
| ไม่มีเสียงหรือคุณภาพเสียงไม่ดี | Volume too low, external audio device not connected, speaker issue | Increase volume. Check external audio connections if used. If internal speaker sound is distorted at low volumes, consider connecting external speakers via the 2.5mm audio jack or Bluetooth. |
| ปัญหาการเชื่อมต่อ Wi-Fi | รหัสผ่านไม่ถูกต้อง ปัญหาเราเตอร์ สัญญาณรบกวน | Verify Wi-Fi password. Restart router. Ensure projector is within Wi-Fi range. |
| รีโมตคอนโทรลไม่ทำงาน | Batteries low/dead, IR sensor blocked | Replace batteries. Ensure no obstructions between remote and projector's IR sensor. |
8. ข้อมูลจำเพาะ
Detailed technical specifications for the Next Cine800S GoogleTV Projector.
| คุณสมบัติ | ข้อมูลจำเพาะ |
|---|---|
| แบบอย่าง | Cine800S |
| เทคโนโลยีการแสดงผล | โปรเจ็คเตอร์ LED |
| ความละเอียดดั้งเดิม | ฟูล HD 1920x1080 |
| ความสว่าง | 800 ANSI Lumens |
| ขนาดการฉายภาพ | 40" — 200" |
| การถอดรหัสวิดีโอ | 4Kx2K @ 60fps |
| จุดสนใจ | อัตโนมัติหรือด้วยตนเอง |
| Keystone Correction | อัตโนมัติ |
| ระบบปฏิบัติการ | Google TV, Android 14 |
| DRM Certification | Netflix L1, Prime Video, YouTube, Disney+ L1 |
| ไวไฟ | 802.11 a/b/g/n/ac (2.4G & 5G) |
| บลูทูธ | 5.0 |
| แรม | แรม 2GB |
| การจัดเก็บข้อมูลภายใน | 8GB อีเอ็มซี |
| เอาท์พุตของลำโพง | 12 วัตต์ (4 วัตต์) |
| พอร์ต | HDMI, 2.5mm Audio Jack, USB |
| รูปแบบสื่อที่รองรับ | JPG, PNG, BMP, JPEG, MP3, M4A, MP2, WAV, FLAC, MP4, MOV, TS, DAT, F4V, 3GP, FAT, NTFS |
| กลไกออปติคอล | Dust-Sealed System |
| การมิเรอร์หน้าจอ | Air Screen, Google Cast (iOS & Android) |
9. การรับประกันและการสนับสนุน
For warranty information, please refer to the documentation provided with your purchase or visit the official Next website. For technical support, product inquiries, or service requests, please contact Next customer service through their official channels.
เก็บใบเสร็จการซื้อและหมายเลขซีเรียลของผลิตภัณฑ์ไว้ให้พร้อมเมื่อติดต่อฝ่ายสนับสนุน