1. บทนำ
The Valeton GP-180 is a versatile digital multi-effects processor designed for guitarists. It offers advanced modeling capabilities and flexible software, making it suitable for various musical applications, whether as a standalone unit or integrated into an existing pedalboard. This manual provides essential information for setting up, operating, and maintaining your GP-180, ensuring you can fully utilize its potential as a reliable core for your signal chain.
2. สินค้าหมดview
The Valeton GP-180 features a robust design with intuitive controls, including footswitches, rotary knobs, and a clear display for easy navigation and parameter adjustment. The rear panel provides comprehensive connectivity options for various setups.
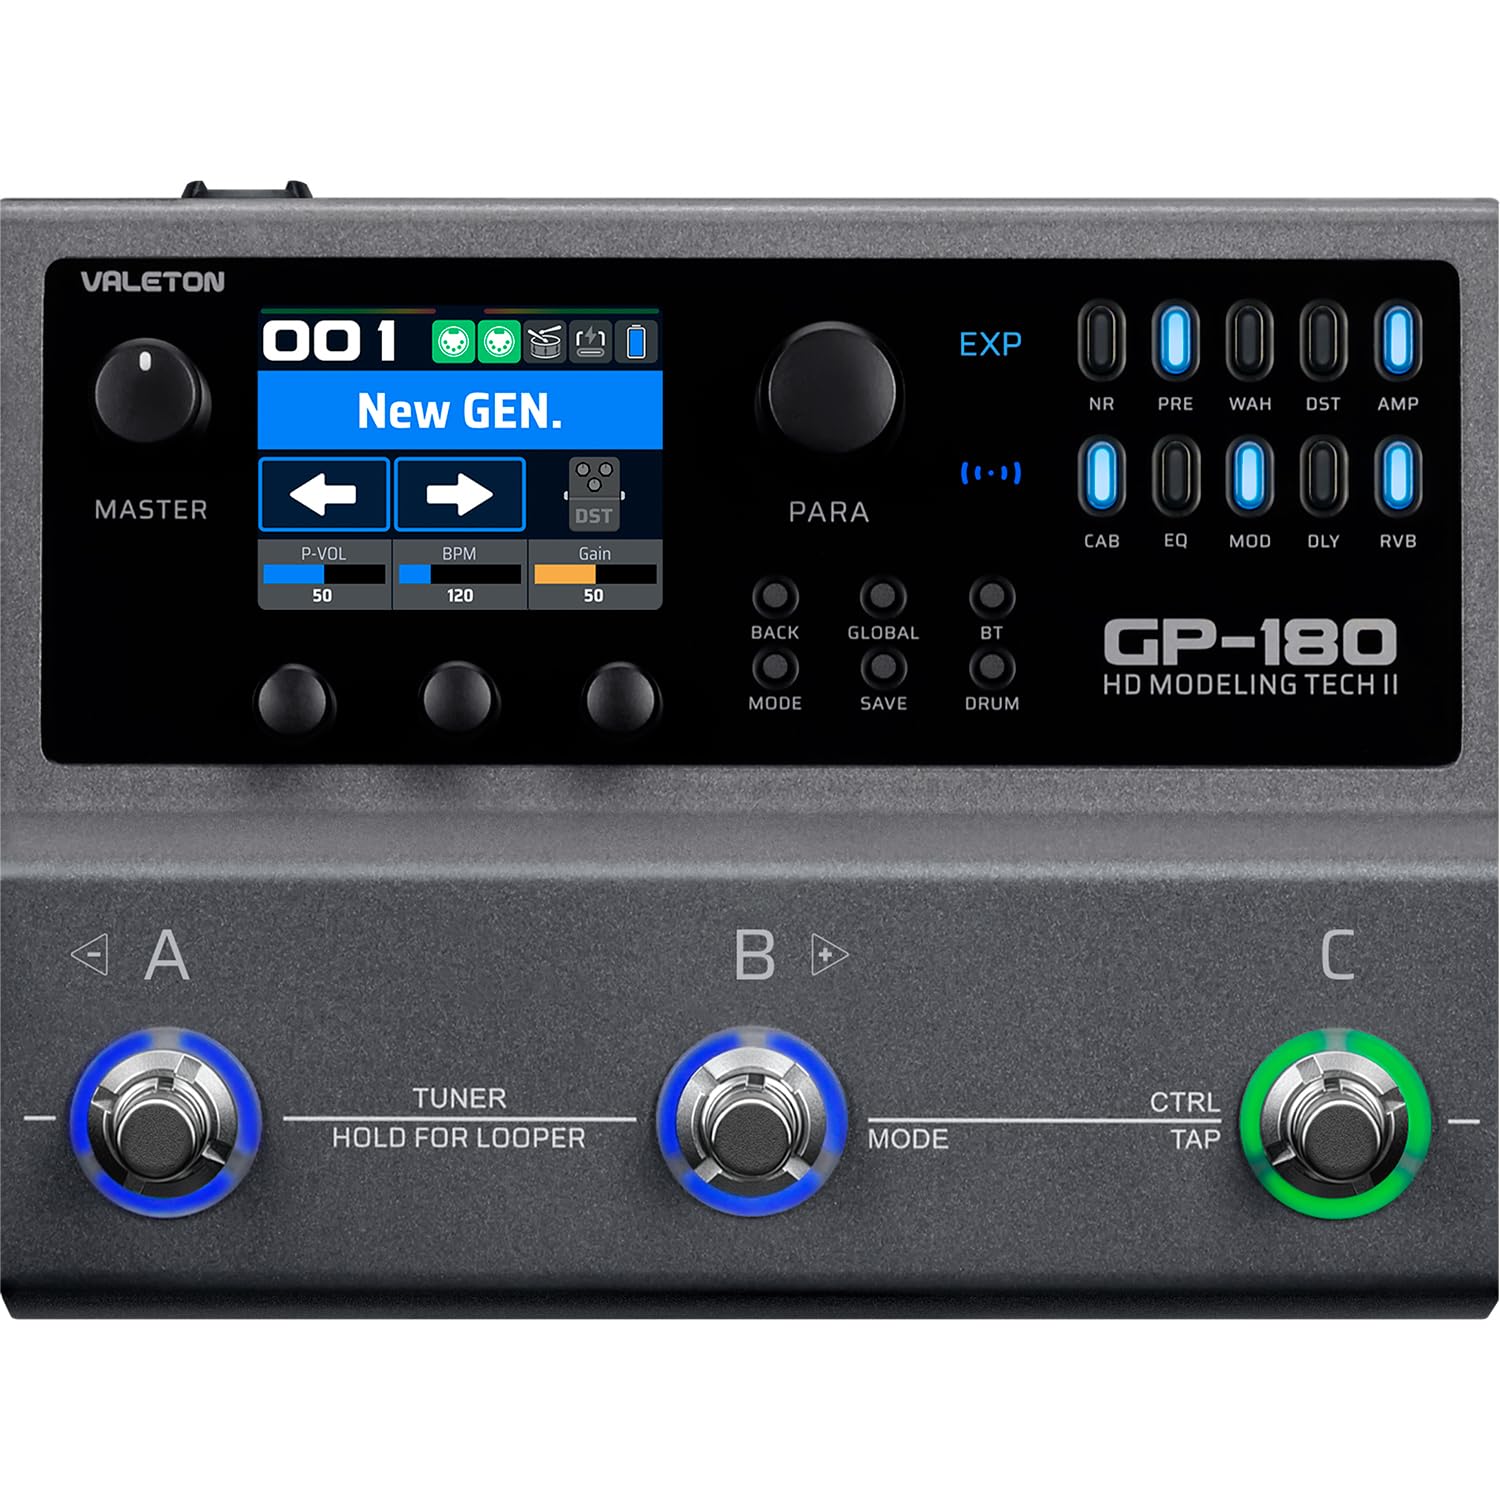
รูปที่ 2.1: ด้านบน view of the Valeton GP-180, highlighting the main interface with its display, rotary knobs, and three footswitches for control.

Figure 2.2: Rear panel connectivity of the GP-180, detailing the various input, output, and control ports.

Figure 2.3: The GP-180 integrated into a home studio environment, connected to headphones and a guitar.

Figure 2.4: Close-up of a user interacting with the GP-180's control knobs.

Figure 2.5: A user operating the footswitches of the GP-180 during performance.
3. การตั้งค่า
3.1 การเชื่อมต่อสายไฟ
Connect the included 9V DC power adapter to the POWER input on the rear panel. Ensure the adapter provides at least 1500mA of current. Use only the specified power supply to prevent damage.
3.2 การเชื่อมต่อเครื่องดนตรีและระบบเสียง
- อินพุตกีตาร์: Connect your guitar to the 'IN' jack on the rear panel.
- เอาต์พุตเสียง: Connect the 'OUT' jacks (L/R Balanced) to your ampเครื่องขยายเสียง อินเทอร์เฟซเสียง หรือมิกเซอร์
- หูฟัง: For silent practice, connect headphones to the 'PHONES' jack.
- ไมโครโฟน: Connect a microphone to the 'MIC' input for vocal processing or recording.
- External Expression Pedal/Footswitch: Use the 'EXP/FS' jacks to connect an external expression pedal or footswitch for additional control.
3.3 การเชื่อมต่อ USB
Connect the GP-180 to your computer using a USB cable via the 'PD USB' port. This allows for firmware updates, software editing, and direct audio recording.
4. คู่มือการใช้งาน
4.1 การนำทางพื้นฐาน
The GP-180 features a central display and several rotary knobs for navigating menus and adjusting parameters. The three footswitches (A, B, C) allow for preset changes, effect toggling, and other performance-oriented functions.
4.2 ฟังก์ชันของสวิตช์เท้า
- สวิตช์เท้า A, B, C: These can be assigned to switch presets, toggle individual effects, or control other parameters depending on the selected mode.
- HOLD FOR LOOPER (Footswitch B): Press and hold footswitch B to activate the looper function. A short press typically engages the tuner.
- CTRL/TAP (Footswitch C): This footswitch can be used for tap tempo or as an assignable control switch.
4.3 ปุ่มควบคุม
- เส้นทาง: Switches between different operational modes (e.g., Patch Mode, Stompbox Mode).
- บันทึก: บันทึกการตั้งค่าปัจจุบันของคุณเป็นค่าที่ตั้งไว้ล่วงหน้า
- GLOBAL: Accesses global settings for the unit.
- บีที (บลูทูธ): Activates Bluetooth for audio streaming or app control.
- กลอง: Engages the built-in drum machine for practice.
4.4 โมดูลเอฟเฟกต์
The GP-180 includes a wide array of effect modules, indicated by LEDs on the right side of the display. These include:
- น.ส.: การลดเสียงรบกวน
- ก่อน: พรีamp
- ว้าห์: วาเหยียบ
- ดีเอสที: ความบิดเบือน
- AMP: Ampการจำลองแอมพลิฟายเออร์
- แท็กซี่: การจำลองตู้เอกสาร
- EQ: อีควอไลเซอร์
- ม็อด: ผลการมอดูเลต
- ดีลี่: เอฟเฟกต์การหน่วงเวลา
- อาร์วีบี: เอฟเฟกต์เสียงก้อง
Use the corresponding buttons and rotary knobs to activate and adjust these effects within your signal chain.
5. การบำรุงรักษา
5.1 การทำความสะอาด
To clean the unit, use a soft, dry cloth. Do not use abrasive cleaners, waxes, or solvents. Avoid spraying liquid directly onto the unit.
5.2 พื้นที่จัดเก็บ
When not in use for extended periods, store the GP-180 in a dry, cool place away from direct sunlight and extreme temperatures. Disconnect the power adapter.
5.3 การอัปเดตซอฟต์แวร์
Periodically check the official Valeton website for firmware updates. Keeping your GP-180's software up-to-date ensures optimal performance and access to new features.
6 การแก้ไขปัญหา
- ไม่มีไฟฟ้า: Ensure the power adapter is correctly connected and provides the specified 9V DC, 1500mA. Check the power outlet.
- ไม่มีเสียง: Verify all audio cables are securely connected. Check the volume levels on the GP-180, your instrument, and your amplifier/mixer. Ensure the correct input/output settings are selected on the unit.
- เสียงผิดเพี้ยน: Check input gain levels to avoid clipping. Ensure all cables are in good condition.
- ปัญหาการเชื่อมต่อ USB: Try a different USB port or cable. Ensure the necessary drivers (if any) are installed on your computer. Restart both the GP-180 and your computer.
- พฤติกรรมที่ไม่คาดคิด: Perform a factory reset (refer to the full manual for instructions on how to do this, as it may vary). If issues persist, contact Valeton support.
7. ข้อมูลจำเพาะ
| คุณสมบัติ | ข้อมูลจำเพาะ |
|---|---|
| ยี่ห้อ | เวลตัน |
| หมายเลขรุ่น | GP180 |
| น้ำหนักผลิตภัณฑ์ | 843 กรัม |
| เล่มที่tage | 9 โวลต์ |
| ปัจจุบัน | 1500มิลลิแอมป์ |
| ฮาร์ดแวร์อินเตอร์เฟซ | ยูเอสบี, บลูทูธ |
| ขนาดสินค้า | 18.1 x 13.9 x 5.2 ซม. |
| ประเทศต้นกำเนิด | จีน |
| ยูพีซี | 888506830174 |
| ASIN | B0GV23QTY7 |
8. การรับประกันและการสนับสนุน
8.1 ข้อมูลการรับประกัน
The Valeton GP-180 comes with a 1-year manufacturer's warranty. Please retain your proof of purchase for warranty claims. The warranty covers defects in materials and workmanship under normal use.
8.2 การสนับสนุนลูกค้า
For technical assistance, troubleshooting beyond this manual, or warranty inquiries, please contact Valeton customer support through their official website or your local distributor. Provide your product model and serial number when contacting support.