
1. บทนำ
This manual provides detailed instructions for the setup, operation, and maintenance of your new Indoor Security Camera. This device is designed to enhance home security and provide monitoring capabilities for various needs, including baby, pet, and elderly care. Please read this manual thoroughly before using the product to ensure proper function and safety.
2. สินค้าหมดview
The Indoor Security Camera features a compact design with advanced functionalities for comprehensive indoor surveillance. It includes pan and tilt capabilities, two-way audio, night vision, and intelligent motion detection.

2.1 เนื้อหาบรรจุภัณฑ์
- กล้องรักษาความปลอดภัยในร่ม
- อะแดปเตอร์แปลงไฟ
- ชุดติดตั้ง (สกรู, ปลั๊กผนัง)
- คู่มือการใช้งาน
3. คุณสมบัติหลัก
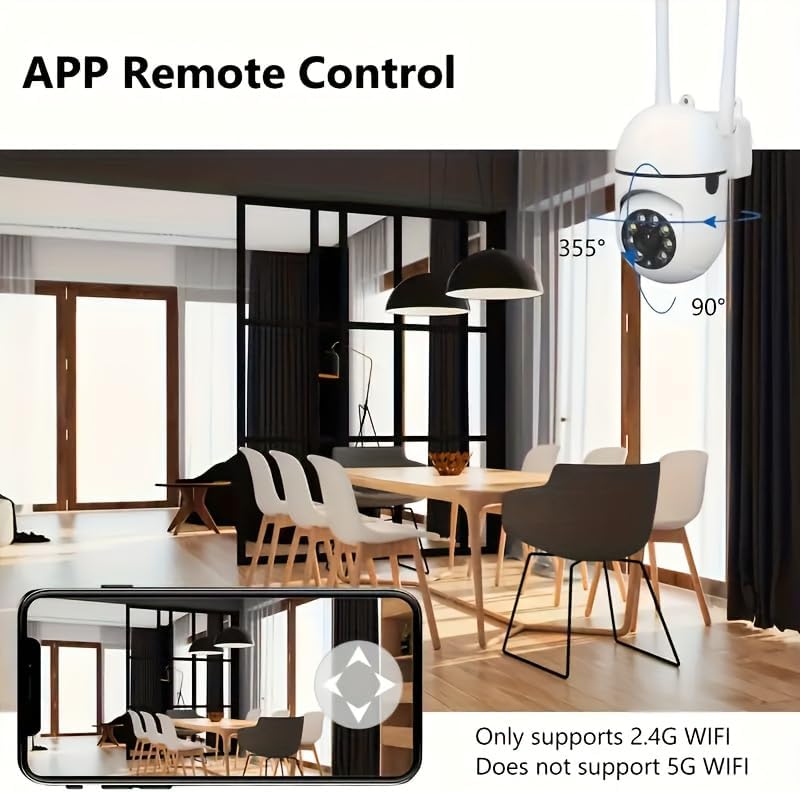
- หมุนได้ 355° ในแนวนอน และ 90° ในแนวตั้ง: ควบคุมกล้องจากระยะไกล viewing angle to cover a wide area.
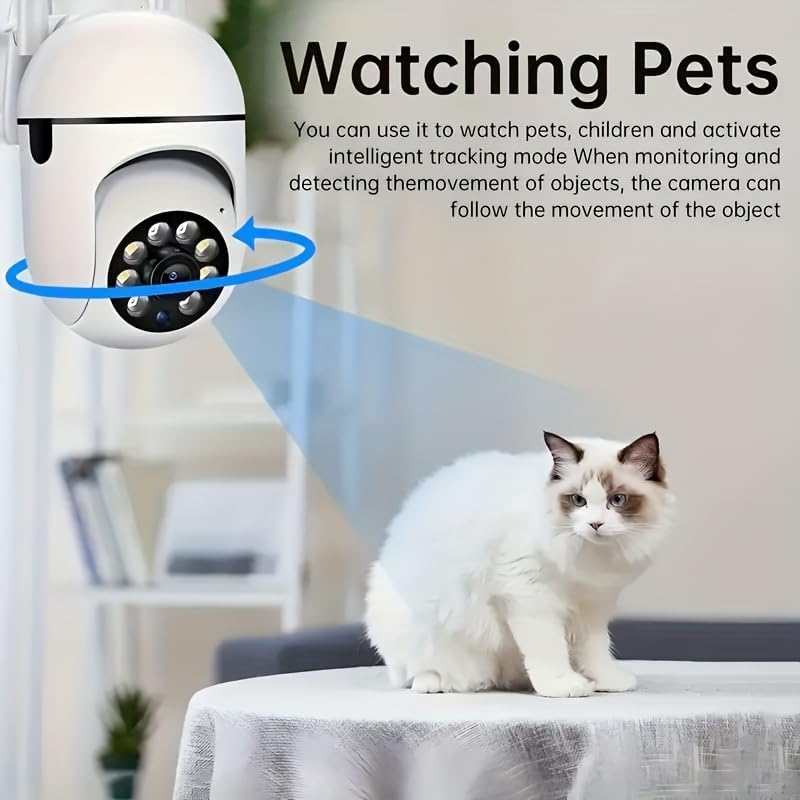
- AI Motion Detection & Human Tracking: Intelligently detects human movement and can automatically track the subject.
- เสียงสองทาง: ไมโครโฟนและลำโพงในตัวช่วยให้สามารถสื่อสารแบบเรียลไทม์
- การมองเห็นตอนกลางคืน: Provides clear video monitoring in low-light or no-light conditions.
- การเชื่อมต่อ Wi-Fi 2.4GHz: Connects to your home network for remote access (หมายเหตุ: ไม่รองรับ Wi-Fi 5GHz).
- Multi-person Sharing: Allows multiple authorized users to view live streams simultaneously.


4. คู่มือการติดตั้ง
4.1 การเปิดเครื่อง
- เชื่อมต่ออะแดปเตอร์ไฟฟ้าเข้ากับพอร์ตอินพุตไฟฟ้าของกล้อง
- เสียบอะแดปเตอร์จ่ายไฟเข้ากับเต้ารับไฟฟ้ามาตรฐาน
- The camera will power on, and an indicator light will typically flash, indicating it is ready for setup.
4.2 ดาวน์โหลดและติดตั้งแอพ
ค้นหา the companion application (e.g., 'Smart Home Cam' or similar, refer to packaging for exact name) in your device's app store (App Store for iOS, Google Play Store for Android) and install it.
4.3 การเชื่อมต่อกับ Wi-Fi
- Open the installed application on your smartphone.
- สร้างบัญชีใหม่หรือเข้าสู่ระบบหากคุณมีบัญชีอยู่แล้ว
- Follow the in-app instructions to add a new device. This usually involves scanning a QR code on the camera or selecting the camera model from a list.
- เมื่อได้รับแจ้ง ให้เลือกของคุณ เครือข่าย Wi-Fi 2.4GHz และป้อนรหัสผ่าน Ensure your phone is also connected to the 2.4GHz network during setup.
- The camera will connect to your Wi-Fi network. A solid indicator light usually signifies a successful connection.
4.4 การติดตั้งกล้อง (ทางเลือก)
If you wish to mount the camera on a wall or ceiling:
- เลือกสถานที่ที่เหมาะสมและมีทัศนวิสัยที่ชัดเจน view and within range of your Wi-Fi signal.
- Use the provided mounting template (if included) to mark screw positions.
- Drill pilot holes and insert wall plugs if mounting into drywall.
- Secure the mounting bracket (if applicable) with screws.
- ติดกล้องเข้ากับขายึด
5. คู่มือการใช้งาน
5.1 สด View
Once connected, open the app and select your camera to view the live feed. You can pinch to zoom or rotate your phone for a full-screen view.
5.2 การควบคุมการหมุนและการเอียง
ไลฟ์สด view screen, use the directional controls (often a joystick-like interface) within the app to remotely pan (horizontal movement) and tilt (vertical movement) the camera lens.
5.3 เสียงสองทาง
To use two-way audio, tap the microphone icon in the app. Speak into your phone, and your voice will be transmitted through the camera's speaker. Tap the speaker icon to listen to audio from the camera's location.
5.4 การตรวจจับการเคลื่อนไหวและการแจ้งเตือน
- ไปที่การตั้งค่ากล้องภายในแอป
- Locate the 'Motion Detection' or 'Alarm Settings' section.
- Enable motion detection and adjust sensitivity levels as needed.
- Configure alert notifications (e.g., push notifications to your phone).
- Enable 'Human Tracking' if available, to have the camera follow detected human movement.
5.5 การบันทึกและการเล่น
The camera typically supports local storage via a microSD card (not included) or cloud storage (subscription may be required). Refer to the app for specific recording and playback options.
- การบันทึกในเครื่อง: Insert a microSD card (up to 128GB, Class 10 recommended) into the camera's slot. Recordings will be stored on the card.
- การเล่นซ้ำ: การเข้าถึงที่บันทึกไว้ footage through the 'Playback' or 'History' section in the app.
5.6 Sharing Device Access
To allow other users to view your camera's feed:
- In the app, go to the camera settings.
- Find the 'Share Device' or 'Invite Members' option.
- ทำตามคำแนะนำเพื่อเชิญผู้ใช้รายอื่น โดยทั่วไปแล้วจะทำได้โดยการป้อนรหัสบัญชีของผู้ใช้หรือสแกนคิวอาร์โค้ด
6. การบำรุงรักษา
6.1 การทำความสะอาดกล้อง
To maintain optimal performance, periodically clean the camera lens and body with a soft, dry cloth. Avoid using harsh chemicals or abrasive materials.
การอัปเดตเฟิร์มแวร์ 6.2 รายการ
Regularly check for firmware updates through the camera's settings in the app. Firmware updates can improve performance, add new features, and enhance security.
6.3 การจัดการการจัดเก็บข้อมูล
หากใช้การ์ด microSD ควรทำการรีเซ็ตเป็นระยะview และจัดการ foo ที่เก็บไว้tage. You may need to format the card occasionally to ensure continuous recording and optimal performance.
7 การแก้ไขปัญหา
| ปัญหา | สาเหตุที่เป็นไปได้ | สารละลาย |
|---|---|---|
| กล้องไม่เปิดเครื่อง | Power adapter not connected; faulty outlet | Ensure power adapter is securely connected; try a different outlet. |
| ไม่สามารถเชื่อมต่อ Wi-Fi ได้ | Incorrect Wi-Fi password; 5GHz network selected; camera too far from router | Verify Wi-Fi password; ensure you are connecting to a 2.4GHz network; move camera closer to the router. |
| คุณภาพวิดีโอไม่ดี | Weak Wi-Fi signal; dirty lens | ปรับปรุงความแรงของสัญญาณ Wi-Fi; ทำความสะอาดเลนส์กล้อง |
| เสียงสองทางไม่ทำงาน | Microphone/speaker muted in app; app permissions | Check app settings to ensure audio is enabled; verify app has microphone permissions on your phone. |
| ไม่ได้รับการแจ้งเตือนการเคลื่อนไหว | Motion detection disabled; app notifications off; incorrect sensitivity | Enable motion detection and notifications in app settings; adjust sensitivity. |
7.1 การรีเซ็ตกล้อง
If you encounter persistent issues, you may need to reset the camera to its factory settings. Locate the reset button (often a small pinhole) on the camera. Use a pin or paperclip to press and hold the button for approximately 5-10 seconds until the camera indicates a reset (e.g., a voice prompt or indicator light change). After resetting, you will need to set up the camera again from scratch.
8. ข้อมูลจำเพาะ
- ช่วงแพน: 355°
- เอียง Range: 90°
- การเชื่อมต่อ: Wi-Fi 2.4GHz (IEEE802.11b/g/n)
- พื้นที่จัดเก็บ: การ์ด microSD (สูงสุด 128GB ไม่รวมอยู่ในชุด)
- กำลังไฟเข้า: DC 5V/1A (typical)
- การมองเห็นตอนกลางคืน: หลอดอินฟราเรด LED
- เสียง: Two-way (built-in microphone and speaker)
- อุณหภูมิในการทำงาน: 0°C ถึง 50°C (32°F ถึง 122°F)
9. การรับประกันและการสนับสนุน
ผลิตภัณฑ์นี้มาพร้อมกับการรับประกันมาตรฐานจากผู้ผลิต โปรดดูรายละเอียดบนบรรจุภัณฑ์ของผลิตภัณฑ์หรือจากผู้จำหน่าย website for specific warranty terms and conditions. For technical support or further assistance, please contact the customer service provided by your retailer or the product manufacturer.