
การแนะนำ
Thank you for choosing the RAINPOINT 4-Zone Programmable Watering Timer. This device is designed to automate your garden and lawn irrigation, providing flexible and efficient watering schedules for up to four independent zones. Please read this manual carefully to ensure proper installation, operation, and maintenance of your watering timer.
คุณสมบัติผลิตภัณฑ์
- โซนที่ตั้งโปรแกรมได้ 4 โซน: Customize watering schedules (start time, duration, frequency) for each zone independently.
- Multiple Watering Cycle Modes: Set watering duration from 1 minute to 3 hours 59 minutes, and frequency for every 8 hours, every 12 hours, or every 1 to 7 days.
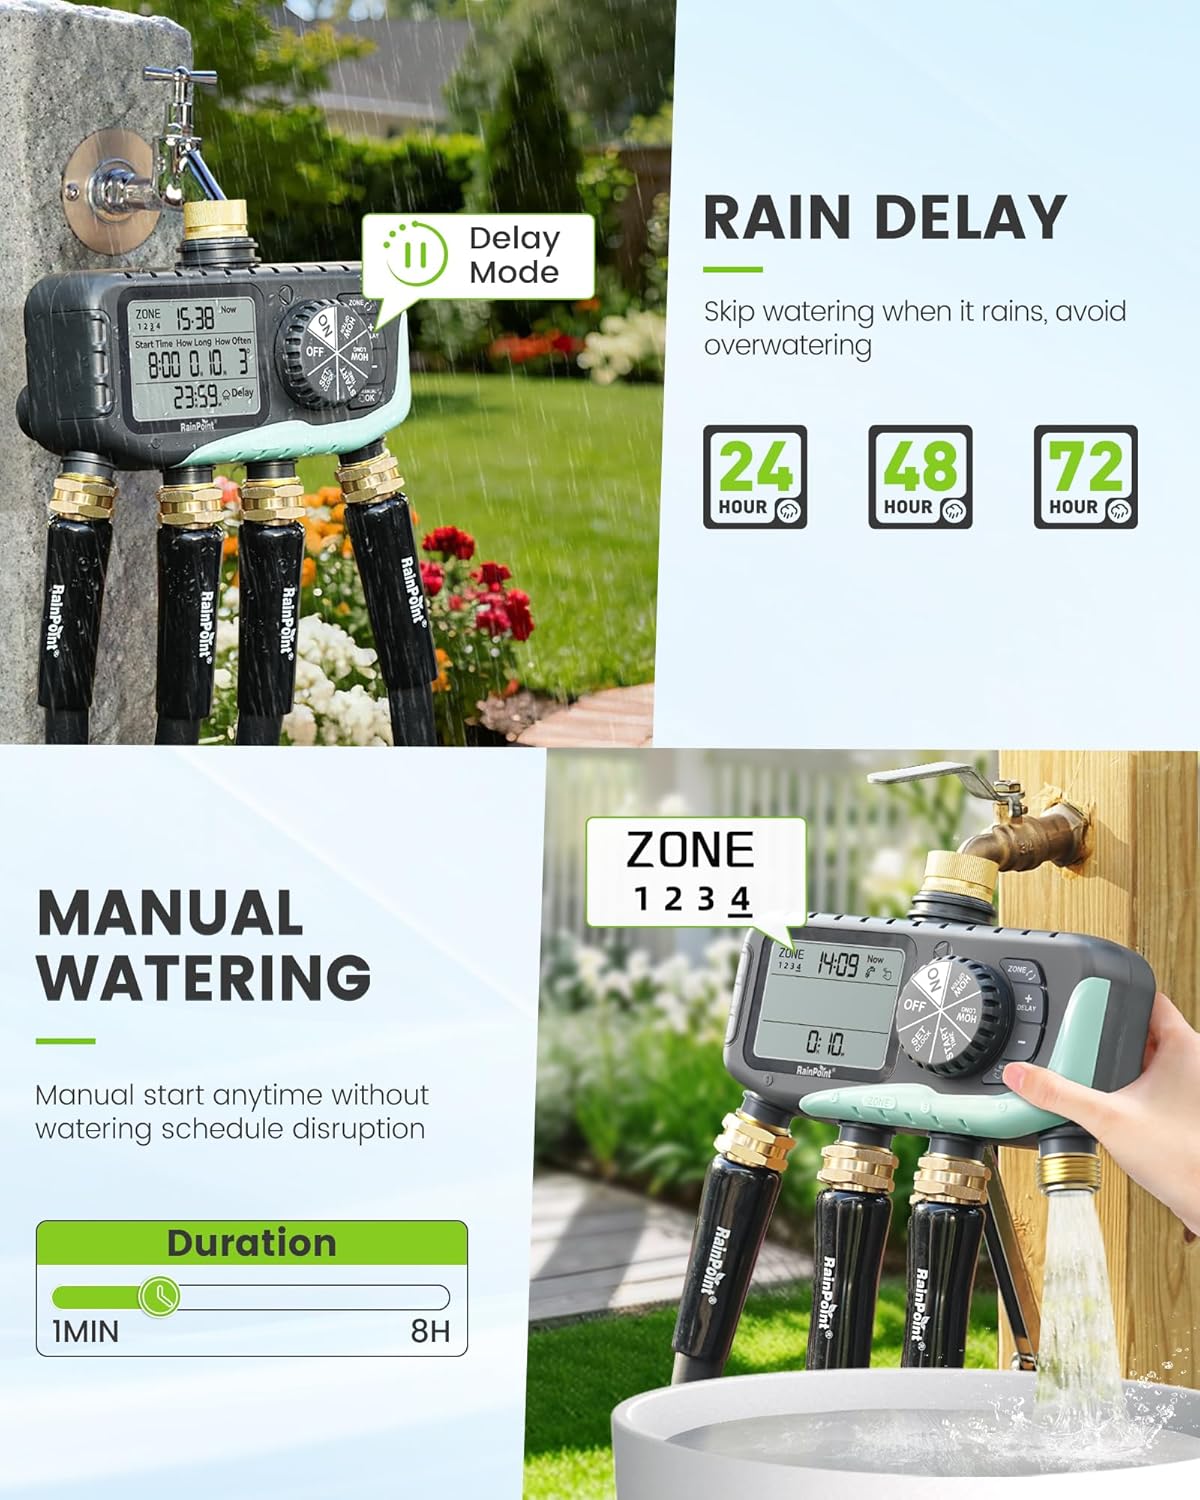
- ฟังก์ชั่นหน่วงเวลาฝน: งดการรดน้ำเป็นเวลา 24, 48 หรือ 72 ชั่วโมง เพื่อประหยัดน้ำในช่วงฤดูฝน
- โหมดการรดน้ำด้วยตนเอง: Initiate watering instantly for 1 minute to 8 hours without affecting programmed schedules.
- การเขียนโปรแกรมอย่างง่าย: Features a large 3.4-inch LCD screen, a large dial, and clear buttons for intuitive setup.
- โครงสร้างทนทาน: Equipped with solid brass inlet and outlet, leak-proof sealing rings, and an IP65 waterproof rating for outdoor use.
- Upgraded Coil Valve: Provides stronger water pressure and wider coverage compared to standard valves.
- การป้องกันพลังงานต่ำ: Valves automatically close when battery power is low to prevent water waste.


เนื้อหาแพ็คเกจ
- RAINPOINT 4-Zone Programmable Watering Timer
- คู่มือการใช้งาน
- Standard 3/4-inch faucet adapter (if applicable)
การติดตั้งและการตั้งค่า
- การติดตั้งแบตเตอรี่: Open the battery compartment on the back of the timer. Insert two (2) AA alkaline batteries (not included), ensuring correct polarity. Close the compartment securely.
- เชื่อมต่อกับ Faucet: Screw the timer onto a standard 3/4-inch outdoor faucet. Ensure the connection is tight to prevent leaks. It is recommended to use a short hose between the faucet and the timer to reduce stress on the faucet connection and allow for easier positioning.
- เชื่อมต่อท่อ: Attach your garden hoses to the four independent outlets (Zone 1, Zone 2, Zone 3, Zone 4) at the bottom of the timer. Ensure each connection is secure.
- เปิดเครื่องครั้งแรก: The LCD screen will light up, and the timer will be ready for programming.


คำแนะนำการใช้งาน
1. การตั้งเวลาปัจจุบัน
Rotate the dial to the 'SET CLOCK' position. Use the '+' and '-' buttons to adjust the current time. Press 'OK' to confirm and move to the next setting (e.g., AM/PM or 24-hour format). Rotate the dial away from 'SET CLOCK' to save.
2. Programming Watering Schedules (for each zone)
ตัวจับเวลาสามารถตั้งโปรแกรมแยกกันได้สำหรับแต่ละโซนทั้ง 4 โซน
- เลือกโซน: Rotate the dial to 'PROGRAM'. Use the 'ZONE' button to select the desired zone (1, 2, 3, or 4) you wish to program.
- ตั้งเวลาเริ่มต้น: Use the '+' and '-' buttons to set the desired watering start time for the selected zone. Press 'OK' to confirm.
- ตั้งค่าระยะเวลาการรดน้ำ: Use the '+' and '-' buttons to set how long the watering will last (from 1 minute to 3 hours 59 minutes). Press 'OK' to confirm.
- ตั้งความถี่: Use the '+' and '-' buttons to set how often the watering will occur (e.g., every 8 hours, every 12 hours, or every 1 to 7 days). Press 'OK' to confirm.
- Repeat steps a-d for each zone you wish to program. Rotate the dial to 'ON' to activate the programmed schedules.

3. ฟังก์ชั่นหน่วงเวลาฝน
To temporarily pause watering due to rain:
- Rotate the dial to 'ON'.
- กดปุ่ม 'DELAY'
- Use the '+' or '-' buttons to select the desired delay duration (24, 48, or 72 hours).
- Press 'OK' to confirm. The timer will resume its programmed schedule after the delay period.
4 การรดน้ำด้วยมือ
รดน้ำทันทีโดยไม่กระทบต่อกำหนดการที่คุณตั้งไว้:
- Rotate the dial to 'ON'.
- Press the 'MANUAL/OK' button.
- Use the '+' or '-' buttons to set the desired manual watering duration (from 1 minute to 8 hours).
- Press 'OK' to start manual watering. The timer will automatically return to its programmed schedule after the manual watering duration ends.
5. ระบบป้องกันไฟตก
When the battery level is critically low, the timer's valves will automatically close to prevent continuous water flow and waste. Replace batteries promptly when the low battery indicator appears on the screen.

การซ่อมบำรุง
- การทำความสะอาด: Periodically wipe the timer's exterior with a soft, damp ผ้า ห้ามใช้สารทำความสะอาดที่มีฤทธิ์กัดกร่อนหรือตัวทำละลาย
- การเปลี่ยนแบตเตอรี่: Replace batteries annually or when the low battery indicator appears. Always use fresh AA alkaline batteries.
- ฤดูหนาว: Before the first frost, disconnect the timer from the faucet and hoses. Drain any remaining water and store the unit indoors in a dry, protected area to prevent freezing damage.
- ตรวจสอบแหวนรอง: Regularly inspect the rubber washers in the inlet and outlet connections for wear or damage. Replace if necessary to prevent leaks.
การแก้ไขปัญหา
- No Water Flow or Partial Flow:
- ตรวจสอบระดับแบตเตอรี่และเปลี่ยนใหม่หากเหลือน้อย
- ตรวจสอบให้แน่ใจว่าก๊อกน้ำเปิดเต็มที่
- Verify that the watering schedule is correctly programmed and activated ('ON' mode).
- Inspect hose connections for kinks or blockages.
- Check the timer's inlet filter for debris.
- ข้อมูลรั่วไหลจากการเชื่อมต่อ:
- Ensure all connections (faucet, hoses) are tightened securely.
- Check rubber washers for proper seating and damage; replace if worn.
- Display Fading or Not Working:
- เปลี่ยนแบตเตอรี่ด้วยแบตเตอรี่ใหม่
- Avoid prolonged exposure to direct sunlight, which can degrade LCD screens over time. Consider shielding the display if installed in a very sunny area.
- Water Hammer (Pipes Clanging):
- This can occur when valves close rapidly. Consider installing a water hammer arrester between the faucet and the timer.
- ตัวจับเวลาไม่ตอบสนอง:
- Remove batteries for a few minutes, then reinsert them to reset the device. Reprogram as needed.
ข้อมูลจำเพาะ
| หมายเลขรุ่น | iob447 |
| ยี่ห้อ | เรนพอยท์ |
| ASIN | B0G32Z1HMB |
| วัสดุ | Plastic, Brass |
| สี | สีฟ้า |
| ขนาดสินค้า (กว้าง x ยาว x สูง) | 2.54 x 2.54 x 2.54 cm (approx. 1 x 1 x 1 inch); 317.51 grams |
| ขนาดหน้าจอ | 3.4 นิ้ว |
| จำนวนการตั้งค่า | 7 (หมายถึงตัวเลือกการเขียนโปรแกรม) |
| ระดับการกันน้ำ | IP65 |
| แหล่งพลังงาน | แบตเตอรี่อัลคาไลน์ขนาด AA 2 ก้อน (ไม่รวม) |
การรับประกันและการสนับสนุน
RAINPOINT products are designed for reliability and performance. For warranty information, technical support, or any questions regarding your 4-Zone Programmable Watering Timer, please contact RAINPOINT customer service through the official website or your retailer's support channels. Please have your model number (iob447) and purchase information ready when contacting support.