
1. บทนำ
The SilverStone RM4A is a 4U rackmount server chassis designed for professional users requiring high performance and reliability. This chassis offers extensive liquid cooling compatibility and flexible expansion options, making it suitable for diverse and demanding server applications. This manual provides essential information for the proper installation, operation, and maintenance of your RM4A chassis.
2. ข้อมูลด้านความปลอดภัย
- Always disconnect the power supply from the wall outlet before performing any installation, maintenance, or troubleshooting procedures.
- ควรสวมสายรัดข้อมือป้องกันไฟฟ้าสถิตเมื่อจับต้องชิ้นส่วนภายใน เพื่อป้องกันความเสียหายจากประจุไฟฟ้าสถิต (ESD)
- Ensure proper grounding of the chassis and all connected components.
- Do not operate the chassis in environments with excessive dust, humidity, or extreme temperatures.
- Refer to the manuals of your motherboard, power supply, and other components for specific installation instructions and safety guidelines.
- Handle sharp edges and components with care to avoid injury.
3. เนื้อหาบรรจุภัณฑ์
ตรวจสอบว่ามีส่วนประกอบทั้งหมดอยู่ในแพ็คเกจของคุณ:
- SilverStone RM4A 4U Rackmount Server Chassis
- Accessory kit (screws, standoffs, cable ties, etc.)
- คู่มือการใช้งาน (เอกสารนี้)
4. คุณสมบัติหลัก
- Supports up to SSI-EEB motherboards (12" x 13"), SSI-CEB (12" x 10.5"), and E-ATX (12" x 13").
- Accommodates 360mm liquid cooling radiators and two 80mm rear fans for enhanced heat dissipation.
- Features eight standard-size PCI/PCIe expansion slots.
- Includes a unique card retention bracket to secure graphics and expansion cards.
- Equipped with a convenient USB Type-C interface and two USB 3.0 ports on the front panel.
- Supports hard drive mounting on the expansion card retainer.
- Compatible with PS2 (ATX) and Mini Redundant power supplies.
5. การตั้งค่าและการติดตั้ง
5.1 แชสซีส์เหนือview
Familiarize yourself with the external and internal layout of the RM4A chassis.

รูปที่ 5.1 : ด้านหน้า view of the RM4A chassis, showing the perforated front panel and handles.

รูปที่ 5.2: ด้านหลัง view of the RM4A chassis, showing expansion slots, fan mounts, and PSU cutout.

Figure 5.3: Internal layout of the RM4A chassis, illustrating component placement such as motherboard, fans, and expansion cards.
5.2 การติดตั้งเมนบอร์ด
The RM4A supports SSI-EEB, SSI-CEB, and E-ATX motherboards. Install the necessary standoffs for your motherboard form factor before securing the motherboard with screws.

Figure 5.4: Motherboard compatibility and layout within the chassis.
5.3 การติดตั้งการ์ดขยาย
The chassis provides eight full-height expansion slots. Remove the slot covers, insert your PCI/PCIe cards, and secure them using the provided screws and the expansion card retention bracket.
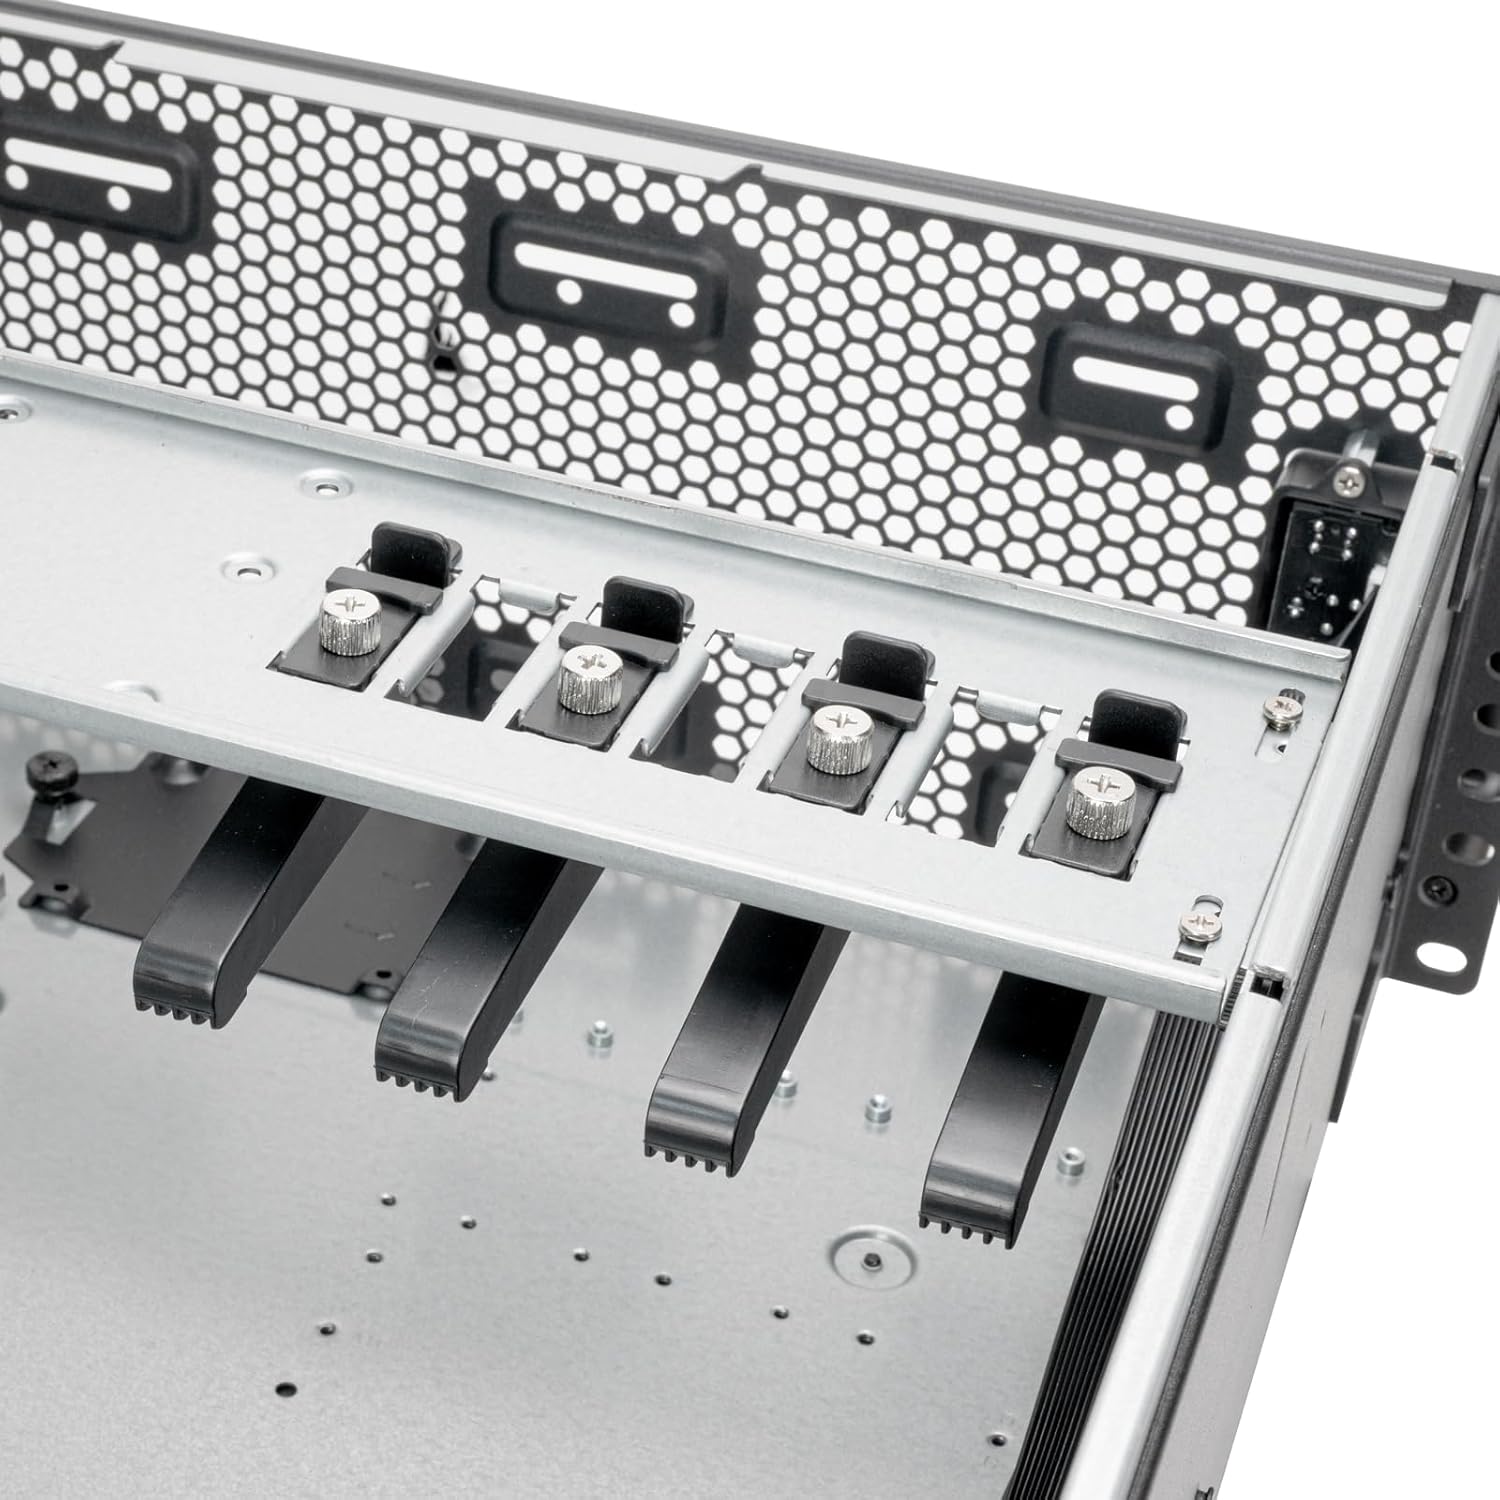
Figure 5.5: Expansion card retention bracket for securing PCI/PCIe cards.
5.4 การติดตั้งอุปกรณ์จัดเก็บข้อมูล
The RM4A supports 2.5" SSDs and 3.5" HDDs. Mount 2.5" SSDs in the designated trays and 3.5" HDDs on the expansion card retainer if applicable.

Figure 5.6: Storage mounting locations, including SSD trays and HDD mounting on the expansion card retainer.
5.5 การติดตั้งระบบระบายความร้อน
Install up to a 360mm liquid cooling radiator at the front and two 80mm fans at the rear for optimal airflow. Ensure fans are oriented correctly for intake and exhaust.

Figure 5.7: Cooling system support for 360mm radiators and 80mm rear fans.
5.6 การติดตั้งหน่วยจ่ายไฟ (PSU)
Install your PS2 (ATX) or Mini Redundant power supply into the designated bay at the rear of the chassis. Secure it with screws.

Figure 5.8: Power supply mounting area.
5.7 การเชื่อมต่อแผงด้านหน้า
Connect the front panel cables (USB Type-C, USB 3.0, Power, Reset, LED indicators) to the corresponding headers on your motherboard. Refer to your motherboard manual for header locations.

Figure 5.9: Front panel I/O, including USB Type-C, USB 3.0 ports, and power/reset buttons.
6. คู่มือการใช้งาน
After completing all hardware installations and connections, connect the power cable to the PSU and a wall outlet. Press the power button on the front panel to turn on the system. The LED indicators will illuminate to show system status.
- เปิด/ปิดเครื่อง: Press the power button to turn the system on or off. A short press typically initiates a soft shutdown, while a long press forces a power off.
- การรีเซ็ตระบบ: Use the reset button for a system restart if needed.
- พอร์ต USB: Utilize the front USB Type-C and USB 3.0 ports for connecting peripherals and external storage devices.
7. การบำรุงรักษา
Regular maintenance helps ensure the longevity and optimal performance of your RM4A chassis and its components.
- การทำความสะอาดฝุ่น: Periodically clean dust from the chassis interior, fan filters, and cooling fins using compressed air or a soft brush. Dust accumulation can impede airflow and lead to overheating.
- การจัดการสายเคเบิล: Ensure internal cables are neatly routed and secured to prevent obstruction of airflow and potential damage.
- การตรวจสอบพัดลม: Check fans for proper operation and clean any dust buildup on blades. Replace noisy or malfunctioning fans.
- การตรวจสอบส่วนประกอบ: Occasionally inspect all installed components for secure connections and proper seating.
8 การแก้ไขปัญหา
If you encounter issues with your RM4A chassis, consider the following basic troubleshooting steps:
- ไม่มีไฟฟ้า:
- ตรวจสอบให้แน่ใจว่าสายไฟเชื่อมต่อกับแหล่งจ่ายไฟและเต้ารับที่ผนังอย่างแน่นหนาแล้ว
- ตรวจสอบให้แน่ใจว่าสวิตช์ของแหล่งจ่ายไฟ (PSU) อยู่ในตำแหน่ง 'เปิด'
- ตรวจสอบการเชื่อมต่อสายไฟทั้งหมด ตั้งแต่แหล่งจ่ายไฟ (PSU) ไปจนถึงเมนบอร์ดและส่วนประกอบต่างๆ
- ระบบไม่สามารถบูตได้:
- Confirm that the CPU, RAM, and graphics card (if applicable) are properly seated.
- Check all motherboard power connectors (24-pin ATX, 8-pin EPS).
- ตรวจสอบให้แน่ใจว่าสายสวิตช์เปิดปิดแผงด้านหน้าเชื่อมต่อกับเมนบอร์ดอย่างถูกต้องแล้ว
- ความร้อนสูงเกินไป:
- Ensure all fans are spinning and free of obstructions.
- Clean any dust buildup from fans and radiator fins.
- Verify proper thermal paste application on the CPU cooler.
- พอร์ต USB ไม่ทำงาน:
- Check the internal USB header connections from the front panel to the motherboard.
- Ensure motherboard USB drivers are installed.
9. ข้อมูลจำเพาะ
| ยี่ห้อ | ซิลเวอร์สโตน |
| หมายเลขรุ่น | 4 บาท |
| ฟอร์มแฟกเตอร์ | แร็คเมาท์ 4U |
| วัสดุ | โลหะ |
| สี | สีดำ |
| ขนาด (Size) | 4U x 17" x 24" |
| การรองรับเมนบอร์ด | SSI-EEB, SSI-CEB, E-ATX |
| ช่องเสียบขยาย | 8 x PCI/PCIe |
| รองรับการระบายความร้อน | Front: 360mm radiator; Rear: 2 x 80mm fans |
| พอร์ต I / O ด้านหน้า | 1 x USB Type-C, 2 x USB 3.0, Power On/Off, System Reset, LED Status Indicators |
| การรองรับแหล่งจ่ายไฟ | PS2 (ATX) / Mini Redundant |
| ยูพีซี | 844761029500 |
10. การรับประกันและการสนับสนุน
10.1 ข้อมูลการรับประกัน
The SilverStone RM4A chassis comes with a การรับประกันจากผู้ผลิต 1 ปี. Please retain your proof of purchase for warranty claims. The warranty covers defects in materials and workmanship under normal use. It does not cover damage caused by misuse, accident, modification, or unauthorized repair.
10.2 การสนับสนุนด้านเทคนิค
For technical assistance, troubleshooting, or further inquiries, please visit the official SilverStone website or contact their customer support. You can find more information and resources at the ร้าน SilverStone บน Amazon หรือบริษัทอย่างเป็นทางการของพวกเขา webเว็บไซต์.