
การแนะนำ
This manual provides detailed instructions for the installation, operation, and maintenance of your GAMDIAS Aura GC11 ARGB Mid-Tower PC Case. Please read this manual thoroughly before beginning installation to ensure proper setup and safe use of the product. The GAMDIAS Aura GC11 ARGB is designed to accommodate Mini-ITX, Micro-ATX, and ATX motherboards, featuring a bar-patterned mesh front panel for optimal airflow and four pre-installed 120mm ARGB fans.
ข้อมูลด้านความปลอดภัย
- ควรตัดการเชื่อมต่อสายไฟออกจากเต้ารับที่ผนังทุกครั้งก่อนติดตั้งหรือถอดชิ้นส่วนใดๆ เพื่อป้องกันไฟฟ้าช็อต
- จัดการส่วนประกอบทั้งหมดด้วยความระมัดระวังเพื่อหลีกเลี่ยงความเสียหาย
- Wear an anti-static wrist strap or frequently touch a grounded metal object to discharge static electricity before handling internal components.
- เก็บชิ้นส่วนขนาดเล็กและวัสดุบรรจุภัณฑ์ให้ห่างจากเด็ก
- ตรวจสอบให้แน่ใจว่ามีการระบายอากาศที่เหมาะสมรอบ ๆ เคสพีซีเพื่อป้องกันความร้อนสูงเกินไป
เนื้อหาแพ็คเกจ
Verify that all the following items are present in your package:
- GAMDIAS Aura GC11 ARGB Mid-Tower PC Case
- 4 x Pre-installed 120mm ARGB Fans
- ชุดอุปกรณ์เสริม (สกรู, ตัวยึด, เคเบิลไทร์)
- คู่มือการใช้งาน (เอกสารนี้)
การติดตั้งและการตั้งค่า
1. การแกะกล่องเคส
Carefully remove the PC case from its packaging. Inspect the case for any signs of damage during transit. Remove any protective films from the tempered glass panel.

ภาพ: มุมเอียง view of the GAMDIAS Aura GC11 ARGB PC case, showcasing the tempered glass side panel and the distinctive bar-patterned mesh front panel.
2. การเข้าถึงภายในอาคาร
To access the interior of the case, locate and remove the thumbscrews securing the tempered glass side panel. Carefully lift and remove the panel. The opposite solid side panel can also be removed for cable management access.

ภาพ: ภายใน view of the GAMDIAS Aura GC11 ARGB PC case, with the side panel removed, revealing the motherboard mounting area, fan cutouts, and cable management space.
3. การติดตั้งเมนบอร์ด
- Install the necessary motherboard standoffs into the motherboard tray according to your motherboard's form factor (Mini-ITX, Micro-ATX, or ATX).
- ติดตั้งแผ่นปิดพอร์ต I/O ของเมนบอร์ดเข้ากับช่องเปิดด้านหลังของเคส
- วางเมนบอร์ดของคุณลงบนสแตนด์ออฟอย่างระมัดระวัง โดยจัดรูสกรูให้ตรงกัน
- ยึดเมนบอร์ดด้วยสกรูที่ให้มา
4. การติดตั้งชุดจ่ายไฟ (PSU)
- Mount your PSU into the dedicated compartment at the bottom rear of the case.
- ยึดพาวเวอร์ซัพพลายด้วยสกรูจากด้านหลังของเคส
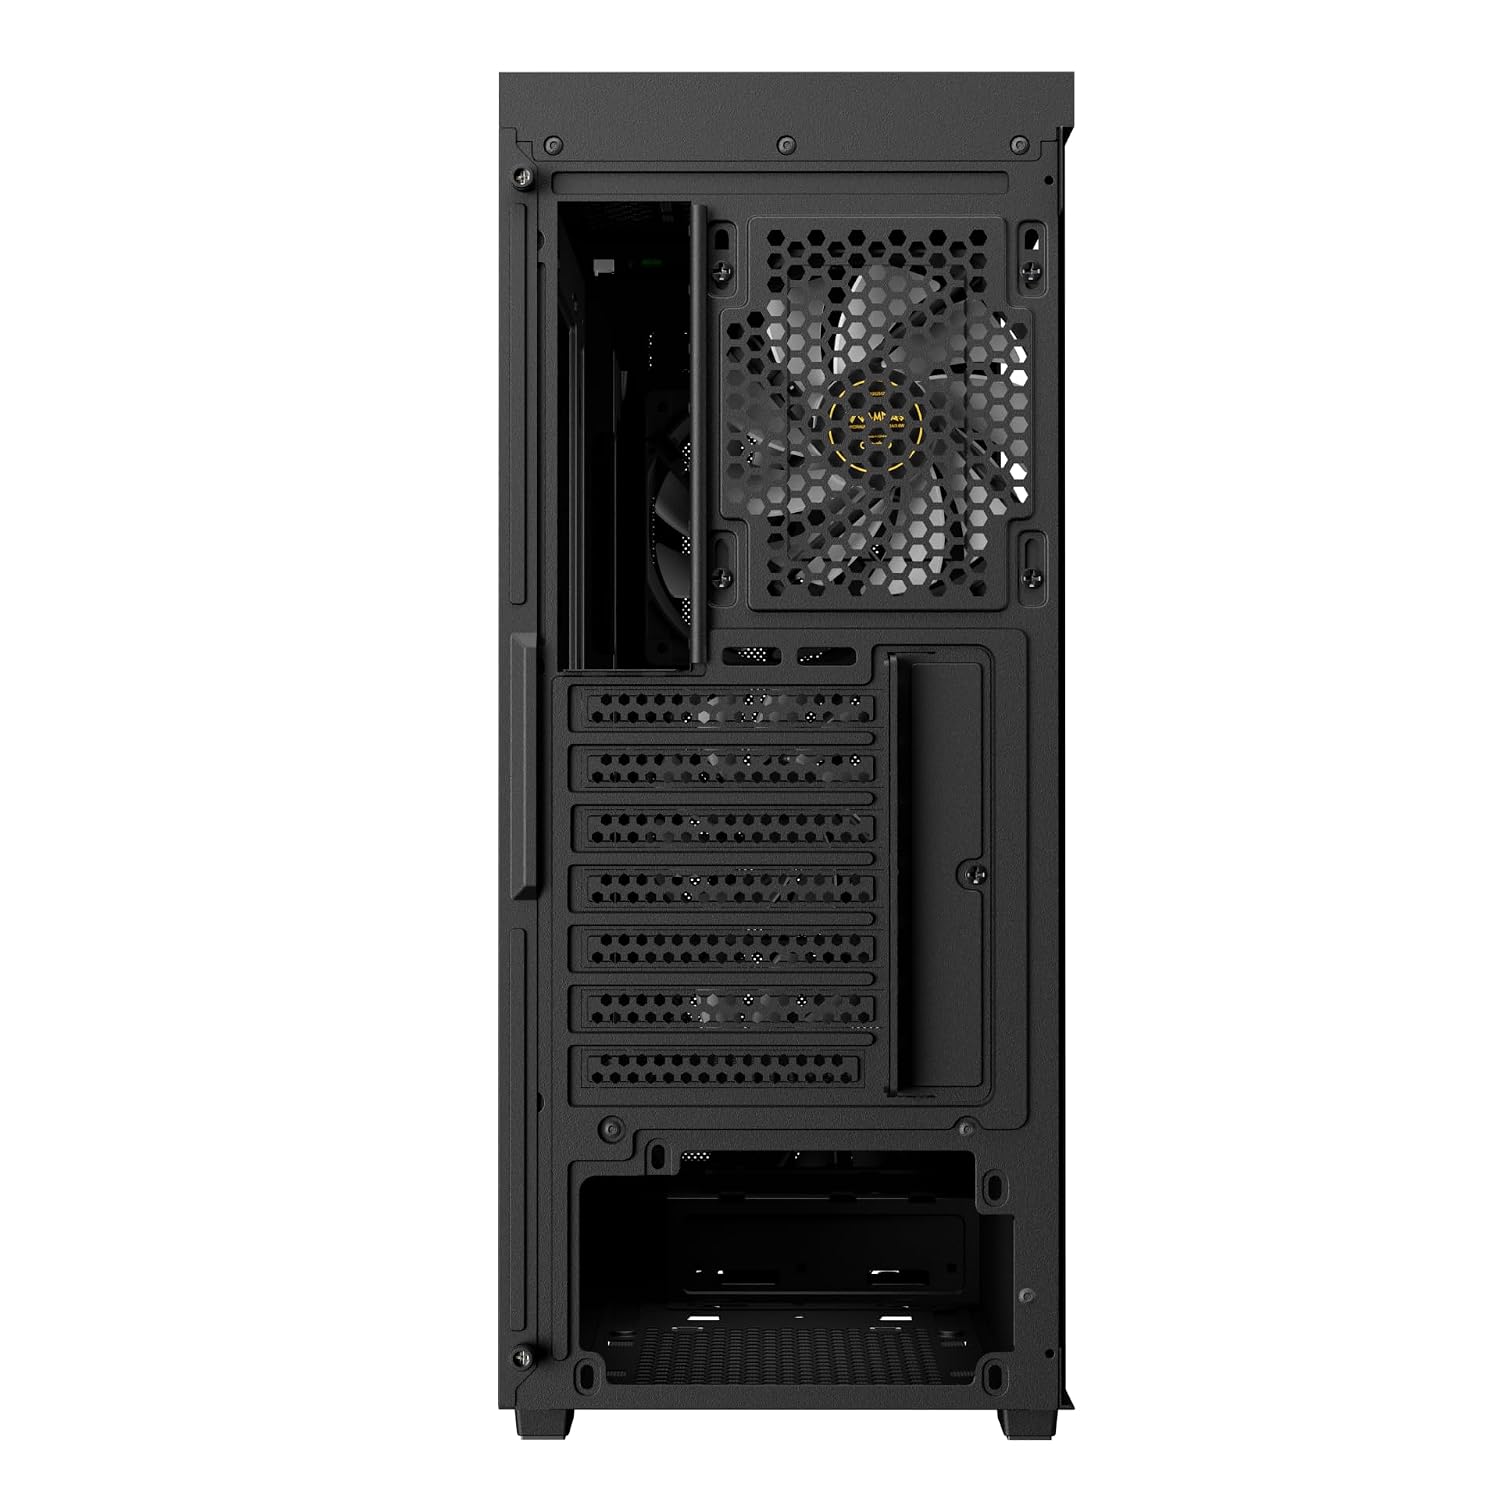
ภาพ: ด้านหลัง view of the GAMDIAS Aura GC11 ARGB PC case, highlighting the power supply unit mounting bracket at the bottom and the expansion slots for graphics cards and other components.
5. การติดตั้งไดรฟ์จัดเก็บข้อมูล
The case supports multiple storage drives. Refer to the accessory kit for specific mounting hardware.
- SSD ขนาด 2.5 นิ้ว: Mount SSDs to the designated trays or mounting points behind the motherboard tray.
- ฮาร์ดดิสก์ขนาด 3.5 นิ้ว: ติดตั้งฮาร์ดดิสก์ลงในช่องใส่ไดรฟ์ที่อยู่ใต้ฝาครอบพาวเวอร์ซัพพลาย
6 การติดตั้งการ์ดจอ (VGA) และการ์ดขยาย
- ถอดฝาครอบช่องขยายที่จำเป็นออกจากด้านหลังของเคส
- เสียบการ์ดจอหรือการ์ดเสริมอื่นๆ ลงในช่อง PCIe ที่เหมาะสมบนเมนบอร์ดของคุณ
- ยึดการ์ดให้แน่นด้วยสกรู
7. การจัดการสายเคเบิลและการเชื่อมต่อแผงด้านหน้า
Route all power and data cables through the cutouts in the motherboard tray for a clean build. Connect the front panel I/O cables (USB, HD Audio, Power, Reset, LED) to their corresponding headers on your motherboard. The case features a Type-C port, two USB 2.0 ports, HD Audio, and Reset button on the top panel.

ภาพ: มุมมองด้านบน view of the GAMDIAS Aura GC11 ARGB PC case, displaying the front I/O panel with Type-C, USB 2.0 ports, and audio jacks, along with the top magnetic dust filter.
8. การปิดคดี
Once all components are installed and cables are managed, reattach the side panels, starting with the solid panel, then the tempered glass panel. Secure them with the thumbscrews.
คำแนะนำการใช้งาน
1. First Power-On
After ensuring all connections are secure, connect your PC to a power outlet and press the power button on the top panel of the case. The pre-installed ARGB fans will illuminate, and your system should begin to boot.

ภาพ: ด้านหน้า view of the GAMDIAS Aura GC11 ARGB PC case, with the four pre-installed ARGB fans visible and illuminated behind the bar-patterned mesh front panel.
2. การควบคุมพัดลม ARGB
The pre-installed ARGB fans are typically connected to a controller or directly to an ARGB header on your motherboard. Refer to your motherboard's manual or the fan controller's instructions for details on how to customize the lighting effects.
การซ่อมบำรุง
1. การทำความสะอาดแผ่นกรองฝุ่น
The GAMDIAS Aura GC11 ARGB case includes a magnetic dust filter on the top panel and a removable filter for the PSU intake. Regularly clean these filters to maintain optimal airflow and prevent dust buildup inside your system.
- Gently remove the magnetic dust filter from the top of the case.
- Slide out the PSU dust filter from the bottom rear of the case.
- ทำความสะอาดตัวกรองโดยใช้ลมเป่าหรือล้างด้วยน้ำ ตรวจสอบให้แน่ใจว่าแห้งสนิทก่อนประกอบกลับเข้าไปใหม่
2. การทำความสะอาดทั่วไป
ใช้แบบนุ่มๆamp cloth to wipe down the exterior surfaces of the case. Avoid using harsh chemicals or abrasive materials that could damage the finish or tempered glass.
การแก้ไขปัญหา
No Power After Assembly
- ตรวจสอบให้แน่ใจว่าได้เปิดเครื่องจ่ายไฟ (PSU) และเสียบปลั๊กเข้ากับเต้ารับที่ผนังอย่างถูกต้องแล้ว
- ตรวจสอบให้แน่ใจว่าสายไฟ ATX 24 พินและสายไฟ CPU 8 พินเชื่อมต่อกับเมนบอร์ดอย่างแน่นหนาแล้ว
- Check that the front panel power switch cable is correctly connected to the motherboard's front panel header.
Fans Not Spinning or ARGB Not Working
- Confirm that the fan power cables are connected to the motherboard or fan controller.
- Ensure ARGB cables are properly connected to the motherboard's ARGB header or the fan controller.
- Check your motherboard's BIOS/UEFI settings or ARGB software for fan and lighting control.
ปัญหาเรื่องความร้อนสูงเกินไป
- Ensure all case fans are spinning correctly and oriented for optimal airflow (intake at front, exhaust at rear/top).
- Clean all dust filters and internal components to remove dust buildup.
- ตรวจสอบว่าพัดลมระบายความร้อน CPU และพัดลม GPU ทำงานได้อย่างถูกต้อง
ข้อมูลจำเพาะ
| คุณสมบัติ | รายละเอียด |
|---|---|
| ยี่ห้อ | แกมเดียส |
| ชื่อรุ่น | Aura GC11 ARGB |
| ประเภทเคส | มิดทาวเวอร์ |
| ความเข้ากันได้ของเมนบอร์ด | มินิ-ITX, ไมโคร-ATX, ATX |
| พัดลมที่ติดตั้งล่วงหน้า | พัดลม ARGB ขนาด 4 x 120 มม |
| วิธีการทำความเย็น | อากาศ |
| วัสดุของตู้หุ้ม | โลหะ, กระจกนิรภัย |
| พอร์ต I/O | 1 x Type-C, 2 x USB 2.0, 1 x HD Audio, 1 x Reset |
| ข้อจำกัดความสูงของตัวทำความเย็นซีพียู CPU | 160มม. |
| ข้อจำกัดด้านความยาวของ VGA | 300มม. |
| ข้อจำกัดความยาว PSU | 150มม. |
| Internal Bays Quantity | 3 (for 2.5"/3.5" drives) |
| คุณสมบัติพิเศษ | Bar Patterned Mesh Front Panel, Magnetic Dust Filter |
| น้ำหนักสินค้า | 4000 กรัม |
| ขนาดสินค้า (ลึก x กว้าง x สูง) | 46D x 20W x 40H เซนติเมตร |
| ประเทศต้นกำเนิด | จีน |
ข้อมูลการรับประกัน
ผลิตภัณฑ์นี้มาพร้อมกับ 1 YEAR MANUFACTURER warranty. Please retain your proof of purchase for warranty claims. For detailed terms and conditions, refer to the official GAMDIAS webไซต์หรือติดต่อฝ่ายสนับสนุนลูกค้า
สนับสนุน
If you encounter any issues or have questions regarding your GAMDIAS Aura GC11 ARGB PC Case that are not covered in this manual, please contact GAMDIAS customer support. You can find contact information on the official GAMDIAS webเว็บไซต์หรือผ่านผู้ค้าปลีกของคุณ
Manufacturer Contact Information: GAMDIAS TAIWAN, No. 113, Jian 2nd Rd., Zhonghe, Dist., New Taipei City 235, Taiwan
Importer Contact Information: Allway Distributions Pvt Ltd, No-49, H.B. Samajha Road, Baswangudi, Bengaluru- 560004, Contact -8904307700