
1. บทนำ
ขอขอบคุณที่เลือก Haloview Byte Tango BT10 ไร้สายด้านหลัง View Mirror Dashcam Backup Camera System. This system provides comprehensive front and rear vehicle coverage with a 10-inch 1080P monitor, a built-in dashcam, and a wireless backup camera. This manual will guide you through the installation, operation, and maintenance of your new system to ensure optimal performance and safety.
2. สินค้าหมดview
2.1 เนื้อหาบรรจุภัณฑ์
ฮาโลview Byte Tango BT10 system includes the following components:
- 1 x BT10 Monitor (10-inch, 1280x320 resolution)
- 1 x Rear Camera BTC128W (with WDR Technology)
- 1 x ปะเก็น
- สายรัดยาง
- Micro-SD / TF Card
- Type-C to DC Power Cable
- สายแปลงกล้อง
- อะแดปเตอร์ไฟฟ้าสำหรับ RV ที่มีสายไฟล่วงหน้า
- สายจับคู่
- อะแดปเตอร์ไฟที่จุดบุหรี่
- สายรัดเวลโคร
- คู่มือการใช้งาน

Figure 2.1: Included components of the Haloview BT10 system.
2.2 คุณสมบัติหลัก
- 10-inch IPS Touchscreen Monitor: Provides a clear and intuitive interface for viewing and controlling the system.
- Built-in 1080P Dashcam: Captures forward-facing video with a 140° wide-angle lens.
- Wireless 1080P Backup Camera (BTC128W): Offers a 135° rear view, eliminating blind spots and aiding in safe reversing.
- Wide Dynamic Range (WDR) Technology: Improves image quality by balancing light and dark contrasts, especially useful in challenging lighting conditions.
- กล้องกันน้ำ IP69K: รับประกันความทนทานและประสิทธิภาพที่เชื่อถือได้ในสภาพอากาศต่างๆ
- ตัวเลือกพลังงานที่ยืดหยุ่น: Can be powered via cigarette lighter socket or Type-C port (PD protocol required).
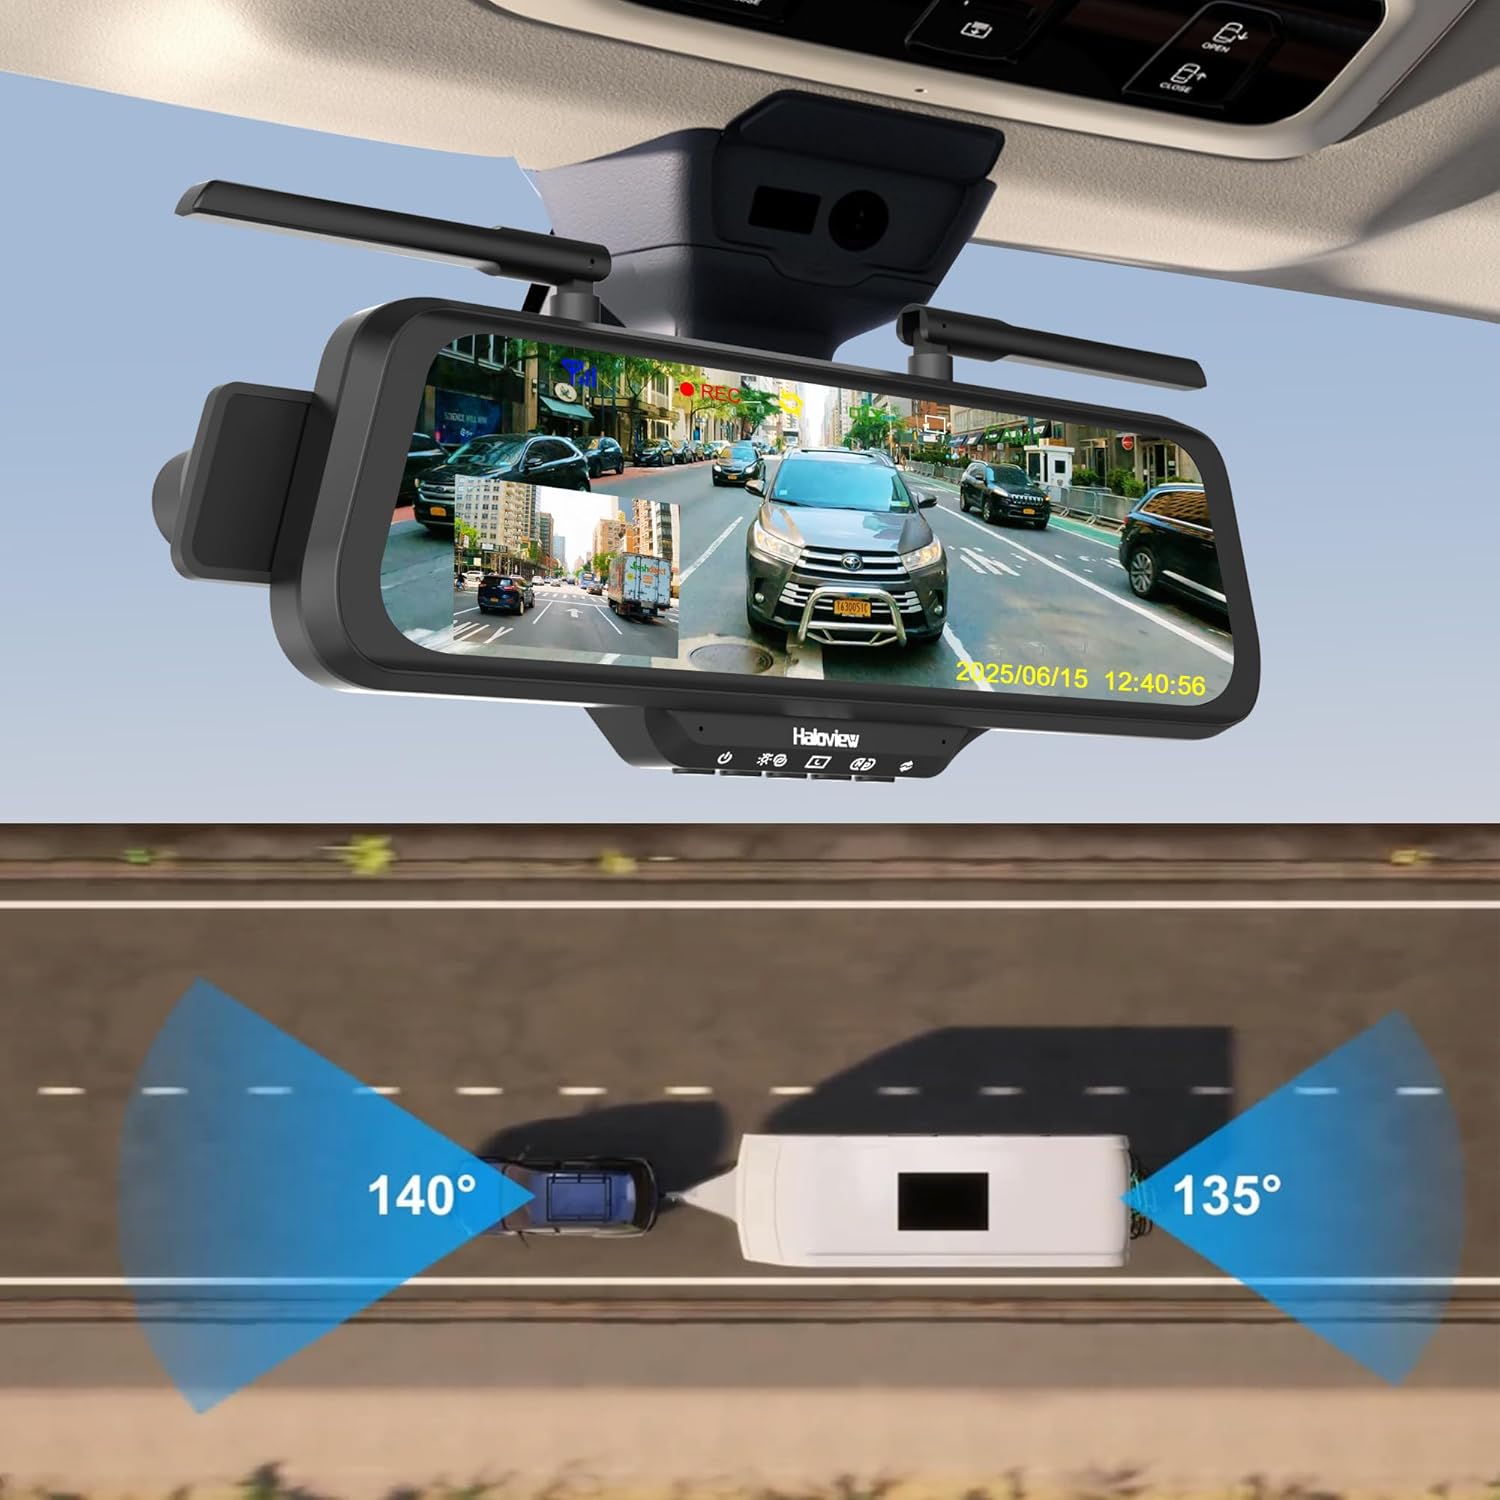
รูปที่ 2.2: Haloview BT10 system with wide-angle views.
3. การตั้งค่าและการติดตั้ง
3.1 การตรวจสอบก่อนการติดตั้ง
Before installing the system, please ensure the stability of your vehicle's rearview mirror. If the rearview mirror or its bracket is loose, it is recommended to replace or tighten it first. An unstable mirror may cause the streaming display to shake or fail to stay in position while driving.
3.2 การติดตั้งจอภาพ
- Attach the BT10 monitor to your existing rearview mirror using the provided rubber straps. Ensure it is securely fastened and centered for optimal viewการไอเอ็นจี
- Adjust the monitor's angle to provide a clear view of the road ahead and the display.

Figure 3.1: Monitor and dashcam installation.
3.3 Wireless Rear Camera Installation (BTC128W)
- Choose a suitable location at the rear of your vehicle for the BTC128W camera, ensuring a clear line of sight and optimal viewมุมอิง
- ติดตั้งกล้องอย่างแน่นหนาโดยใช้ฮาร์ดแวร์ที่ให้มา
- Connect the camera to a power source (e.g., reverse light power for automatic activation when reversing, or constant power for continuous monitoring).

Figure 3.2: Wireless rear camera installation on an RV.
3.4 การเชื่อมต่อสายไฟ
The BT10 monitor offers flexible power options:
- ช่องเสียบที่จุดบุหรี่: Use the provided cigarette lighter power adapter to plug into your vehicle's 12V accessory socket.
- พอร์ต Type-C: Connect a Type-C cable to the monitor's Type-C port. Note that a Power Delivery (PD) protocol compatible power source is required for this option.

Figure 3.3: Flexible power options for the monitor.
4. คู่มือการใช้งาน
4.1 การทำงานพื้นฐาน
- เปิด/ปิดเครื่อง: The system will typically power on automatically when the vehicle starts and power off when the vehicle is turned off. A manual power button may also be available on the monitor.
- อินเทอร์เฟซหน้าจอสัมผัส: Navigate through menus and settings by tapping and swiping on the 10-inch IPS touchscreen.
- โหมดการแสดงผล: The monitor can display the front dashcam view,กล้องหลัง viewหรือแบบแบ่งหน้าจอ view of both. Switch between modes via the touchscreen interface.
4.2 Dashcam Features
- การบันทึกต่อเนื่อง: The built-in 1080P dashcam continuously records footage of the road ahead (140° wide-angle). Footage is stored on the Micro-SD card.
- การบันทึกแบบวนซ้ำ: When the Micro-SD card is full, the oldest files will be overwritten automatically.
- การบันทึกเหตุการณ์ฉุกเฉิน: In the event of a sudden impact or collision, the G-sensor will trigger emergency recording, locking the current footage เพื่อป้องกันไม่ให้ถูกเขียนทับ
- จับภาพด่วน: Tap the "REC" icon on the screen to manually capture a snapshot or start/stop recording.

Figure 4.1: Quick capture function on the monitor.
4.3 Backup Camera Features
- การเปิดใช้งานอัตโนมัติ: If wired to the reverse lights, the rear camera view will automatically display when the vehicle is put into reverse.
- ช่วงไดนามิกกว้าง (WDR): The BTC128W camera features WDR technology, which enhances image clarity in high-contrast lighting conditions, such as bright sunlight and deep shadows, or at night.
- Full-Color Dim-Light Night Vision: Provides clear, full-color images even in low-light environments.

Figure 4.2: Wide Dynamic Range (WDR) technology comparison.
4.4 Parking Line Adjustment
The parking guidelines displayed on the monitor can be adjusted to match your vehicle's dimensions and preferences:
- การปรับแนวนอน: Slide left/right on the touchscreen to adjust the parking lines horizontally.
- การปรับแนวตั้ง: Slide up/down on the touchscreen to adjust the parking lines vertically.

Figure 4.3: Adjusting parking lines on the display.
5. การบำรุงรักษา
- การทำความสะอาดจอภาพ: Use a soft, dry cloth to clean the monitor screen. For stubborn smudges, lightly dampชุบผ้าด้วยน้ำหรือน้ำยาทำความสะอาดที่ปลอดภัยต่อหน้าจอ หลีกเลี่ยงสารเคมีรุนแรง
- การทำความสะอาดเลนส์กล้อง: เช็ดเลนส์กล้องเบา ๆ ด้วยผ้าเนื้อนุ่มที่ไม่เป็นขุย เพื่อให้ได้ภาพที่คมชัด
- การจัดการการ์ด Micro-SD: Regularly format the Micro-SD card (at least once a month) to maintain optimal recording performance and prevent data corruption. Back up important footage ก่อนการจัดรูปแบบ
- อัพเดตเฟิร์มแวร์: ตรวจสอบรัศมีview เป็นทางการ website periodically for any available firmware updates for your BT10 system. Follow the instructions provided with the update carefully.
6 การแก้ไขปัญหา
6.1 ปัญหาทั่วไปและแนวทางแก้ไข
- ไม่มีไฟฟ้าให้ตรวจสอบ:
- Check if the power cable is securely connected to both the monitor and the power source (cigarette lighter or Type-C port).
- ตรวจสอบให้แน่ใจว่าปลั๊กไฟในรถใช้งานได้ปกติ
- If using Type-C, confirm the power source supports Power Delivery (PD) protocol.
- No Signal from Rear Camera:
- Verify the rear camera is receiving power.
- Ensure the camera and monitor are paired. Refer to the pairing instructions in the full user manual if re-pairing is needed.
- Check for any obstructions between the camera and monitor that might interfere with the wireless signal.
- คุณภาพของภาพต่ำ:
- Clean the camera lens and monitor screen.
- ตรวจสอบให้แน่ใจว่าติดตั้งกล้องอย่างแน่นหนาและไม่สั่น
- Check for strong electromagnetic interference sources near the camera or monitor.
- Dashcam Not Recording:
- Ensure a Micro-SD card is inserted correctly.
- ฟอร์แมตการ์ด Micro-SD
- Check if the recording function is enabled in the monitor's settings.
7. ข้อมูลจำเพาะ
| คุณสมบัติ | ข้อมูลจำเพาะ |
|---|---|
| ยี่ห้อ | ฮาโลview |
| แบบอย่าง | BT10 |
| ขนาดหน้าจอ | 10 นิ้ว |
| ขนาดสินค้า | ยาว 11 นิ้ว x กว้าง 9 นิ้ว x สูง 5 นิ้ว |
| อุปกรณ์ที่รองรับ | BTC128W/BTC126/BTC125W |
| ประเภทการติดตั้ง | การติดตั้งบนพื้นผิว |
| ประเภทเลนส์ | มุมกว้าง |
| มุมจริงของ View (Dashcam) | 140 องศา |
| ที่ดินของ View (กล้องสำรอง) | 135 องศา |
| ประเภทขั้วต่อ | ไร้สาย |
| ความละเอียดในการจับภาพวิดีโอ | 1080p |
| สื่อในตัว | Monitor and camera |
8. ข้อมูลการรับประกัน
ฮาโลview Byte Tango BT10 system comes with a การรับประกันจากผู้ผลิต 1 ปี. This warranty covers defects in materials and workmanship under normal use. Please retain your proof of purchase for warranty claims. For specific terms and conditions, refer to the warranty card included in your package or visit the official Haloview webเว็บไซต์.
9. การสนับสนุนและข้อมูลการติดต่อ
If you encounter any issues or have questions regarding your Haloview Byte Tango BT10 system that are not covered in this manual, please contact Haloview customer support. You can typically find contact information (email, phone, or support portal) on the official Haloview webไซต์หรือบนบรรจุภัณฑ์ของผลิตภัณฑ์ของคุณ
สำหรับแหล่งข้อมูลสนับสนุนล่าสุด โปรดไปที่: www.haloview.คอม


