
1. บทนำ
Thank you for choosing the Lefant M3L Robot Vacuum and Mop. This intelligent cleaning device is designed to simplify your home cleaning routine by efficiently vacuuming and mopping various floor types. Please read this manual thoroughly before using the product to ensure proper operation, maintenance, and safety.
For optimal performance, follow the instructions carefully and keep this manual for future reference.
2. ข้อมูลด้านความปลอดภัยที่สำคัญ
Before using the Lefant M3L, please observe the following safety precautions:
- เด็กอายุตั้งแต่ 8 ปีขึ้นไป รวมไปถึงบุคคลที่มีความบกพร่องทางร่างกาย ประสาทสัมผัส หรือจิตใจ หรือขาดประสบการณ์และความรู้ สามารถใช้เครื่องใช้ไฟฟ้านี้ได้ หากมีการดูแลหรือได้รับคำแนะนำเกี่ยวกับการใช้เครื่องใช้ไฟฟ้าในลักษณะที่ปลอดภัย และเข้าใจถึงอันตรายที่อาจเกิดขึ้น
- ควรมีผู้ดูแลเด็กเพื่อให้แน่ใจว่าไม่ได้เล่นกับเครื่องใช้ไฟฟ้าดังกล่าว
- การทำความสะอาดและการบำรุงรักษาผู้ใช้ไม่ควรทำโดยเด็กโดยไม่มีผู้ดูแล
- Do not use the robot in environments with open flames, flammable materials, or explosive substances.
- ตรวจสอบให้แน่ใจว่าแท่นชาร์จวางอยู่บนพื้นผิวระดับที่ชิดผนัง โดยไม่มีสิ่งกีดขวางในระยะ 1 เมตรด้านหน้าและ 0.5 เมตรด้านข้างแต่ละข้าง
- ห้ามจุ่มหุ่นยนต์หรือชิ้นส่วนอิเล็กทรอนิกส์ลงในน้ำ
- Only use the original power adapter and charging dock provided by the manufacturer.
- ก่อนเริ่มดำเนินการ โปรดนำสายเคเบิลที่หลวม วัตถุขนาดเล็ก หรือสิ่งของที่แตกหักง่ายออกจากพื้น เพื่อป้องกันการพันกันหรือความเสียหาย
- Do not use the robot to clean liquids, burning objects, or sharp objects.
- หากสายไฟเสียหาย จะต้องเปลี่ยนโดยผู้ผลิต ตัวแทนให้บริการ หรือบุคคลที่มีคุณสมบัติใกล้เคียงเพื่อหลีกเลี่ยงอันตราย
3. เนื้อหาบรรจุภัณฑ์
Please check if all accessories are present and in good condition:
- Lefant M3L Robot Vacuum and Mop
- แท่นชาร์จ
- อะแดปเตอร์แปลงไฟ
- ถังทิ้งขยะ
- ถังเก็บน้ำพร้อมแผ่นถูพื้น
- แปรงด้านข้าง (2 คู่)
- แผ่นกรอง HEPA (ติดตั้ง 1 ชิ้น, สำรอง 1 ชิ้น)
- เครื่องมือทำความสะอาด
- คู่มือการใช้งาน
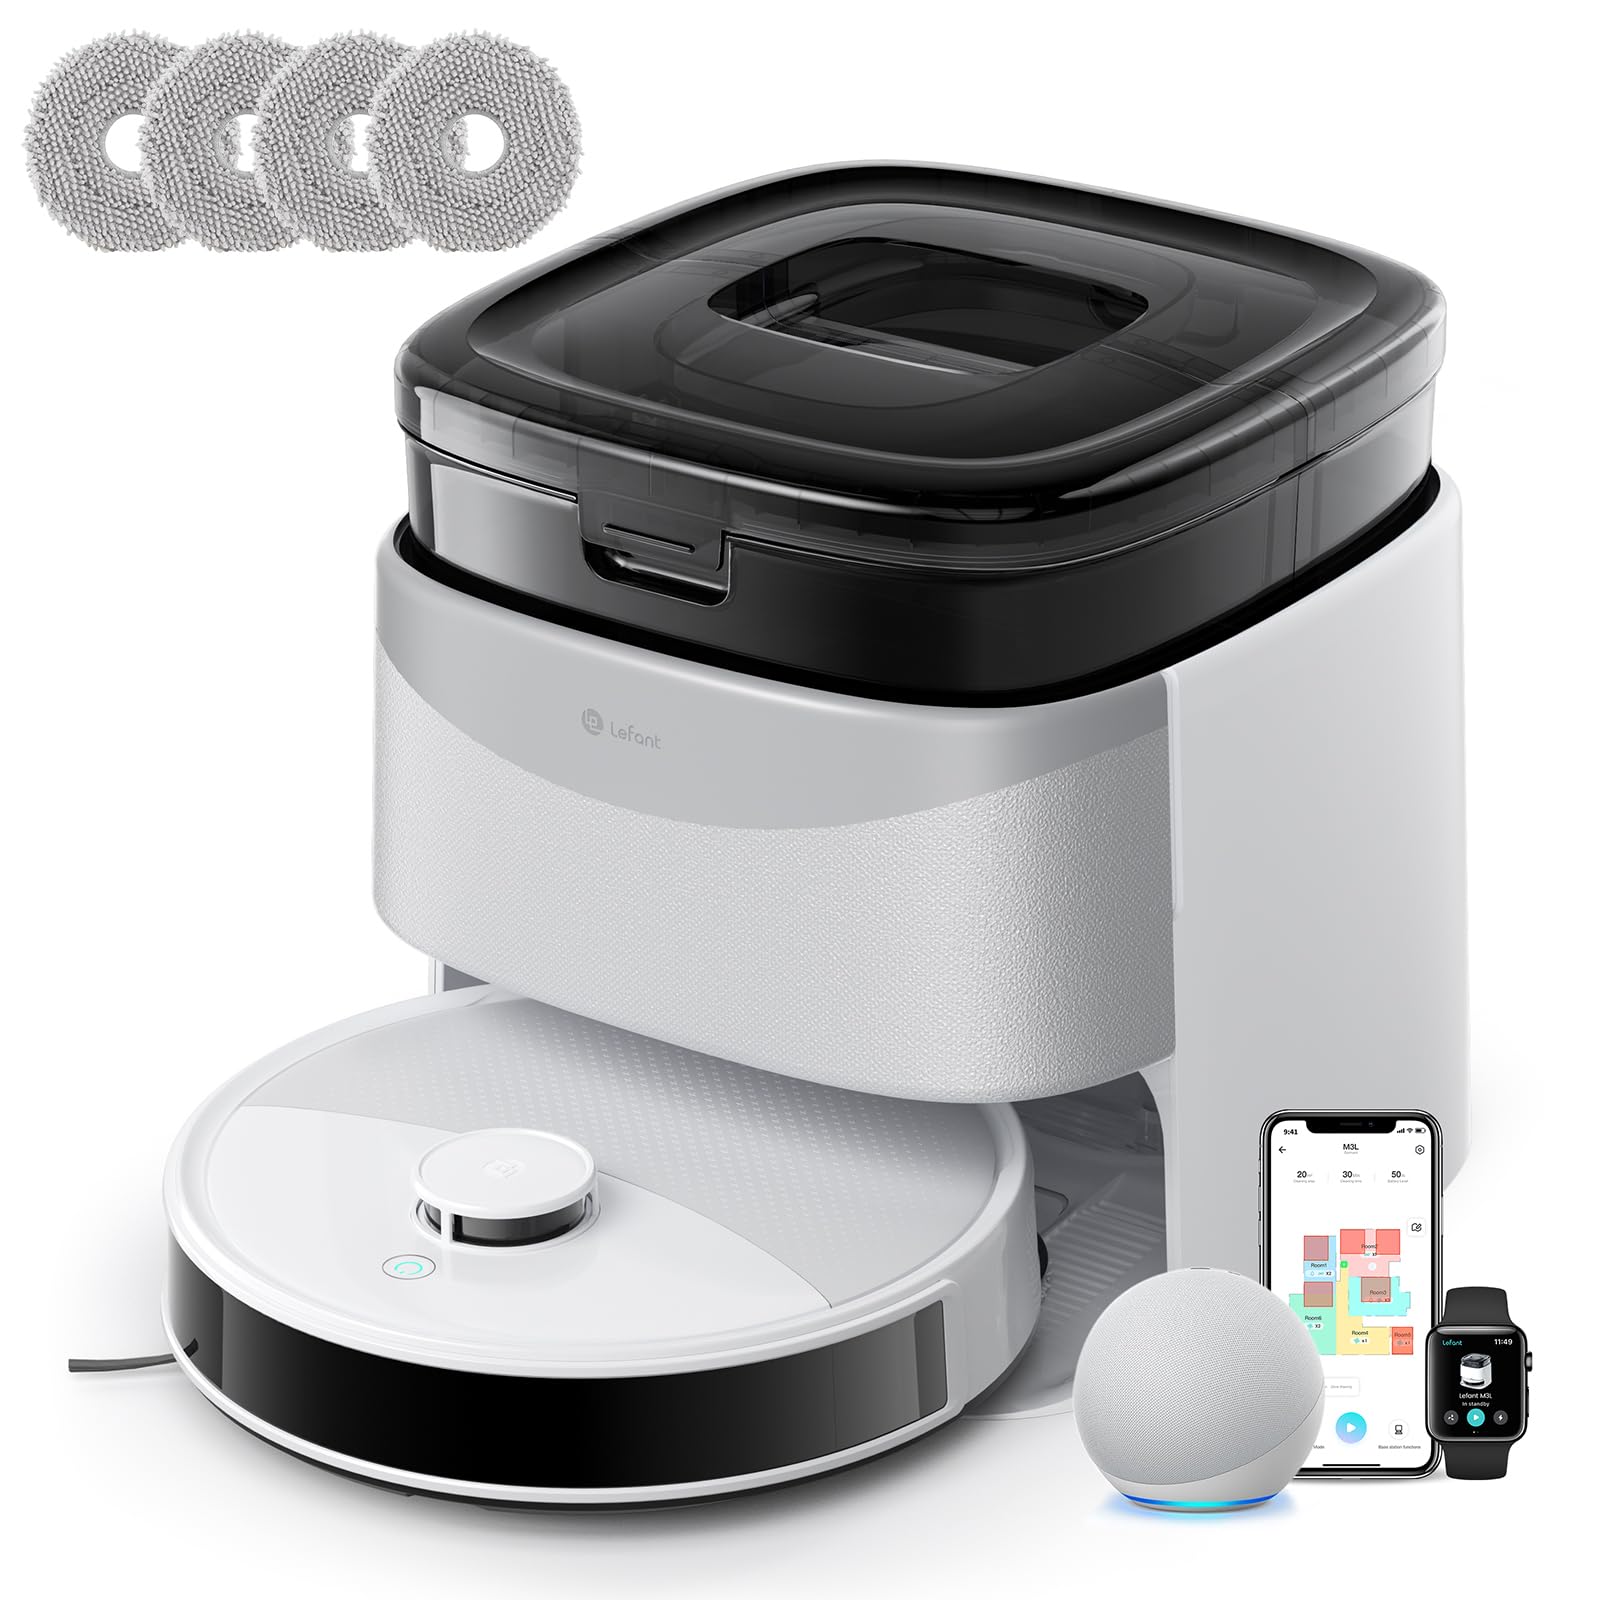
Image 1: Lefant M3L Robot Vacuum and Mop with its included accessories. This image shows the main unit, charging dock, power adapter, dustbin, water tank, mop pad, side brushes, and cleaning tool.
4. สินค้าหมดview
4.1 Robot Top View
- ปุ่มเปิดปิด/ล้าง: Press to start/pause cleaning. Hold to power on/off.
- ไฟแสดงสถานะ: Shows battery status and working mode.
- ปุ่มปลดล็อคถังขยะ: Press to remove the dustbin.
4.2 Robot Bottom View
- แปรงด้านข้าง: Collect dust and debris from edges and corners.
- ล้อขับเคลื่อน: Allow the robot to move across various surfaces.
- ล้อสากล: สามารถหมุนได้ 360 องศา
- หน้าสัมผัสการชาร์จ: Connect with the charging dock for power.
- เซ็นเซอร์ตรวจจับการตกหล่น: Detect edges and prevent falls.
- แปรงหลัก: แปรงกลางสำหรับทำความสะอาดอย่างล้ำลึก
- Water Tank/Mop Pad Slot: Area for attaching the water tank and mop pad.
4.3 แท่นชาร์จ
- ไฟแสดงสถานะการชาร์จ: แสดงสถานะการชาร์จ
- หน้าสัมผัสการชาร์จ: Connect with the robot for power.
- พอร์ตไฟ: เชื่อมต่อกับอะแดปเตอร์ไฟ
5. คู่มือการติดตั้ง
5.1 Preparing the Robot
- การลอกฟิล์มป้องกันออก: Remove all protective films from the robot and charging dock.
- ติดตั้งแปรงด้านข้าง: Press the side brushes onto the square posts at the bottom of the robot until they click into place. Ensure the 'L' and 'R' marks match.
- ติดตั้งถังขยะ: Open the top cover of the robot and insert the dustbin until it locks securely.

Image 2: Illustration of attaching the side brushes to the underside of the robot. Align the brush with the corresponding post and push until it clicks.
5.2 Positioning the Charging Dock
- วางแท่นชาร์จบนพื้นผิวเรียบแข็งชิดผนัง
- Ensure there are no obstacles within 1 meter (3 feet) in front of the dock and 0.5 meters (1.5 feet) on either side.
- Connect the power adapter to the charging dock and plug it into a wall outlet. The indicator light on the dock will illuminate.

Image 3: Diagram showing the recommended clear space around the charging dock for optimal robot navigation.
5.3 การชาร์จเริ่มต้น
Place the robot onto the charging dock, ensuring the charging contacts on the robot align with those on the dock. The robot's indicator light will pulse during charging and turn solid when fully charged. For first-time use, charge the robot for at least 6 hours.
5.4 การเชื่อมต่อกับแอป Lefant
- Download the "Lefant" app from the App Store (iOS) or Google Play Store (Android).
- ลงทะเบียนบัญชีและเข้าสู่ระบบ
- Tap "+" to add a device and select your Lefant M3L model.
- Follow the in-app instructions to connect the robot to your home Wi-Fi network (2.4GHz only).
- Once connected, you can control the robot, set schedules, and monitor cleaning status via the app.
6. คู่มือการใช้งาน
6.1 การเริ่มรอบการทำความสะอาด
- เริ่มต้นด้วยตนเอง: Press the Power/Clean button on the robot once. The robot will automatically start cleaning in Auto mode.
- การควบคุมแอพ: Open the Lefant app, select your M3L robot, and tap "Start Cleaning".
- การควบคุมด้วยเสียง: If integrated with a smart assistant (e.g., Alexa, Google Assistant), use voice commands like "Alexa, ask Lefant to start cleaning."
6.2 การหยุดชั่วคราว/การเริ่มการทำความสะอาดใหม่
Press the Power/Clean button on the robot or use the app to pause a cleaning cycle. Press again to resume.
6.3 การกลับไปยังแท่นชาร์จ
The robot will automatically return to the charging dock when its battery is low or when a cleaning cycle is complete. You can also send it back manually via the app.
6.4 การใช้งานฟังก์ชันถูพื้น
- เติมถังน้ำ: Open the water tank cover and fill it with clean water. Do not use cleaning solutions that are not approved by Lefant.
- ติดแผ่นม็อป: Securely attach the mop pad to the bottom of the water tank.
- ติดตั้งถังเก็บน้ำ: Slide the filled water tank into the designated slot at the back of the robot until it clicks.
- Start a cleaning cycle. The robot will now vacuum and mop simultaneously.

Image 4: Steps for filling the water tank and attaching the mop pad before inserting it into the robot.
บันทึก: Remove the water tank before charging the robot or if it will be inactive for an extended period.
6.5 Cleaning Modes (via App)
- ทำความสะอาดอัตโนมัติ: หุ่นยนต์จะนำทางและทำความสะอาดบ้านของคุณอย่างชาญฉลาด
- ทำความสะอาดเฉพาะจุด: ทำความสะอาดบริเวณเฉพาะอย่างได้อย่างเข้มข้นยิ่งขึ้น
- ขอบสะอาด: ทำความสะอาดตามผนังและขอบเฟอร์นิเจอร์
- บริการทำความสะอาดตามกำหนด: ตั้งเวลาเฉพาะให้หุ่นยนต์ทำความสะอาดอัตโนมัติ
7. การบำรุงรักษา
การบำรุงรักษาตามปกติจะช่วยให้หุ่นยนต์ดูดฝุ่นของคุณทำงานได้อย่างเหมาะสมที่สุดและยืดอายุการใช้งาน
7.1 Cleaning the Dustbin and Filter (After each use)
- กดปุ่มปลดล็อกถังขยะและดึงถังขยะออกมา
- เปิดฝาถังขยะและเทสิ่งของภายในลงในถังขยะ
- Remove the HEPA filter and sponge filter. Tap them gently to remove dust. Do not wash the HEPA filter with water.
- Rinse the dustbin with water (ensure it's completely dry before reinstallation).
- Reassemble the filters and dustbin, then reinsert into the robot.

Image 5: Visual guide on how to remove, empty, and clean the dustbin and its filters.
7.2 Cleaning the Side Brushes (Weekly)
Remove the side brushes by pulling them upwards. Use the cleaning tool to remove any hair or debris tangled around them. Rinse with water if necessary and allow to air dry completely before reattaching.
7.3 Cleaning the Water Tank and Mop Pad (After each mopping session)
Empty any remaining water from the tank. Remove the mop pad and wash it by hand or machine. Allow both to air dry completely before storage or next use.
7.4 Cleaning Sensors and Charging Contacts (Monthly)
Wipe the drop sensors (on the bottom of the robot) and the charging contacts (on the robot and charging dock) with a clean, dry cloth. This ensures proper navigation and charging.

ภาพที่ 6: ภาพระยะใกล้ view of the robot's underside, highlighting the locations of the drop sensors and charging contacts for cleaning.
8 การแก้ไขปัญหา
| ปัญหา | สาเหตุที่เป็นไปได้ | สารละลาย |
|---|---|---|
| หุ่นยนต์ไม่เปิดเครื่อง | แบตเตอรี่ต่ำ สวิตช์ไฟปิด | Charge the robot; Ensure the main power switch (usually on the side/bottom) is ON. |
| หุ่นยนต์ไม่สามารถชาร์จได้ | Charging contacts dirty; Dock not powered; Robot not properly aligned. | Clean charging contacts; Check power adapter connection; Manually place robot on dock. |
| หุ่นยนต์ติดขัดบ่อยครั้ง | Too many obstacles; Loose cables; High thresholds. | Clear the cleaning area; Use virtual boundaries if available; Block off problematic areas. |
| ประสิทธิภาพการทำความสะอาดไม่ดี | Dustbin full; Filters clogged; Side brushes worn. | Empty dustbin; Clean/replace filters; Clean/replace side brushes. |
| ฟังก์ชั่นถูพื้นไม่ทำงาน | Water tank empty; Mop pad dirty/dry; Water outlet clogged. | Fill water tank; Clean/wet mop pad; Check water tank for blockages. |
| ปัญหาการเชื่อมต่อแอป | Incorrect Wi-Fi password; Router too far; 5GHz Wi-Fi used. | Ensure 2.4GHz Wi-Fi; Re-enter password; Move robot closer to router; Restart router/robot. |
9. ข้อมูลจำเพาะ
| คุณสมบัติ | รายละเอียด |
|---|---|
| ชื่อรุ่น | เอ็ม3แอล |
| ยี่ห้อ | เลฟองต์ |
| ขนาด (กว้าง x ยาว x สูง) | 32L x 32L x 9.7H เซนติเมตร |
| น้ำหนักสินค้า | 9.7 กิโลกรัม |
| ประเภทแบตเตอรี่ | ลิเธียมไอออน |
| ประเภทตัวกรอง | แผ่นกรอง HEPA |
| ประเภทการควบคุม | การควบคุมแอพ, การควบคุมด้วยเสียง |
| คุณสมบัติพิเศษ | Dry and Wet Cleaning, Carpet Cleaning |
| พื้นผิวที่แนะนำ | Hard floors, Wood floors, Tiles, Carpets |
| ฟอร์มแฟกเตอร์ | กลม |
| แหล่งพลังงาน | ใช้พลังงานจากแบตเตอรี่ |
| ส่วนประกอบที่รวมอยู่ | หัวไม้ถูพื้น, ถังน้ำ |
10. การรับประกันและการสนับสนุนลูกค้า
Lefant products come with a standard manufacturer's warranty. For detailed warranty terms and conditions, please refer to the warranty card included in your package or visit the official Lefant webเว็บไซต์.
If you encounter any issues or have questions regarding your Lefant M3L Robot Vacuum and Mop, please contact Lefant Customer Support. You can usually find contact information (email, phone, or online chat) on the official Lefant website or through the Lefant app.
Please have your model number (M3L) and purchase information ready when contacting support.