การแนะนำ
This manual provides detailed instructions for the ATTACK SHARK G3 Tri-Mode Wireless Gaming Mouse. Please read this manual thoroughly before use to ensure proper operation and to maximize your experience with the product.
The ATTACK SHARK G3 is a high-performance gaming mouse designed for versatility and precision. It offers three connectivity modes: 2.4GHz wireless, Bluetooth 5.2, and wired USB-C, allowing seamless switching between various devices and setups. Featuring a lightweight design, a high-precision PAW3311 sensor, and programmable buttons, the G3 is engineered for both gaming and productivity.
เนื้อหาแพ็คเกจ
- ATTACK SHARK G3 Wireless Gaming Mouse
- สายชาร์จ/ข้อมูล USB-C
- ตัวรับสัญญาณ USB 2.4GHz
- คู่มือการใช้งาน
สินค้าเกินview
Familiarize yourself with the components of your ATTACK SHARK G3 mouse.

ภาพ: จากบนลงล่าง view of the ATTACK SHARK G3 Wireless Gaming Mouse in Berry Red, showing the left and right click buttons, scroll wheel, and two side buttons on the left.
- ปุ่มคลิกซ้าย: ฟังก์ชันพื้นฐานมาตรฐานของเมาส์
- ปุ่มคลิกขวา: ฟังก์ชันเมาส์รองมาตรฐาน
- ล้อเลื่อน: สำหรับการเลื่อนและฟังก์ชั่นคลิกกลาง
- ปุ่มด้านข้าง (x2): Default to Forward/Backward, programmable via software.
- DPI Button (underside): หมุนเวียนผ่านระดับ DPI ที่ตั้งไว้ล่วงหน้า
- Mode Switch (underside): Toggles between 2.4GHz, Bluetooth, and Wired modes.
- พอร์ต USB-C: สำหรับการเชื่อมต่อแบบมีสายและการชาร์จ
- 2.4GHz USB Receiver Storage: อยู่บริเวณด้านล่างของตัวเมาส์

ภาพ: ภาพตัดปะแสดงasing key features of the G3 mouse, including its 59g ultra-light design, 500mAh battery, PixArt PAW3311 sensor, 25000 DPI capability, Huano Blue Shell Pink Dot Switches, and Tri-mode connectivity.
การตั้งค่า
1. การเชื่อมต่อแบบใช้สาย
- เชื่อมต่อปลาย USB-C ของสายเคเบิลที่ให้มาเข้ากับเมาส์
- เชื่อมต่อปลายสาย USB-A เข้ากับพอร์ต USB ที่ว่างอยู่บนคอมพิวเตอร์ของคุณ
- Ensure the mode switch on the underside of the mouse is set to the "Wired" position.
- The mouse will be recognized by your computer and is ready for use.
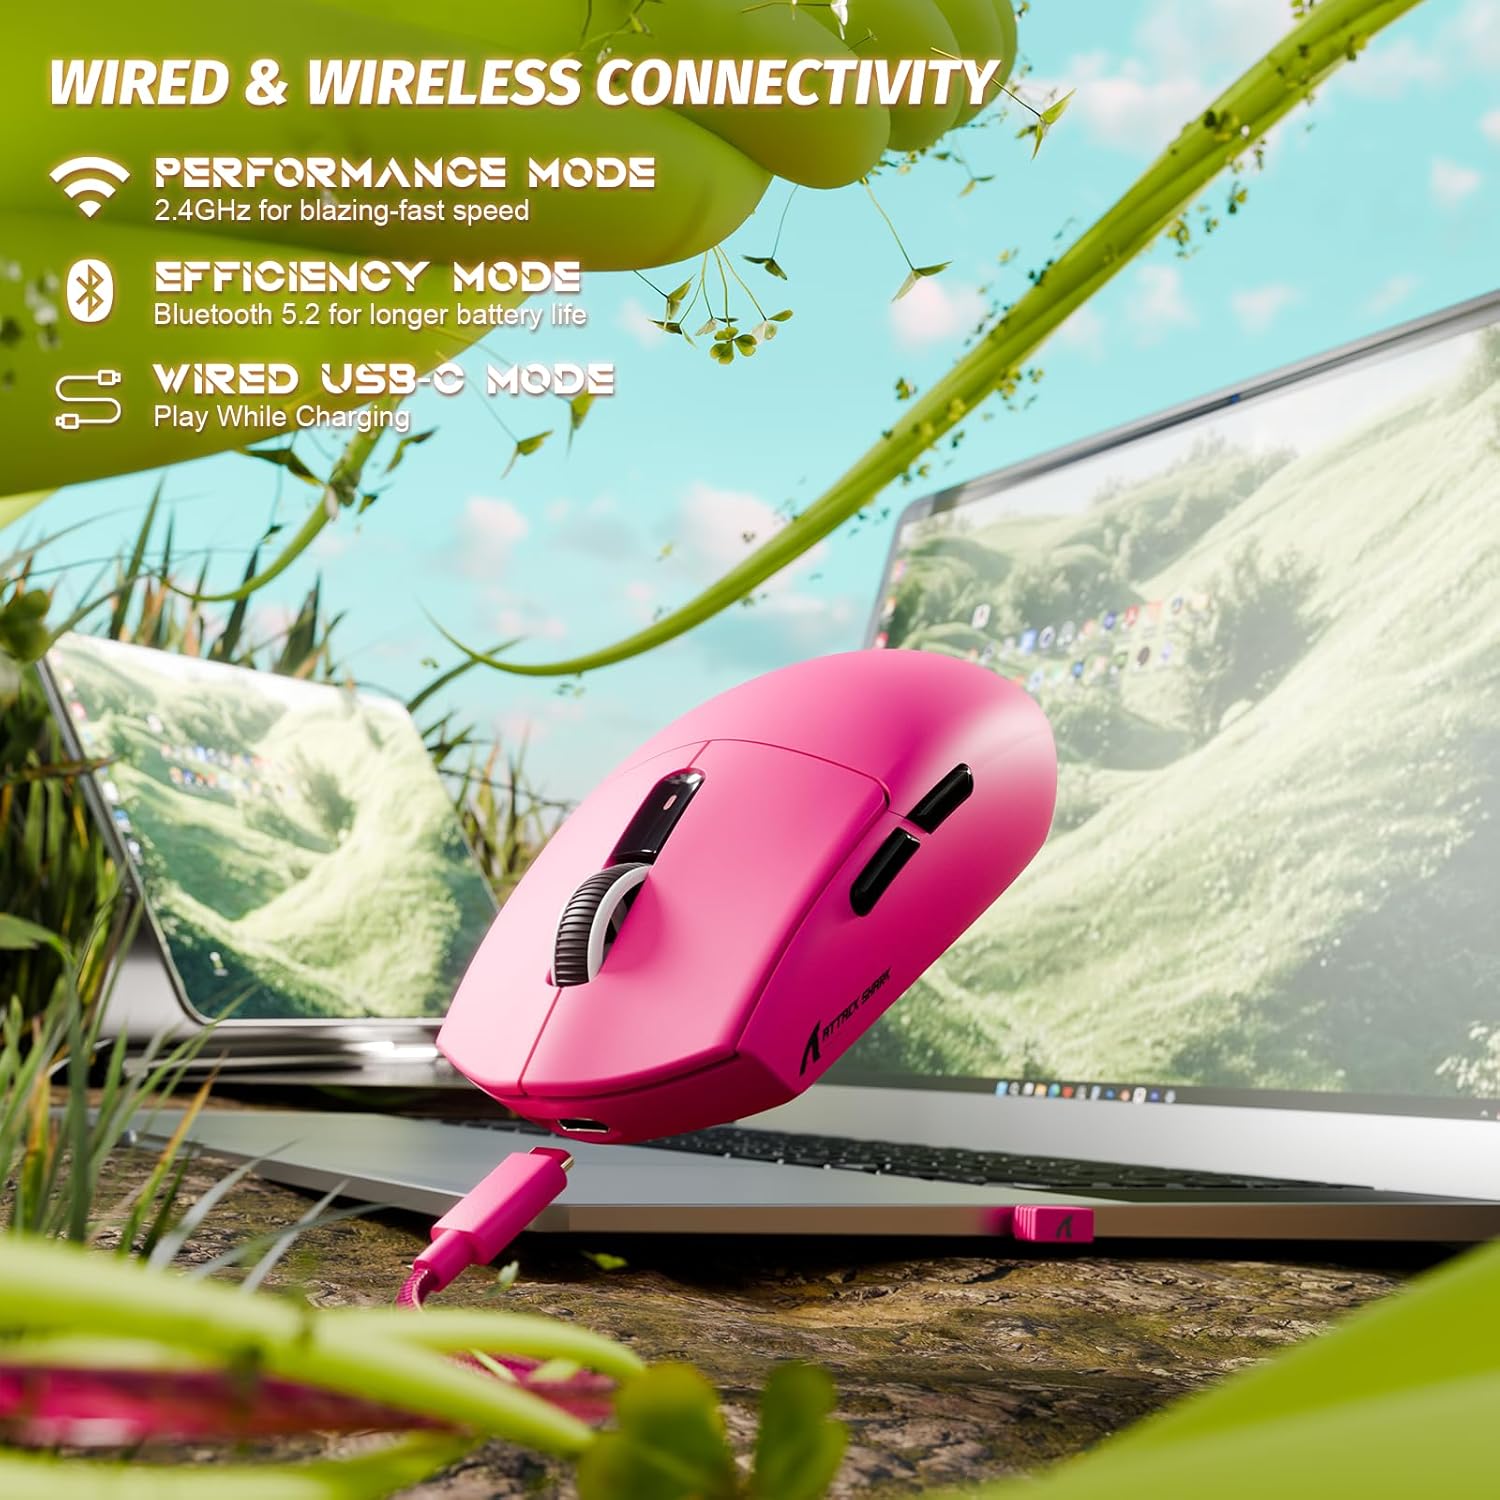
Image: The ATTACK SHARK G3 mouse connected to a laptop via its USB-C cable, illustrating the wired connectivity option.
2. 2.4GHz Wireless Mode Connection
- Locate the 2.4GHz USB receiver stored on the underside of the mouse.
- เสียบตัวรับสัญญาณ USB เข้ากับพอร์ต USB ที่พร้อมใช้งานบนคอมพิวเตอร์ของคุณ
- Set the mode switch on the underside of the mouse to the "2.4G" position.
- The mouse should automatically connect to the receiver. If not, press and hold the DPI button and a side button simultaneously for 3 seconds to initiate pairing.
3. Bluetooth 5.2 Mode Connection
- Set the mode switch on the underside of the mouse to the "BT" (Bluetooth) position.
- The mouse will enter pairing mode, indicated by a blinking LED light.
- บนคอมพิวเตอร์หรืออุปกรณ์ของคุณ ไปที่การตั้งค่าบลูทูธ
- ค้นหา new devices and select "ATTACK SHARK G3" from the list.
- ปฏิบัติตามคำแนะนำบนหน้าจอเพื่อดำเนินการจับคู่ให้เสร็จสมบูรณ์
คำแนะนำการใช้งาน
การปรับ DPI
The ATTACK SHARK G3 features a PAW3311 sensor with adjustable DPI settings. You can cycle through preset DPI levels by pressing the DPI button located on the underside of the mouse. For fine adjustments and custom DPI profiles, use the dedicated driver software.

ภาพ: ภาพระยะใกล้ view of the PixArt PAW3311 sensor inside the mouse, highlighting its capabilities such as 1000Hz polling rate, 25000 DPI max, and 40G acceleration.
ปุ่มและซอฟต์แวร์ที่ตั้งโปรแกรมได้
The G3 mouse includes 5 programmable buttons. To customize button functions, create macros, and adjust settings like polling rate and Lift-Off Distance (LOD), download and install the official ATTACK SHARK driver software from the manufacturer's website. The software allows for personalized configurations to suit your specific needs.

Image: A screenshot of the ATTACK SHARK G3 customization software interface, showing options for mouse settings, DPI settings, parameter settings, macro editing, and personal center.
กำลังชาร์จเมาส์
The mouse is equipped with a built-in 500mAh rechargeable lithium-ion battery. When the battery is low, the LED indicator will signal. Connect the mouse to your computer using the provided USB-C cable to charge. The mouse can be used normally while charging in wired mode.

Image: The ATTACK SHARK G3 mouse in a natural setting, emphasizing its 500mAh battery capacity for extended use.
การซ่อมบำรุง
- การทำความสะอาด: ใช้ผ้านุ่มและแห้งเช็ดทำความสะอาดพื้นผิวของเมาส์ สำหรับคราบสกปรกฝังแน่น ให้เช็ดเบาๆamp สามารถใช้ผ้าได้เพื่อให้แน่ใจว่าไม่มีความชื้นเข้าไปในส่วนประกอบภายใน
- การดูแลเซ็นเซอร์: รักษาเซ็นเซอร์ออปติคัลที่อยู่ใต้เมาส์ให้สะอาดและปราศจากฝุ่นหรือเศษต่างๆ เพื่อให้การติดตามแม่นยำ
- อายุการใช้งานแบตเตอรี่: เพื่อยืดอายุการใช้งานแบตเตอรี่ ควรหลีกเลี่ยงการใช้งานเมาส์จนแบตหมดบ่อยๆ ชาร์จเมาส์เมื่อไฟแสดงสถานะแบตเตอรี่เหลือน้อยปรากฏขึ้น
- พื้นที่จัดเก็บ: เมื่อไม่ได้ใช้งานเป็นเวลานาน ควรเก็บเมาส์ไว้ในที่แห้งและเย็น

Image: An inverted view of the ATTACK SHARK G3 mouse, showcasing its double-layer mouse feet for smooth gliding and stability.
การแก้ไขปัญหา
- เมาส์ไม่ตอบสนอง:
- ตรวจสอบให้แน่ใจว่าเมาส์ได้รับการชาร์จแล้ว
- Check the mode switch (2.4G, BT, Wired) is set correctly.
- สำหรับความถี่ 2.4GHz โปรดตรวจสอบให้แน่ใจว่าตัวรับสัญญาณ USB เสียบแน่นดีแล้ว ลองใช้พอร์ต USB อื่นดู
- สำหรับการใช้งานผ่านบลูทูธ โปรดตรวจสอบให้แน่ใจว่าได้เปิดใช้งานบลูทูธบนอุปกรณ์ของคุณและได้ทำการจับคู่เมาส์แล้ว
- Try connecting in wired mode to confirm functionality.
- การติดตามที่ไม่แม่นยำ:
- ทำความสะอาดเซ็นเซอร์ออปติคัลที่อยู่ใต้เมาส์
- ตรวจสอบให้แน่ใจว่าคุณใช้เมาส์บนพื้นผิวที่เหมาะสม (เช่น แผ่นรองเมาส์)
- Adjust DPI settings via the DPI button or software.
- ปัญหาการเชื่อมต่อ:
- ขยับเมาส์ให้ใกล้กับตัวรับสัญญาณ/อุปกรณ์มากขึ้นเพื่อลดการรบกวน
- Avoid using the 2.4GHz receiver near other wireless devices that may cause interference.
- Re-pair the mouse in 2.4GHz or Bluetooth mode if connection is lost.
- ซอฟต์แวร์ไม่ตรวจจับเมาส์:
- Ensure the mouse is connected in wired or 2.4GHz mode (Bluetooth may not be supported by all software).
- รีสตาร์ทซอฟต์แวร์และ/หรือคอมพิวเตอร์ของคุณ
- ติดตั้งซอฟต์แวร์ไดรเวอร์ใหม่
ข้อมูลจำเพาะ
| คุณสมบัติ | รายละเอียด |
|---|---|
| แบบอย่าง | G3 |
| การเชื่อมต่อ | 2.4GHz ไร้สาย, บลูทูธ 5.2, USB-C แบบมีสาย |
| เซ็นเซอร์ | เซ็นเซอร์ออปติคัล PixArt PAW3311 |
| ช่วง DPI | 800 - 25,000 DPI (ปรับได้) |
| ความเร็วในการติดตาม | 400 IPS |
| การเร่งความเร็ว | 40จี |
| อัตราการสำรวจความคิดเห็น | 1000Hz (Wired/2.4GHz) |
| ปุ่ม | 5 ปุ่มตั้งโปรแกรมได้ |
| สวิตซ์ | Huano Blue Shell Pink Dot Switches (80 million clicks) |
| แบตเตอรี่ | แบตเตอรี่ลิเธียมไอออนแบบชาร์จได้ 500mAh |
| น้ำหนักเมาส์ | ประมาณ 59 กรัม (2.08 ออนซ์) |
| ความเข้ากันได้ | PC, Mac (Windows/macOS) |
การรับประกันและการสนับสนุน
ATTACK SHARK products are designed and manufactured to the highest quality standards. For warranty information and technical support, please refer to the official ATTACK SHARK webหรือติดต่อฝ่ายบริการลูกค้าโดยตรง โปรดเก็บหลักฐานการซื้อไว้เพื่อใช้ในการเคลมประกัน
For further assistance, visit the official ATTACK SHARK store: ร้านค้า ATTACK SHARK