
Netzu 6208D
คู่มือการใช้งานนาฬิกาปลุกดิจิตอล Netzu
รุ่น : 6208D
Brand: Netzu
การแนะนำ
Thank you for choosing the Netzu Digital Alarm Clock. This clock features a vibrant RGB display, dual alarms, adjustable brightness, and a loud alarm option, designed to provide a reliable and customizable timekeeping experience. This manual will guide you through the setup, operation, and maintenance of your new alarm clock.

ภาพ: ด้านหน้า view of the Netzu Digital Alarm Clock displaying the time in vibrant RGB colors.
ข้อมูลด้านความปลอดภัย
- อย่าให้เครื่องสัมผัสกับอุณหภูมิที่สูงหรือต่ำเกินไป แสงแดดโดยตรง หรือความชื้นสูง
- เก็บอุปกรณ์ให้ห่างจากน้ำหรือของเหลวอื่นๆ
- อย่าพยายามถอดประกอบหรือซ่อมแซมอุปกรณ์ด้วยตนเอง แนะนำให้ส่งช่างผู้ชำนาญการไปรับบริการทั้งหมด
- ใช้เฉพาะอะแดปเตอร์แปลงไฟและสายเคเบิลที่ให้มาเท่านั้น
- Ensure proper ventilation around the clock.
เนื้อหาแพ็คเกจ
กรุณาตรวจสอบแพ็คเกจสำหรับรายการต่อไปนี้:
- Netzu Digital Alarm Clock x 1
- อะแดปเตอร์แปลงไฟ x 1
- สายไฟ x 1
- คู่มือการใช้งาน x 1

Image: Illustration showing the alarm clock, power cable, adapter, and manual, indicating items included in the package.
สินค้าเกินview
Familiarize yourself with the main components and controls of your Netzu Digital Alarm Clock.

Image: Visual representation highlighting key features such as loud sound, 4-level brightness, dual alarm clocks, 12/24h time format, snooze function, and battery memory.
การควบคุมและปุ่ม:
- ปุ่มเลื่อน: Located on top, used to activate snooze or turn off display.
- ปุ่มตั้งเวลา: On the side, used to enter time setting mode.
- ALARM 1/2 Buttons: On the side, used to set Alarm 1 and Alarm 2.
- ปุ่ม +/-: On the side, used to adjust values (time, brightness, volume).
- ปุ่ม RGB: On the side, used to cycle through RGB color modes.
การตั้งค่า
1. การเชื่อมต่อไฟฟ้า:
Connect the provided power adapter to the DC input port on the back of the alarm clock, then plug the adapter into a standard wall outlet. The display will light up.

Image: The alarm clock connected to a wall outlet via its power adapter and cable, illustrating the plug-in functionality.
2. Battery Backup Installation (Optional but Recommended):
For memory function during power outages, install 2 x AAA batteries (not included) into the battery compartment on the bottom of the clock. This ensures that time and alarm settings are retained even if the main power is disconnected. The display will not be lit during battery backup mode, but the internal clock and alarm settings will remain active.

Image: Depiction of the alarm clock with two AAA batteries, explaining how battery backup maintains time and alarm settings during power failures.
คำแนะนำการใช้งาน
1. การตั้งเวลา:
- กดปุ่มค้างไว้ ตั้งเวลา กดปุ่มจนกว่าตัวเลขชั่วโมงจะกะพริบ
- ใช้ - ปุ่มเพื่อปรับชั่วโมง
- กด ตั้งเวลา กดอีกครั้งเพื่อยืนยันชั่วโมง แล้วเปลี่ยนไปตั้งค่านาที ตัวเลขนาทีจะกะพริบ
- ใช้ - ปุ่มปรับนาที
- กด ตั้งเวลา again to save the time and exit time setting mode.
รูปแบบเวลา 12 ชั่วโมง/24 ชั่วโมง:
While in time setting mode (hour or minute flashing), press the ตั้งเวลา button repeatedly to toggle between 12-hour (with AM/PM indicator) and 24-hour formats.
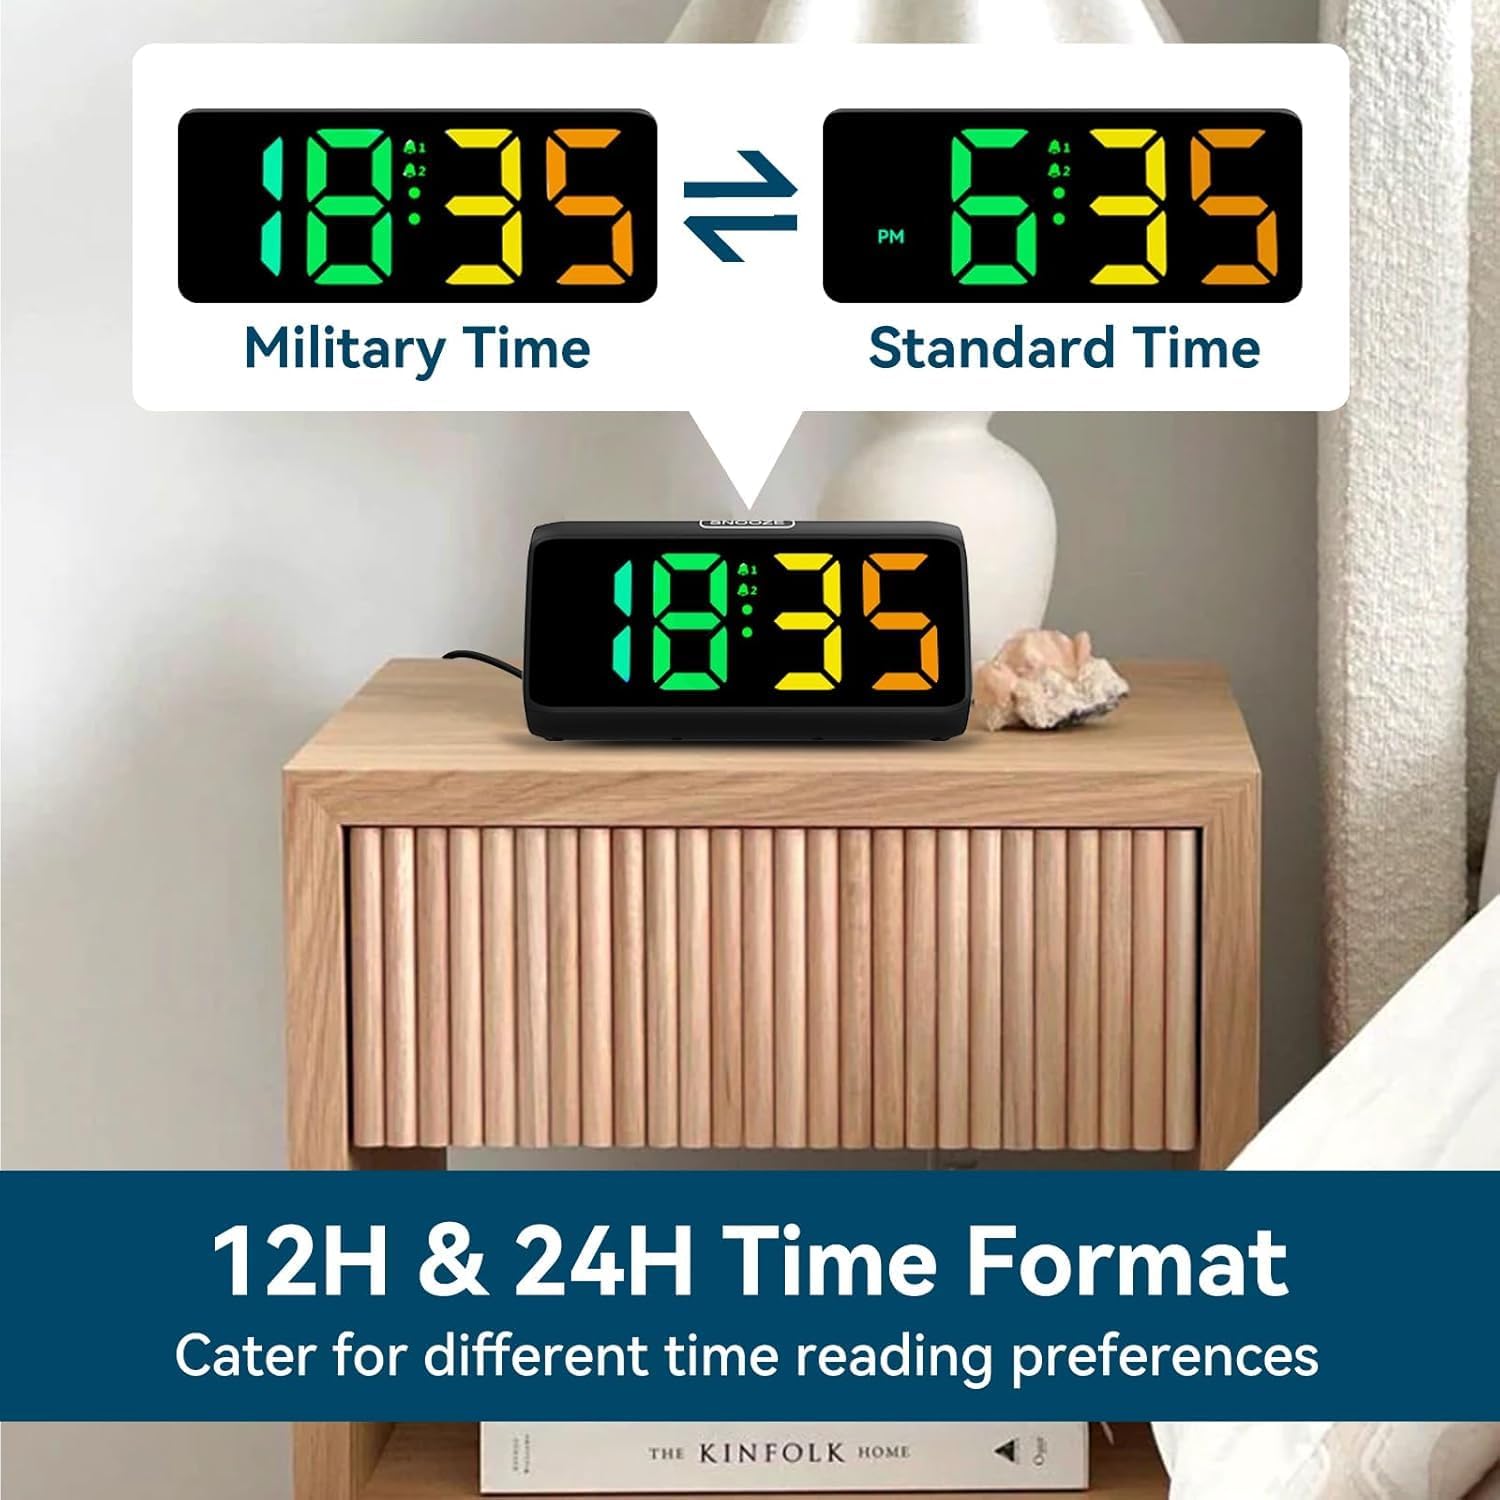
Image: Comparison of the alarm clock display showing time in 12-hour format (with AM/PM) and 24-hour (military) format.
2. Setting Alarms (Alarm 1 & Alarm 2):
นาฬิกาเรือนนี้สามารถตั้งปลุกได้สองระบบแยกอิสระ
- กดปุ่มค้างไว้ นาฬิกาปลุก 1 ปุ่ม (หรือ นาฬิกาปลุก 2 button) until the alarm hour digits flash.
- ใช้ - ปุ่มเพื่อปรับชั่วโมงการปลุก
- กดปุ่ม นาฬิกาปลุก 1 (หรือ นาฬิกาปลุก 2) button again to confirm the hour and move to minute setting. The minute digits will flash.
- ใช้ - ปุ่มเพื่อปรับนาทีการปลุก
- กดปุ่ม นาฬิกาปลุก 1 (หรือ นาฬิกาปลุก 2) button again to save the alarm time.
- After setting the time, the alarm icon (bell 1 or bell 2) will appear on the display, indicating the alarm is active.
- To turn an alarm ON/OFF, short press the corresponding นาฬิกาปลุก 1 or นาฬิกาปลุก 2 button. The bell icon will appear/disappear.
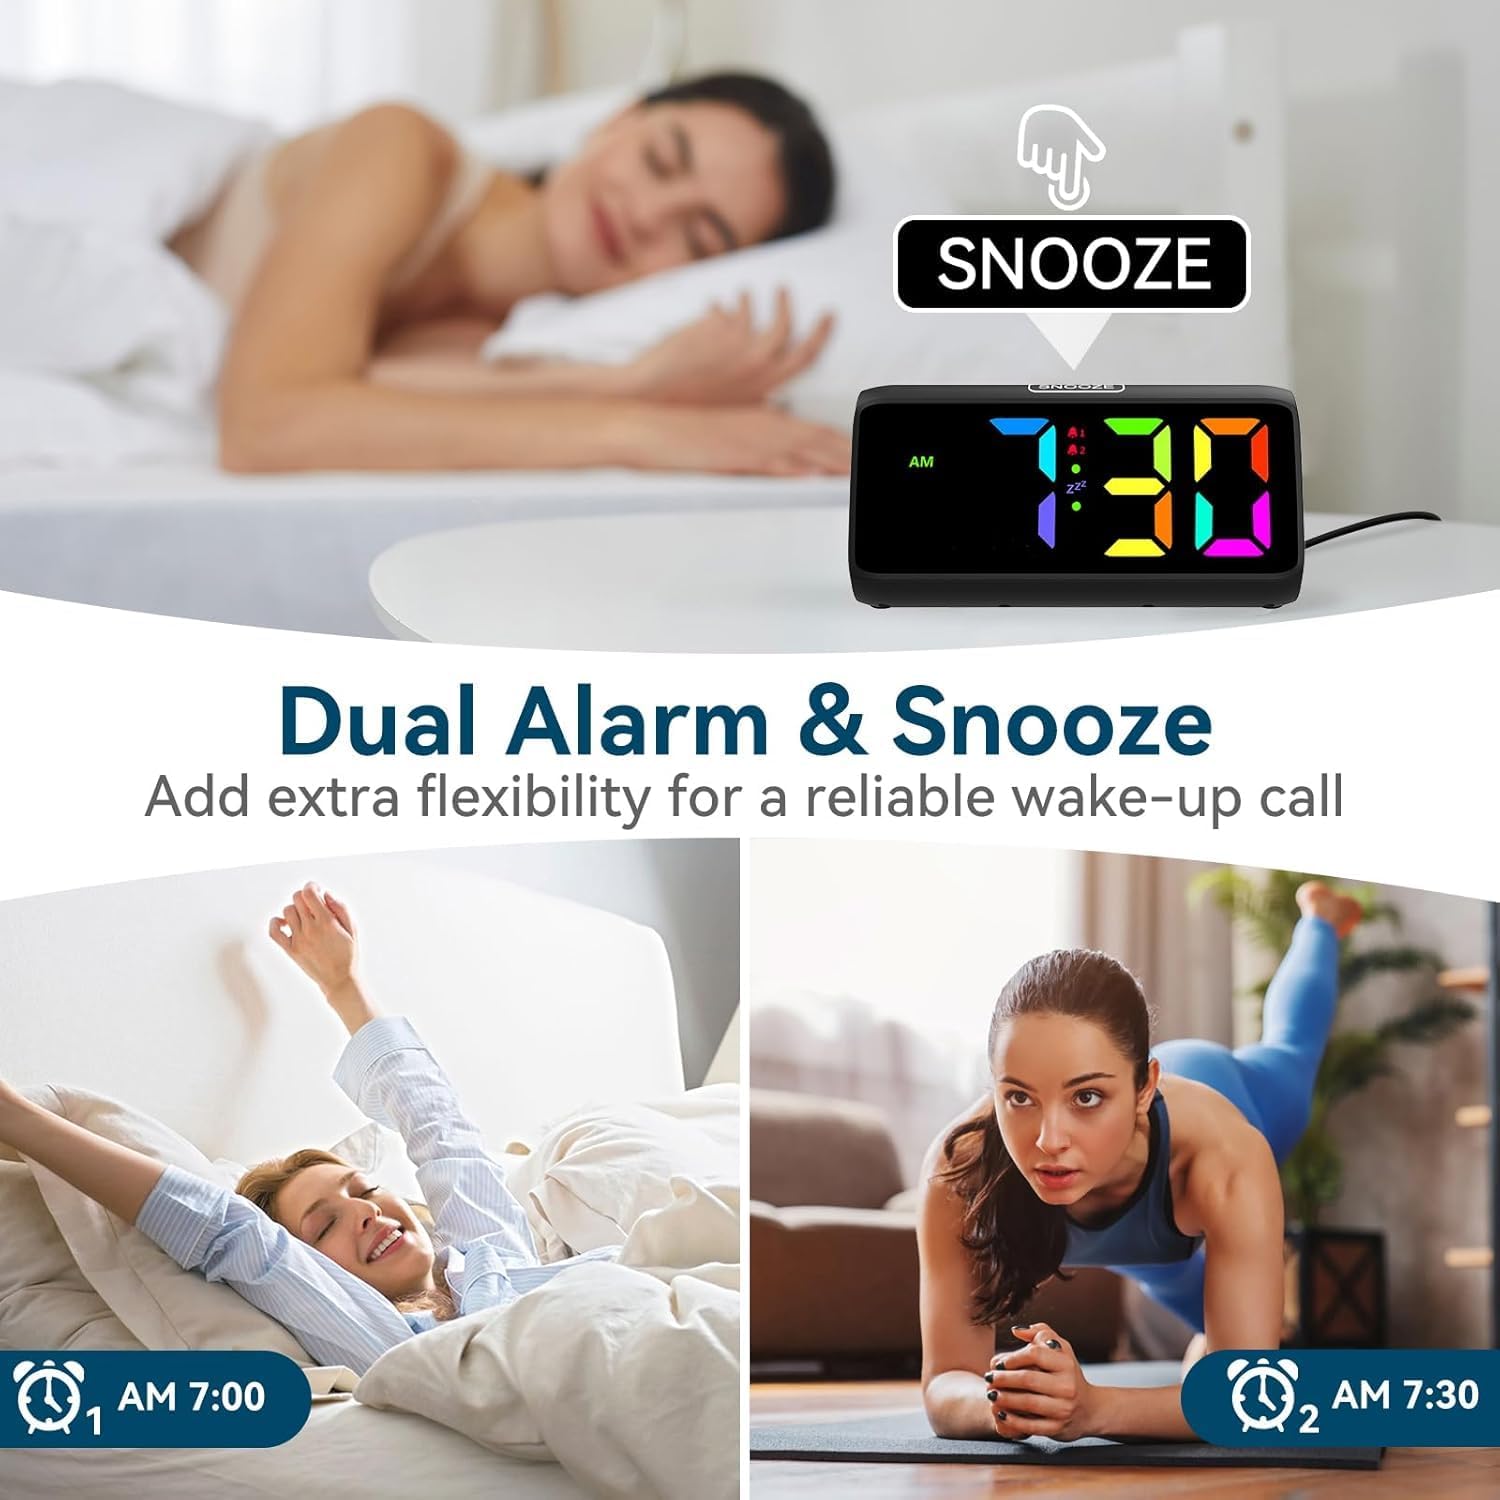
Image: Visual demonstrating the dual alarm functionality, showing two different alarm times and the snooze button.
3. Adjusting Alarm Volume:
When an alarm is sounding, press the - buttons to cycle through the 4 available volume levels. The clock can reach up to 115 decibels.

Image: Graphic illustrating the alarm clock's sound output, showing volume levels from 85dB to 115dB.
4. ฟังก์ชั่นการงีบหลับ:
When the alarm sounds, tap the large เลื่อน button on top of the clock to activate the snooze function. The alarm will pause for 9 minutes and then sound again. The 'Zz' icon will appear on the display.
To turn off the alarm completely, press any other button (e.g., ALARM 1/2, TIME SET) or let the alarm sound for its full duration (typically 60 minutes) without snoozing.

Image: A person reaching for the snooze button on the alarm clock, demonstrating the ease of activating the 9-minute snooze.
5. การปรับความสว่างของจอภาพ:
กดสั้น ๆ เลื่อน button to cycle through 5 brightness levels (Lv.4, Lv.3, Lv.2, Lv.1, OFF). Choose the level that suits your preference, including turning the display completely off.

Image: Visual comparison of the alarm clock display at different brightness levels (Lv.4 to OFF), showing how the screen can be adjusted from bright to completely dark.
6. Changing RGB Colors/Modes:
กดปุ่ม อาร์จีบี button to cycle through the 8 available RGB color modes. These include various solid colors and a dynamic color-changing mode, allowing for personalized visual effects.

Image: A grid displaying 8 different RGB color options for the alarm clock's screen, showcasing the customizable visual experience.
การซ่อมบำรุง
- การทำความสะอาด: Use a soft, dry cloth to wipe the surface of the clock. Do not use abrasive cleaners or solvents.
- พื้นที่จัดเก็บ: หากจะเก็บนาฬิกาไว้เป็นเวลานาน ควรนำแบตเตอรี่ AAA ออกเพื่อป้องกันการรั่วไหล
- สิ่งแวดล้อม: Keep the clock in a clean, dry environment, away from dust and moisture.
การแก้ไขปัญหา
| ปัญหา | สาเหตุที่เป็นไปได้ | สารละลาย |
|---|---|---|
| หน้าจอแสดงเวลาปิดอยู่ | No power connection or display is set to OFF. | Ensure the power adapter is securely plugged in. Press the SNOOZE button to cycle through brightness levels and turn the display ON. |
| สัญญาณเตือนภัยไม่ดัง | Alarm is not set or is turned off. Volume is too low. | Check if the alarm icon is displayed. If not, set the alarm. Increase the alarm volume when it is sounding. |
| เวลา/การตั้งค่าจะถูกรีเซ็ตหลังจากไฟดับtage. | No AAA batteries installed for backup. | Install 2 x AAA batteries (not included) for memory retention during power interruptions. |
| ปุ่มต่างๆ ไม่ตอบสนอง | ซอฟต์แวร์มีปัญหาชั่วคราว | Unplug the power adapter, remove backup batteries (if installed), wait 30 seconds, then reconnect power. |
ข้อมูลจำเพาะ
- ยี่ห้อ: เน็ตซึ
- หมายเลขรุ่น: 6208ดี
- สี: สีดำ
- ขนาดสินค้า : 15.8 x 3.81 x 7.2 ซม.
- น้ำหนักสินค้า: 280 กรัม
- วัสดุ: พลาสติก
- ประเภทจอภาพ: ดิจิตอล
- คุณสมบัติพิเศษ: Adjustable Brightness, Adjustable Volume, Alarm, Loud Alarm, Snooze, RGB Display
- แหล่งพลังงาน: Plug-in (AC adapter included)
- พลังงานสำรอง: 2 x AAA Batteries (not included) for memory function
การรับประกันและการสนับสนุน
For warranty information or technical support, please refer to the contact details provided on the product packaging or visit the official Netzu webไซต์นี้ โปรดเก็บใบเสร็จรับเงินที่ซื้อไว้เพื่อใช้เรียกร้องการรับประกัน
หากต้องการความช่วยเหลือเพิ่มเติม คุณสามารถติดต่อผู้ขายโดยตรงผ่านแพลตฟอร์มที่คุณซื้อสินค้าได้เช่นกัน
Ask a question about this manual
Ask about setup, troubleshooting, compatibility, parts, safety, or missing instructions. Manuals+ will review the question and use this page’s manual context to help answer it.