1. บทนำ
This manual provides detailed instructions for the installation, operation, and maintenance of your Petokix V1 1080P Mini Car Dashboard Camera. Please read this manual thoroughly before using the device to ensure proper functionality and safety.
2. อะไรอยู่ในกล่อง
ตรวจสอบว่ามีรายการทั้งหมดอยู่ในแพ็คเกจ:
- V1 แดชแคม
- การ์ด microSD 64GB
- สายชาร์จ USB
- ACC Charging Cable (Hardwire Kit)
- คู่มือการใช้งาน
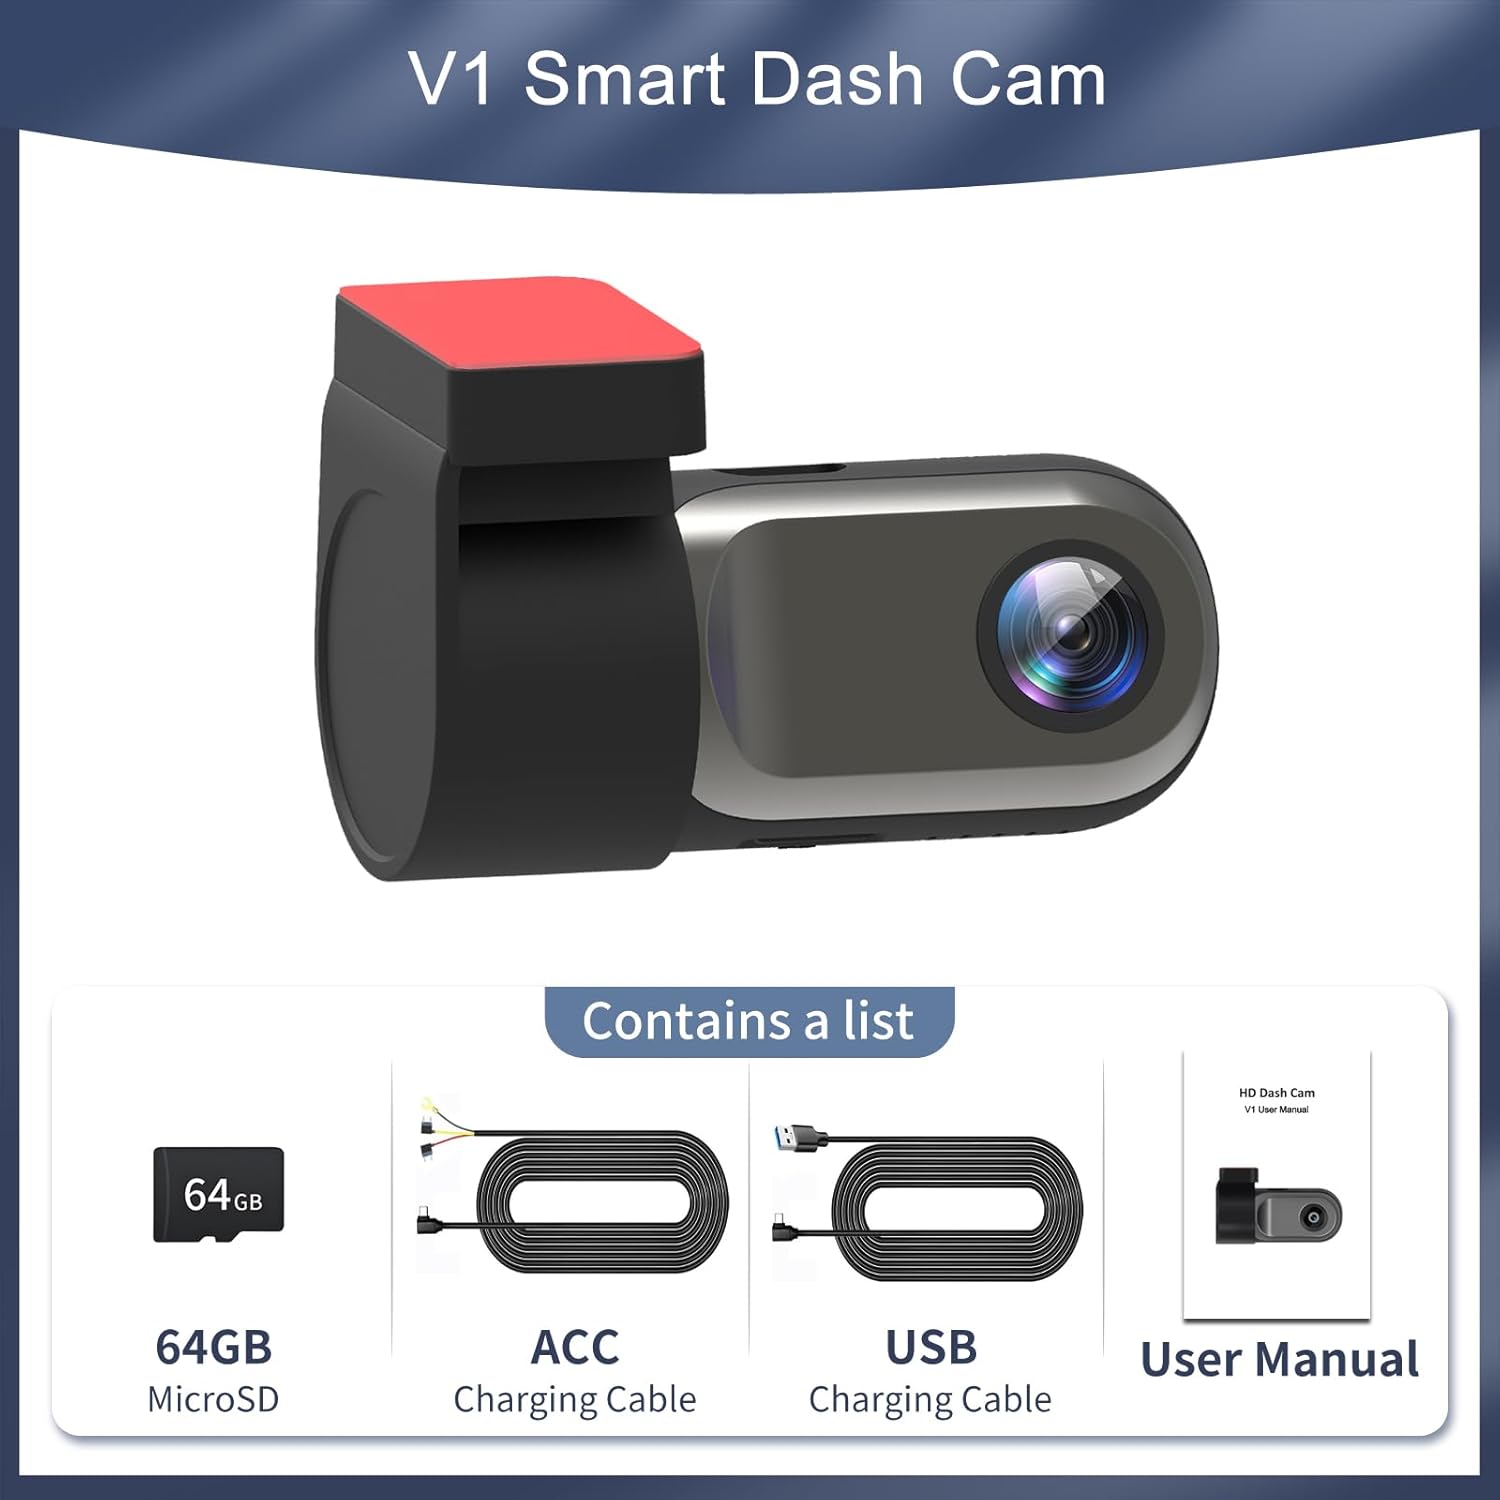
Figure 2.1: Package Contents. The image displays the Petokix V1 Dash Cam, a 64GB microSD card, a USB charging cable, an ACC charging cable (hardwire kit), and the user manual.
3. สินค้าหมดview
The Petokix V1 is a compact 1080P Full HD car dashboard camera designed for discreet installation and reliable recording. It features a heat-resistant metal shell, adjustable camera angle, and WiFi connectivity for app control.
คุณสมบัติหลัก:
- บันทึกวิดีโอความละเอียด Full HD 1080P: Captures clear video at 1920x1080P resolution.
- เลนส์มุมกว้าง 120°: Provides broad road coverage.
- มุมกล้องที่ปรับได้: Allows for optimal positioning.
- Night Vision & WDR: Enhances clarity in low-light conditions.
- การควบคุมผ่านแอป WiFi: View อยู่ footage, download, and manage settings via a smartphone app.
- การบันทึกแบบวนซ้ำ: เขียนทับเก่าโดยอัตโนมัติ fileเมื่อเมมโมรี่การ์ดเต็ม
- จีเซ็นเซอร์: Detects collisions and locks current video fileเพื่อป้องกันการเขียนทับข้อมูล
- โหมดจอดรถตลอด 24 ชั่วโมง: Records motion or impacts when the vehicle is parked (requires ACC hardwire kit).
- Compact & Hidden Design: Small form factor (2.9"x1.4"x1.8") for discreet placement behind the rearview กระจกเงา.
- โครงสร้างทนความร้อน: Durable ABS plastic and metal shell for stable operation in various temperatures.
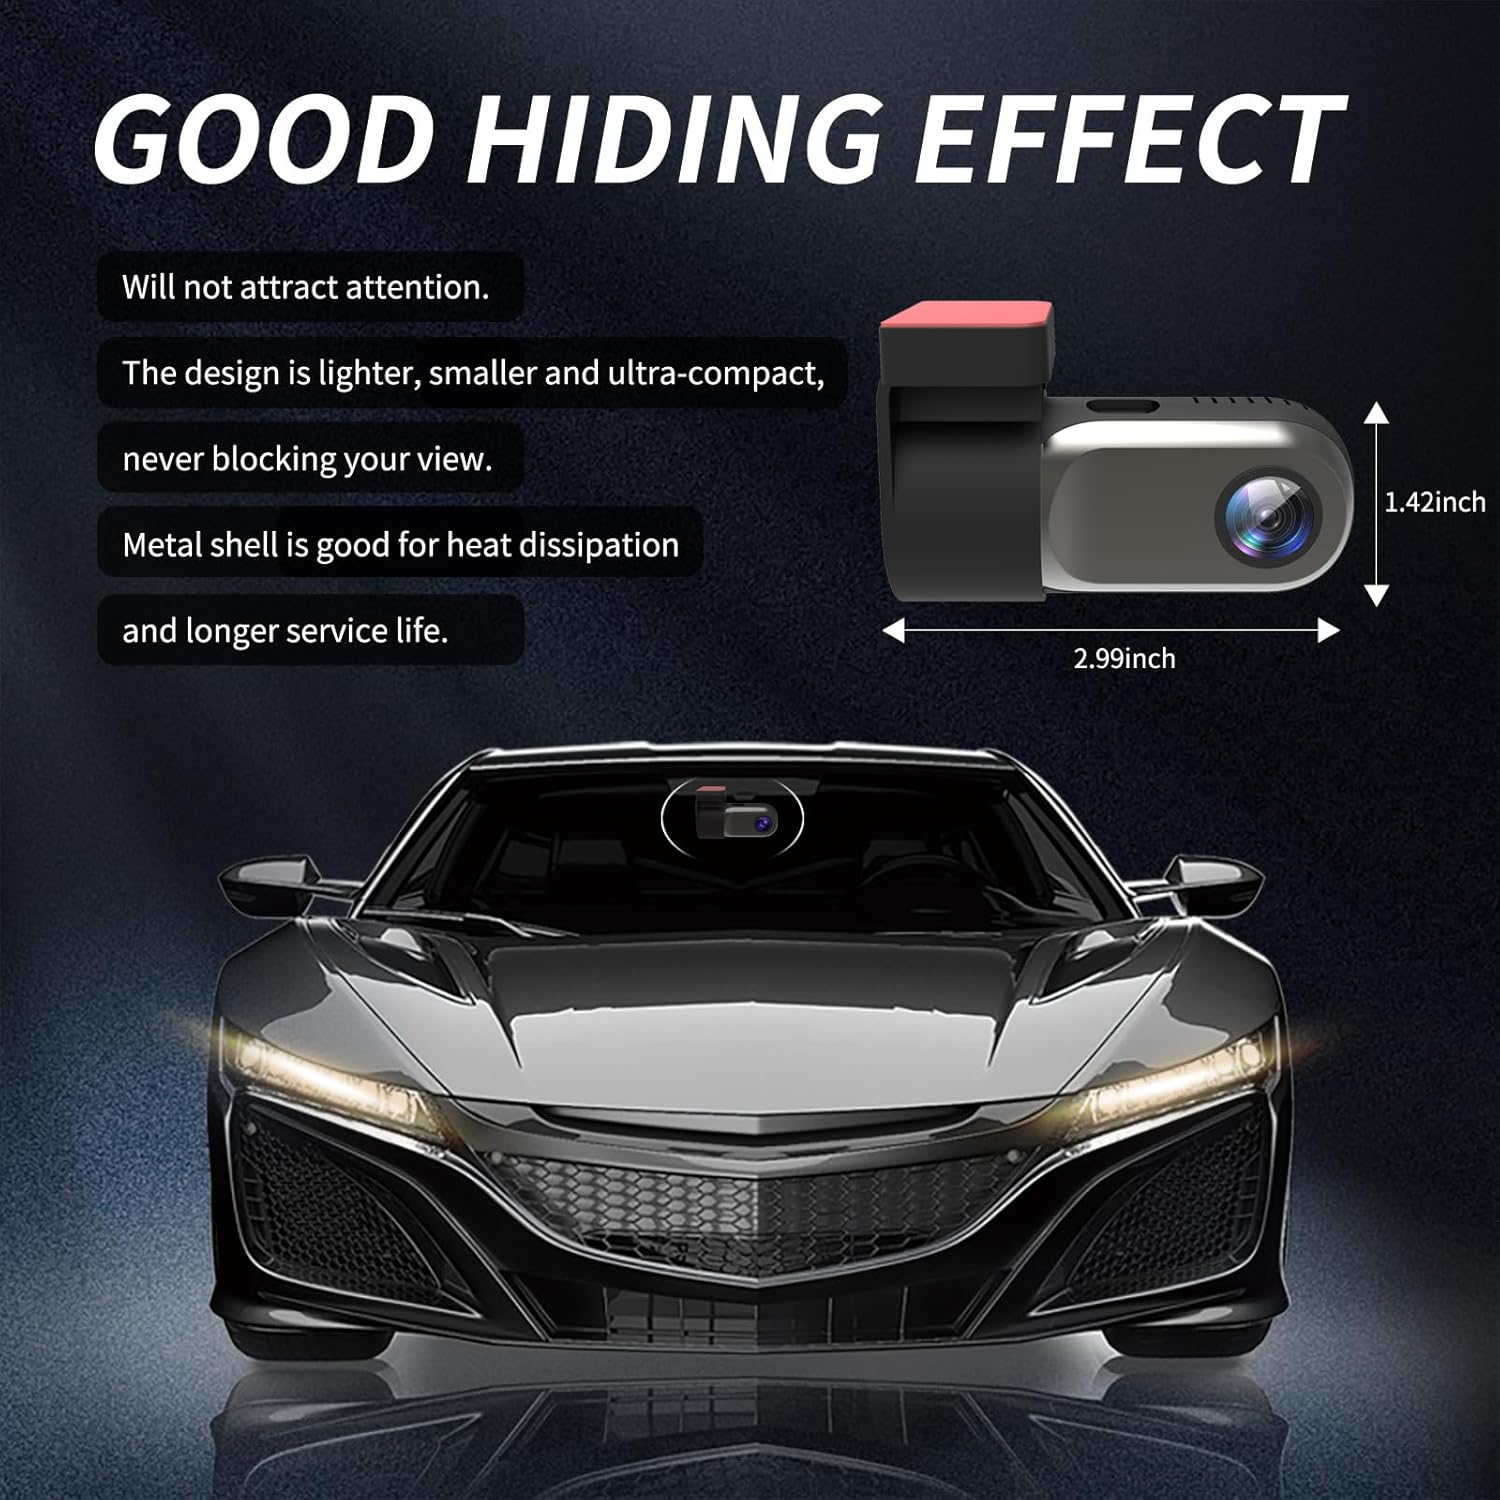
Figure 3.1: Compact Design. The image illustrates the small dimensions of the dash cam, highlighting its ability to be discreetly hidden.

Figure 3.2: Adjustable Lens. The camera lens can rotate 360 degrees, allowing for flexible recording angles.
4. การตั้งค่าและการติดตั้ง
การติดตั้งการ์ด SD 4.1 ตัว
- Locate the microSD card slot on the dash cam.
- Insert the provided 64GB microSD card into the slot until it clicks into place. Ensure the card is inserted correctly.
- If using a different microSD card (up to 128GB supported), ensure it is a high-speed Class 10 or U3 card and format it within the app or on a computer before first use.
Video 4.1: Petokix V1 Dash Cam Overview and SD Card Insertion. This video demonstrates the physical features of the dash cam, including how to insert the microSD card, and provides a general overview ของความสามารถของตน
4.2 การติดตั้ง Dash Cam
- ทำความสะอาดบริเวณกระจกหน้ารถที่คุณต้องการติดตั้งกล้องติดรถยนต์ ตรวจสอบให้แน่ใจว่าปราศจากฝุ่นและคราบไขมัน
- ลอกฟิล์มป้องกันออกจากแผ่นกาวบนตัวยึด
- Attach the dash cam to the windshield, ideally behind the rearview กระจก เพื่อไม่ให้บดบังทัศนวิสัยของคุณ view. Apply firm pressure for a few seconds to ensure a secure bond.
- Adjust the camera lens angle as needed. The lens can rotate 360 degrees for optimal recording coverage.
4.3 การเชื่อมต่อสายไฟ
The Petokix V1 Dash Cam offers two power connection methods:
- USB Installation (Driving Mode): Connect the USB Charging Cable to the dash cam and plug the other end into a car USB port or cigarette lighter adapter. The camera will power on and record when the vehicle is running and turn off when the vehicle is off.
- ACC Hardwire Kit Installation (24/7 Parking Mode): Use the ACC Charging Cable to connect the dash cam directly to your car's fuse box. This enables the 24/7 parking monitoring feature. Consult a professional if you are unsure about hardwiring.
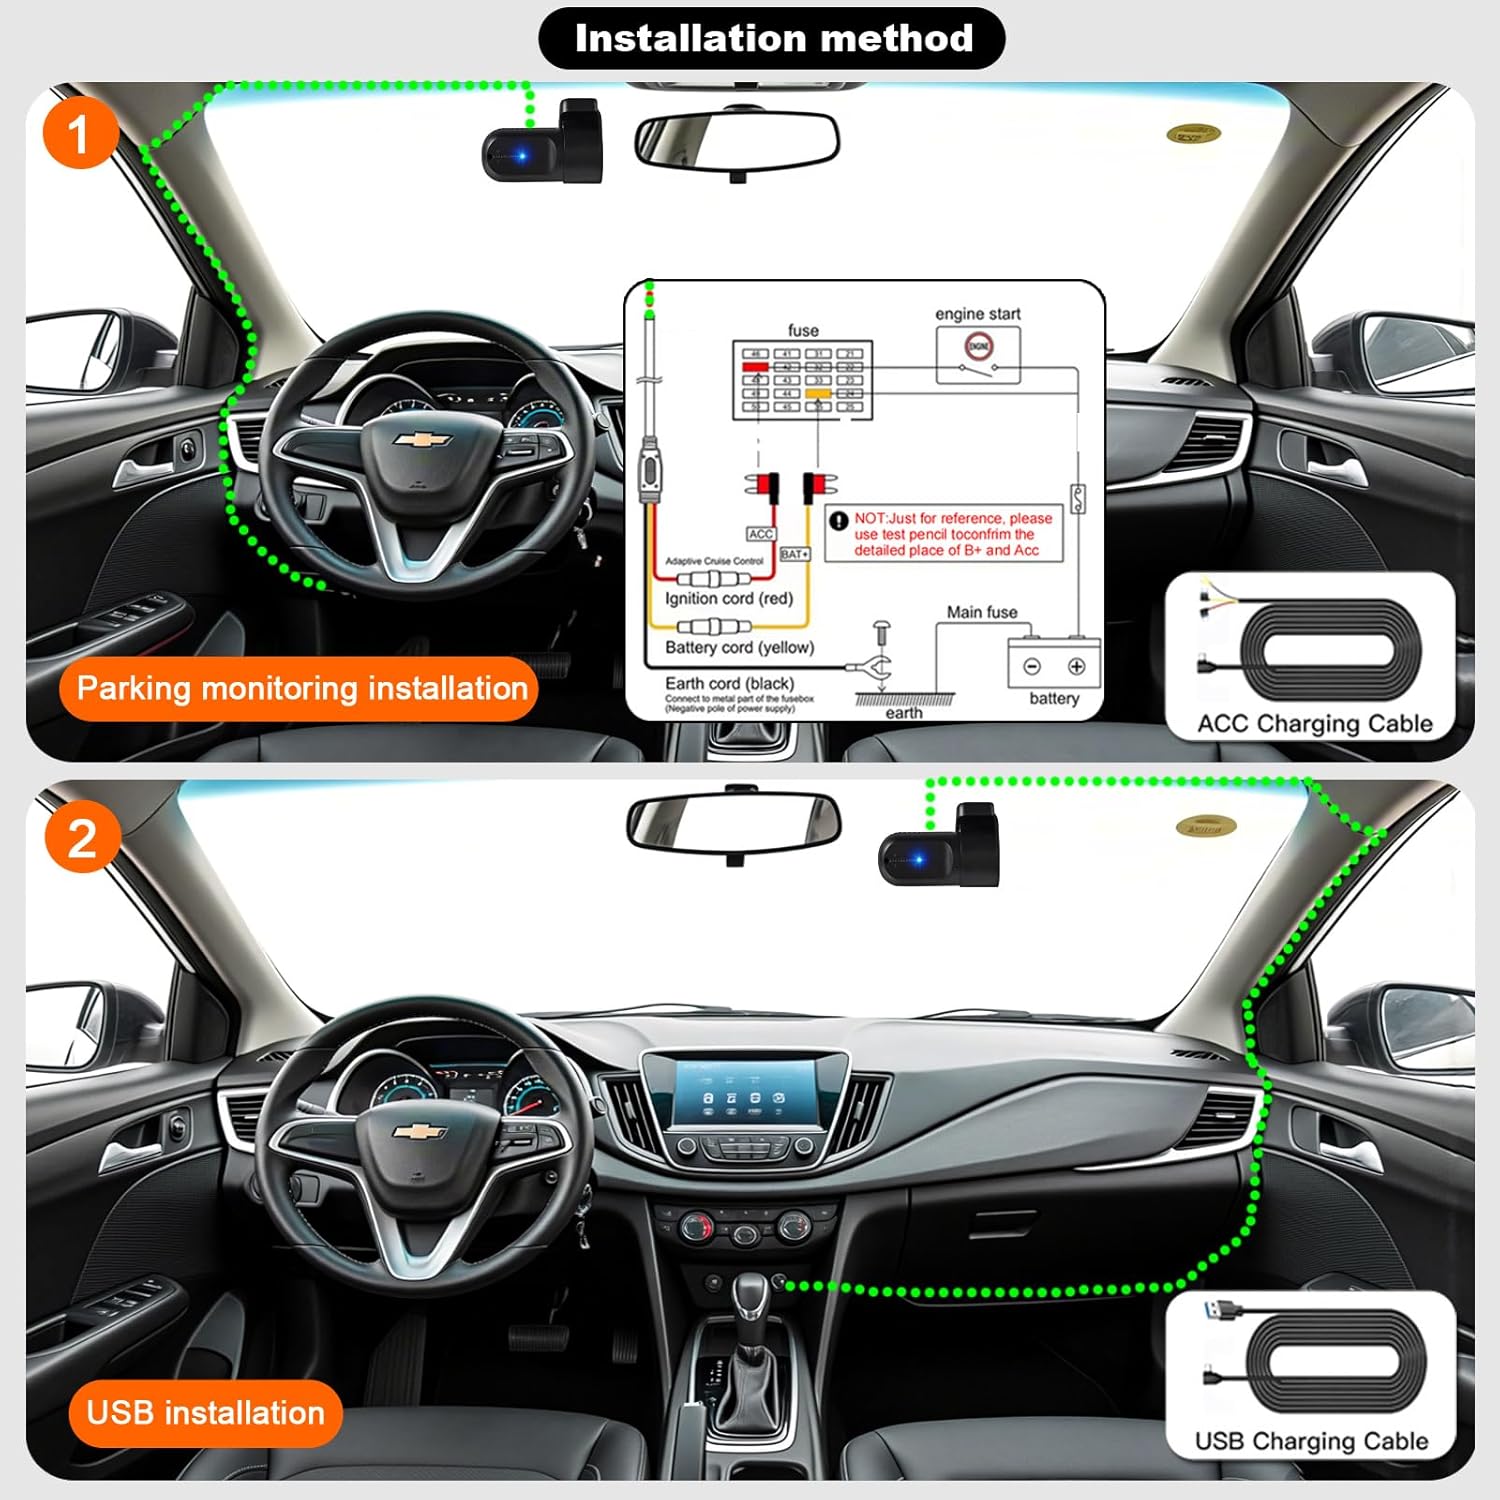
Figure 4.1: Installation Methods. This diagram illustrates how to install the dash cam using either the ACC hardwire kit for parking monitoring or the USB charging cable for standard operation.
5. App Installation and WiFi Connection
The Petokix V1 Dash Cam connects to your smartphone via WiFi for live viewing, video playback, and settings management.
5.1 ดาวน์โหลดแอป
Download the "CarDV" or "Vidure" app from your smartphone's app store (iOS App Store or Google Play Store).
5.2 การเชื่อมต่อผ่าน WiFi
- ตรวจสอบให้แน่ใจว่ากล้องติดรถยนต์เปิดใช้งานอยู่
- On your smartphone, go to WiFi settings.
- Look for a WiFi network named "CarDV_XXXX" (where XXXX is a unique identifier) and connect to it.
- Open the downloaded app. The app should automatically detect and connect to the dash cam.
- เมื่อเชื่อมต่อแล้ว คุณสามารถ view อยู่ footage เข้าถึงวิดีโอที่บันทึกไว้ และปรับการตั้งค่ากล้อง

Figure 5.1: WiFi App Control. This image displays the smartphone app interface, demonstrating real-time viewing and control over the dash cam via WiFi.
Video 5.1: Petokix Dash Cam App Connection. This video demonstrates the process of connecting the dash cam to a smartphone via WiFi and accessing live footage ผ่านแอพ
6. คู่มือการใช้งาน
6.1 การบันทึกอัตโนมัติ
Once powered on, the dash cam will automatically begin recording. The recording will stop when the power is disconnected (e.g., when the car engine is turned off, unless 24/7 parking mode is active).
6.2 การบันทึกแบบวนซ้ำ
The dash cam continuously records video in short segments (e.g., 1, 3, or 5 minutes). When the microSD card is full, the oldest unlocked video fileไฟล์ s จะถูกบันทึกทับโดยอัตโนมัติด้วยไฟล์บันทึกใหม่ ซึ่งช่วยให้สามารถบันทึกได้อย่างต่อเนื่องโดยไม่ต้องมีการแทรกแซงด้วยตนเอง
6.3 เซ็นเซอร์ G (ระบบล็อคฉุกเฉิน)
เซ็นเซอร์ G ในตัวจะตรวจจับแรงกระแทกหรือการชนอย่างกะทันหัน เมื่อตรวจจับได้ ระบบจะล็อกส่วนวิดีโอปัจจุบันโดยอัตโนมัติ ป้องกันไม่ให้ถูกบันทึกทับด้วยการบันทึกแบบวนซ้ำ ส่วนที่ล็อกไว้เหล่านี้ files are stored in a separate folder on the microSD card.

Figure 6.1: G-Sensor Emergency Lock. This image visually represents how the G-sensor detects impacts and locks video footagเพื่อป้องกันไม่ให้ถูกเขียนทับ
6.4 โหมดจอดรถตลอด 24 ชั่วโมง
When the dash cam is connected using the ACC hardwire kit, it can monitor your vehicle even when parked. If motion is detected or an impact occurs, the camera will automatically start recording. This feature provides continuous surveillance for theft prevention and vandalism monitoring.

Figure 6.2: 24-Hour Parking Monitoring. This image illustrates the dash cam's ability to monitor the vehicle continuously while parked, accessible via the mobile app.
6.5 ระบบมองเห็นกลางคืนและ WDR
The dash cam is equipped with enhanced night vision capabilities and Wide Dynamic Range (WDR) technology. These features work together to improve video clarity and detail in low-light conditions, ensuring license plates and road signs are visible both day and night.

Figure 6.3: WDR Technology. This image demonstrates the improvement in video quality when Wide Dynamic Range (WDR) is enabled, providing better exposure balance in challenging lighting conditions.

Figure 6.4: 1080P Video Clarity. This image highlights the superior detail captured at 1080P resolution compared to 720P, particularly for identifying elements like license plates.
7. การบำรุงรักษา
7.1 การฟอร์แมตการ์ด MicroSD
It is recommended to format the microSD card regularly (e.g., once a month) to maintain optimal recording performance and prevent data corruption. This can usually be done through the dash cam's mobile app settings.
7.2 การทำความสะอาดเลนส์
Gently wipe the camera lens with a soft, lint-free cloth to ensure clear video recordings. Avoid using abrasive materials or harsh chemicals.
8 การแก้ไขปัญหา
| ปัญหา | สาเหตุที่เป็นไปได้ | สารละลาย |
|---|---|---|
| กล้องติดรถยนต์ไม่สามารถเปิดได้ | ไม่มีไฟเลี้ยง; สายไฟชำรุด | Check power connection. Ensure the car's ignition is on if using USB power. Test with a different cable if available. |
| App fails to connect to the camera. | Outdated app; incorrect WiFi connection; interference. |
|
| วิดีโอ footage ไม่ชัดเจนหรือไม่ชัดเจน | เลนส์สกปรก ฟิล์มป้องกันยังอยู่ที่เลนส์ โฟกัสไม่ถูกต้อง | Clean the lens with a soft cloth. Remove any protective film. Ensure the lens is properly adjusted. |
| MicroSD card error or recording stops. | Card full; card not formatted; incompatible card; faulty card. | Format the microSD card via the app. Ensure the card is Class 10 or U3. Replace the card if the issue persists. |
| โหมดจอดรถไม่ทำงาน | Incorrect wiring; feature not enabled. | Ensure the dash cam is connected using the ACC hardwire kit. Check app settings to confirm parking mode is enabled. |

Figure 8.1: App Connection Troubleshooting. This image provides a visual guide for updating the mobile application, a common solution for connection problems.
9. ข้อมูลจำเพาะ
| คุณสมบัติ | รายละเอียด |
|---|---|
| ชื่อรุ่น | V1 |
| ความละเอียดในการจับภาพวิดีโอ | 1080p |
| ที่ดินของ View | 120 องศา |
| เทคโนโลยีการเชื่อมต่อ | ไวไฟ |
| คุณสมบัติพิเศษ | App Control, Night Vision, Loop Recording, G-Sensor, Parking Monitor |
| ประเภทการติดตั้ง | ติดตั้งบนกระจกหน้ารถ (แบบมีกาว) |
| ขนาดสินค้า | 1.42 x 2.99 x 1.8 นิ้ว |
| น้ำหนักสินค้า | 0.12 ออนซ์ |
| การสนับสนุนการจัดเก็บข้อมูล | 64GB microSD included, supports up to 128GB |
| ตัวเลือกพลังงาน | USB Charging Cable, ACC Charging Cable (Hardwire Kit) |
| อุณหภูมิในการทำงาน | สูงถึง 176 ° F (80 ° C) |
10. การรับประกันและการสนับสนุน
For warranty information and technical support, please refer to the contact details provided with your product packaging or visit the official Petokix webไซต์ โปรดเก็บใบเสร็จรับเงินไว้เป็นหลักฐานการซื้อสำหรับการเรียกร้องการรับประกัน