
สินค้าเกินview
The ALLIANCE LAUNDRY SYSTEMS 4 Prong Electric Dryer Install Kit (Model D519205) provides the necessary components for connecting an electric dryer to a 4-prong electrical outlet. This kit is designed to ensure a safe and compliant electrical connection for your dryer, facilitating proper operation.
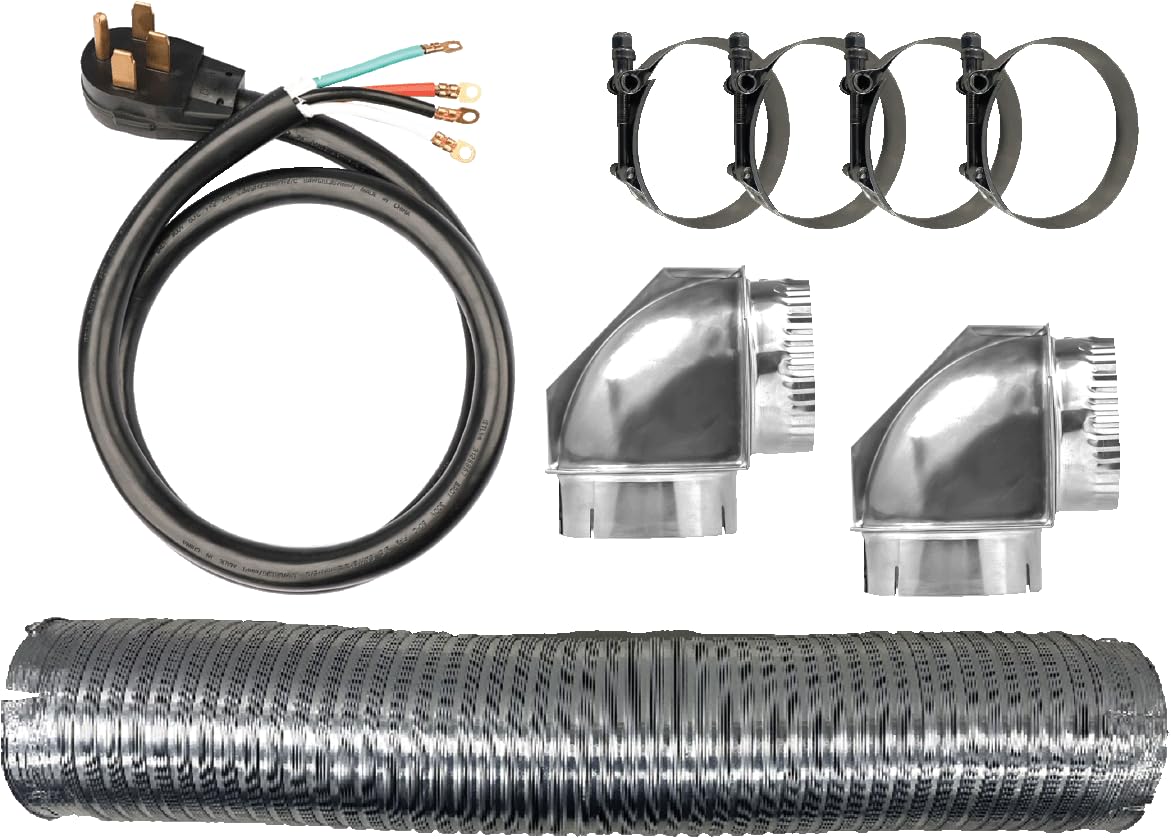
Image of the ALLIANCE LAUNDRY SYSTEMS 4 Prong Electric Dryer Install Kit, showing the 4-prong cord and associated components.
ข้อมูลด้านความปลอดภัย
คำเตือน: To reduce the risk of fire, electric shock, or injury to persons, read all instructions before installing this kit. Installation should be performed by a qualified technician.
- Always disconnect power to the dryer at the circuit breaker or fuse box before beginning any installation or maintenance.
- Ensure that the electrical outlet matches the 4-prong configuration of this kit.
- Verify that the dryer's electrical requirements (voltagอีและ amperage) are compatible with your home's electrical supply.
- Follow all local electrical codes and ordinances. If unsure, consult a licensed electrician.
- ผลิตภัณฑ์นี้อาจมีสารเคมีที่รัฐแคลิฟอร์เนียทราบว่าก่อให้เกิดมะเร็งและความพิการแต่กำเนิด หรืออันตรายต่อระบบสืบพันธุ์อื่นๆ สำหรับข้อมูลเพิ่มเติม โปรดไปที่ www.P65Warnings.ca.gov.
เนื้อหาแพ็คเกจ
The ALLIANCE LAUNDRY SYSTEMS 4 Prong Electric Dryer Install Kit D519205 typically includes the following components:
- 4-Prong Dryer Power Cord
- ตัวเชื่อมต่อการบรรเทาความเครียด
- Installation Hardware (e.g., screws, nuts, washers)
Note: Actual contents may vary slightly. Please inspect your package upon receipt.
การตั้งค่า
ก่อนที่คุณจะเริ่มต้น
- เครื่องมือที่จำเป็น: Screwdriver (Phillips and/or flathead), wire strippers (if needed), pliers, voltagอีผู้ทดสอบ
- ความเข้ากันได้: Ensure your dryer is designed for a 4-prong electrical connection.
- การตัดการเชื่อมต่อไฟฟ้า: Locate your home's main electrical panel and turn off the circuit breaker supplying power to the dryer outlet. Verify power is off using a voltagอีผู้ทดสอบ
ขั้นตอนการติดตั้ง
- บล็อกเทอร์มินัลการเข้าถึง: Remove the access plate on the back of the dryer that covers the electrical terminal block. Keep screws for reassembly.
- Install Strain Relief: Insert the strain relief connector into the power cord opening on the dryer's back panel. Secure it according to the manufacturer's instructions, ensuring it holds the power cord firmly.
- เชื่อมต่อสายไฟ: Feed the power cord through the strain relief. Connect the wires to the terminal block as follows:
- สายสีแดง: Connect to the right outer terminal.
- สายสีดำ: Connect to the left outer terminal.
- White (Neutral) Wire: Connect to the center terminal.
- Green (Ground) Wire: Connect to the ground screw (usually green) or the dryer cabinet.
- Remove Ground Strap (if applicable): For 4-prong installations, the dryer's internal ground strap (connecting the neutral terminal to the dryer chassis) must be removed. Refer to your dryer's specific manual for instructions on removing this strap.
- สายไฟที่ปลอดภัย: Ensure no bare wires are exposed and that the wires are not pinched.
- Reattach Access Plate: Replace the terminal block access plate on the back of the dryer.
- คืนค่าพลัง: Return to your main electrical panel and turn the circuit breaker for the dryer back on.
การดำเนินงาน
After successful installation of the 4-prong electric dryer install kit, your dryer should be ready for operation. Plug the dryer's power cord into the matching 4-prong wall outlet. Before loading clothes, run a short, empty cycle to confirm proper power supply and function. Listen for any unusual noises or observe any error codes.
การซ่อมบำรุง
Regular maintenance of the dryer power cord is minimal but important for safety and longevity:
- การตรวจสอบเป็นระยะ: Periodically check the power cord for any signs of damage, fraying, or kinks. Ensure the plug is fully seated in the wall outlet.
- ตรวจสอบการเชื่อมต่อ: If the dryer is moved, or if you suspect an issue, disconnect power and re-check the terminal block connections on the dryer for tightness.
- ความสะอาด : Keep the area around the dryer and its electrical connections clean and free of lint buildup.
การแก้ไขปัญหา
If your dryer is not functioning correctly after installing the kit, consider the following:
- ไม่มีไฟฟ้า: Check the circuit breaker for the dryer outlet. Ensure it is in the 'ON' position. Verify the power cord is securely plugged into both the dryer and the wall outlet.
- การเชื่อมต่อหลวม: Disconnect power and re-check all wire connections at the dryer's terminal block. Ensure they are tight and correctly wired (Red to outer, Black to outer, White to center, Green to ground).
- สายดิน: Confirm that the internal ground strap on the dryer was removed for a 4-prong installation, if applicable to your dryer model.
- Dryer Specific Issues: If the power cord connections are verified correct, consult your dryer's owner's manual for further troubleshooting steps related to the dryer itself.
- ความช่วยเหลือจากมืออาชีพ: If issues persist, contact a qualified electrician or appliance repair technician.
ข้อมูลจำเพาะ
| คุณสมบัติ | รายละเอียด |
|---|---|
| ผู้ผลิต | ระบบซักรีดอัลไลแอนซ์ |
| หมายเลขชิ้นส่วน | D519205 |
| น้ำหนักสินค้า | 5.45 ปอนด์ |
| ขนาดแพ็คเกจ | 24 x 14.6 x 4 นิ้ว |
| รายการ จำนวนแพ็คเกจ | 1 |
| ASIN | B0F4V2GH59 |
การรับประกันและการสนับสนุน
Specific warranty information for the ALLIANCE LAUNDRY SYSTEMS 4 Prong Electric Dryer Install Kit D519205 is not provided in the available product data. For warranty details, please refer to the documentation included with your purchase or contact Alliance Laundry Systems directly.
For technical support or further assistance, please contact the manufacturer or your product retailer. Always provide your model number (D519205) when seeking support.