
1. บทนำ
This manual provides detailed instructions for the installation, operation, and maintenance of your GIGABYTE GA-B760M D3HP WIFI6 motherboard. Designed for optimal performance and reliability, this motherboard supports Intel Core 14th, 13th, and 12th generation CPUs and features DDR5 memory support, PCIe 4.0 M.2 connectors, and Wi-Fi 6 connectivity. Please read this manual thoroughly before beginning installation to ensure proper setup and to maximize the lifespan of your product.
2. คุณสมบัติหลัก
- รองรับซีพียู: Compatible with Intel Core 14th, 13th, and 12th generation processors.
- การออกแบบพลังงาน: Features a 4+1+1 phase hybrid digital VRM solution for stable power delivery.
- หน่วยความจำ: Supports Dual Channel DDR5 memory with 4 DIMM slots and XMP memory module support.
- พื้นที่จัดเก็บ: Equipped with 2 PCIe 4.0 x4 M.2 connectors for high-speed storage.
- การสร้างเครือข่าย: Includes GbE LAN and Wi-Fi 6 802.11ax for fast and reliable network connectivity.
3. การตั้งค่าและการติดตั้ง
Before installing the motherboard, ensure your system is powered off and disconnected from the power source. Handle the motherboard by its edges to avoid static discharge.
3.1 เค้าโครงเมนบอร์ด
Familiarize yourself with the layout of the motherboard components before proceeding with installation.

รูปที่ 1: จากบนลงล่าง view of the GIGABYTE GA-B760M D3HP WIFI6 motherboard, showing the CPU socket, DIMM slots, PCIe slots, and various headers.
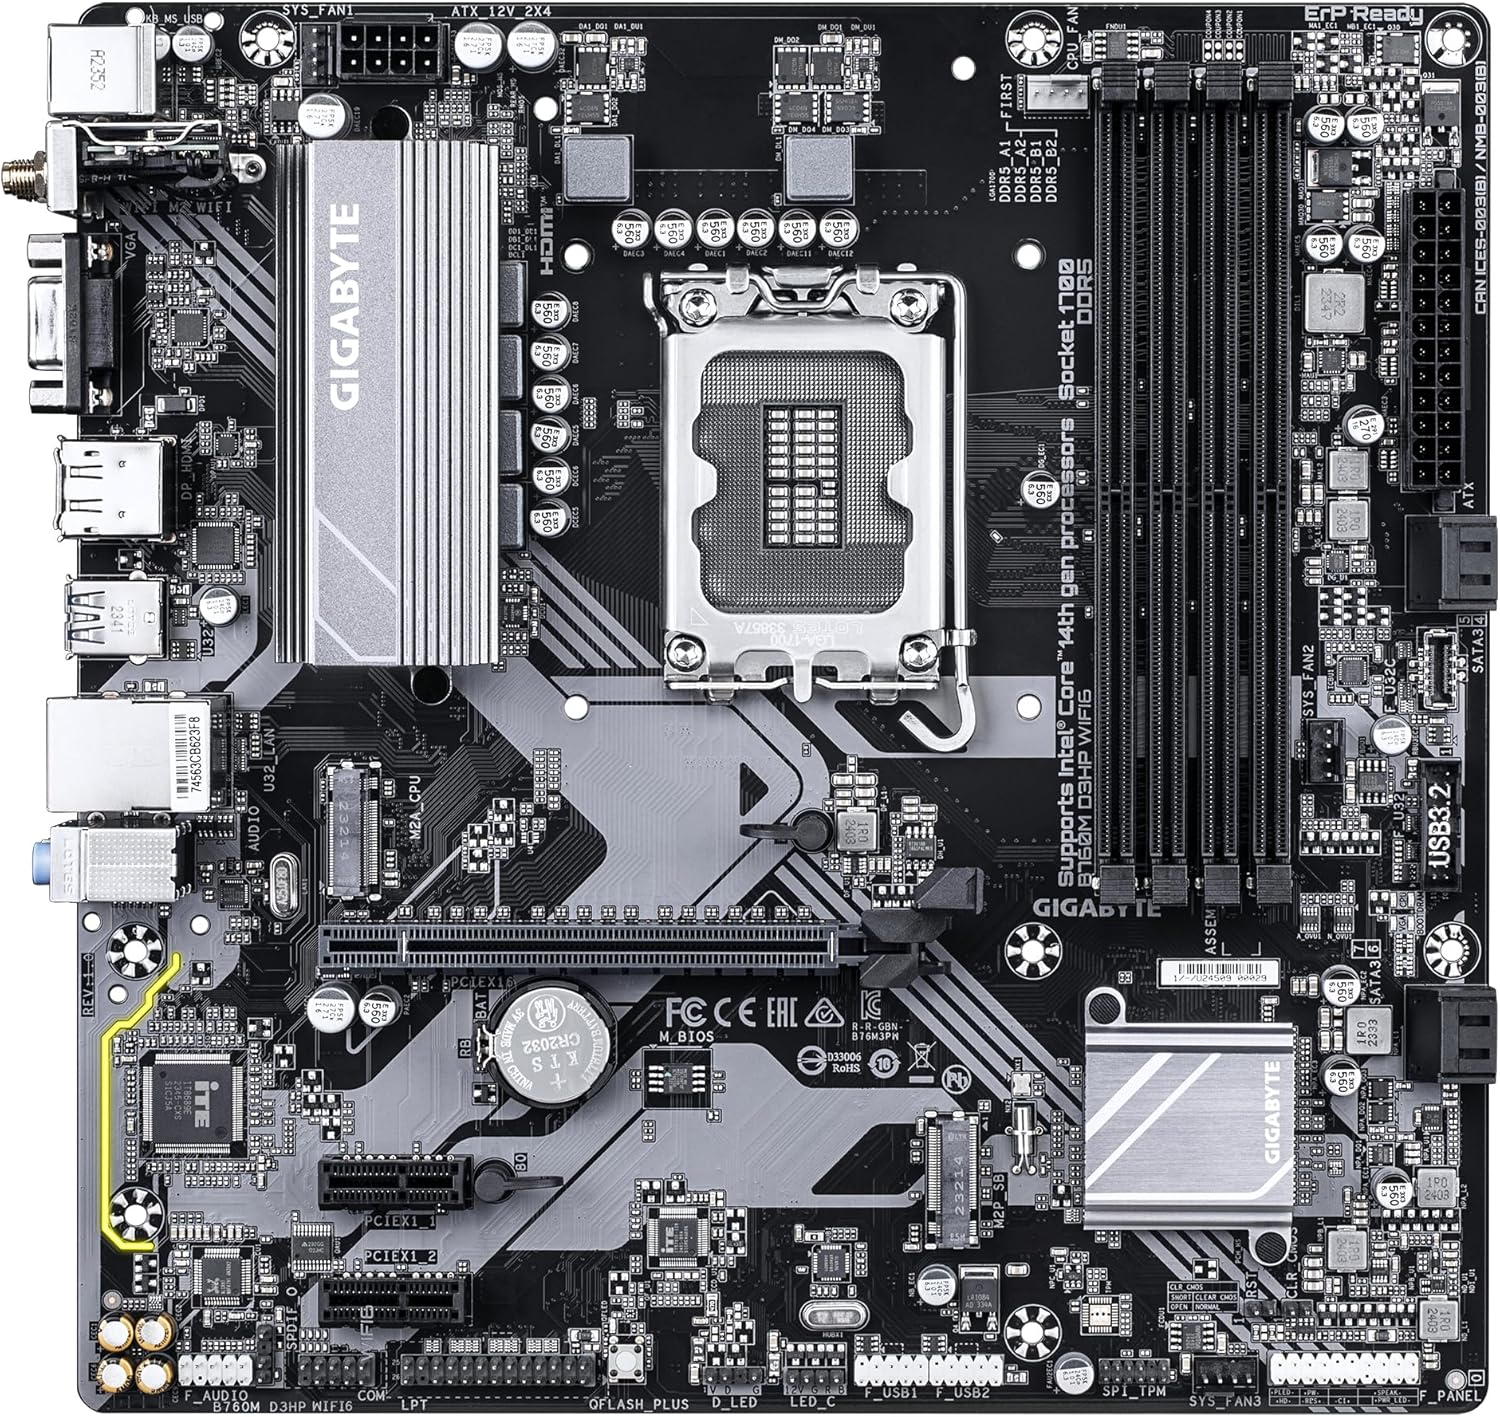
รูปที่ 2: มุม view of the GIGABYTE GA-B760M D3HP WIFI6 motherboard, highlighting the heatsinks and overall component placement.
3.2 การติดตั้งซีพียู
- ค้นหาซ็อกเก็ต CPU LGA 1700 บนเมนบอร์ด
- เปิดคันโยกซ็อกเก็ต CPU และยกแผ่นโหลดขึ้น
- จัดวาง CPU ให้ตรงกับซ็อกเก็ตอย่างระมัดระวัง โดยให้แน่ใจว่าเครื่องหมายสามเหลี่ยมบน CPU ตรงกับเครื่องหมายบนซ็อกเก็ต อย่าฝืนดัน CPU เข้าไปในซ็อกเก็ต
- ลดแผ่นโหลดลงและยึดด้วยคันโยก
- ทาซิลิโคนระบายความร้อนลงบนซีพียู และติดตั้งพัดลมระบายความร้อนซีพียูตามคำแนะนำของผู้ผลิต
3.3 การติดตั้งหน่วยความจำ (RAM)
- ค้นหาช่องเสียบ DDR5 DIMM ทั้งสี่ช่อง
- เปิดคลิปที่ปลายทั้งสองด้านของช่อง DIMM
- จัดตำแหน่งรอยบากบนโมดูลหน่วยความจำ DDR5 ให้ตรงกับคีย์ในช่อง DIMM
- ใส่โมดูลหน่วยความจำเข้าไปในช่องให้แน่นจนกระทั่งตัวล็อกเข้าที่ ตรวจสอบให้แน่ใจว่าตัวล็อกทั้งสองปิดสนิทแล้ว
- สำหรับการตั้งค่าแบบดูอัลแชนเนล โปรดดูคู่มือเฉพาะของเมนบอร์ดสำหรับคำแนะนำการจับคู่สล็อตที่เหมาะสม
3.4 Storage Device Installation (M.2 SSDs and SATA Drives)
- M.2 SSD: Locate the M.2 connectors. Remove the M.2 screw/standoff. Insert the M.2 SSD into the slot at a 30-degree angle. Push down the SSD and secure it with the screw/standoff.
- ไดรฟ์ SATA: Connect SATA data cables from your storage drives (HDDs/SSDs) to the SATA ports on the motherboard. Connect power cables from your power supply to the drives.
3.5 การต่อสายไฟ
- เชื่อมต่อขั้วต่อไฟหลัก ATX 24 พินจากแหล่งจ่ายไฟของคุณเข้ากับพอร์ตที่ตรงกันบนเมนบอร์ด
- Connect the 8-pin ATX 12V CPU power connector to the port near the CPU socket.
3.6 แผงด้านหน้าและการเชื่อมต่ออุปกรณ์ต่อพ่วง
Connect your case's front panel connectors (power button, reset button, USB ports, audio jacks, LED indicators) to the corresponding headers on the motherboard. Refer to the motherboard's detailed manual for exact pin layouts.

รูปที่ 3: Rear I/O panel of the GIGABYTE GA-B760M D3HP WIFI6 motherboard, showing USB ports, display outputs, audio jacks, Ethernet, and Wi-Fi antenna connectors.
4. คู่มือการใช้งาน
4.1 การตั้งค่าไบออส
Upon first boot, you may need to enter the BIOS (Basic Input/Output System) to configure settings such as boot order, date/time, and enable specific features. To enter BIOS, press the เดล key repeatedly during startup. The GIGABYTE UEFI BIOS provides an intuitive graphical interface for configuration.
4.2 การติดตั้งไดรเวอร์
After installing your operating system, install the necessary drivers for the motherboard's components (chipset, audio, LAN, Wi-Fi, etc.). These drivers are typically provided on a support DVD or can be downloaded from the official GIGABYTE webไซต์สำหรับรุ่นเมนบอร์ดเฉพาะของคุณ
5. การบำรุงรักษา
- การทำความสะอาด: Regularly clean dust from the motherboard and case fans using compressed air. Ensure the system is powered off and unplugged before cleaning.
- อัปเดต BIOS: ตรวจสอบ GIGABYTE เป็นระยะ webเว็บไซต์สำหรับอัปเดต BIOS การอัปเดต BIOS สามารถปรับปรุงเสถียรภาพ ความเข้ากันได้ และประสิทธิภาพของระบบได้ โปรดปฏิบัติตามคำแนะนำที่ GIGABYTE ให้ไว้อย่างระมัดระวังเมื่อทำการอัปเดต BIOS
- การอัปเดตไดรเวอร์: อัปเดตไดรเวอร์ของคุณอยู่เสมอเพื่อให้มั่นใจถึงประสิทธิภาพที่เหมาะสมและความเข้ากันได้กับซอฟต์แวร์และฮาร์ดแวร์ใหม่
6 การแก้ไขปัญหา
- ไม่มีไฟฟ้า:
- ตรวจสอบการเชื่อมต่อสายไฟทั้งหมด (ขั้วต่อ ATX 24 พิน, ขั้วต่อ CPU 8 พิน)
- ตรวจสอบให้แน่ใจว่าได้เปิดแหล่งจ่ายไฟแล้ว
- ทดสอบแหล่งจ่ายไฟด้วยระบบอื่นหรือเครื่องทดสอบแหล่งจ่ายไฟ
- ไม่มีจอแสดงผล:
- Ensure the monitor is connected to the graphics card (or integrated graphics port if no discrete GPU is used).
- ติดตั้งการ์ดจอและโมดูลหน่วยความจำใหม่
- ลองบูตด้วย RAM เพียงอันเดียว
- ความไม่เสถียรของระบบ/การขัดข้อง:
- ตรวจสอบอุณหภูมิ CPU และ GPU
- Ensure all components are properly seated.
- เรียกใช้เครื่องมือวินิจฉัยหน่วยความจำเพื่อตรวจสอบข้อผิดพลาด RAM
- อัปเดต BIOS และไดรเวอร์
- ปัญหาการเชื่อมต่อเครือข่าย:
- For wired LAN, check the Ethernet cable and router connection.
- For Wi-Fi, ensure antennas are securely attached and drivers are installed.
- Verify network settings in the operating system.
7. ข้อมูลจำเพาะ
| คุณสมบัติ | รายละเอียด |
|---|---|
| ยี่ห้อ | กิกะไบต์ |
| ชื่อรุ่น | B760M D3HP ไวไฟ6 |
| ซ็อคเก็ตซีพียู | แอลจีเอ 1700 |
| โปรเซสเซอร์ที่เข้ากันได้ | โปรเซสเซอร์ Intel Core เจนเนอเรชั่นที่ 14, Intel Core เจนเนอเรชั่นที่ 13, Intel Core เจนเนอเรชั่นที่ 12 |
| ประเภทชิปเซ็ต | อินเทล B760 |
| เทคโนโลยีหน่วยความจำ RAM | DDR5 |
| ความเร็วสัญญาณนาฬิกาหน่วยความจำ | 5600 เมกะเฮิรตซ์ |
| อุปกรณ์ที่รองรับ | Personal Computer, Desktop Computer |
| แพลตฟอร์ม | 10 ของ Windows, Windows 11 |
| ขนาดสินค้า | 9.61 x 9.61 x 1.38 นิ้ว |
| น้ำหนักสินค้า | 2.2 ปอนด์ |
8. การรับประกันและการสนับสนุน
สำหรับข้อมูลการรับประกันและการสนับสนุนทางเทคนิค โปรดดูที่ GIGABYTE อย่างเป็นทางการ webเยี่ยมชมเว็บไซต์หรือติดต่อฝ่ายบริการลูกค้าของ GIGABYTE เก็บหลักฐานการซื้อไว้เพื่อใช้ในการเคลมประกัน
GIGABYTE อย่างเป็นทางการ Webเว็บไซต์: www.gigabyte.com


