1. สินค้าหมดview
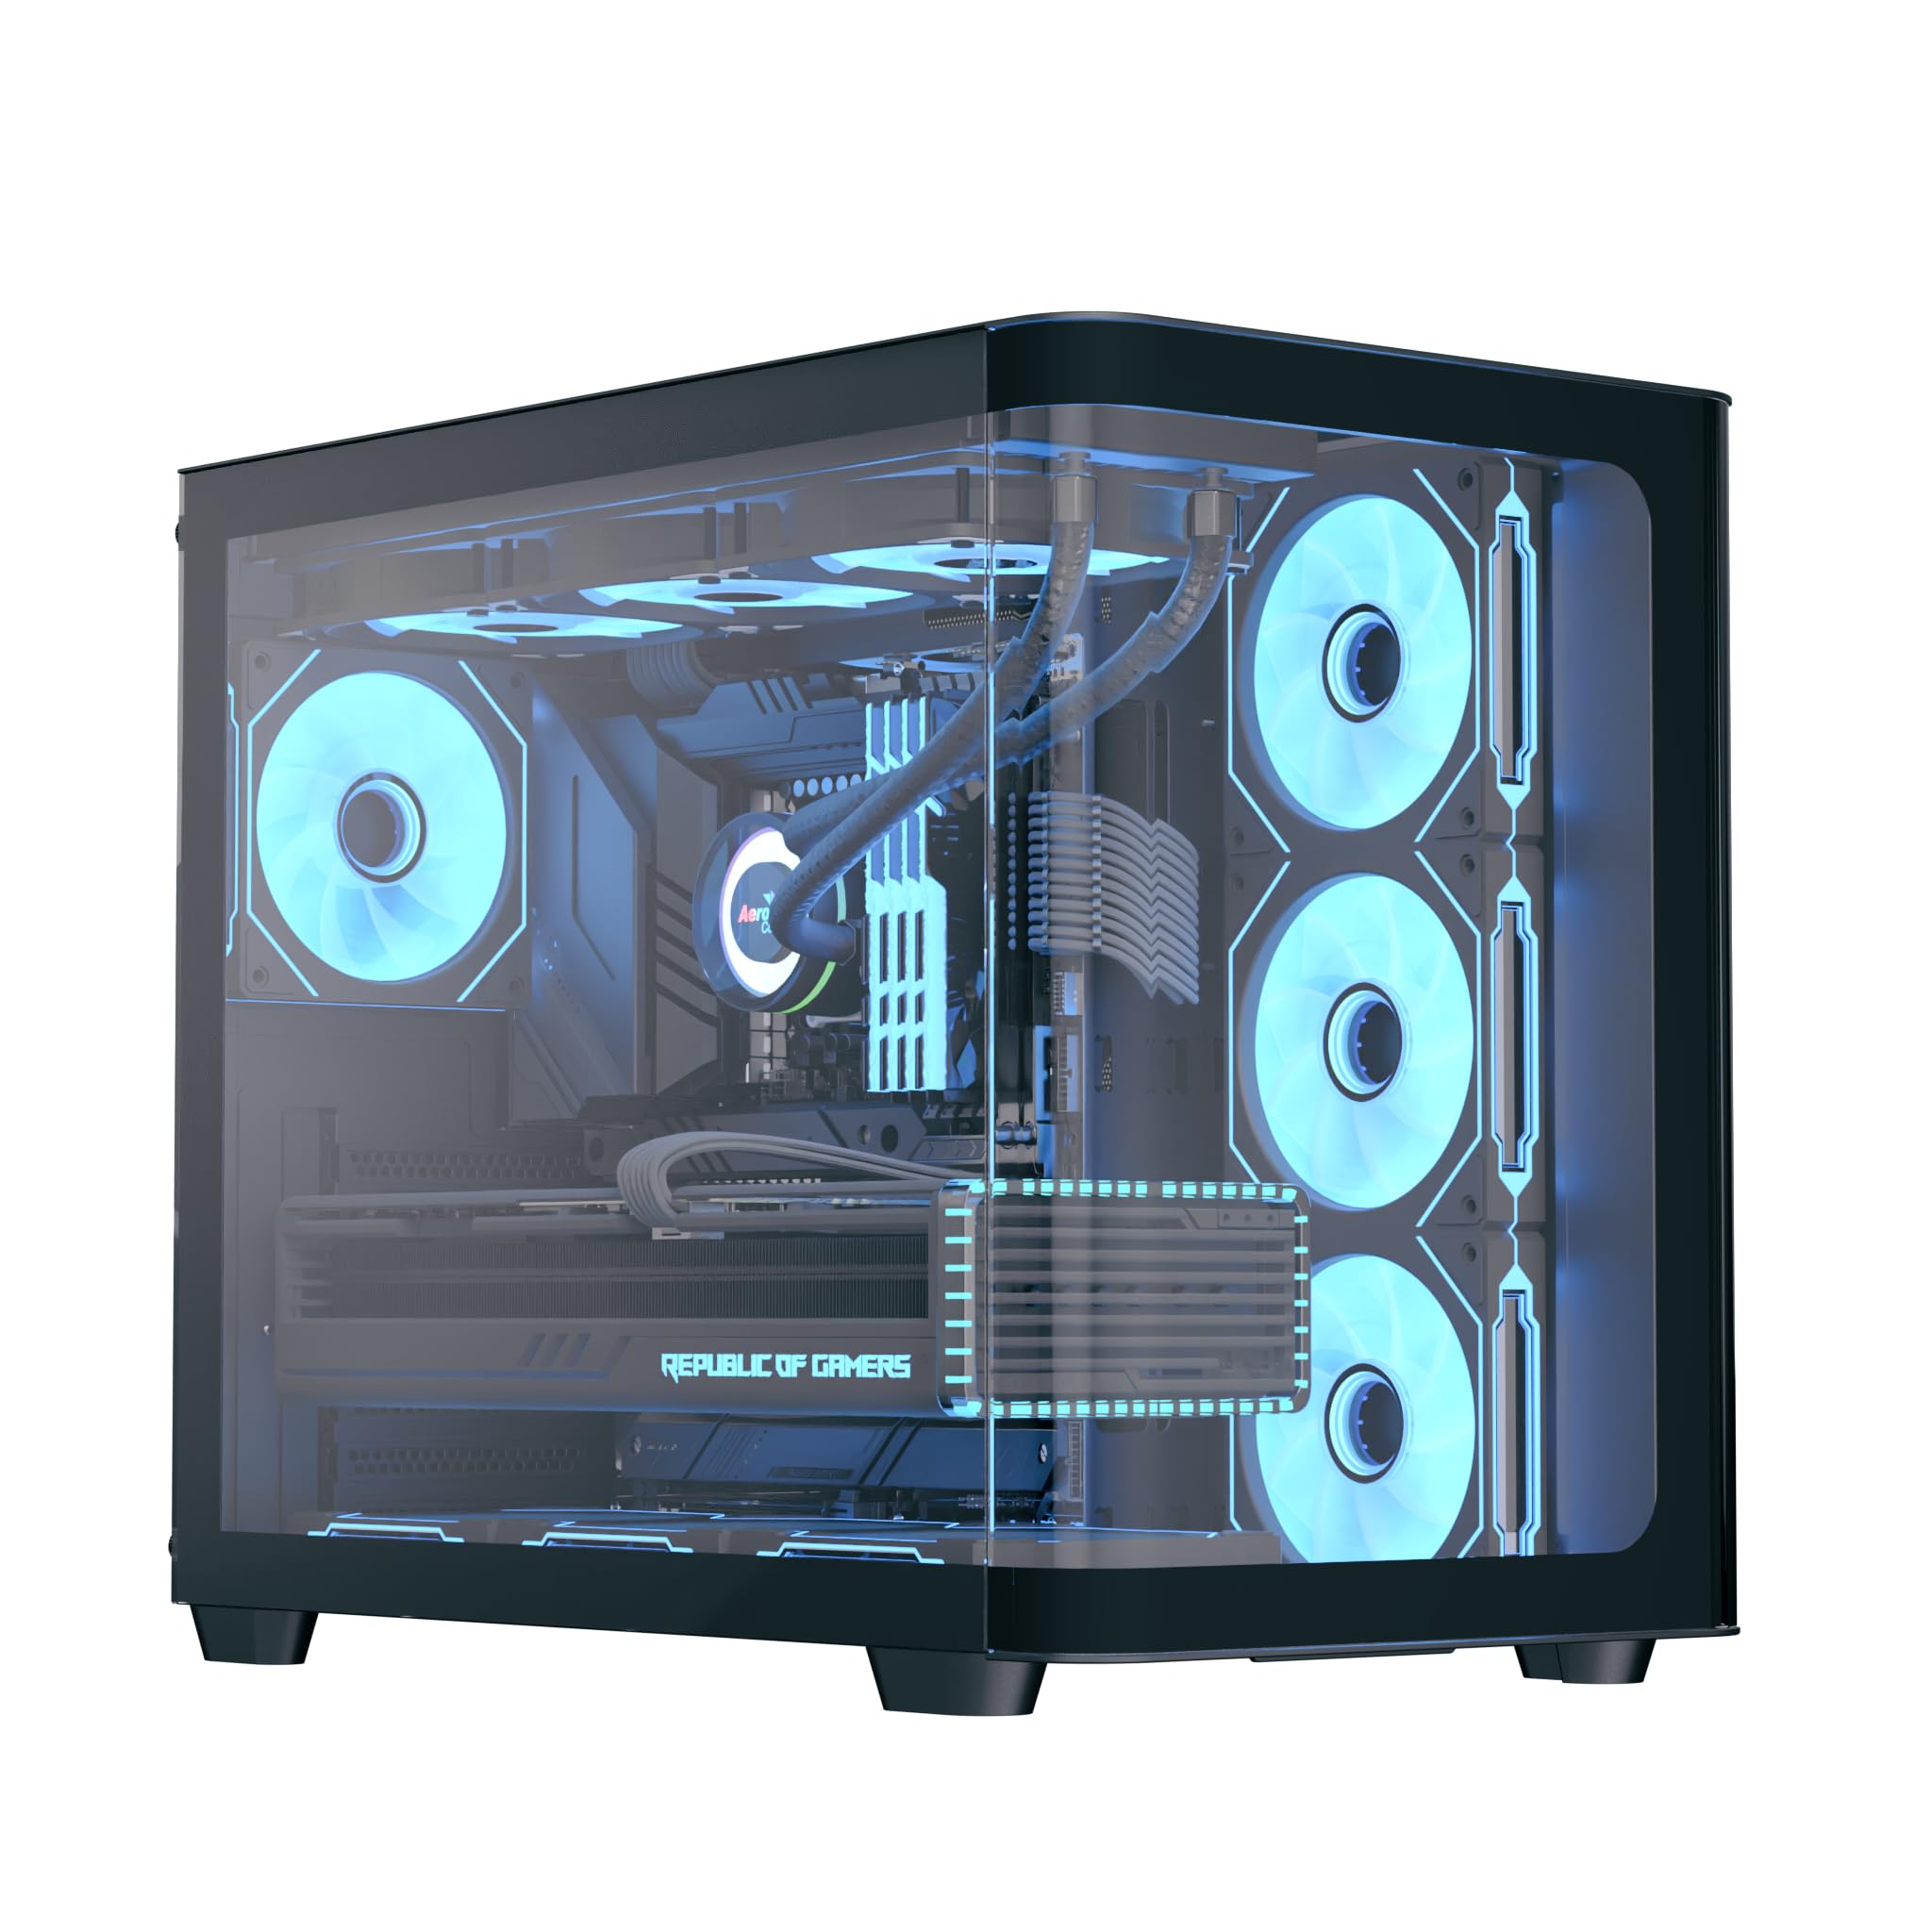
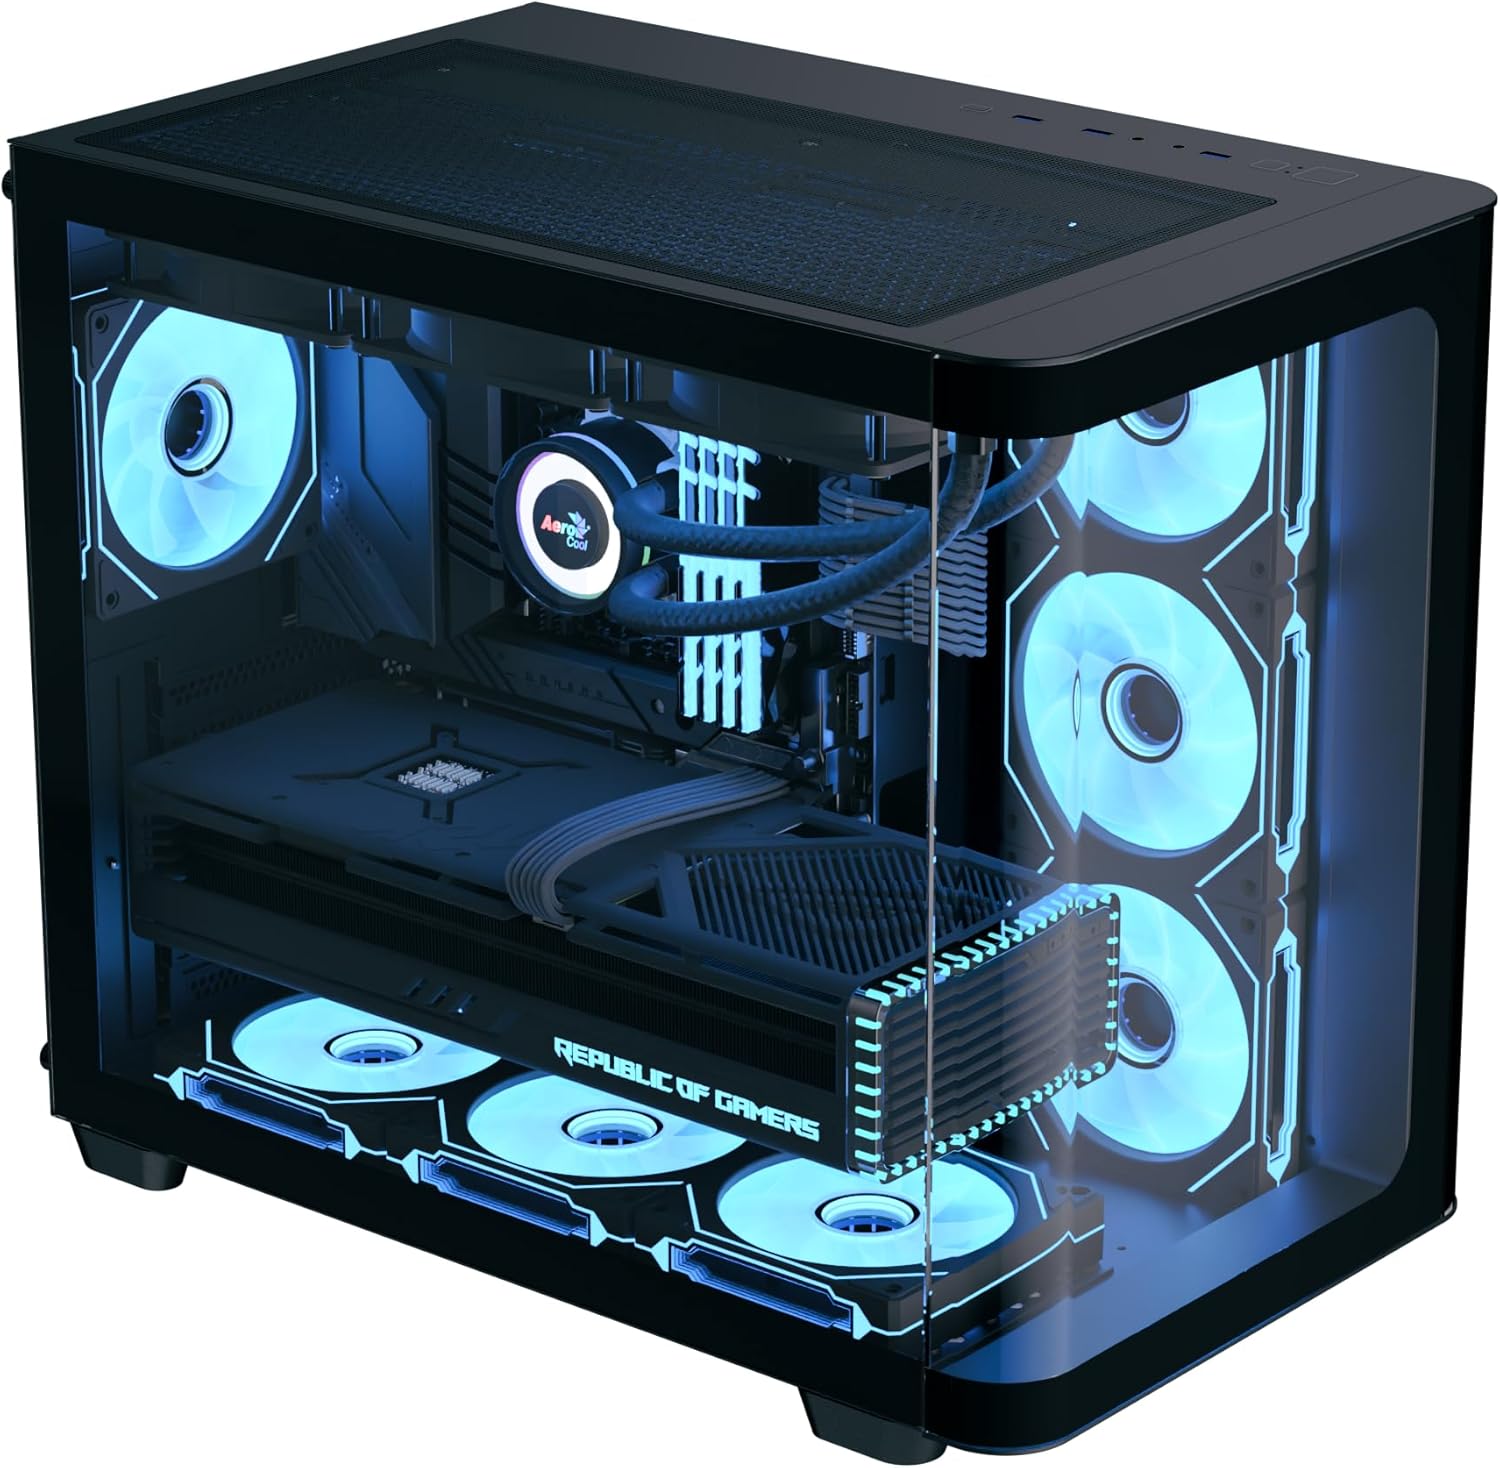
The AeroCool P500C is a mid-tower PC case designed with a dual-chamber layout. It features full tempered glass panels on the front and side, providing a clear view of internal components. The case includes four pre-installed ARGB fans, with three reverse-blade fans on the side and one standard fan at the rear, all featuring a "mirage" infinity mirror lighting effect. This case supports various cooling configurations, including air and liquid cooling systems up to 360mm radiators. It is compatible with ATX, micro-ATX, and mini-ITX motherboards, and accommodates high-end graphics cards up to 450mm in length and CPU coolers up to 162mm in height. Storage options include three SSD slots and two HDD drive bays. For ease of maintenance, the case is equipped with magnetic dust filters on the top and bottom.
2. คุณสมบัติหลัก
- Mid-tower dual chamber design with full tempered glass front and side panels.
- Four pre-installed ARGB fans: three 12cm reverse-blade fans on the side and one 12cm fan at the rear.
- "Mirage" infinity mirror lighting effect on all included fans.
- Extensive cooling support for radiators up to 360mm (top and bottom) and up to 10 total fan slots.
- Compatibility with high-end graphics cards up to 450mm in length.
- Supports ATX, micro-ATX, and mini-ITX motherboards.
- Includes a 4-port PWM ARGB fan hub for centralized control.
- Equipped with top and bottom magnetic dust filters for easy maintenance.
3. เนื้อหาบรรจุภัณฑ์
โปรดตรวจสอบว่าบรรจุภัณฑ์มีส่วนประกอบทั้งหมด:
- AeroCool P500C Mid-Tower PC Case
- Four pre-installed 12cm ARGB fans (3 reverse-blade, 1 standard)
- 4-port PWM ARGB fan hub
- กล่องอุปกรณ์เสริมพร้อมสกรู ตัวยึด และสายรัดเคเบิล
- คู่มือการใช้งาน (เอกสารนี้)
4. การตั้งค่าและการติดตั้ง
This section provides general guidelines for installing components into your AeroCool P500C PC case. Always refer to the specific manuals for your motherboard, power supply, and other components for detailed installation instructions.
4.1 การเตรียมคดี
- ถอดแผงด้านข้างออก: Carefully remove the tempered glass side panel(s) by unscrewing the thumb screws and gently sliding them off. Place them on a soft, flat surface to prevent scratches.
- กล่องอุปกรณ์เสริม: ค้นหากล่องอุปกรณ์เสริมภายในเคส ซึ่งบรรจุสกรูและอุปกรณ์ติดตั้งที่จำเป็นทั้งหมด
4.2 การติดตั้งเมนบอร์ด
- ติดตั้งสแตนด์ออฟ: Ensure the correct standoffs are installed for your motherboard form factor (ATX, micro-ATX, mini-ITX). The P500C typically has pre-installed standoffs for ATX. Adjust as needed.
- ติดตั้ง I/O Shield: If your motherboard requires a separate I/O shield, install it into the rear opening of the case before mounting the motherboard.
- ติดตั้งเมนบอร์ด: Carefully align your motherboard with the standoffs and I/O shield, then gently lower it into place. Secure it with the provided screws.
4.3 การติดตั้งอุปกรณ์จัดเก็บข้อมูล
The P500C supports three SSDs and two HDDs.
- SSD ขนาด 2.5 นิ้ว: Mount 2.5" SSDs onto the dedicated SSD trays, typically located behind the motherboard tray or in the PSU shroud area. Secure with screws.
- ฮาร์ดดิสก์ขนาด 3.5 นิ้ว: Install 3.5" HDDs into the drive bays, usually found in the lower chamber. Slide the drives into the trays and secure them.
4.4 การติดตั้งการ์ดจอ (GPU)
เคสนี้รองรับการ์ดจอที่มีความยาวสูงสุด 450 มม.
- ถอดฝาครอบสล็อต PCIe: Remove the necessary PCIe slot covers from the rear of the case corresponding to your GPU's size.
- ใส่ GPU: Align your graphics card with the PCIe slot on the motherboard and press firmly until it clicks into place. Secure it with screws.

4.5 การติดตั้งระบบระบายความร้อน
The P500C supports up to 360mm radiators at the top and bottom, and a total of 10 fans.
- หม้อน้ำ: Mount radiators to the designated top or bottom brackets using the appropriate screws.
- พัดลมเพิ่มเติม: Install any additional fans in available slots (e.g., front, top, bottom, rear) as needed for optimal airflow.
- Fan Hub: Connect the pre-installed fans and any additional ARGB/PWM fans to the included 4-port PWM ARGB fan hub. Connect the hub to your motherboard's ARGB header and a PWM fan header for control.
4.6 การจัดการสายเคเบิล
ใช้ช่องเจาะและจุดยึดสายเคเบิลด้านหลังถาดเมนบอร์ดเพื่อจัดระเบียบสายเคเบิล ซึ่งจะช่วยเพิ่มการไหลเวียนของอากาศและทำให้ดูสวยงามยิ่งขึ้น
4.7 การเชื่อมต่อแผง I/O ด้านหน้า
Connect the front panel cables (USB, audio, power switch, reset switch, LED indicators) to the corresponding headers on your motherboard. Refer to your motherboard manual for header locations.

5. คู่มือการใช้งาน
- เปิดเครื่อง: After all components are installed and cables connected, close the side panels. Connect your power supply to a wall outlet and flip the PSU switch to the ON position. Press the power button on the front panel of the case to start your system.
- การควบคุมแสง ARGB: The pre-installed ARGB fans are connected to a 4-port PWM ARGB fan hub. If this hub is connected to your motherboard's ARGB header, you can control the lighting effects using your motherboard's RGB software (e.g., ASUS Aura Sync, MSI Mystic Light Sync, Gigabyte RGB Fusion, ASRock Polychrome Sync).
- การควบคุมความเร็วพัดลม: The PWM functionality of the fan hub allows your motherboard to control fan speeds based on system temperatures, optimizing cooling performance and noise levels.
6. การบำรุงรักษา
การบำรุงรักษาตามปกติจะช่วยให้มั่นใจได้ถึงประสิทธิภาพสูงสุดและอายุการใช้งานที่ยาวนานของส่วนประกอบพีซีของคุณ
- ตัวกรองฝุ่น: The AeroCool P500C is equipped with magnetic dust filters on the top and bottom. Regularly remove and clean these filters to prevent dust buildup inside the case, which can impede airflow and component cooling.
- การทำความสะอาดภายใน: Periodically open the case and use compressed air to remove dust from fans, heatsinks, and other components. Ensure the system is powered off and unplugged before cleaning.
- การจัดการสายเคเบิล: ตรวจสอบการจัดระเบียบสายเคเบิลเป็นระยะ เพื่อให้แน่ใจว่าไม่มีสายเคเบิลใดกีดขวางการไหลเวียนของอากาศหรือการทำงานของพัดลม
7 การแก้ไขปัญหา
หากคุณพบปัญหา โปรดพิจารณาขั้นตอนการแก้ไขปัญหาทั่วไปต่อไปนี้:
- ระบบไม่เปิดเครื่อง:
- ตรวจสอบให้แน่ใจว่าแหล่งจ่ายไฟเชื่อมต่อกับเต้ารับที่ผนังอย่างถูกต้องและสวิตช์ PSU อยู่ที่เปิดอยู่
- Verify all power cables (24-pin ATX, 8-pin CPU, PCIe power) are securely connected to the motherboard and components.
- ตรวจสอบว่าสายเคเบิลของสวิตช์เปิดปิดแผงด้านหน้าเชื่อมต่อกับหัวต่อบนเมนบอร์ดอย่างถูกต้องแล้ว
- พัดลมไม่หมุน/ไฟ ARGB ไม่ติด:
- Confirm that the fans are properly connected to the fan hub.
- Ensure the fan hub is connected to a power source (e.g., SATA power) and the motherboard's ARGB/PWM headers.
- Check your motherboard's BIOS/UEFI settings or RGB software for fan control and lighting settings.
- ปัญหาเรื่องความร้อนสูงเกินไป:
- Verify that all case fans are spinning and oriented correctly for optimal airflow (intake/exhaust).
- Clean dust filters and internal components to ensure unrestricted airflow.
- ตรวจสอบให้แน่ใจว่าตัวระบายความร้อน CPU และพัดลม GPU ทำงานได้อย่างถูกต้อง
8. ข้อมูลจำเพาะ
| คุณสมบัติ | ข้อมูลจำเพาะ |
|---|---|
| ยี่ห้อ | แอร์โรคูล |
| ประเภทเคส | มิดทาวเวอร์ |
| ชื่อรุ่น | พี500ซี |
| สี | สีดำ |
| การรองรับเมนบอร์ด | ATX, ไมโคร-ATX, มินิ-ITX |
| พัดลมที่ติดตั้งล่วงหน้า | 4 x 12cm ARGB (3 reverse-blade side, 1 rear) |
| ฐานรองหม้อน้ำ | Up to 360mm (Top, Bottom) |
| ความยาวสูงสุดของ GPU | 450มม. |
| ความสูงสูงสุดของตัวระบายความร้อนซีพียู | 162มม. |
| ช่องไดรฟ์ | SSD ขนาด 2.5 นิ้ว 3 ตัว, HDD ขนาด 3.5 นิ้ว 2 ตัว |
| พอร์ต I/O | USB, Audio (specifics not detailed in source) |
| น้ำหนักสินค้า | 9.12 กิโลกรัม |
| ยูพีซี | 810189570009 |
9. การรับประกันและการสนับสนุน
The AeroCool P500C PC Case comes with a การรับประกันแบบจำกัดโปรดเก็บหลักฐานการซื้อไว้เพื่อใช้เรียกร้องการรับประกัน
For technical support, warranty inquiries, or further assistance, please visit the official AeroCool website or contact their customer service department. Contact information can typically be found on the AeroCool webไซต์หรือบนบรรจุภัณฑ์ผลิตภัณฑ์