
1. บทนำ
The TUOPUONE LCD1602 I2C Module is a character liquid crystal display designed for integration with various microcontrollers and development boards. It features a 16x2 character display and utilizes an I2C communication interface, requiring only two signal pins (SCL, SDA) for operation, thereby conserving I/O resources on your host device. This module is compatible with both 3.3V and 5V operating voltages and includes an adjustable backlight.
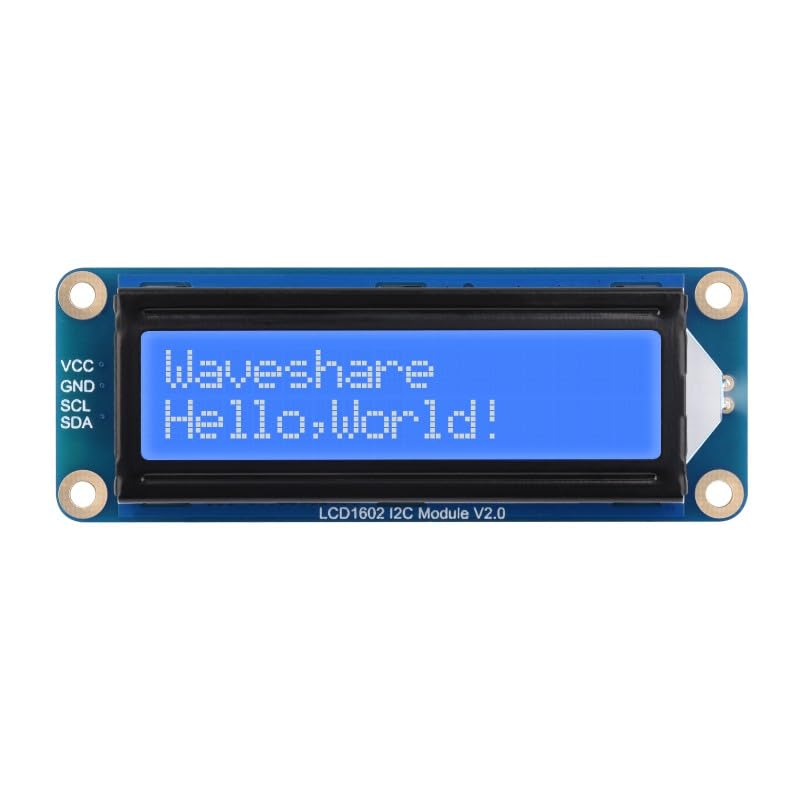
รูปที่ 1 : ด้านหน้า view of the LCD1602 I2C Module.
2. คุณสมบัติ
- Incorporates a character LCD panel, model LCD1602.
- I2C control interface, requiring only two signal pins (SCL, SDA) to save I/O resources.
- Compatible with 3.3V and 5V operating voltagใช่
- Onboard AiP31068 LCD driver and SN3193 backlight driver.
- Adjustable backlight for varied lighting conditions.
- Comes with online development resources and example code for Raspberry Pi, Jetson Nano, ESP32, and Arduino.

รูปที่ 2: เกินview of LCD1602 I2C Module features and display options.
3. ข้อมูลจำเพาะ
| พารามิเตอร์ | ค่า |
|---|---|
| อินเทอร์เฟซการสื่อสาร | ไอทูซี |
| คอนโทรลเลอร์ LCD | AiP31068 |
| ปฏิบัติการฉบับที่tage | 3.3V ~ 5V |
| ไดร์เวอร์แบ็คไลท์ | สเอ็น3193 |
| แผงแสดงผล | จอแอลซีดีตัวอักษร |
| ตัวละคร | 16 × 2 |
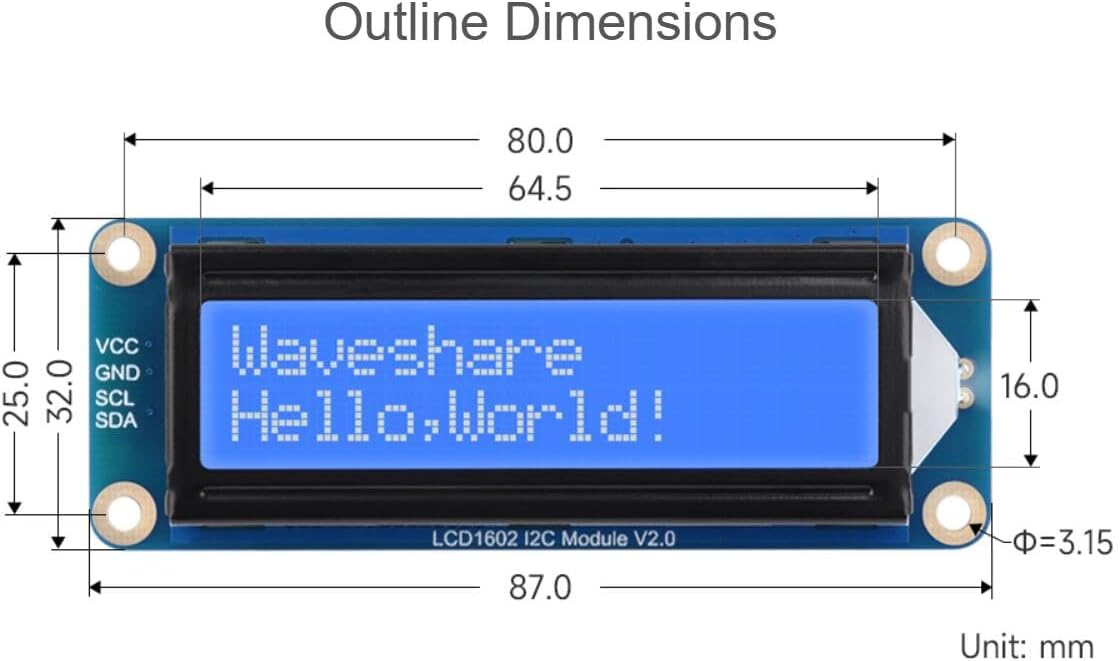
| ขนาดจอแสดงผล | 64.5 × 16.0 มม. |
| อุณหภูมิในการทำงาน | -20 ~ +70 องศาเซลเซียส |
| ขนาด | 87.0 × 32.0 × 13.0 มม. |

Figure 3: Detailed specifications and features summary.
4. Pinout and Interface
The LCD1602 I2C Module uses a 4-pin interface for I2C communication and power supply. The pins are clearly labeled on the module.

รูปที่ 4: ย้อนกลับ view of the module highlighting the I2C interface pins.
| เข็มหมุด | คำอธิบาย |
|---|---|
| วีซีซี | Power supply input (3.3V ~ 5V) |
| ก.ย.ด. | พื้น |
| เอส ซี แอล | สายนาฬิกา I2C |
| เอสดีเอ | สายข้อมูล I2C |
5. การตั้งค่าและการเชื่อมต่อ
To connect the LCD1602 I2C Module to your development board (e.g., Raspberry Pi, Arduino), follow these steps:
- เชื่อมต่อ วีซีซี pin of the module to the 3.3V or 5V power output of your development board. Ensure the voltage matches the board's I2C logic level.
- เชื่อมต่อ ก.ย.ด. pin of the module to the Ground pin of your development board.
- เชื่อมต่อ เอส ซี แอล pin of the module to the I2C Clock (SCL) pin of your development board.
- เชื่อมต่อ เอสดีเอ pin of the module to the I2C Data (SDA) pin of your development board.
A typical connection example with a Raspberry Pi is shown below:
รูปที่ 5: อดีตample connection of the LCD1602 I2C Module to a Raspberry Pi. (Raspberry Pi is not included).
6. ความเข้ากันได้
The LCD1602 I2C Module is designed for broad compatibility with various popular development platforms, including:
- Raspberry Pi (various models)
- ราสเบอร์รี่ Pi ปิโก
- เจ็ตสัน นาโน
- ESP32
- Arduino (various models)
- STM32
Online development resources and user manuals are available to facilitate integration and development on these platforms.

Figure 6: Compatible development platforms.
7. คู่มือการใช้งาน
To operate the LCD1602 I2C Module, you will typically need to:
- Install I2C Library: For most platforms (e.g., Arduino, Raspberry Pi), you will need to install a compatible I2C LCD library. Common libraries include the "LiquidCrystal_I2C" library for Arduino or
smbusและi2c-toolsfor Raspberry Pi. - Find I2C Address: The default I2C address for the module is often 0x27 or 0x3F. You may need to run an I2C scanner sketch/script to confirm the address if the display does not initialize.
- เริ่มต้นการแสดงผล: Use the installed library to initialize the LCD with its I2C address and dimensions (16 columns, 2 rows).
- เขียนข้อความ: Use the library's functions to print text to the display, set cursor position, clear the screen, and control the backlight.
- ปรับแสงพื้นหลัง: The module typically has a potentiometer on the back to adjust the backlight brightness.
Refer to the online development resources and examples provided by TUOPUONE for specific code examples and detailed instructions for your chosen platform.
8. การบำรุงรักษา
- การทำความสะอาด: Use a soft, dry cloth to gently clean the display surface. Avoid abrasive cleaners or solvents.
- พื้นที่จัดเก็บ: Store the module in a dry, dust-free environment away from direct sunlight and extreme temperatures.
- การจัดการ: Handle the module by its edges to avoid touching the display area or sensitive electronic components.
- แหล่งจ่ายไฟ: Always ensure the correct operating voltage (3.3V or 5V) is applied to prevent damage.
9 การแก้ไขปัญหา
- Display shows blank or blocks:
- ตรวจสอบการเชื่อมต่อสายไฟ (VCC, GND)
- Verify I2C connections (SCL, SDA) are correct.
- Adjust the potentiometer on the back of the module. This controls contrast and can make the display appear blank if set incorrectly.
- Ensure the correct I2C address is used in your code. Run an I2C scanner to confirm.
- Backlight is off:
- Check if the backlight control in your code is enabled.
- Ensure the backlight potentiometer is not turned all the way down.
- Garbled text:
- Confirm the correct I2C address and LCD dimensions (16x2) are set in your code.
- Ensure the I2C library is correctly installed and initialized.
- Module not detected by I2C scanner:
- Double-check all wiring, especially SCL and SDA.
- Ensure the host board's I2C interface is enabled (e.g.,
raspi-configfor Raspberry Pi). - ตรวจสอบว่าโมดูลได้รับพลังงานหรือไม่
10. ขนาดโดยรวม
The physical dimensions of the LCD1602 I2C Module are provided below for integration into your projects.

Figure 7: Outline dimensions of the LCD1602 I2C Module (Unit: mm).
11. เนื้อหาแพ็คเกจ
แพ็คเกจมาตรฐานประกอบด้วยรายการต่อไปนี้:
- LCD1602 I2C Module (Blue) x1
- PH2.0 4PIN wire x1
12. การรับประกันและการสนับสนุน
For warranty information, technical support, and additional resources, please refer to the official TUOPUONE website or contact your retailer. Online development resources and examples for various platforms are available to assist with integration and programming.
หากต้องการความช่วยเหลือเพิ่มเติม โปรดไปที่ TUOPUONE Store on Amazon.