
1. บทนำ
This manual provides detailed instructions for the installation, operation, and maintenance of your Haloview Byte Tango BT6 Touch RV Backup Camera System. Please read this manual thoroughly before using the product to ensure proper function and safety.
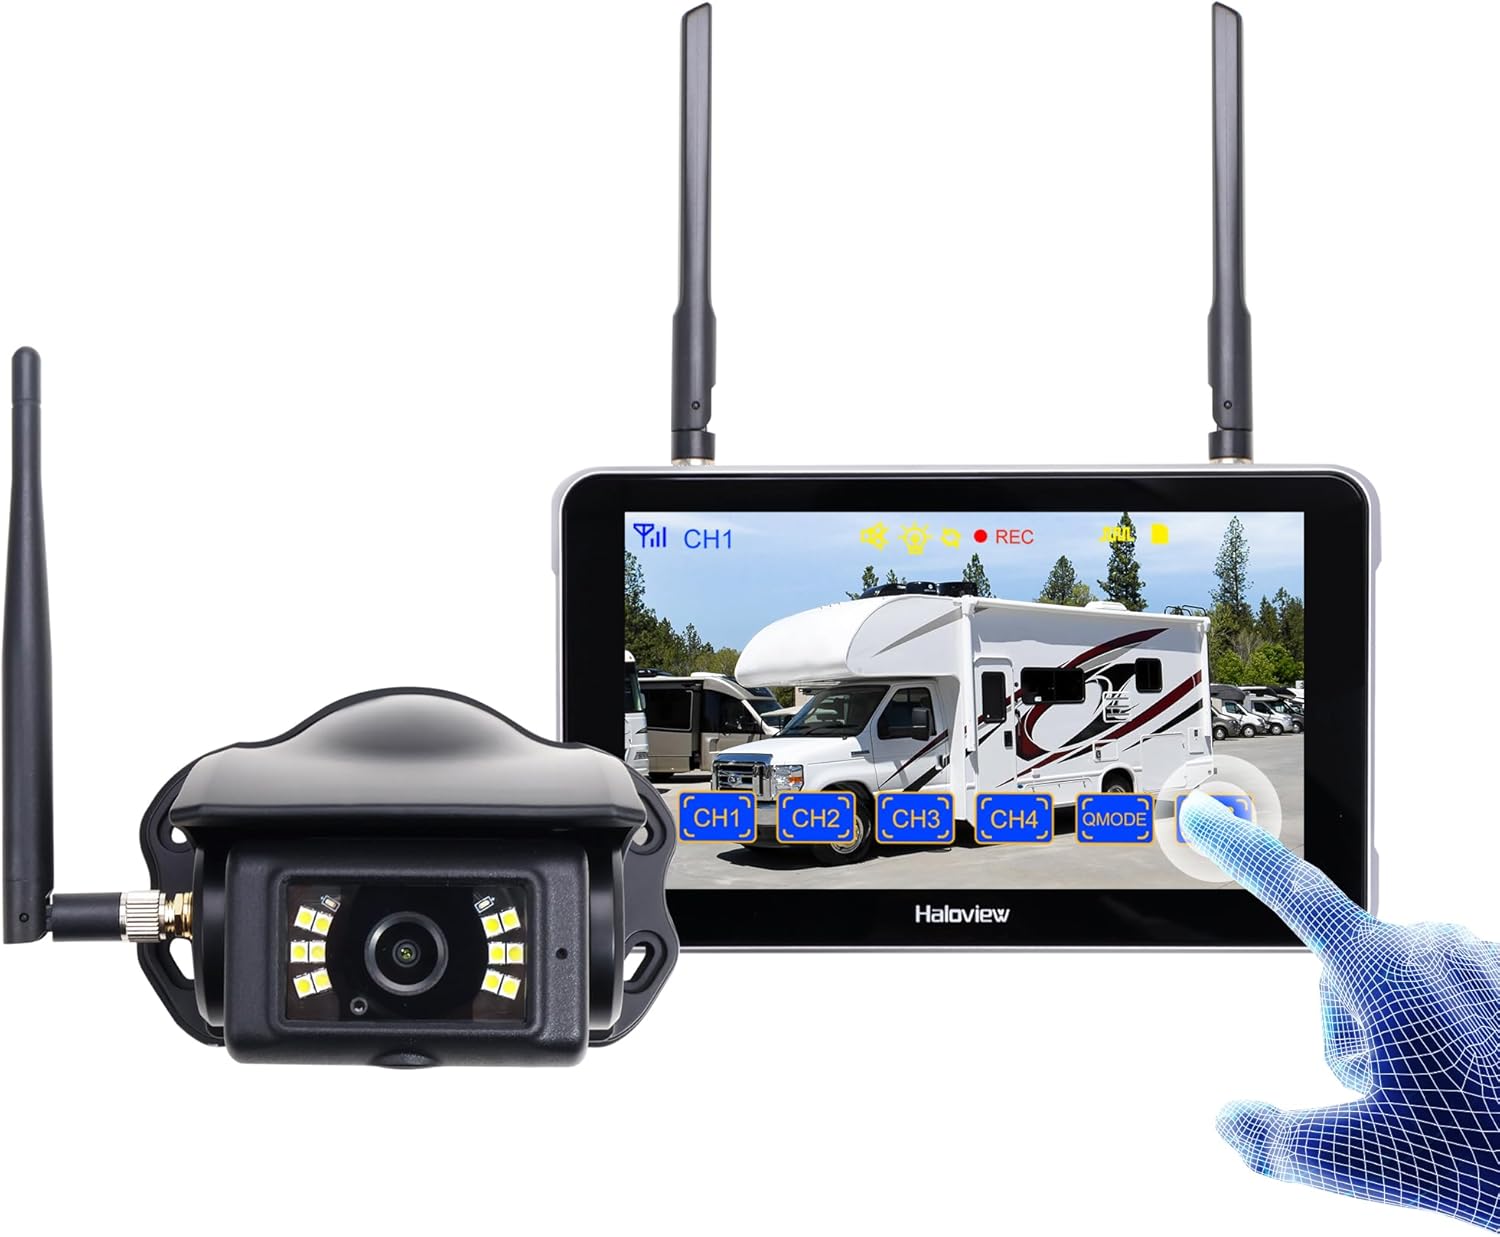
Image 1.1: Haloview Byte Tango BT6 Touch RV Backup Camera System components, including the 5.5-inch touch screen monitor and the wireless camera.
คุณสมบัติหลัก:
- 2.5D Curved Glass 5.5'' Touch Screen: Offers a smooth and responsive user interface.
- Low Latency Wireless Technology: Ensures minimal lag and interference-free signal transmission, supporting vehicles up to 65ft in length (e.g., RVs, travel trailers, trucks, campers, vans, pickups, tractors, fifth wheels, motorhomes).
- Full-Color Dim-Light Night Vision: Advanced image sensors provide full-color video even in low-light conditions. Night Vision Fill Lights can be activated or deactivated remotely via the monitor.
- บันทึกเสียง: Built-in speaker alerts users to pedestrians, animals, or unusual sounds in the surroundings.
- เครื่องบันทึกวิดีโอในตัว (DVR): Supports real-time recording and video playback with 1080P@30fps FHD resolution.
2. อะไรอยู่ในกล่อง
ตรวจสอบว่ารายการทั้งหมดที่ระบุไว้ด้านล่างนี้รวมอยู่ในแพ็คเกจของคุณ:

Image 2.1: All components included in the Haloview Byte Tango BT6 Touch system package.
- BT6 Touch Screen Monitor
- BTC128 กล้อง
- ขายึดถ้วยดูด
- ขายึด 3M
- สายเคเบิล Type-C
- สายแปลงกล้อง
- อะแดปเตอร์จ่ายไฟสำหรับรถบ้านแบบมีสาย Furrion
- สายจับคู่
- อะแดปเตอร์ไฟที่จุดบุหรี่
3. การตั้งค่าและการติดตั้ง
3.1 การติดตั้งกล้อง
- เลือกตำแหน่งการติดตั้ง: Select a suitable surface mount location at the rear of your vehicle, ensuring a clear view and protection from direct impact.
- รักษาความปลอดภัยกล้อง: Mount the BTC128 camera securely using appropriate fasteners. Ensure the antenna is positioned for optimal signal reception.
- การเชื่อมต่อไฟฟ้า: Connect the camera to a 12V DC power source. If your RV is pre-wired for Furrion, use the provided power adapter. Otherwise, connect to your vehicle's reverse light circuit or another suitable 12V power source.
3.2 การติดตั้งจอภาพ
- ติดตั้งจอภาพ: Attach the 5.5-inch monitor to your dashboard or windshield using either the suction cup mount bracket or the 3M adhesive mount bracket. Ensure the monitor is positioned for easy viewโดยไม่กีดขวางการขับขี่ของคุณ view.
- เปิดใช้งานจอภาพ: Connect the monitor to power using the provided cigarette lighter power adapter or the Type-C cable for USB power.
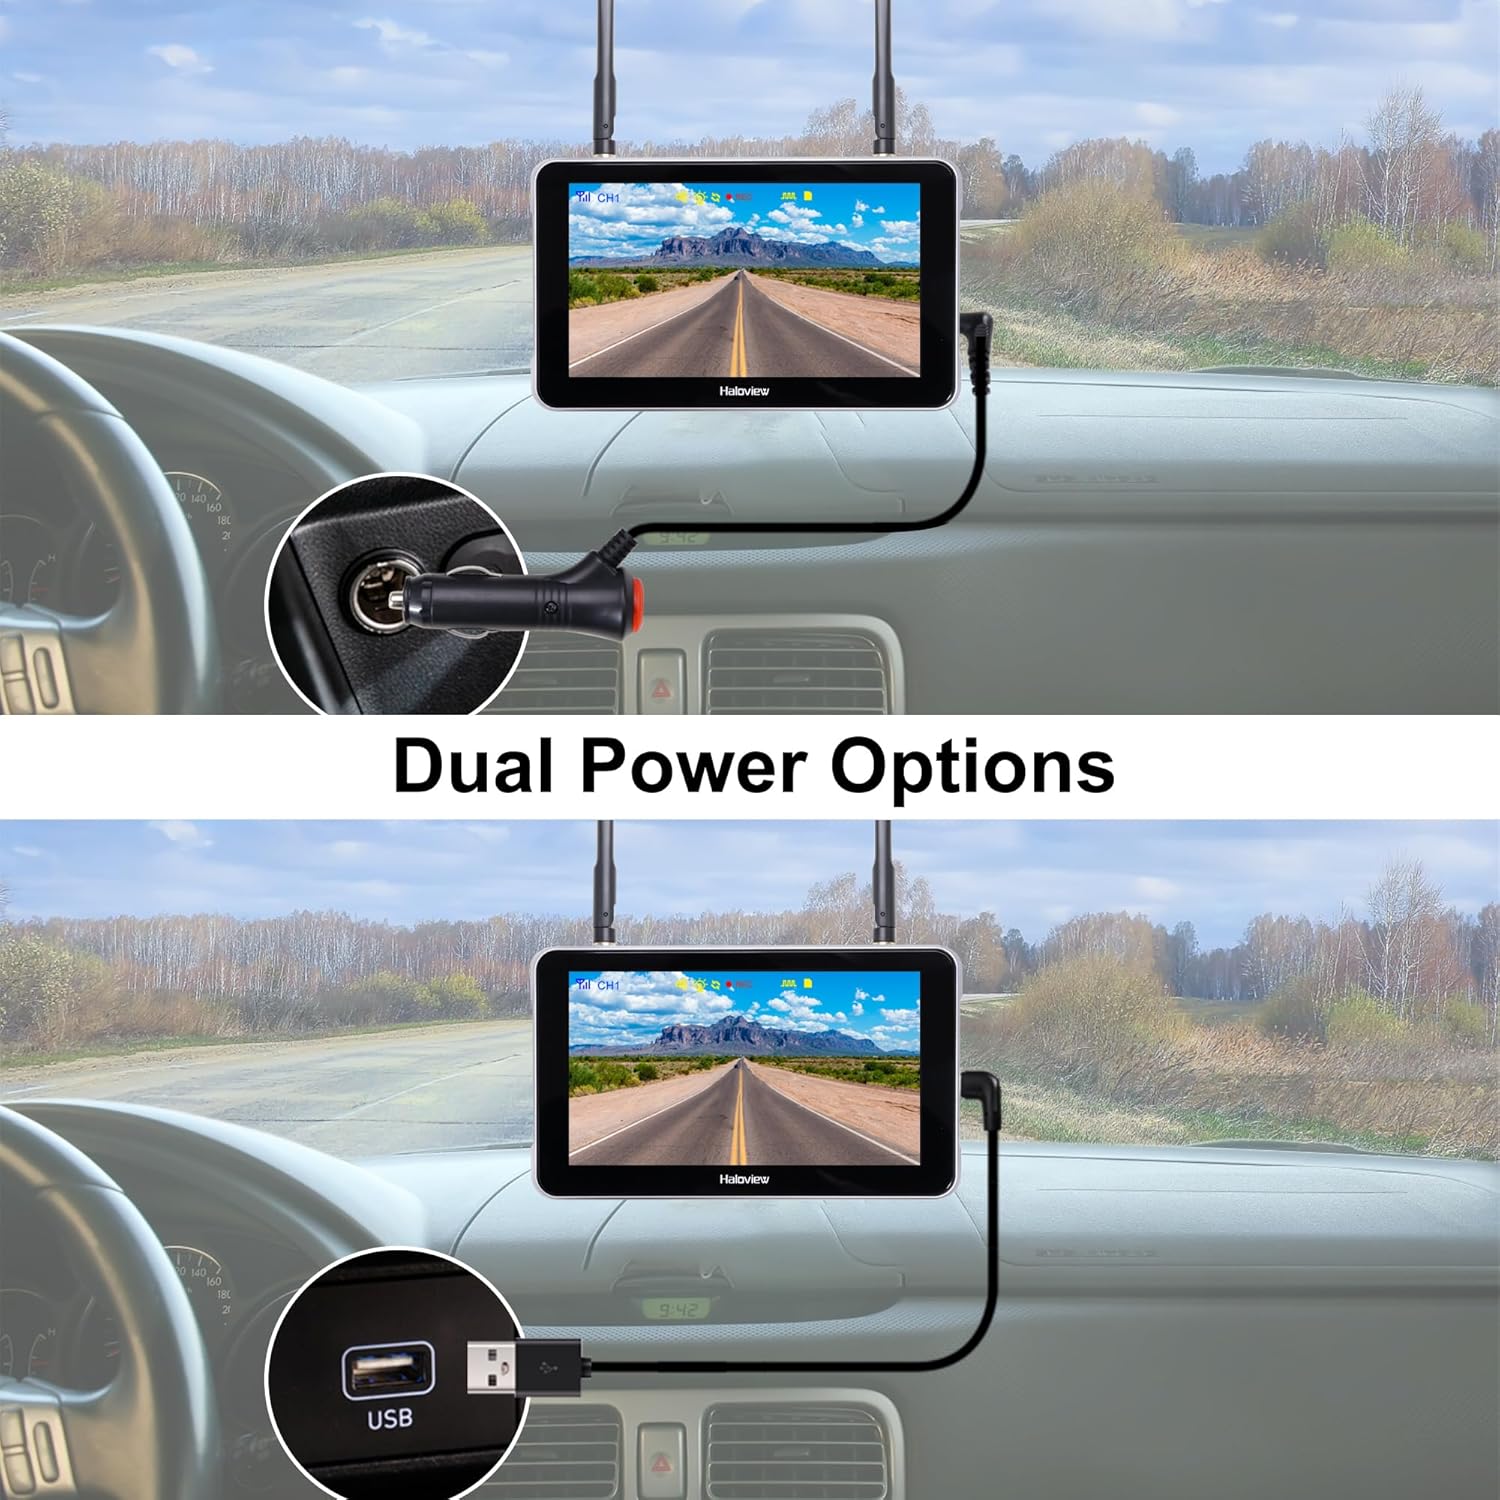
Image 3.1: The monitor can be powered via a cigarette lighter adapter or a USB Type-C cable.
3.3 Pairing the Camera and Monitor
The camera and monitor are typically pre-paired from the factory. If no image appears or you are adding additional cameras, follow these steps:
- เปิดทั้งกล้องและจอภาพ
- On the monitor, navigate to the pairing menu (refer to the operating section for menu access).
- Select an available channel for pairing.
- Press the pairing button on the camera (if applicable, consult camera-specific instructions) or follow the on-screen prompts on the monitor to initiate pairing.
- Once paired, the camera's video feed will appear on the monitor.

Image 3.2: Wireless signal transmission between the camera and monitor.
4. คู่มือการใช้งาน
4.1 การทำงานพื้นฐาน
- เปิด/ปิดเครื่อง: Press and hold the power button on the monitor to turn it on or off.
- อินเทอร์เฟซหน้าจอสัมผัส: Navigate through menus and settings by tapping and swiping on the 5.5-inch touch screen.
- การสลับช่อง: If multiple cameras are connected, tap the channel buttons (CH1, CH2, etc.) on the screen to switch between camera views.

Image 4.1: The touch screen allows for intuitive control of the system.
คุณสมบัติขั้นสูง 4.2 ประการ
- พลิกภาพ: Access the settings menu to adjust the image orientation (horizontal/vertical flip) to match your camera's mounting position.

Image 4.2: The image flip function allows for various display orientations.
- การมองเห็นตอนกลางคืน: The system automatically adjusts for low-light conditions. Night Vision Fill Lights can be manually controlled via the monitor settings if ambient light is extremely low.

Image 4.3: The camera provides full-color images even in dim light conditions.
- การบันทึก DVR: Insert a Micro-SD card (not included) into the monitor's slot to enable continuous recording. Access recorded footage through the playback menu. The system records in 1080P at 30 frames per second.

Image 4.4: The monitor supports Micro-SD card recording for continuous video capture.
- Rear Assist Marker Lines: Customizable parking guidelines can be activated and adjusted via the monitor settings to aid in reversing and parking maneuvers.
Image 4.5: Customizable rear assist marker lines for precise maneuvering.
5. การบำรุงรักษา
- การทำความสะอาด: ใช้ผ้าแห้งนุ่มๆ เช็ดทำความสะอาดหน้าจอมอนิเตอร์และเลนส์กล้อง สำหรับคราบสกปรกที่ติดแน่น ให้ใช้ผ้าชุบน้ำหมาดๆ เช็ดเบาๆampชุบผ้าด้วยน้ำ หลีกเลี่ยงน้ำยาทำความสะอาดหรือตัวทำละลายที่มีฤทธิ์กัดกร่อน
- การเชื่อมต่อสายเคเบิล: Periodically check all cable connections for tightness and signs of wear. Ensure power cables are securely plugged in.
- เลนส์กล้อง: Keep the camera lens clear of dirt, snow, or ice to maintain optimal image quality.
- เสาอากาศ: Ensure antennas on both the camera and monitor are securely attached and positioned for best signal.
6 การแก้ไขปัญหา
- ไม่มีภาพปรากฏบนจอภาพ:
- ตรวจสอบให้แน่ใจว่าทั้งกล้องและจอภาพเปิดใช้งานอยู่
- ตรวจสอบการเชื่อมต่อพลังงานทั้งหมด
- Verify that the camera and monitor are properly paired (refer to Section 3.3).
- Check for obstructions between the camera and monitor that might block the wireless signal.
- คุณภาพของภาพต่ำ:
- ทำความสะอาดเลนส์กล้อง
- ตรวจสอบให้แน่ใจว่าติดตั้งกล้องอย่างแน่นหนาและไม่สั่น
- ตรวจสอบหาแหล่งกำเนิดสัญญาณรบกวนแรงๆ ในบริเวณใกล้เคียง
- ปัญหาการบันทึก:
- Ensure a compatible Micro-SD card is inserted correctly.
- Check if the Micro-SD card is full; format it if necessary (this will erase all data).
- Verify recording settings in the monitor menu.
- Monitor Not Responding to Touch:
- Restart the monitor by powering it off and on again.
- ตรวจสอบให้แน่ใจว่าหน้าจอสะอาดและไม่มีเศษขยะ
7. ข้อมูลจำเพาะ
| คุณสมบัติ | ข้อมูลจำเพาะ |
|---|---|
| ขนาดของผลิตภัณฑ์ (จอภาพ) | ขนาด 6.1 x 1 x 8.8 นิ้ว (ยาว 155 มม. x กว้าง 25 มม. x สูง 88 มม.) |
| น้ำหนักสินค้า | 2.7 ปอนด์ |
| ขนาดหน้าจอ | 5.5 นิ้ว |
| เทคโนโลยีการแสดงผล | จอแอลซีดี |
| การเชื่อมต่อแบบไร้สาย | 2.4G ดิจิตอลไร้สาย |
| อุปกรณ์ที่รองรับ | BTC128, BTC129, BTC126, BTC125, BTC131 |
| ประเภทการติดตั้ง | การติดตั้งบนพื้นผิว |
| ปฏิบัติการฉบับที่tage | 12 โวลต์ (กระแสตรง) |
| เทคโนโลยีเซ็นเซอร์ออปติคัล | ซีมอส |
| ประเภทเลนส์ | มุมกว้างคงที่ |
| มุมจริงของ View | 120 องศา |
| ความละเอียดในการบันทึกวิดีโอ | 1080P@30fps FHD |

Image 7.1: Physical dimensions of the Haloview monitor and a summary of key features.
8. การรับประกันและการสนับสนุน
8.1 ข้อมูลการรับประกัน
ฮาโลview products are covered by a limited warranty. Please refer to the warranty card included with your product or visit the official Haloview webดูรายละเอียดเงื่อนไขและข้อกำหนดการรับประกันได้ที่เว็บไซต์ โปรดเก็บใบเสร็จรับเงินไว้เป็นหลักฐานสำหรับการเคลมประกัน
8.2 การสนับสนุนลูกค้า
For technical assistance, troubleshooting, or product inquiries, please contact Haloview การสนับสนุนลูกค้าผ่านช่องทางต่อไปนี้:
- Webเว็บไซต์: Visit the official Haloview webเว็บไซต์นี้รวบรวมคำถามที่พบบ่อย แหล่งข้อมูลสนับสนุน และแบบฟอร์มติดต่อ
- อีเมล: Refer to your product packaging or the Haloview webเว็บไซต์สำหรับที่อยู่อีเมลฝ่ายบริการลูกค้า
- โทรศัพท์: หมายเลขติดต่ออาจมีอยู่ในเว็บไซต์ทางการ webไซต์สำหรับการสนับสนุนโดยตรง
When contacting support, please have your product model (BT6 Touch) and purchase information ready.