
ข้อมูลด้านความปลอดภัยที่สำคัญ
โปรดอ่านคำแนะนำทั้งหมดอย่างละเอียดก่อนใช้งานจอภาพนี้ เก็บคู่มือนี้ไว้เพื่อใช้อ้างอิงในอนาคต
- ห้ามให้จอภาพโดนฝนหรือความชื้น เพื่อหลีกเลี่ยงอันตรายจากไฟไหม้หรือไฟฟ้าช็อต
- อย่าเปิดจอภาพcasinก. ไม่มีชิ้นส่วนใดที่ผู้ใช้สามารถซ่อมบำรุงเองได้ภายใน แนะนำให้ช่างผู้ชำนาญการซ่อมบำรุงเป็นผู้รับผิดชอบ
- ตรวจสอบให้แน่ใจว่ามีการระบายอากาศที่เหมาะสมรอบ ๆ จอภาพ อย่าปิดกั้นช่องระบายอากาศ
- ใช้เฉพาะอะแดปเตอร์ไฟฟ้าและสายไฟที่ผู้ผลิตจัดให้เท่านั้น
- ถอดปลั๊กไฟออกจากเต้าเสียบหากจะไม่ใช้จอภาพเป็นเวลานาน
เนื้อหาแพ็คเกจ
ตรวจสอบว่ามีรายการทั้งหมดอยู่ในแพ็คเกจของคุณ:
- GIGABYTE MO32U Monitor
- สายไฟ
- สาย HDMI 2.1
- DP cable (DisplayPort cable)
- USB cable (USB Type-A to Type-B upstream cable)
- คู่มือเริ่มต้นใช้งานฉบับย่อ / คู่มือผู้ใช้ (เอกสารนี้)
การตั้งค่า
1. การประกอบขาตั้ง
Carefully remove the monitor and stand components from the packaging. Attach the stand neck to the monitor panel, ensuring it clicks securely into place. Then, attach the base to the stand neck and tighten the screws if necessary. The stand allows for height adjustment (up to 130mm) and tilt (-5° to +21°).
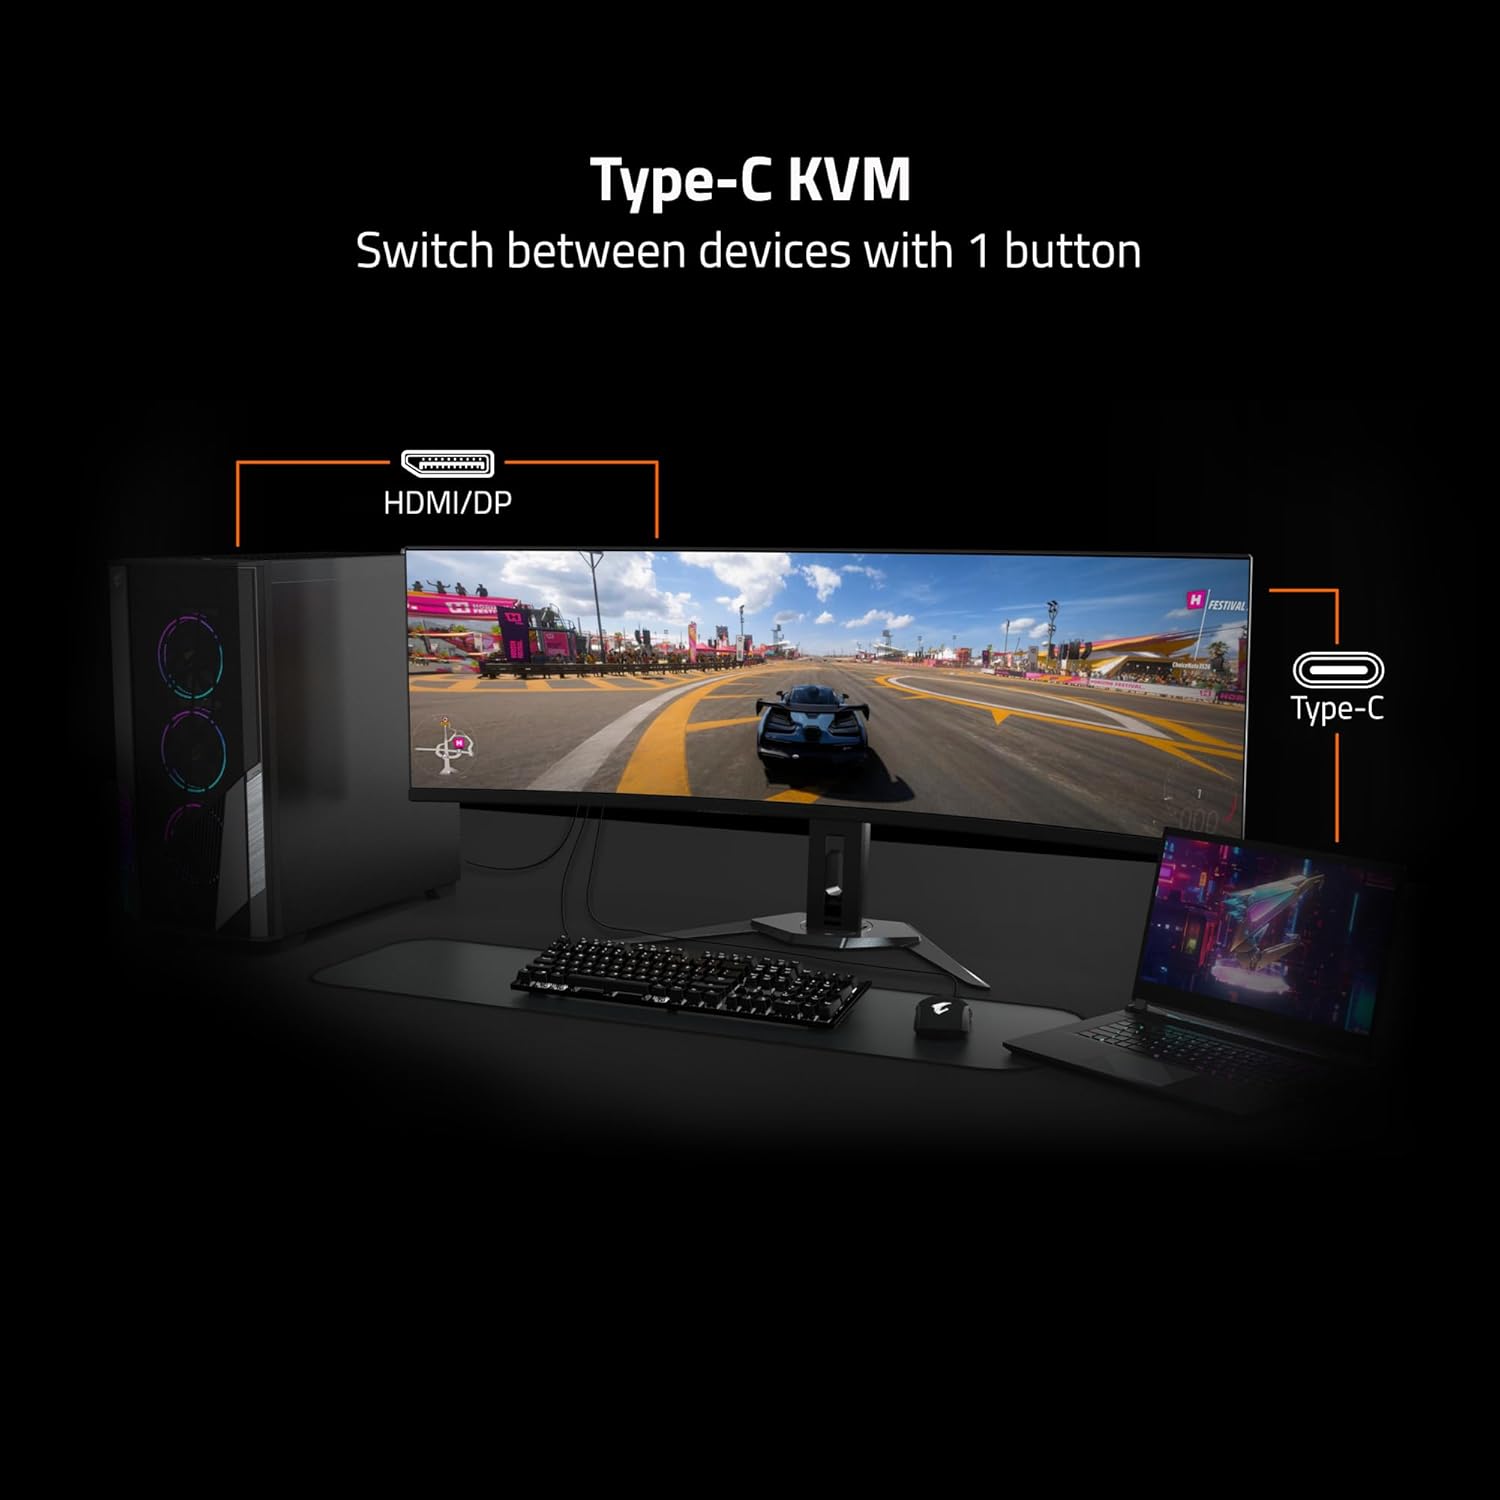
Image: Adjustable Stand and VESA Wall Mount points.
2. VESA Wall Mount Installation
The monitor supports VESA 100x100mm mounting. If using a VESA compatible wall mount or arm, remove the stand from the monitor. Secure the VESA mount to the monitor using appropriate screws (not included) according to the mount manufacturer's instructions. Refer to the image above for VESA mount point location.
3. การเชื่อมต่อจอภาพของคุณ
Connect the necessary cables to the corresponding ports on the back of the monitor and to your computer or other devices. Ensure all connections are secure.
- พลัง: ต่อสายไฟเข้ากับจอภาพและเต้ารับไฟฟ้า
- อินพุตวิดีโอ: Use the provided HDMI 2.1 or DisplayPort 1.4 cables to connect to your graphics card. The monitor also supports USB Type-C for video input.
- USB อัปสตรีม: Connect the USB upstream cable (USB Type-A to Type-B) from your computer to the monitor's USB 3.0 Upstream port to enable the monitor's USB downstream ports and KVM functionality.
- USB ดาวน์สตรีม: Connect USB devices (keyboard, mouse, USB drives) to the USB 3.0 Downstream ports.
- แจ็คหูฟัง: เชื่อมต่อหูฟังหรือลำโพงภายนอก

Image: I/O Ports diagram on the back of the monitor.
การใช้งานจอภาพของคุณ
1. เปิด/ปิดเครื่อง
Press the power button, usually located on the back or bottom of the monitor, to turn the monitor on or off. The power indicator light will illuminate when the monitor is on.
3. ฟังก์ชัน KVM
The GIGABYTE MO32U features a built-in KVM (Keyboard, Video, Mouse) switch, allowing you to control multiple devices (e.g., a desktop PC and a laptop) with a single set of keyboard and mouse connected to the monitor. To use KVM, ensure both devices are connected to the monitor via video inputs (HDMI/DP and Type-C) and the USB upstream cable is connected to the primary device. You can switch between devices using a dedicated KVM button or through the OSD menu.

Image: Type-C KVM setup for switching between devices.
4. Display Settings and Features
The MO32U monitor offers advanced display features for an optimized viewประสบการณ์การ:
- ความละเอียดและอัตราการรีเฟรช: Enjoy a 4K UHD (3840x2160) resolution with a 165Hz refresh rate for smooth visuals.
- เวลาตอบสนอง: Experience ultra-fast 0.03ms GTG (Gray-to-Gray) response time, minimizing motion blur.
- AMD FreeSync พรีเมียมโปร: ซิงโครไนซ์อัตราการรีเฟรชของจอภาพกับอัตราเฟรมของ GPU ของคุณเพื่อขจัดปัญหาภาพฉีกขาดและกระตุก
- QD-OLED Panel: Delivers vibrant colors, deep blacks, and high contrast (1.5M:1) with 99% DCI-P3 color gamut and 10-bit color depth.
- VESA DisplayHDR ทรูแบล็ค 400: Provides enhanced contrast and color accuracy for HDR content.
- VESA ClearMR 9000: Ensures high motion clarity.
- คุณสมบัติการดูแลดวงตา: Includes Flicker-Free and Low Blue Light technologies, certified by Eyesafe, to reduce eye strain during prolonged use.

Image: Key display features and certifications.

Image: Visual comparison of 0.03ms/165Hz performance versus 5ms/60Hz.
5. GIGABYTE OLED Care
The monitor incorporates GIGABYTE OLED Care, an AI-based algorithm designed to minimize the risk of OLED burn-in issues. This suite of technologies operates in the background with minimal user interference. OLED Care includes various adjustable settings within the OSD menu to help protect the panel and extend its lifespan.
การซ่อมบำรุง
การบำรุงรักษาอย่างถูกต้องจะช่วยให้จอภาพของคุณมีอายุการใช้งานยาวนานและมีประสิทธิภาพเหมาะสมที่สุด
- การทำความสะอาดหน้าจอ: เช็ดหน้าจอเบาๆ ด้วยผ้านุ่มที่ไม่เป็นขุย สำหรับรอยฝังแน่น ให้เช็ดเบาๆampชุบผ้าด้วยน้ำหรือน้ำยาทำความสะอาดหน้าจอที่ไม่ทำให้เกิดรอยขีดข่วน ห้ามฉีดของเหลวลงบนหน้าจอโดยตรง
- การทำความสะอาด Casing: ใช้ผ้าแห้งนุ่มเช็ดจอภาพasinก. หลีกเลี่ยงการใช้ผงซักฟอกหรือน้ำยาทำความสะอาดที่มีฤทธิ์กัดกร่อน
- การดูแล OLED: Allow the monitor to perform its automatic OLED Care functions. Avoid prolonged display of static images at high brightness settings.
การแก้ไขปัญหา
หากคุณพบปัญหาเกี่ยวกับจอภาพของคุณ โปรดดูวิธีแก้ไขทั่วไปต่อไปนี้:
- ไม่มีไฟฟ้า: ตรวจสอบให้แน่ใจว่าสายไฟเชื่อมต่อกับทั้งจอภาพและเต้ารับไฟฟ้าที่ใช้งานได้แน่นหนา ตรวจสอบว่าไฟแสดงสถานะเปิดอยู่หรือไม่
- ไม่มีสัญญาณ: Verify that the video cables (HDMI, DisplayPort, USB-C) are correctly connected to both the monitor and your source device. Ensure the correct input source is selected in the monitor's OSD menu.
- ภาพสั่นไหวหรือบิดเบี้ยว: Check cable connections. Ensure your graphics card drivers are up to date. Try adjusting the refresh rate in your operating system's display settings.
- การเก็บรักษาภาพ/การเบิร์นอิน: While OLED Care minimizes this risk, prolonged static images can contribute. Utilize OLED Care features and avoid displaying static content for extended periods.
- KVM ไม่สลับการทำงาน: Ensure the USB upstream cable is connected to the active source device and that the KVM function is properly configured in the OSD menu.
If the problem persists after trying these steps, contact GIGABYTE customer support.
ข้อมูลจำเพาะ
| คุณสมบัติ | รายละเอียด |
|---|---|
| ยี่ห้อ | กิกะไบต์ |
| หมายเลขรุ่น | MO32U |
| ขนาดหน้าจอ | 32 นิ้ว |
| ประเภทจอภาพ | คิวดีโอแอลอีดี |
| ปณิธาน | 4K UHD (3840 x 2160) |
| อัตราการรีเฟรช | 165 เฮิรตซ์ |
| เวลาตอบสนอง | 0.03 Milliseconds GTG |
| อัตราส่วนภาพ | 16:9 น. |
| อัตราส่วนคอนทราสต์ | 1.5ม.:1 |
| ความสว่าง | 1000 Candela per Square Meter (Peak) |
| ช่วงสี | 99% DCI-P3 |
| Viewอิงแองเกิล | 178 องศา |
| การเชื่อมต่อ | 2x HDMI 2.1, 1x DisplayPort 1.4, 1x USB Type-C, 1x USB 3.0 Upstream, 3x USB 3.0 Downstream, 1x Earphone Jack |
| การซิงค์แบบปรับตัว | เอเอ็มดี FreeSync พรีเมียมโปร |
| รองรับ HDR | VESA DisplayHDR True Black 400 |
| เควีเอ็ม | Yes, Type-C KVM |
| ประเภทการติดตั้ง | VESA 100x100mm, Height Adjustable Stand |
| การใช้พลังงาน | 54 วัตต์ |
| สี | สีดำ |
ข้อมูลการรับประกัน
This GIGABYTE MO32U monitor comes with a รับประกันจากผู้ผลิต 3 ปี. For detailed terms and conditions, please refer to the warranty card included in your product packaging or visit the official GIGABYTE webเว็บไซต์.
สนับสนุน
For technical assistance, troubleshooting beyond this manual, or warranty claims, please contact GIGABYTE customer support. You can find contact information and additional resources on the official GIGABYTE webเว็บไซต์.
แหล่งข้อมูลออนไลน์: Visit the GIGABYTE support page for drivers, FAQs, and further documentation.