
Coolake IM55SS-C
Coolake IM55SS-C 15-Inch Under Counter Ice Maker User Manual
แบบอย่าง: IM55SS-C | ยี่ห้อ: คูเลค
ข้อมูลด้านความปลอดภัยที่สำคัญ
โปรดอ่านคำแนะนำทั้งหมดอย่างละเอียดก่อนใช้งานเครื่องใช้ไฟฟ้า เก็บคู่มือนี้ไว้เพื่อใช้อ้างอิงในอนาคต
- Ensure the ice maker is connected to a grounded electrical outlet.
- ห้ามใช้งานเครื่องกับสายไฟหรือปลั๊กที่ชำรุด
- รักษาช่องระบายอากาศให้ไม่มีสิ่งกีดขวาง
- Only connect to a potable water supply.
- ห้ามเก็บวัตถุระเบิด เช่น กระป๋องสเปรย์ที่มีเชื้อเพลิงไวไฟไว้ในเครื่องใช้ไฟฟ้านี้
- ถอดปลั๊กเครื่องก่อนทำความสะอาดหรือดำเนินการบำรุงรักษาใดๆ
สินค้าเกินview
The Coolake IM55SS-C is a 15-inch wide under counter ice maker designed for both built-in and freestanding installations. It features a stainless steel exterior, an LCD control panel, and a self-cleaning function. This unit is capable of producing up to 80 lbs of ice per day and has a storage capacity of 25 lbs.

ภาพ: ด้านหน้า view of the Coolake IM55SS-C under counter ice maker, showcasinด้วยการตกแต่งด้วยสแตนเลสและมีดีไซน์เพรียวบาง
เนื้อหาแพ็คเกจ
ตรวจสอบว่ามีรายการทั้งหมดรวมอยู่ในแพ็คเกจ:
- Coolake IM55SS-C Ice Maker Unit
- ถังใส่น้ำแข็งแบบถอดออกได้
- ที่ตักน้ำแข็ง
- ท่อน้ำเข้า
- ท่อระบายน้ำ
- เครื่องกรองน้ำ
- Adjustable Leveling Legs (pre-installed or included separately)
- คู่มือการใช้งาน (เอกสารนี้)
ข้อมูลจำเพาะ
| คุณสมบัติ | ข้อมูลจำเพาะ |
|---|---|
| หมายเลขรุ่น | IM55SS-C |
| ยี่ห้อ | คูเลค |
| ขนาดสินค้า (ลึก x กว้าง x สูง) | 21" x 15" x 33" |
| การผลิตน้ำแข็งรายวัน | สูงสุด 80 ปอนด์ |
| ความจุน้ำแข็ง | 25 ปอนด์ |
| วัดtage | 3.43 กิโลวัตต์ชั่วโมง |
| ประเภทการติดตั้ง | ในตัวหรือแบบอิสระ |
| สารทำความเย็น | R290 (เป็นมิตรต่อสิ่งแวดล้อม) |
การติดตั้ง
1 การวาง
The ice maker can be installed as a freestanding unit or built into existing cabinetry. Ensure adequate clearance for front breathing vents. The unit's height of 33 inches is designed to fit under lower ADA-compliant counters.

Image: The ice maker seamlessly integrated under a kitchen counter, demonstrating a built-in installation.

Image: Diagram illustrating the flexibility of built-in or freestanding installation, highlighting the importance of front breathing vents for proper air circulation.
2. การเชื่อมต่อท่อน้ำและท่อระบายน้ำ
Connect the ice maker to a cold water supply and ensure proper drainage. This unit utilizes a gravity drain system, meaning the drain outlet must be lower than the unit's drain fitting for water to flow out. If a gravity drain is not feasible, a condensate pump may be required (not included).
- ขั้นตอนที่ 1: Install the provided drain hose onto the drain fitting located on the back of the unit. Route the drain hose to an open site drain or a suitable drainage system.
- ขั้นตอนที่ 2: Connect the water inlet hose to the water inlet on the back of the machine and to your cold water line. Ensure all connections are secure and leak-free.
- ขั้นตอนที่ 3: Plug the power cord into a grounded electrical receptacle.

Image: Detailed diagram illustrating the connection points for the water inlet, drain outlet, power cord, and external water filter.
3. การปรับระดับ
Use the included adjustable leveling legs to ensure the unit is perfectly level. Proper leveling is crucial for efficient ice production and drainage.

Image: Diagram showing the adjustable leveling legs at the base of the ice maker, indicating how to raise or lower the unit for stability.
การดำเนินการ
1. แผงควบคุม
The ice maker features an intuitive LCD control panel for easy operation. The panel displays current status and allows for various settings adjustments.

ภาพ: รายละเอียด view of the LCD control panel, showing buttons for Mode, Clean, Up, and Down, along with status indicators.

Image: Diagram explaining the functions of the control panel, including automatic ice-making, self-cleaning, adjustable ice thickness, and ice full warning light.
2. Automatic Ice Making Mode
Once connected and powered on, the unit will automatically begin the ice-making process. The ice maker produces crystal-clear, slow-melting ice cubes.

Image: The internal ice bin of the Coolake ice maker, filled with a large quantity of clear, restaurant-quality ice cubes.
3. Adjusting Ice Thickness
Use the 'UP' and 'DOWN' buttons on the control panel to adjust the thickness of the ice cubes according to your preference. Options typically include thin, medium, and thick settings, which affect the ice-making cycle duration.

Image: Diagram illustrating how to adjust ice thickness settings (Thin, Medium, Thick) and their corresponding ice cube appearance.
4. Ice Full Alert
The unit is equipped with a sensor that detects when the ice bin is full. When the bin is full, the ice-making process will automatically pause to prevent overflow. Production will resume once ice is removed.

Image: The ice maker with its door open, revealing the ice bin below the ice-making evaporator, demonstrating the internal layout.
การซ่อมบำรุง
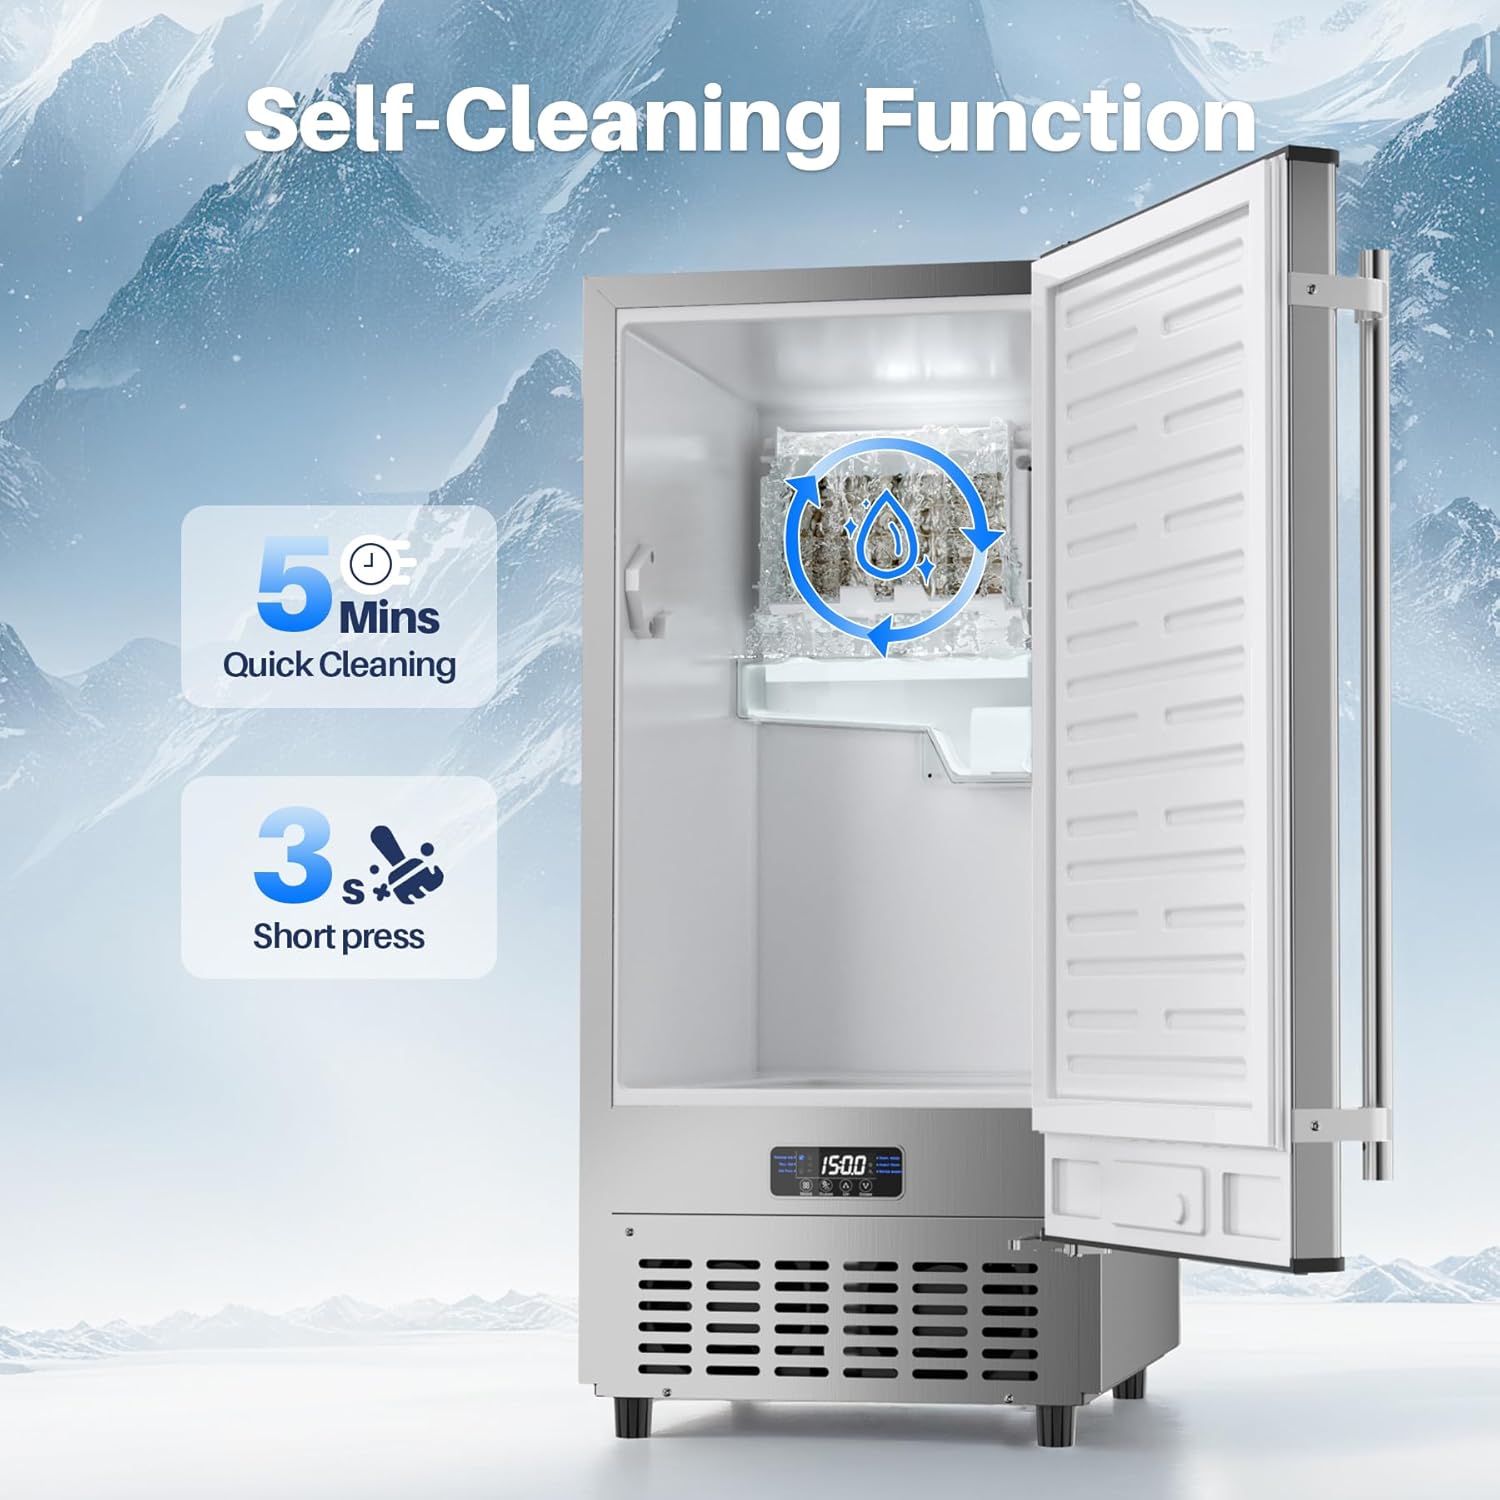
1. ฟังก์ชั่นทำความสะอาดตัวเอง
The ice maker includes a self-cleaning cycle for convenient maintenance. Refer to the control panel instructions for activating this mode. Regular use of the self-cleaning function helps maintain efficiency and longevity.

Image: Diagram showing the internal water circulation during the self-cleaning cycle, indicating a quick 5-minute cleaning process.
2. การทำความสะอาดเป็นประจำ
In addition to the self-cleaning cycle, it is recommended to manually clean the ice maker regularly. The internal ice bucket is removable for easy cleaning. Use a soft cloth and mild detergent for cleaning surfaces. Ensure the unit is unplugged before manual cleaning.
3. การเปลี่ยนไส้กรองน้ำ
The ice maker comes with a water filter to improve ice quality and reduce mineral scale buildup. For best results, replace the water filter every 6 months. Replacement frequency may vary based on local water conditions.
ภาพ: ก. view of the external water filter system, connected to the ice maker's water inlet, designed to enhance ice clarity and taste.
การแก้ไขปัญหา
โปรดดูตารางด้านล่างเพื่อดูปัญหาทั่วไปและวิธีแก้ไขที่เป็นไปได้
| ปัญหา | สาเหตุที่เป็นไปได้ | สารละลาย |
|---|---|---|
| No ice production / "No Water" alert | Water supply off, clogged water filter, kinked water line, float switch issue. | Ensure water supply is on. Check and replace water filter if necessary. Inspect water lines for kinks. Consult a technician if float switch is suspected. |
| Ice bin full, but unit continues to make ice | Ice full sensor obstructed or malfunctioning. | Clear any ice blocking the sensor. If issue persists, contact support. |
| Ice comes out in large chunks | Normal operation for some ice makers, or ice thickness setting is too high. | Use an ice scoop or pick to break apart large chunks. Adjust ice thickness setting to a thinner option. |
| หน่วยมีเสียงดังมากเกินไป | Normal operational sounds, or unit is not level. | Ensure the unit is level using the adjustable legs. Some operational noise is normal. If noise is unusual or very loud, contact support. |
| ไม่มีไฟเข้าเครื่อง | Power cord unplugged, circuit breaker tripped, no power switch on front. | Check power cord connection. Reset circuit breaker. If a front power switch is desired, consider an external switched extension cord. |
| น้ำไม่ระบายออก | Drain hose kinked or obstructed, drain outlet higher than unit, no condensate pump for non-gravity drain setup. | Check drain hose for kinks or blockages. Ensure drain outlet is lower than the unit's drain fitting. Install a condensate pump if gravity drain is not possible. |
การรับประกันและการสนับสนุน
The Coolake IM55SS-C ice maker is covered by a รับประกันอะไหล่ 1 ปี และก รับประกันคอมเพรสเซอร์ 5 ปี ตั้งแต่วันที่ซื้อสินค้า
For technical assistance, troubleshooting beyond this manual, or warranty claims, please contact Coolake customer support. Please have your model number (IM55SS-C) and purchase information ready when contacting support.
การสนับสนุนลูกค้า: [Please refer to your product packaging or Coolake's official website for current contact information.]
Ask a question about this manual
Ask about setup, troubleshooting, compatibility, parts, safety, or missing instructions. Manuals+ will review the question and use this page’s manual context to help answer it.