
1. ข้อมูลด้านความปลอดภัยที่สำคัญ
โปรดอ่านและทำความเข้าใจคำแนะนำทั้งหมดก่อนเริ่มการติดตั้ง การไม่ปฏิบัติตามคำแนะนำเหล่านี้อาจส่งผลให้เกิดไฟฟ้าช็อต ไฟไหม้ หรือการบาดเจ็บได้
- โปรดตรวจสอบให้แน่ใจว่าได้ปิดสวิตช์ไฟที่ตัวตัดวงจรแล้วก่อนทำการติดตั้งหรือบำรุงรักษา
- สายไฟทั้งหมดจะต้องเป็นไปตามมาตรฐานไฟฟ้าระดับชาติและระดับท้องถิ่น
- The ceiling fan must be mounted to a structure capable of supporting a minimum of 35 lbs (15.9 kg).
- ห้ามใช้งานพัดลมหากใบพัดหรือตัวเรือนชำรุด
- โปรดระวังอย่าให้มือ เสื้อผ้า หรือสิ่งของอื่นๆ อยู่ใกล้ใบพัดลมขณะที่พัดลมกำลังทำงาน
- พัดลมนี้ออกแบบมาสำหรับใช้ภายในอาคารเท่านั้น
2. เนื้อหาบรรจุภัณฑ์
Verify that all components listed below are included in your package. If any parts are missing or damaged, contact LEDLUX customer support before proceeding with installation.
- การประกอบตัวเรือนมอเตอร์
- Fan Blades (8 pieces)
- Downrods (4.5", 12", 24" options)
- ตัวยึด
- รีโมทคอนโทรลและเครื่องรับสัญญาณ
- ชุดอุปกรณ์ฮาร์ดแวร์ (สกรู แหวนรอง ตัวเชื่อมสายไฟ)
- คู่มือการใช้งาน
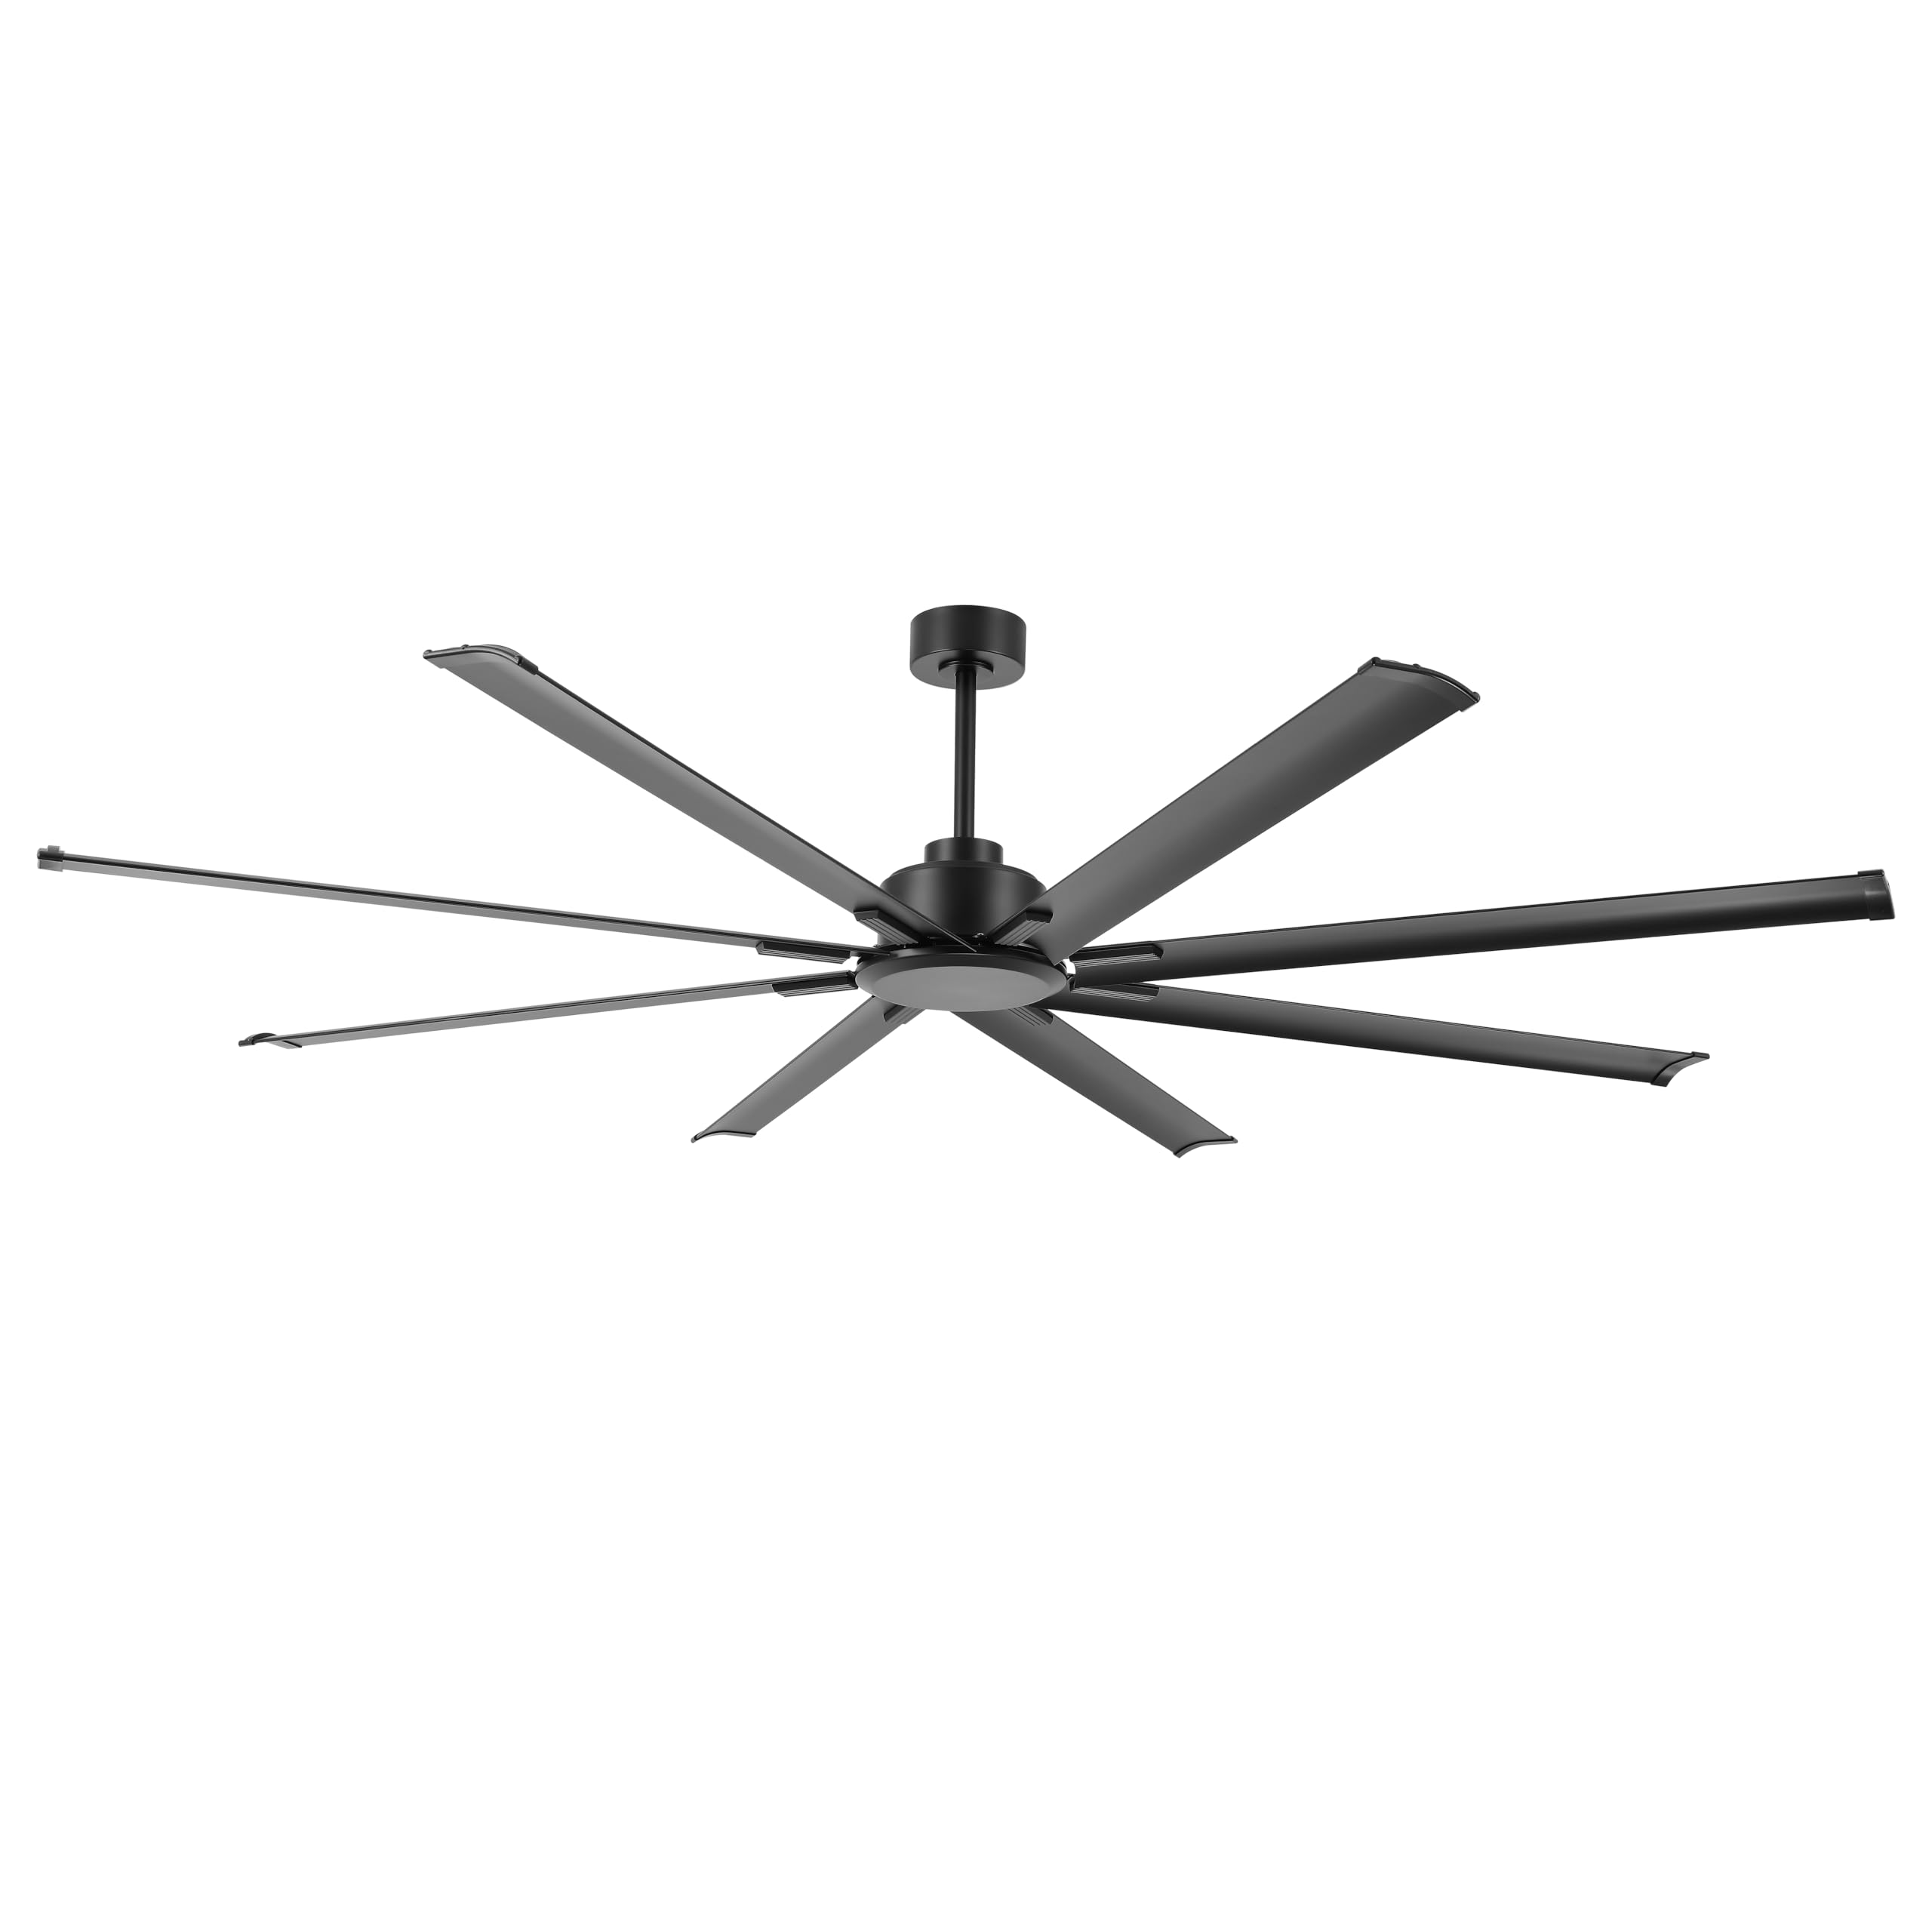
Image: The LEDLUX 96-inch ceiling fan, showcasing its eight black aluminum blades, central motor housing, and the included remote control. This image provides an overview ของส่วนประกอบหลักของผลิตภัณฑ์
3. การตั้งค่าและการติดตั้ง
Follow these steps carefully for proper installation of your LEDLUX ceiling fan.
3.1 รายการตรวจสอบก่อนการติดตั้ง
- ปิดไฟที่เบรกเกอร์หลัก
- ตรวจสอบให้แน่ใจว่าตำแหน่งติดตั้งสามารถรับน้ำหนักของพัดลมได้
- เตรียมอุปกรณ์ที่จำเป็น (ไขควง, คีมปอกสายไฟ, บันได ฯลฯ)
3.2 การติดตั้งพัดลม
- Attach the mounting bracket to the ceiling junction box. Ensure it is securely fastened to a structural beam.
- Select the appropriate downrod (4.5", 12", or 24") for your ceiling height.
- สอดสายไฟของพัดลมผ่านแกนต่อที่เลือกไว้
- Secure the downrod to the motor housing.
- ยกชุดพัดลมขึ้นอย่างระมัดระวังแล้วแขวนไว้บนตัวยึด

Image: A diagram illustrating the overall dimensions of the 96-inch ceiling fan, including its width and height with different downrod lengths (12.7", 20.3", 32.5"). It also shows how the fan can be mounted on both flat and sloped ceilings, along with the three included downrod sizes (4.5", 12", 24").

Image: This image displays the LEDLUX ceiling fan installed in three different room settings: a high ceiling, a low ceiling, and a slanted ceiling, demonstrating its versatility for various architectural styles.
3.3 การเชื่อมต่อสายไฟ
- Connect the fan's wires to the household wiring according to the wiring diagram provided in the full manual. Use wire nuts to secure connections.
- Install the remote receiver into the mounting bracket canopy.
- Connect the receiver wires to the fan and household wires as instructed.
3.4 การติดตั้งใบมีด
- Attach each of the 8 fan blades to the motor housing using the provided screws and washers. Ensure all screws are tightened securely.
4. คู่มือการใช้งาน
Your LEDLUX ceiling fan is controlled by the included remote control. Ensure batteries are installed correctly in the remote.
4.1 ฟังก์ชั่นการควบคุมระยะไกล

ภาพ: รายละเอียด view of the remote control for the LEDLUX ceiling fan, highlighting buttons for speed adjustment (1-6), fan on/off, forward/reverse function, natural wind mode, and timer settings (1H/2H/4H/8H).
- ปุ่มเปิด/ปิด: ควบคุมการเปิดหรือปิดพัดลม
- ปุ่มความเร็ว (1-6): ปรับความเร็วพัดลมจากต่ำ (1) ถึงสูง (6)
- ปุ่มเดินหน้า/ถอยหลัง: เปลี่ยนทิศทางการหมุนของใบพัด
- Timer Buttons (1H/2H/4H/8H): ตั้งค่าให้พัดลมปิดโดยอัตโนมัติหลังจากระยะเวลาที่เลือกไว้
- Natural Wind Button: จำลองลมธรรมชาติโดยการปรับความเร็วต่างๆ กัน
4.2 ฟังก์ชันปรับโหมดได้ (โหมดฤดูร้อน/ฤดูหนาว)
The fan features a reversible DC motor, allowing for year-round use to optimize air circulation.
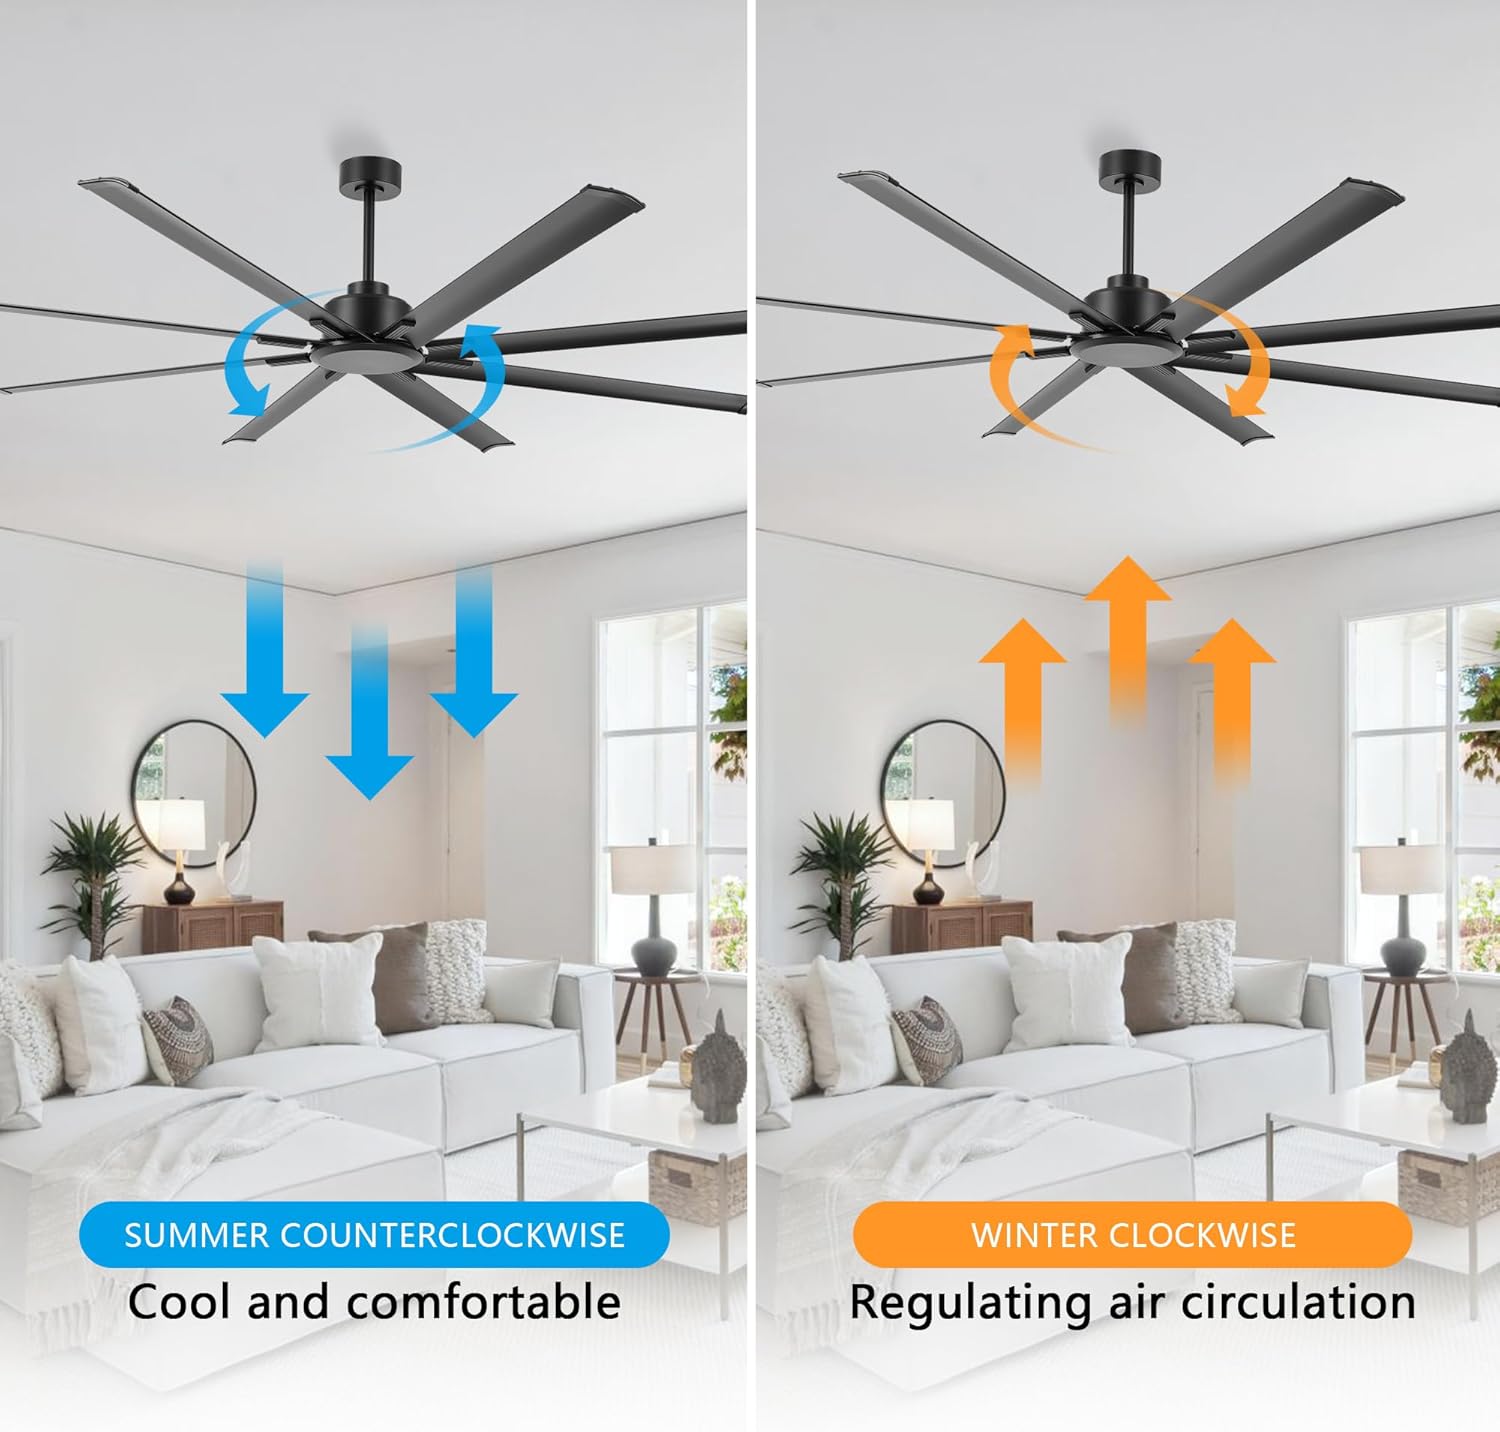
Image: This image illustrates the reversible function of the ceiling fan. On the left, blue arrows indicate counter-clockwise rotation for a cooling downdraft in summer. On the right, orange arrows show clockwise rotation for an updraft to circulate warm air in winter.
- โหมดฤดูร้อน (หมุนทวนเข็มนาฬิกา): Press the reverse button to make the blades rotate counter-clockwise, creating a downward airflow that produces a cooling effect.
- โหมดฤดูหนาว (ตามเข็มนาฬิกา): Press the reverse button again to make the blades rotate clockwise, creating an upward airflow that helps circulate warm air trapped near the ceiling.
4.3 ฟังก์ชั่นจับเวลา
Use the timer buttons on the remote control to set the fan to operate for a specific duration before automatically turning off.

Image: This graphic highlights the silent operation of the fan, stating sound is less than 35dB, and illustrates the available timer settings: 1 hour, 2 hours, 4 hours, and 8 hours.
- Press the 1H, 2H, 4H, or 8H button to activate the timer. The fan will run for the selected time and then shut off.
- To cancel the timer, press the fan On/Off button or select a different timer setting.
5. การบำรุงรักษา
การบำรุงรักษาตามปกติจะช่วยให้พัดลมเพดานของคุณมีประสิทธิภาพสูงสุดและมีอายุการใช้งานยาวนาน
- การทำความสะอาด: ควรเช็ดใบพัดและตัวมอเตอร์ด้วยผ้าเนื้อนุ่มเป็นระยะๆamp ผ้า ห้ามใช้สารทำความสะอาดที่มีฤทธิ์กัดกร่อนหรือตัวทำละลาย
- สกรูขันให้แน่น: Check all screws on the fan blades and mounting hardware annually to ensure they are secure.
- ความสมดุลของใบมีด: If the fan wobbles, ensure all blades are securely attached and consider using a blade balancing kit (not included) if necessary.
6 การแก้ไขปัญหา
หากคุณพบปัญหาเกี่ยวกับพัดลม โปรดดูปัญหาทั่วไปและวิธีแก้ไขต่อไปนี้:
| ปัญหา | สาเหตุที่เป็นไปได้ | สารละลาย |
|---|---|---|
| พัดลมไม่เริ่มทำงาน | ไม่มีไฟเข้าพัดลม | ตรวจสอบเบรกเกอร์และสวิตช์ติดผนัง ตรวจสอบให้แน่ใจว่าการเชื่อมต่อสายไฟทั้งหมดแน่นหนาดีแล้ว |
| รีโมตคอนโทรลไม่ทำงาน | Dead batteries or incorrect pairing | เปลี่ยนแบตเตอรี่รีโมท โปรดดูคู่มือฉบับเต็มสำหรับคำแนะนำในการจับคู่รีโมท |
| พัดลมสั่นมากเกินไป | Loose blades or unbalanced blades | Ensure all blade screws are tight. Check for bent blades. Use a blade balancing kit if needed. |
| การทำงานมีเสียงดัง | Loose screws or motor issues | ขันสกรูทั้งหมดให้แน่น หากยังมีเสียงดังอยู่ โปรดติดต่อฝ่ายบริการลูกค้า |
7. ข้อมูลจำเพาะ
| คุณสมบัติ | รายละเอียด |
|---|---|
| ยี่ห้อ | แอลอีดีลักซ์ |
| หมายเลขรุ่น | SYCF9605 |
| สี | สีดำ |
| ประเภทการติดตั้ง | การติดตั้งบนเพดาน |
| จำนวนความเร็ว | 6 |
| เล่มที่tage | 12 โวลต์ (กระแสตรง) |
| การใช้งานภายใน/ภายนอกอาคาร | ในร่ม |
| วิธีการควบคุม | ระยะไกล |
| ประสิทธิภาพ | ประสิทธิภาพสูง |
| จำนวนใบมีด | 8 |
| วัสดุใบมีด | อลูมิเนียม |
8. การรับประกันและการสนับสนุน
LEDLUX stands behind the quality of its products.

Image: A graphic detailing the LEDLUX "Worry-Free Promise," which includes a 3-Year Full Warranty on all parts and a 10-Year Motor Warranty.
- การรับประกันมอเตอร์: The DC motor is covered by a 10-year free replacement warranty.
- การรับประกันชิ้นส่วน: All other parts of the fan are covered by a full 3-year warranty.
For warranty claims, technical assistance, or missing parts, please contact LEDLUX customer support through the retailer where the product was purchased or visit the official LEDLUX webเว็บไซต์.