
1. บทนำ
This manual provides essential instructions for the safe and effective use, installation, and maintenance of your Linkifly XT1 Vacuum Cleaner Replacement Battery. Please read this manual thoroughly before installing or using the battery to ensure optimal performance and longevity.
2. ข้อมูลด้านความปลอดภัย
- ห้ามถอดประกอบ เปิด หรือทำลายชุดแบตเตอรี่
- อย่าให้แบตเตอรี่ถูกความร้อนหรือไฟ หลีกเลี่ยงการจัดเก็บในแสงแดดโดยตรง
- อย่าลัดวงจรก้อนแบตเตอรี่ อย่าเก็บแบตเตอรี่ไว้ในกล่องหรือลิ้นชักโดยไม่ได้ตั้งใจ ซึ่งอาจทำให้ลัดวงจรกันหรือลัดวงจรด้วยวัสดุที่นำไฟฟ้าได้
- อย่าให้แบตเตอรี่เกิดการกระแทกทางกล
- ในกรณีที่แบตเตอรี่รั่ว อย่าให้ของเหลวสัมผัสกับผิวหนังหรือดวงตา หากเข้าตาให้ล้างบริเวณที่ได้รับผลกระทบด้วยน้ำปริมาณมากและปรึกษาแพทย์
- รักษาแบตเตอรี่ให้สะอาดและแห้ง
- ห้ามใช้เครื่องชาร์จอื่นใดนอกจากที่จัดไว้ให้โดยเฉพาะสำหรับใช้กับอุปกรณ์เท่านั้น
- สังเกตเครื่องหมายบวก (+) และลบ (-) บนแบตเตอรี่และอุปกรณ์ และตรวจสอบว่าใช้งานอย่างถูกต้อง
- เก็บแบตเตอรี่ให้พ้นจากมือเด็ก
3. เนื้อหาบรรจุภัณฑ์
ตรวจสอบให้แน่ใจว่าสินค้าทุกชิ้นครบถ้วนและอยู่ในสภาพดีก่อนเปิดบรรจุภัณฑ์
- 1 x Linkifly XT1 Vacuum Cleaner Replacement Battery
4. การตั้งค่าและการติดตั้ง
Follow these steps to safely replace the battery in your compatible vacuum cleaner.
- หมดแรง: Ensure your vacuum cleaner is completely turned off and unplugged from any power source before beginning the battery replacement process.
- ค้นหาช่องใส่แบตเตอรี่: Identify the battery compartment on your vacuum cleaner. This is typically located on the main body or handle of the device. Refer to your vacuum cleaner's original manual if you are unsure.
- ถอดแบตเตอรี่เก่าออก: Depending on your vacuum model, you may need to press a release button or unlatch a cover to access the battery. Carefully remove the old battery pack.
- ใส่แบตเตอรี่ใหม่: Align the Linkifly XT1 replacement battery with the battery slot. Ensure the connectors are properly aligned and gently push the battery into place until it clicks or locks securely. Do not force the battery.
- ช่องที่ปลอดภัย: Close the battery compartment cover or latch it securely.
- ค่าใช้จ่ายเริ่มต้น: After installation, it is recommended to fully charge the new battery before its first use. Connect your vacuum cleaner to its charger and allow it to charge until the indicator light shows a full charge.

Image: The Linkifly XT1 Replacement Battery, highlighting its connection interface for proper installation.
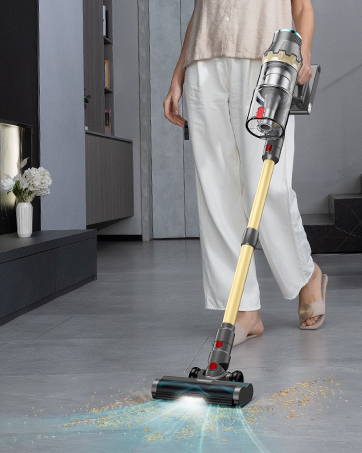
Image: A person operating a Linkifly stick vacuum cleaner, demonstrating the type of device this battery is designed for.
5. คู่มือการใช้งาน
The XT1 replacement battery operates in conjunction with your vacuum cleaner's existing charging system. Once installed, the battery will power your vacuum as designed by the original manufacturer.
- การชาร์จ: Always use the original charger provided with your vacuum cleaner. Connect the charger to the vacuum and a power outlet. The charging indicator on your vacuum will show the charging status.
- การใช้ครั้งแรก: For optimal performance, fully charge the battery before its initial use.
- การระบาย: Avoid completely draining the battery frequently. Recharge the battery when the vacuum's power indicator shows low battery.
6. การบำรุงรักษา
Proper maintenance ensures the longevity and performance of your XT1 replacement battery.
- การชาร์จปกติ: If the vacuum is not used for an extended period, charge the battery at least once every 3 months to prevent deep discharge, which can reduce battery life.
- พื้นที่จัดเก็บ: เก็บแบตเตอรี่ไว้ในที่แห้งและเย็น หลีกเลี่ยงแสงแดดโดยตรงและอุณหภูมิที่สูงหรือต่ำเกินไป สำหรับการเก็บรักษาในระยะยาว ควรตรวจสอบให้แน่ใจว่าแบตเตอรี่มีประจุอยู่บ้าง (ประมาณ 50%)
- การทำความสะอาด: รักษาขั้วแบตเตอรี่ให้สะอาด ปราศจากฝุ่นหรือสิ่งสกปรก ใช้ผ้าแห้งเช็ดทำความสะอาดหากจำเป็น
- การกำจัด: ห้ามทิ้งแบตเตอรี่ลงในถังขยะทั่วไป โปรดปฏิบัติตามระเบียบข้อบังคับท้องถิ่นเกี่ยวกับการกำจัดแบตเตอรี่ลิเธียมไอออนอย่างถูกต้อง
7 การแก้ไขปัญหา
If you encounter issues with your XT1 replacement battery, refer to the following common problems and solutions.
| ปัญหา | สาเหตุที่เป็นไปได้ | สารละลาย |
|---|---|---|
| แบตเตอรี่ไม่ชาร์จ | Charger not connected properly; faulty charger; battery not seated correctly; vacuum cleaner issue. | Ensure charger is securely connected to both vacuum and power outlet. Verify the battery is correctly installed. Test the charger with another device if possible. Consult your vacuum cleaner's manual for charging troubleshooting. |
| เวลาในการทำงานสั้น | Battery not fully charged; battery degradation over time; vacuum cleaner operating in high-power mode. | Ensure the battery is fully charged before use. If the battery is old, its capacity may naturally decrease. Use the vacuum in standard mode for longer run times. |
| เครื่องดูดฝุ่นไม่เปิด | Battery not charged; battery not installed correctly; vacuum cleaner fault. | Charge the battery. Re-install the battery, ensuring it is securely seated. If the issue persists, the problem might be with the vacuum cleaner itself, not the battery. |
If these solutions do not resolve the issue, please contact Linkifly customer support.
8. ข้อมูลจำเพาะ
- แบบอย่าง: เอที1
- ยี่ห้อ: ลิงก์ฟลาย
- ส่วนประกอบเซลล์แบตเตอรี่: ลิเธียมไอออน
- น้ำหนักสินค้า: 6.4 ออนซ์
- ขนาดแพ็คเกจ: 7.68 x 3.66 x 1.69 นิ้ว
- ASIN: B0DR2TVS6C
- วันที่เข้าใช้งานครั้งแรก: วันที่ 20 ธันวาคม 2024
9. การรับประกันและการสนับสนุน
Linkifly is committed to providing high-quality products and excellent customer service.
- การรับประกัน: This product comes with a 12-Month Normal Warranty from the date of purchase.
- การรับประกันคืนเงิน: Enjoy a 30-Day Money Back Guarantee.
- การสนับสนุนลูกค้า: Linkifly offers 24/7 Customer Support.
- ความพึงพอใจของลูกค้า: We aim for 100% Customer Satisfaction.
For warranty claims, technical assistance, or any questions regarding your XT1 replacement battery, please contact Linkifly customer service through the retailer's platform or the official Linkifly webเว็บไซต์.
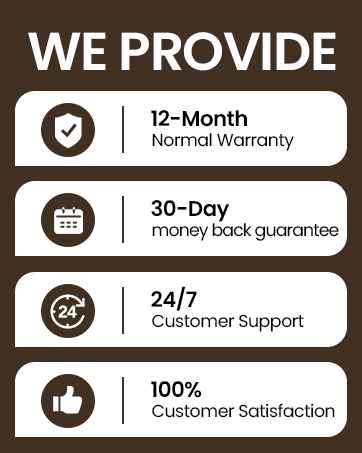
ภาพ: เหนือview of Linkifly's customer service commitments, including warranty and satisfaction guarantees.