
การแนะนำ
This manual provides detailed instructions for the installation, operation, and maintenance of your GIGABYTE Z890 AORUS Master AI TOP Motherboard. Designed to support Intel Core Ultra Processors (Series 2), this E-ATX motherboard features DDR5 memory compatibility, multiple M.2 slots, PCIe 5.0 support, Thunderbolt 4, WIFI7, and 10GbE LAN for optimal performance and connectivity. Please read this manual thoroughly before proceeding with installation to ensure proper setup and functionality.

Figure 1: GIGABYTE Z890 AORUS Master AI TOP Motherboard overview.
คุณสมบัติหลัก
- รองรับโปรเซสเซอร์: Compatible with Intel Core Ultra Processors (Series 2) for enhanced computing power.
- หน่วยความจำ: Four DDR5 DIMM slots with XMP Memory Module Support for high-speed memory configurations.
- การออกแบบพลังงาน: Robust 20+1+2, 110A Smart Power Stage เพื่อการจ่ายพลังงานที่เสถียร
- การจัดการความร้อน: Features VRM Thermal Armor Advanced and M.2 Thermal Guard for efficient heat dissipation.
- การเชื่อมต่อ: Includes PCIe 5.0 slots, four M.2 slots, dual Thunderbolt 4 ports, and a front USB-C port.
- การออกแบบที่เป็นมิตรต่อผู้ใช้: Incorporates M.2 EZ-Latch, PCIe EZ-Latch, WIFI EZ-Plug, and EZ-Debug Zone for simplified installation and troubleshooting.
- การสร้างเครือข่าย: Equipped with WIFI7 and 10GbE LAN for high-speed wireless and wired network connections.

Figure 2: GIGABYTE Z890 Motherboards are fully compatible with Intel Core Ultra 200S Plus Processors.
การติดตั้งและการตั้งค่า
Follow these steps for proper installation of your GIGABYTE Z890 AORUS Master AI TOP Motherboard and its components.
1. การติดตั้งโปรเซสเซอร์
Carefully align your Intel Core Ultra (Series 2) processor with the LGA 1851 socket. Ensure the triangular mark on the CPU matches the mark on the socket. Gently lower the CPU into the socket and secure it with the retention arm.

รูปที่ 3: รายละเอียด view of the LGA 1851 processor socket.
2. การติดตั้งหน่วยความจำ (RAM)
Open the clips on both ends of the DDR5 DIMM slots. Align the notch on your DDR5 memory module with the key in the slot. Press down firmly on both ends of the memory module until the clips snap into place, securing the RAM.

Figure 4: DDR5 memory slots for RAM installation.
3. การติดตั้งอุปกรณ์จัดเก็บข้อมูล (M.2 SSD)
The motherboard features four M.2 slots. Remove the M.2 Thermal Guard heatsink. Insert your M.2 SSD into the slot, ensuring it is fully seated. Secure the SSD with the EZ-Latch mechanism, then reattach the Thermal Guard heatsink.
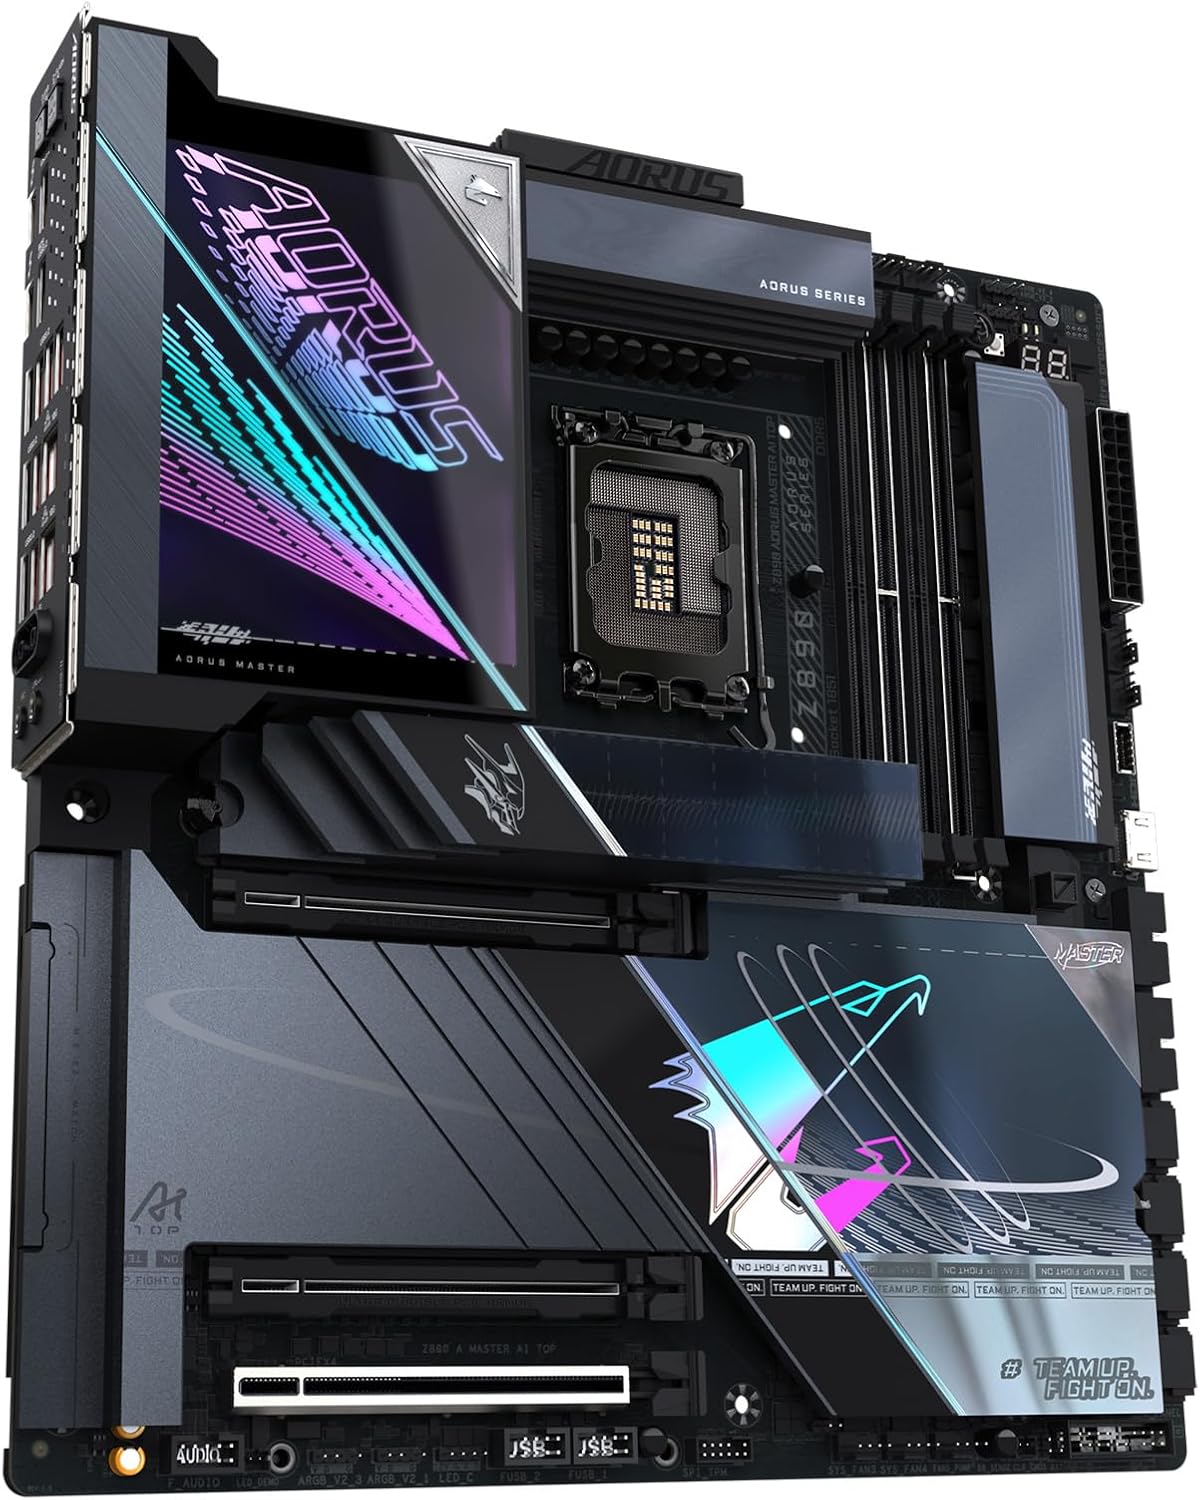
Figure 5: M.2 slots with heatsinks for high-speed storage.
4. การติดตั้งการ์ดกราฟิก (PCIe)
Open the PCIe EZ-Latch on the desired PCIe 5.0 x16 slot. Insert your graphics card firmly into the slot until it clicks into place. Ensure any necessary power connectors from your power supply are attached to the graphics card.

Figure 6: PCIe 5.0 slots for graphics cards and expansion.
5. การเชื่อมต่ออุปกรณ์ต่อพ่วงและพลังงาน
Connect all necessary power cables from your power supply to the motherboard (24-pin ATX and 8-pin CPU power connectors). Connect your case's front panel connectors, USB ports, and audio jacks. Utilize the various USB, Thunderbolt 4, and LAN ports on the rear I/O panel for external devices.

Figure 7: Rear I/O panel with USB, LAN, and audio ports.

Figure 8: Detailed diagram illustrating various ports and features on the motherboard.
วิดีโอแนะนำการติดตั้ง
For a visual guide on motherboard installation, refer to the video below. While the video may feature a slightly different model (Z790), the general installation steps for CPU, RAM, and other components are largely similar.
Video 1: Motherboard installation overview. This video demonstrates the general process of installing a GIGABYTE AORUS Master motherboard, including CPU and RAM.
คำแนะนำการใช้งาน
After successful hardware installation, connect your display, keyboard, and mouse. Power on your system. The motherboard will initiate the Power-On Self-Test (POST). You may need to access the BIOS/UEFI setup to configure boot order, enable XMP for memory, or adjust other system settings. Refer to the GIGABYTE website for the latest BIOS updates and driver downloads for your operating system (e.g., Windows 11).
- การเข้าถึง BIOS/UEFI: Typically accessed by pressing เดล or F2 ระหว่างการเริ่มต้นระบบ
- การติดตั้งไดร์เวอร์: Install all necessary drivers for chipset, audio, LAN, and graphics from the GIGABYTE support website or the included driver disk.
- ระบบปฏิบัติการ: Install your preferred operating system, such as Windows 11, following its installation prompts.
การซ่อมบำรุง
การบำรุงรักษาอย่างสม่ำเสมอจะช่วยให้เมนบอร์ดของคุณมีอายุการใช้งานยาวนานและทำงานได้อย่างมีประสิทธิภาพสูงสุด
- การกำจัดฝุ่น: ทำความสะอาดฝุ่นออกจากเมนบอร์ดและส่วนประกอบต่างๆ เป็นระยะโดยใช้ลมอัด ตรวจสอบให้แน่ใจว่าได้ปิดเครื่องและถอดปลั๊กออกก่อนทำความสะอาด
- อัปเดต BIOS: ตรวจสอบ GIGABYTE website for BIOS updates. Updates can improve stability, compatibility, and performance. Follow the provided instructions carefully when updating the BIOS.
- การอัปเดตไดรเวอร์: Keep all system drivers updated to ensure compatibility and optimal performance with new software and hardware.
- การจัดการสายเคเบิล: ตรวจสอบให้แน่ใจว่าสายเคเบิลทั้งหมดถูกจัดวางอย่างเป็นระเบียบ เพื่อเพิ่มการไหลเวียนของอากาศและป้องกันการรบกวน
การแก้ไขปัญหา
If you encounter issues, refer to these common troubleshooting steps.
- ไม่มีไฟ/ไม่มี POST:
- Verify all power cables are securely connected to the motherboard and components.
- Check the power supply unit (PSU) for proper function.
- ตรวจสอบให้แน่ใจว่า CPU และ RAM ติดตั้งอย่างถูกต้อง
- Utilize the EZ-Debug Zone LEDs on the motherboard to identify the component causing the POST failure.
- ความไม่เสถียรของระบบ/การขัดข้อง:
- Check RAM for proper installation and run memory diagnostic tools.
- Ensure CPU and GPU temperatures are within normal operating ranges.
- อัปเดต BIOS และไดรเวอร์ทั้งหมดให้เป็นเวอร์ชันล่าสุด
- Test components individually if possible to isolate the faulty part.
- ปัญหาการตรวจจับอุปกรณ์รอบข้าง:
- ตรวจสอบให้แน่ใจว่าอุปกรณ์ USB เชื่อมต่อกับพอร์ตที่ถูกต้องแล้ว
- Check for updated drivers for the specific peripheral.
- Verify BIOS settings for USB or other port configurations.
ข้อมูลจำเพาะ
| คุณสมบัติ | รายละเอียด |
|---|---|
| ยี่ห้อ | กิกะไบต์ |
| ชื่อรุ่น | Z890 AORUS MASTER AI TOP |
| ซ็อคเก็ตซีพียู | อินเทล LGA 1851 |
| โปรเซสเซอร์ที่เข้ากันได้ | โปรเซสเซอร์ Intel Core Ultra (ซีรี่ส์ 2) |
| ประเภทชิปเซ็ต | อินเทล Z890 |
| เทคโนโลยีหน่วยความจำ RAM | DDR5 |
| ความเร็วสัญญาณนาฬิกาหน่วยความจำ | 5600 เมกะเฮิรตซ์ |
| มีช่องหน่วยความจำให้เลือก | 4 |
| อินเทอร์เฟซการ์ดกราฟิก | พีซีไอ เอ็กซ์เพรส |
| Total PCIe Ports | 4 |
| Total M.2 Slots | 4 |
| พอร์ต SATA ทั้งหมด | 4 |
| พอร์ต USB รวม | 10 (including Thunderbolt 4 and Front USB-C) |
| การสร้างเครือข่าย | WIFI7, LAN 10GbE |
| แพลตฟอร์ม | วินโดวส์ 11 |
| ฟอร์มแฟกเตอร์ | อี-เอทีเอ็กซ์ |
การรับประกันและการสนับสนุน
The GIGABYTE Z890 AORUS Master AI TOP Motherboard comes with a การรับประกันจากผู้ผลิต 5 ปี. For technical support, driver downloads, BIOS updates, and further assistance, please visit the official GIGABYTE support website. You can also refer to the comprehensive online resources and FAQs available there.
For warranty claims, retain your proof of purchase. Contact GIGABYTE customer service for detailed instructions on warranty procedures.