1. บทนำ
Thank you for choosing the Netzu Alarm Clock 6206ZD. This digital alarm clock is designed to provide a reliable wake-up experience, especially for heavy sleepers and individuals with hearing impairments, through its powerful vibrating bed shaker, loud alarm, and bright wake-up light. This manual will guide you through the setup, operation, and maintenance of your new alarm clock.
2. ข้อมูลด้านความปลอดภัย
- ตรวจสอบให้แน่ใจว่าได้เสียบอะแดปเตอร์แปลงไฟเข้ากับเต้ารับไฟฟ้าที่เหมาะสมแล้ว
- อย่าให้เครื่องโดนน้ำหรือความชื้นมากเกินไป
- เก็บอุปกรณ์ให้ห่างจากแหล่งความร้อนและแสงแดดโดยตรง
- ใช้เฉพาะอะแดปเตอร์ที่ให้มาเท่านั้น
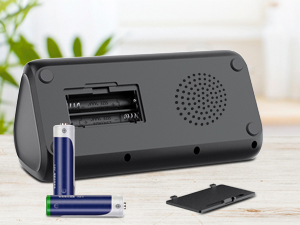
- For battery backup, insert 2 AAA batteries (not included) correctly, observing polarity.
- อย่าพยายามถอดประกอบหรือซ่อมแซมอุปกรณ์ด้วยตนเอง ติดต่อฝ่ายสนับสนุนลูกค้าเพื่อขอความช่วยเหลือ
3. เนื้อหาบรรจุภัณฑ์
กรุณาตรวจสอบแพ็คเกจสำหรับรายการต่อไปนี้:
- Netzu Alarm Clock (Model 6206ZD)
- Vibrating Bed Shaker
- อะแดปเตอร์แปลงไฟ
- คู่มือการใช้งาน

รูปที่ 3.1: ส่วนประกอบของผลิตภัณฑ์
4. สินค้าหมดview
Familiarize yourself with the main components of your Netzu Alarm Clock:
- จอแสดงผลด้านหน้า: Large RGB LED time display.
- แผงด้านบน: Snooze button, light bar, control buttons (Time Set, Alarm Set, Brightness, Color, Volume, DST).
- แผงด้านหลัง: Power input port, bed shaker port, battery compartment.
- Vibrating Bed Shaker: Connects to the alarm clock for silent or combined wake-up.
5. การตั้งค่า
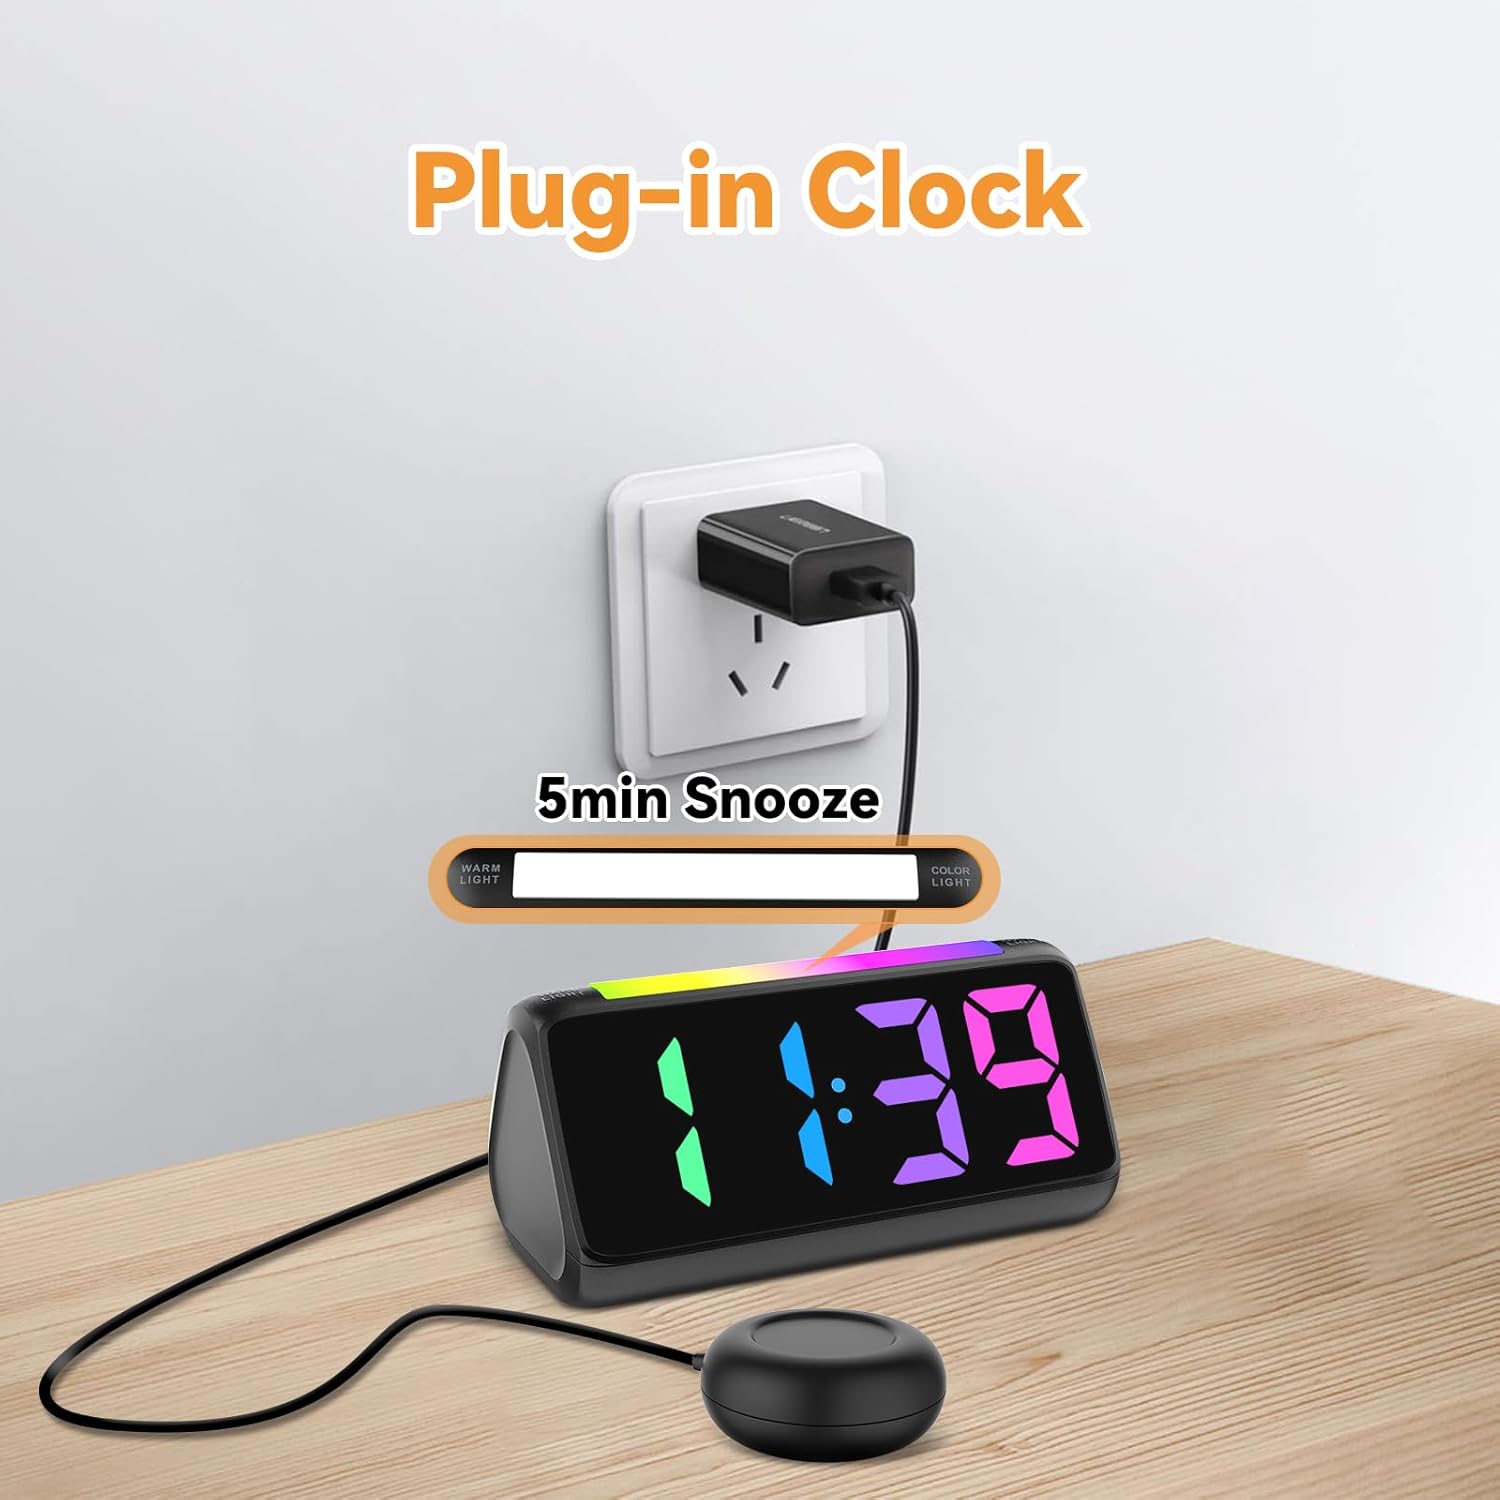
5.1 การเชื่อมต่อสายไฟ
- เชื่อมต่ออะแดปเตอร์ไฟฟ้าที่ให้มาเข้ากับพอร์ตอินพุต DC ที่ด้านหลังของนาฬิกาปลุก
- เสียบอะแดปเตอร์แปลงไฟเข้ากับเต้ารับไฟฟ้าทั่วไป หน้าจอจะสว่างขึ้น
รูปที่ 5.1: การเชื่อมต่อไฟฟ้า
5.2 Battery Installation (for Power Loss Memory)
เพื่อรักษาระบบเวลาและการตั้งค่านาฬิกาปลุกไว้ระหว่างไฟฟ้าดับtage. ติดตั้งแบตเตอรี่สำรอง:
- Open the battery compartment cover on the bottom of the alarm clock.
- Insert 2 new AAA batteries (not included), ensuring correct polarity (+ and -).
- ปิดฝาช่องใส่แบตเตอรี่ให้แน่น
รูปที่ 5.2: ช่องใส่แบตเตอรี่
5.3 การเชื่อมต่อเครื่องเขย่าเตียง
Plug the cable of the vibrating bed shaker into the dedicated port on the back of the alarm clock. Place the shaker under your pillow or mattress for optimal vibration.
6. คู่มือการใช้งาน
6.1 การตั้งเวลา
- กดปุ่มค้างไว้ ตั้งเวลา button (usually located on the top or back) until the hour digits flash.
- ใช้ - buttons (or similar adjustment buttons) to set the hour. Pay attention to AM/PM indicators if in 12-hour format.
- กด ตั้งเวลา อีกครั้งเพื่อยืนยันชั่วโมงและเปลี่ยนเป็นนาที
- ใช้ - ปุ่มเพื่อตั้งนาที
- กด ตั้งเวลา one last time to save the time.
- To switch between 12-hour and 24-hour display, briefly press the ตั้งเวลา button when not in setting mode.
- To adjust for Daylight Saving Time (DST), long press the เวลาออมแสง button to add or subtract an hour.
รูปที่ 6.1: การแสดงรูปแบบเวลา
6.2 การตั้งปลุก
The alarm clock offers three wake-up modes: Ring Only, Vibration Only, or Ring + Vibration.
- กดปุ่มค้างไว้ ตั้งปลุก กดปุ่มจนกว่าตัวเลขชั่วโมงปลุกจะกะพริบ
- ใช้ - ปุ่มสำหรับตั้งเวลาปลุกที่ต้องการ
- กด ตั้งปลุก อีกครั้งเพื่อยืนยันชั่วโมงและเปลี่ยนเป็นนาที
- ใช้ - ปุ่มสำหรับตั้งนาทีปลุกตามต้องการ
- กด ตั้งปลุก again to select the wake-up mode: Ring Only, Vibration Only, or Ring + Vibration. An icon on the display will indicate the selected mode.
- กด ตั้งปลุก one last time to save the alarm settings.
- To adjust alarm volume (4 levels, up to 110 dB), use the ปริมาณ button (or +/- during alarm setting).

รูปที่ 6.2: Three Wake-up Modes
6.3 ฟังก์ชั่นเลื่อนซ้ำ
เมื่อเสียงสัญญาณเตือนดังขึ้น ให้กดปุ่มขนาดใหญ่ เลื่อน button on the top of the clock to temporarily silence the alarm for 5 minutes. The alarm will sound again after the snooze period.
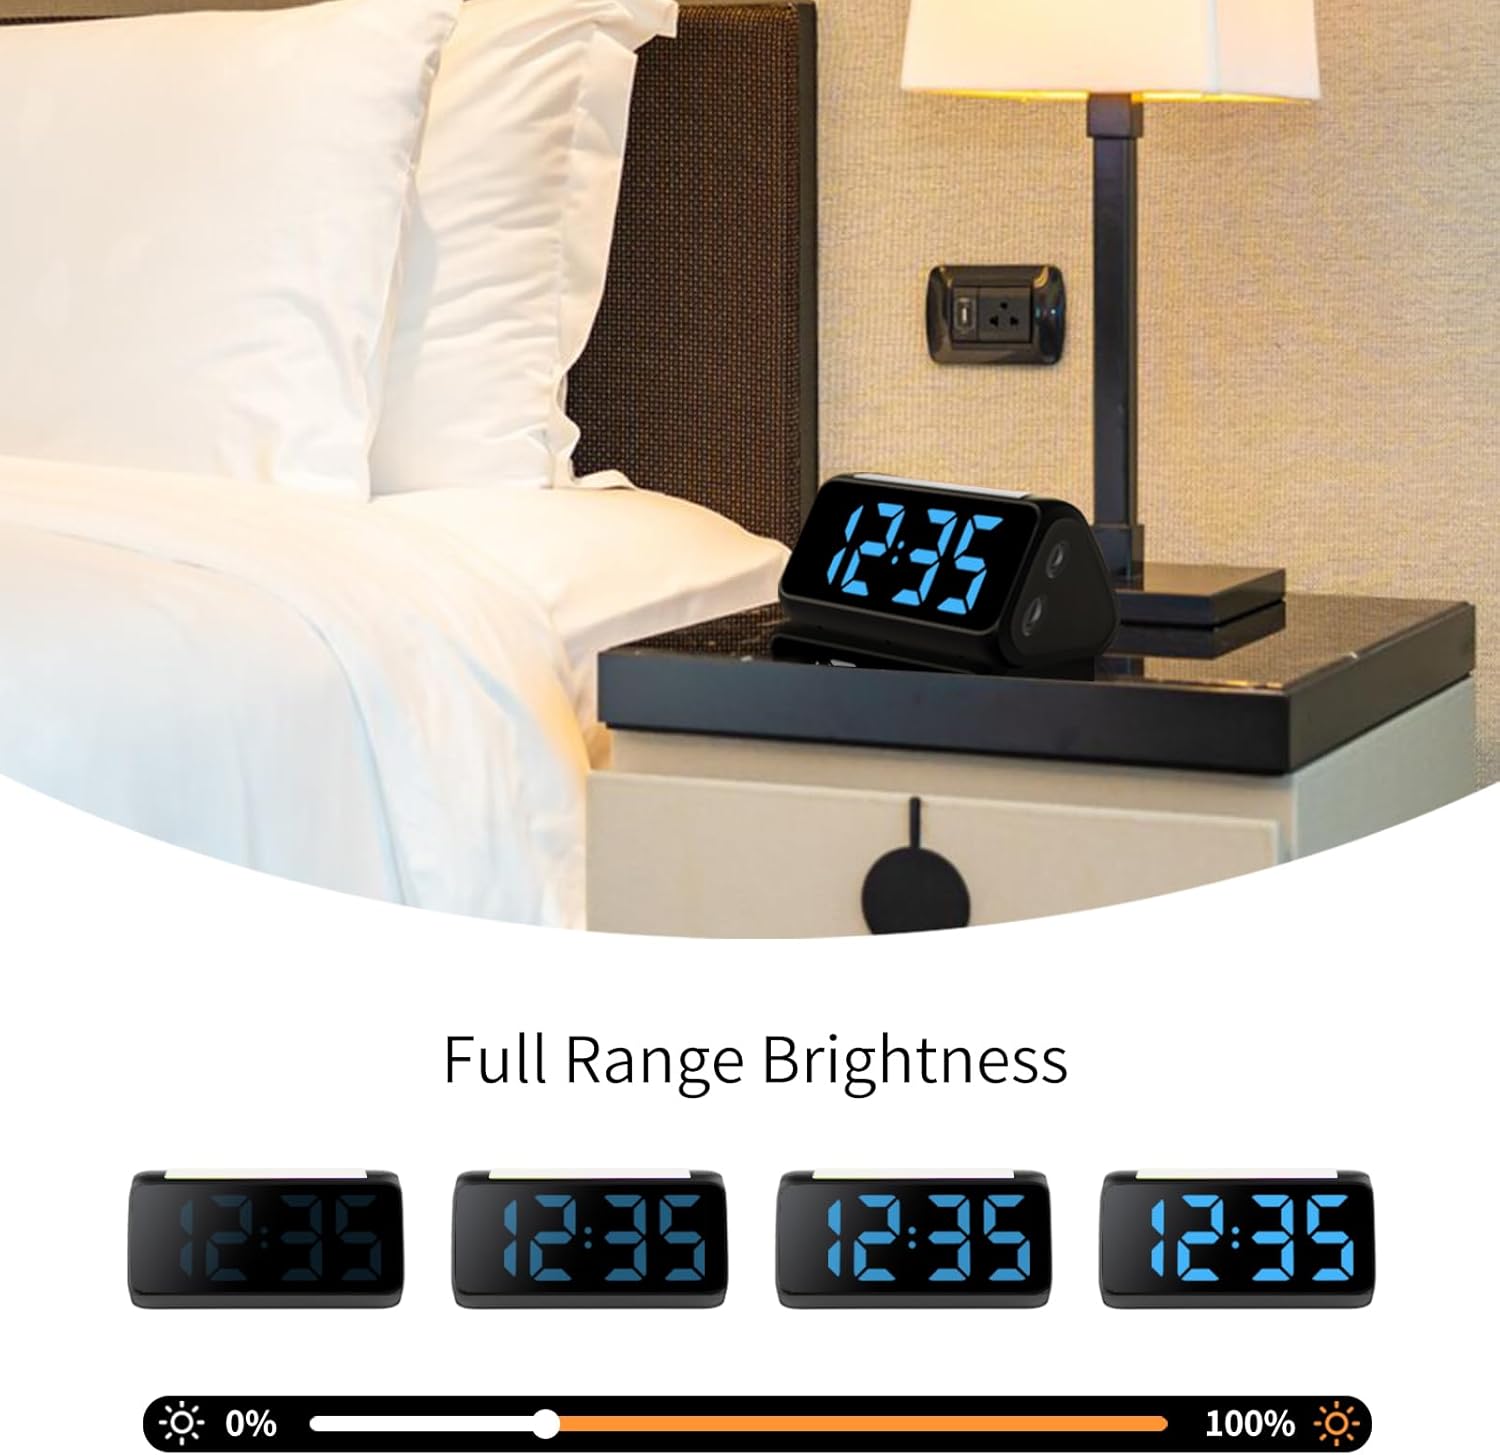
6.4 Adjusting Display Brightness and Color
The alarm clock features an RGB display with 11 color options and adjustable brightness (10%-100%).
- กดปุ่ม ความสว่าง button (or a dedicated dimmer button) to cycle through brightness levels for the time display.
- กดปุ่ม สี button to cycle through the 11 available display colors.
รูปที่ 6.3: Colorful Display Options
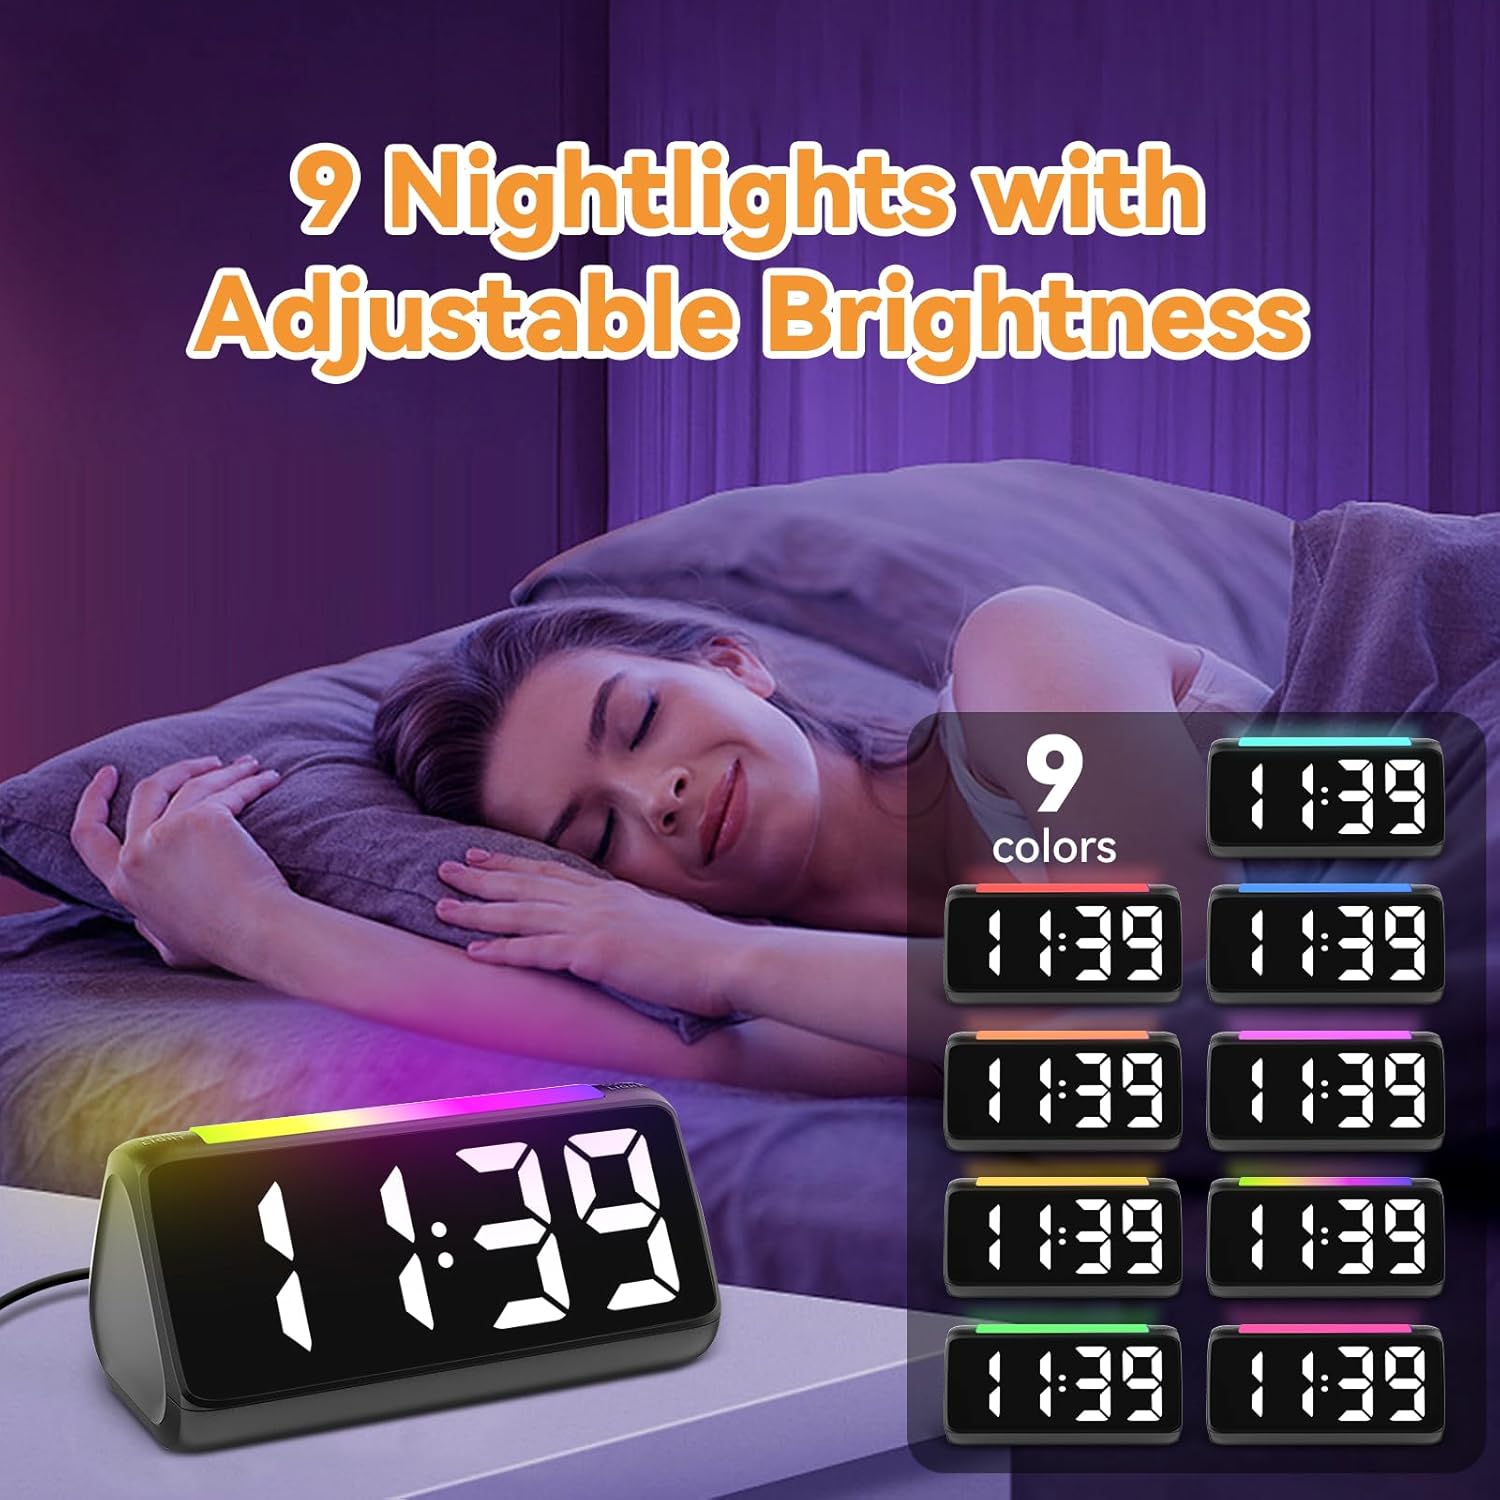
6.5 การใช้งานไฟกลางคืน
The integrated light bar offers 9 color modes and adjustable brightness, functioning as a calming night light.
- กดปุ่ม ไฟกลางคืน button (or a dedicated light bar button) to turn the night light on/off and cycle through color modes.
- ใช้ - buttons (or a separate brightness control for the night light) to adjust its brightness.

รูปที่ 6.4: Night Light with Adjustable Brightness
7. การบำรุงรักษา
To ensure the longevity and proper functioning of your alarm clock:
- ทำความสะอาดอุปกรณ์ด้วยผ้านุ่มและแห้ง ห้ามใช้น้ำยาทำความสะอาดหรือสารละลายที่มีฤทธิ์กัดกร่อน
- Keep the bed shaker clean and free from dust.
- If not using the clock for an extended period, remove the AAA backup batteries to prevent leakage.
8 การแก้ไขปัญหา
| ปัญหา | สาเหตุที่เป็นไปได้ | สารละลาย |
|---|---|---|
| หน้าจอแสดงเวลาปิดอยู่ | ไม่มีอำนาจหรืออำนาจคุณtage. | Ensure the power adapter is securely plugged in. Check the power outlet. If using battery backup, ensure batteries are fresh and correctly installed. |
| สัญญาณเตือนไม่ดัง/ไม่สั่น | Alarm not set, incorrect mode, or volume too low. | Verify alarm time and mode (Ring Only, Vibration Only, or Ring + Vibration) are correctly set. Increase alarm volume. Ensure the bed shaker is properly connected. |
| หน้าจอแสดงผลสว่าง/มืดเกินไป | การตั้งค่าความสว่างต้องมีการปรับ | กดปุ่ม ความสว่าง ปุ่มสำหรับปรับระดับความสว่าง |
| เวลาไม่ถูกต้อง | Time not set or DST not adjusted. | Follow instructions in Section 6.1 to set the correct time. Adjust DST if applicable. |
| ไฟกลางคืนไม่ทำงาน | ไฟกลางคืนปิดอยู่หรือความสว่างต่ำเกินไป | กดปุ่ม ไฟกลางคืน button to turn it on and cycle through modes. Adjust its brightness. |
9. ข้อมูลจำเพาะ
| คุณสมบัติ | รายละเอียด |
|---|---|
| ยี่ห้อ | เน็ตซึ |
| หมายเลขรุ่น | 6206แซด |
| ประเภทจอภาพ | Digital LED (RGB) |
| แหล่งพลังงาน | สายไฟ |
| แบตเตอรี่สำรอง | แบตเตอรี่ AAA จำนวน 2 ก้อน (ไม่รวม) |
| ระดับเสียงปลุก | 4 levels, up to 110 dB |
| เลื่อนระยะเวลา | 5 นาที |
| สีที่แสดง | 11 ตัวเลือก |
| สีแสงกลางคืน | 9 โหมด |
| ขนาดสินค้า | กว้าง 6.3 นิ้ว x สูง 3.15 นิ้ว |
| วัสดุ | พลาสติก |
| น้ำหนักสินค้า | 13.7 ออนซ์ |
10. การรับประกันและการสนับสนุน
Netzu products are designed for reliability and performance. For warranty information or technical support, please refer to the contact details provided with your purchase or visit the official Netzu website. Please have your model number (6206ZD) ready when contacting support.