
1. บทนำ
This manual provides detailed instructions for the setup, operation, maintenance, and troubleshooting of your ACASIS DS-0202 14-in-1 USB C Docking Station. Please read this manual thoroughly before using the product to ensure optimal performance and longevity.

Image 1.1: The ACASIS DS-0202 14-in-1 USB C Docking Station, showcasing its compact design and multiple connectivity options including USB-C, USB-A, HDMI, DisplayPort, Ethernet, and card readers.
2. คุณสมบัติหลัก
- การเชื่อมต่อ 14-in-1: Expands a single USB-C/Thunderbolt 3/4 port into 14 ports, including 2 HDMI, 1 DisplayPort, 3 USB-C 3.1 (10Gbps), 2 USB-A 3.1 (10Gbps), 1 USB 2.0, SD/TF card reader, 1Gbps Ethernet, 3.5mm audio, and 100W Power Delivery.
- รองรับการแสดงผลสามจอ: Supports single 4K@60Hz display and triple 4K@30Hz displays (under DP1.4). Windows systems support both MST (Multi-Stream Transport) and SST (Single-Stream Transport) for mirror and extend modes. macOS systems do not support MST.
- การถ่ายโอนข้อมูลความเร็วสูง: Features 3 USB-C 3.1 and 2 USB-A 3.1 ports, all offering 10Gbps data transfer speeds for rapid file การโอนย้าย
- กำลังส่ง 100W: Provides up to 100W Power Delivery through the dedicated USB-C port to charge compatible laptops, tablets, and phones.
- กิกะบิตอีเธอร์เน็ต: Integrated 1000Mbps Ethernet port ensures stable and fast wired network connectivity.
- การเชื่อมต่อเสียง: Includes a 3.5mm audio and microphone port for headset connection.
- เครื่องอ่านการ์ด SD/TF: Built-in SD and TF card slots for convenient data access.
3. การจัดวางพอร์ต
Familiarize yourself with the various ports on the ACASIS DS-0202 docking station:

ภาพที่ 3.1: รายละเอียด view of the docking station's ports, including RJ45 (Ethernet), DisplayPort, HDMI 1, HDMI 2, USB 2.0, USB-A 3.1, PD 3.0 (Max 100W), 3.5mm Audio, and three USB-C 3.1, two USB-A 3.1, SD/TF 3.0 ports.
- พอร์ตด้านหน้า/ด้านข้าง:
- 3 x USB-C 3.1 (10Gbps)
- 2 x USB-A 3.1 (10Gbps)
- 1 x SD Card Reader (SD 3.0)
- 1 x TF Card Reader (TF 3.0)
- พอร์ตด้านหลัง:
- 1 x พอร์ต RJ45 Gigabit Ethernet (1000Mbps)
- 1 x พอร์ต DisplayPort (4K@60Hz)
- 2 x HDMI 2.0 (4K@60Hz)
- 1 x USB 2.0 (480Mbps)
- 1 x USB-A 3.1 (10Gbps)
- 1 x USB-C PD 3.0 (Max 100W input)
- 1 x 3.5mm Audio & Mic In
4. คำแนะนำในการตั้งค่า
Before connecting the docking station, ensure your laptop's USB-C port supports Power Delivery, DisplayPort Alt Mode, and Data Transfer. Refer to your laptop's specifications or manufacturer for details.

Image 4.1: USB-C port compatibility check. Ensure your laptop's USB-C port supports Thunderbolt 3/4 or USB-C with Power Delivery, DisplayPort Alt Mode, and Data Transfer for full functionality.
- เชื่อมต่ออะแดปเตอร์ไฟ (เป็นทางเลือกแต่แนะนำ): If you wish to charge your laptop via the docking station, connect your laptop's USB-C power adapter (up to 100W) to the "PD 100W" USB-C port on the docking station.
- เชื่อมต่อกับแล็ปท็อป: Connect the integrated USB-C cable from the docking station to a compatible USB-C/Thunderbolt 3/4 port on your laptop.
- เชื่อมต่อจอแสดงผลภายนอก:
- For single or dual monitors: Connect your monitors using HDMI cables to the HDMI 1 and HDMI 2 ports, or a DisplayPort cable to the DP port.
- For triple monitors: Connect your monitors to the HDMI 1, HDMI 2, and DP ports.
Note: Ensure your display cables are securely connected.
- เชื่อมต่ออุปกรณ์ต่อพ่วง: Connect your USB devices (keyboard, mouse, external drives, etc.) to the available USB-A and USB-C data ports.
- เชื่อมต่ออีเทอร์เน็ต (ทางเลือก): For a wired network connection, connect an Ethernet cable from your router/modem to the RJ45 port on the docking station.
- เชื่อมต่ออุปกรณ์เสียง (ไม่จำเป็น): เสียบหูฟังหรือลำโพงเข้ากับแจ็คเสียงขนาด 3.5 มม.
The docking station is plug-and-play and should be automatically recognized by your operating system. You may need to configure display settings manually.
5. คู่มือการใช้งาน
5.1 Display Configuration (Windows)
Windows operating systems support both Mirror Mode (SST) and Extend Mode (MST) for multiple displays. You can configure these settings via your display settings.

Image 5.1: Triple display setup examples for Windows, illustrating Mirror Mode (A-BBB) and Extend Mode (A-BCD, A-BC, A-BD) with various monitor arrangements and resolutions.
- Mirror Mode (SST): จอแสดงผลที่เชื่อมต่อทั้งหมดจะแสดงเนื้อหาเดียวกันกับหน้าจอแล็ปท็อปของคุณ
- โหมดขยาย (MST): Each connected display can show different content, extending your desktop across multiple screens.
- ปณิธาน: Supports up to 4K@60Hz for a single display and 4K@30Hz for triple displays (under DP1.4).
To adjust display settings in Windows:
- คลิกขวาบนเดสก์ท็อป แล้วเลือก "การตั้งค่าการแสดงผล"
- Identify and arrange your displays.
- Select the desired display mode (Extend these displays, Duplicate these displays).
- Adjust resolution and orientation as needed.
5.2 Display Configuration (macOS)
macOS systems do not support Multi-Stream Transport (MST). Therefore, when multiple external monitors are connected, they will either mirror each other or extend the laptop display, but cannot extend independently to three unique displays.

Image 5.2: Triple display setup examples for macOS, illustrating Mirror Mode (A-AAA) where all displays show the same content, and Extend Mode (A-BBB) where external displays mirror each other while extending the laptop screen.
- โหมดมิเรอร์: จอแสดงผลที่เชื่อมต่อทั้งหมดจะแสดงเนื้อหาเดียวกันกับหน้าจอ MacBook ของคุณ
- โหมดขยาย: The external displays will mirror each other, extending your desktop from the MacBook screen. You cannot have three independent extended displays.
- ปณิธาน: Supports up to 4K@30Hz for triple displays.
To adjust display settings in macOS:
- Go to "System Settings" (or "System Preferences" on older macOS versions).
- เลือก "จอแสดงผล"
- Arrange your displays and select the desired mode (Mirror Displays or Use as separate display).
5.3 การถ่ายโอนข้อมูล
The docking station features 3 USB-C 3.1 and 2 USB-A 3.1 ports, all capable of 10Gbps data transfer. Connect your high-speed storage devices to these ports for optimal performance.

Image 5.3: The docking station's 10Gbps USB-C and USB-A ports enable ultra-fast data transfer for large files and high-bandwidth peripherals.
5.4 การจ่ายพลังงาน
The dedicated USB-C PD port supports up to 100W power input. Connect your laptop's power adapter to this port to charge your laptop while using the docking station.

Image 5.4: The 100W Power Delivery port allows for fast charging of your laptop while connected to the docking station, with an example showing 100W input and 85W output to the laptop.
5.5 กิกะบิตอีเทอร์เน็ต
The RJ45 port provides a stable and fast 1000Mbps (1 Gigabit) Ethernet connection. This is ideal for reliable internet access and large file การถ่ายโอนข้อมูลผ่านเครือข่ายท้องถิ่น

Image 5.5: The Gigabit Ethernet port provides a fast and stable wired network connection, supporting speeds up to 1000Mbps.
5.6 SD/TF Card Readers
Insert your SD or TF (Micro SD) cards into the respective slots for quick access to photos and other data. Both slots can be used simultaneously.
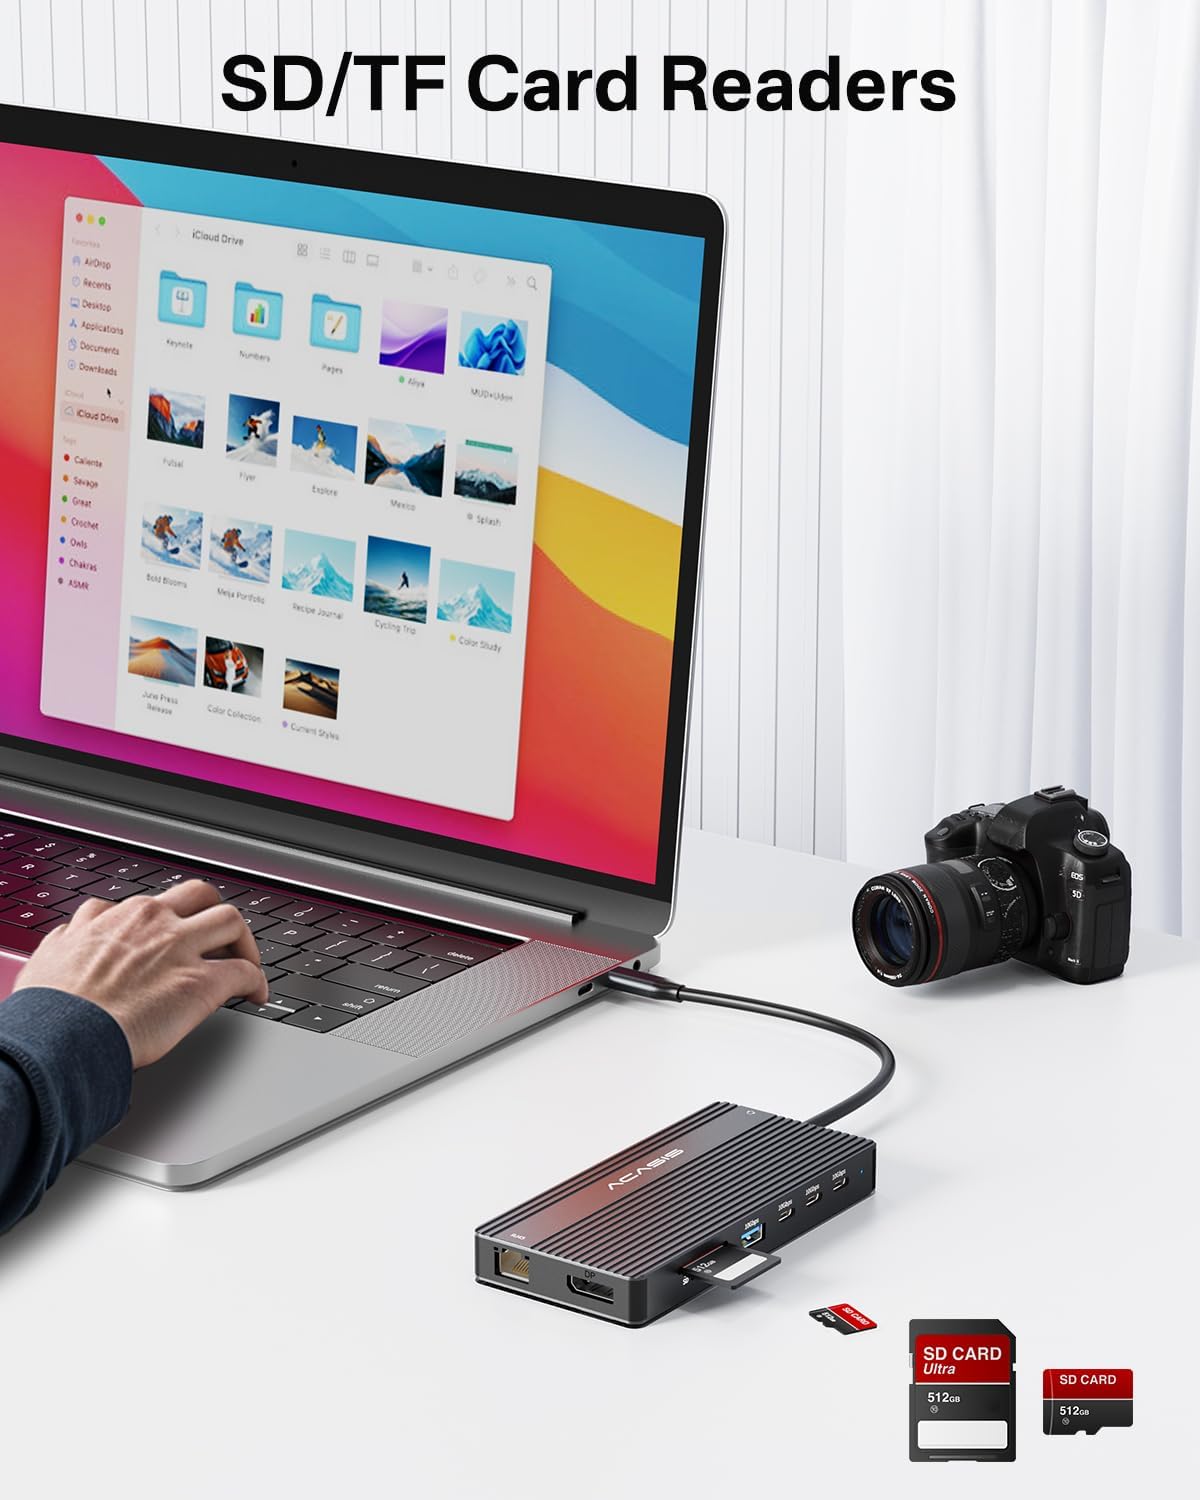
Image 5.6: The integrated SD and TF card readers allow for convenient and fast access to memory card data, useful for photographers and content creators.
6. การบำรุงรักษา
- การทำความสะอาด: ใช้ผ้าแห้งเนื้อนุ่มเช็ดทำความสะอาดพื้นผิวของแท่นวาง หลีกเลี่ยงการใช้น้ำยาทำความสะอาดหรือวัสดุที่มีฤทธิ์กัดกร่อน
- พื้นที่จัดเก็บ: เก็บแท่นวางไว้ในที่แห้งและเย็น หลีกเลี่ยงแสงแดดโดยตรงและอุณหภูมิที่สูงหรือต่ำเกินไป
- การจัดการ: หลีกเลี่ยงการทำอุปกรณ์ตกหรือกระแทกแรงๆ อย่าให้สาย USB-C ในตัวงอมากเกินไป
- การระบายอากาศ : Ensure the docking station has adequate ventilation to prevent overheating, especially during prolonged use with multiple connected devices.
7 การแก้ไขปัญหา
| ปัญหา | สาเหตุที่เป็นไปได้ | สารละลาย |
|---|---|---|
| No display output / Flickering screen |
|
|
| แล็ปท็อปชาร์จไฟไม่เข้า |
|
|
| USB devices not recognized / Slow data transfer |
|
|
| Ethernet connection unstable or not working |
|
|
8. ข้อมูลจำเพาะ
| คุณสมบัติ | รายละเอียด |
|---|---|
| หมายเลขรุ่น | DS-0202 |
| ยี่ห้อ | อคาซิส |
| การเชื่อมต่อ | USB-C (การเชื่อมต่อโฮสต์) |
| เอาท์พุตวิดีโอ | 2 x HDMI 2.0 (4K@60Hz), 1 x DisplayPort (4K@60Hz) |
| พอร์ตข้อมูล USB | 3 x USB-C 3.1 (10Gbps), 2 x USB-A 3.1 (10Gbps), 1 x USB 2.0 (480Mbps) |
| อีเธอร์เน็ต | 1 x พอร์ต RJ45 Gigabit Ethernet (1000Mbps) |
| เครื่องอ่านการ์ด | SD 3.0, TF 3.0 (simultaneous use) |
| เสียง | 1 x 3.5mm Audio & Mic In |
| การส่งกำลัง | USB-C PD 3.0, up to 100W input |
| อุปกรณ์ที่รองรับ | Laptops with full-featured USB-C/Thunderbolt 3/4 ports (Dell, HP, Lenovo, ThinkPad, Surface, MacBook, etc.) |
| ระบบปฏิบัติการ | Windows, macOS, Linux, iPadOS |
| ขนาดสินค้า | ขนาด 1 x 1 x 1 นิ้ว (โดยประมาณ) |
| น้ำหนักสินค้า | 5 ออนซ์ (โดยประมาณ) |
| สี | สีดำ |
9. ข้อมูลการรับประกัน
ACASIS products typically come with a standard manufacturer's warranty. For specific warranty terms and conditions, please refer to the warranty card included with your product or visit the official ACASIS webไซต์ โปรดเก็บใบเสร็จรับเงินไว้เป็นหลักฐานการซื้อสำหรับการเรียกร้องการรับประกัน
Protection plans are also available for purchase separately:
- แผนคุ้มครอง 3 ปี
- แผนคุ้มครอง 4 ปี
- Complete Protect (แผนรายเดือน)
แผนเหล่านี้เสนอความคุ้มครองเพิ่มเติมที่นอกเหนือไปจากการรับประกันมาตรฐานของผู้ผลิต
10. การสนับสนุนลูกค้า
If you encounter any issues or have questions regarding your ACASIS DS-0202 14-in-1 USB C Docking Station, please contact ACASIS customer support through the following channels:
- เป็นทางการ Webเว็บไซต์: เยี่ยมชม ACASIS Store on Amazon สำหรับข้อมูลผลิตภัณฑ์และทรัพยากรสนับสนุน
- การสนับสนุนทางอีเมล์: Refer to your product packaging or the ACASIS webโปรดเยี่ยมชมเว็บไซต์เพื่อดูที่อยู่อีเมลฝ่ายสนับสนุนล่าสุด
- แบบฟอร์มติดต่อออนไลน์: Many manufacturers provide a contact form on their webเว็บไซต์สำหรับความช่วยเหลือทางเทคนิค
When contacting support, please have your product model number (DS-0202) and purchase details ready.