
1. บทนำ
This manual provides detailed instructions for the setup, operation, and maintenance of your JoFomp 17.3" Large Digital Wall Clock. Please read this manual thoroughly before use to ensure proper functionality and longevity of the product.
2. ข้อมูลด้านความปลอดภัย
- Ensure the clock is connected to a stable power source (5V/2A adapter included).
- อย่าให้เครื่องสัมผัสกับอุณหภูมิที่สูงหรือต่ำเกินไป แสงแดดโดยตรง หรือความชื้นสูง
- เก็บให้พ้นจากมือเด็ก
- อย่าพยายามถอดประกอบหรือซ่อมแซมอุปกรณ์ด้วยตนเอง ติดต่อฝ่ายสนับสนุนลูกค้าเพื่อขอความช่วยเหลือ
- รีโมทคอนโทรลต้องใช้แบตเตอรี่ AAA 2 ก้อน (ไม่รวม)
- A 1 AAA battery (not included) is required for the memory function to retain settings during power outagใช่
3. เนื้อหาบรรจุภัณฑ์
ตรวจสอบว่ามีรายการทั้งหมดอยู่ในแพ็คเกจ:
- JoFomp 17.3" Digital Wall Clock
- รีโมทคอนโทรล
- อะแดปเตอร์ไฟ DC 5V/1A
- สายไฟ
- Mounting Hooks (2)
- Mounting Template Ruler
- คู่มือการใช้งาน (เอกสารนี้)

รูปที่ 3.1: อุปกรณ์เสริมที่มาพร้อมในชุดและตัวเครื่องหลัก
4. สินค้าหมดview
The JoFomp 17.3" Large Digital Wall Clock features a clear LED display and multiple functions for convenience.

Figure 4.1: Front display of the digital wall clock.
4.1 คุณสมบัติการแสดงผล
- การแสดงเวลา: Large 17.3" LED digits.
- การแสดงวันที่: Month and Day.
- วันของสัปดาห์: Indicated by illuminated text (Mon-Sun).
- อุณหภูมิ: Displays in Celsius or Fahrenheit.
- ความชื้น: Displays relative humidity percentage.
- สัญญาณเตือนคู่: Two independent alarm settings.
- ตัวบ่งชี้ DST: Daylight Saving Time status.

Figure 4.2: Labeled display functions.
4.2 Back Panel and Buttons
The back of the clock houses control buttons and connection ports.

Figure 4.3: Back panel with labeled components.
- ปุ่มการตั้งค่า: Five buttons for manual adjustments (Light, SET, +, -, Alarm).
- Memory Battery Compartment: For 1 AAA battery (not included) to retain settings.
- พอร์ตไฟ: สำหรับการเชื่อมต่ออะแดปเตอร์ไฟฟ้า
- รูยึด: สำหรับติดตั้งบนผนัง
5. การตั้งค่า
5.1 การเชื่อมต่อสายไฟ
- Connect the power cord to the clock's power port.
- Plug the 5V/2A power adapter into a standard electrical outlet. The clock will power on and display.
บันทึก: The clock requires continuous power to operate. It is not battery-powered for primary display.
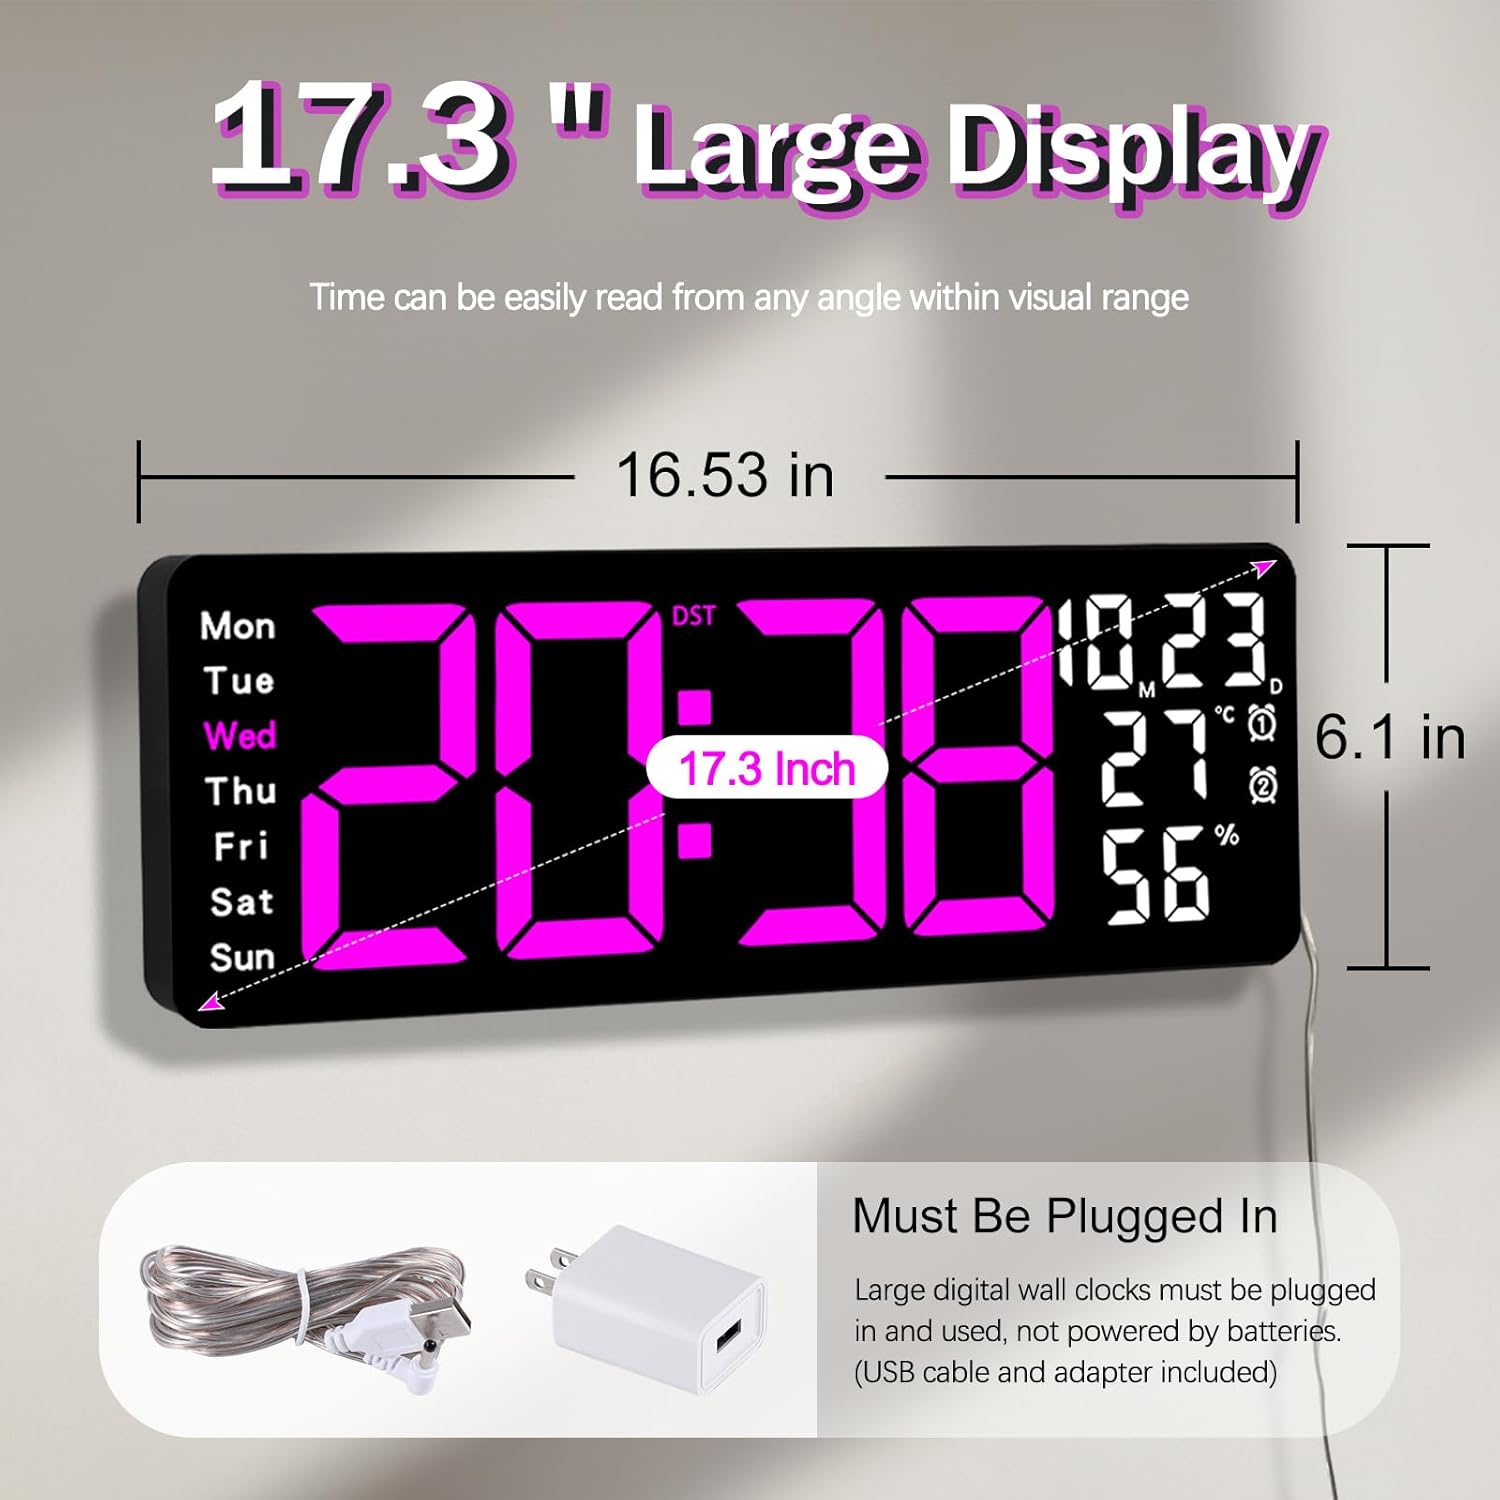
Figure 5.1: Power connection and dimensions.
5.2 Memory Battery Installation (Optional)
To retain time and settings during a power outage, install a 1 AAA battery (not included) into the memory battery compartment on the back of the clock.
- Locate the memory battery compartment on the back of the clock.
- เปิดฝาครอบช่อง
- Insert one 1.5V AAA battery, ensuring correct polarity (+/-).
- ปิดฝาปิดช่องใส่ให้แน่น
5.3 การติดตั้งบนผนัง
Use the included mounting template ruler and hooks for easy wall installation.
- Determine the desired location for your clock.
- Place the mounting template ruler on the wall at the desired height.
- Mark the positions for the mounting hooks according to the ruler's indications.
- Install the mounting hooks into the wall at the marked positions.
- Carefully hang the clock onto the installed hooks, ensuring it is level and secure.
6. คู่มือการใช้งาน
The clock can be operated using either the remote control or the buttons on the back.
6.1 การตั้งค่าเวลาและวันที่
Use the remote control or the "SET" button on the back of the clock.
- กดปุ่ม ชุด button (on remote or back of clock) to enter setting mode.
- ใช้ + และ - ปุ่มสำหรับปรับค่าการกระพริบ (เช่น ชั่วโมง นาที ปี เดือน วัน)
- กด ชุด again to confirm the current setting and move to the next parameter.
- Repeat until all settings are configured.
6.2 12/24 Hour Format Conversion
วิธีการสลับระหว่างรูปแบบเวลา 12 ชั่วโมงและ 24 ชั่วโมง:
- กดปุ่มเฉพาะ 12/24 ชม. ปุ่มบนรีโมทคอนโทรล
- Alternatively, during time setting, the format option will appear.

Figure 6.1: 12/24H format conversion.
6.3 การแปลงหน่วยอุณหภูมิ (°C/°F)
หากต้องการสลับระหว่างหน่วยอุณหภูมิเซลเซียสและฟาเรนไฮต์:
- กดปุ่ม ° C / ° F ปุ่มบนรีโมทคอนโทรล
6.4 Alarm Setting (Dual Alarms)
นาฬิกาเรือนนี้สามารถตั้งปลุกได้สองระบบแยกอิสระ
- กดปุ่ม เตือน button on the remote control or the back of the clock.
- ใช้ + และ - เพื่อตั้งเวลาปลุกที่ต้องการ
- กด เตือน again to confirm and move to the next alarm or exit.
- To activate/deactivate an alarm, press the corresponding alarm button (e.g., AL1 or AL2) บนรีโมท
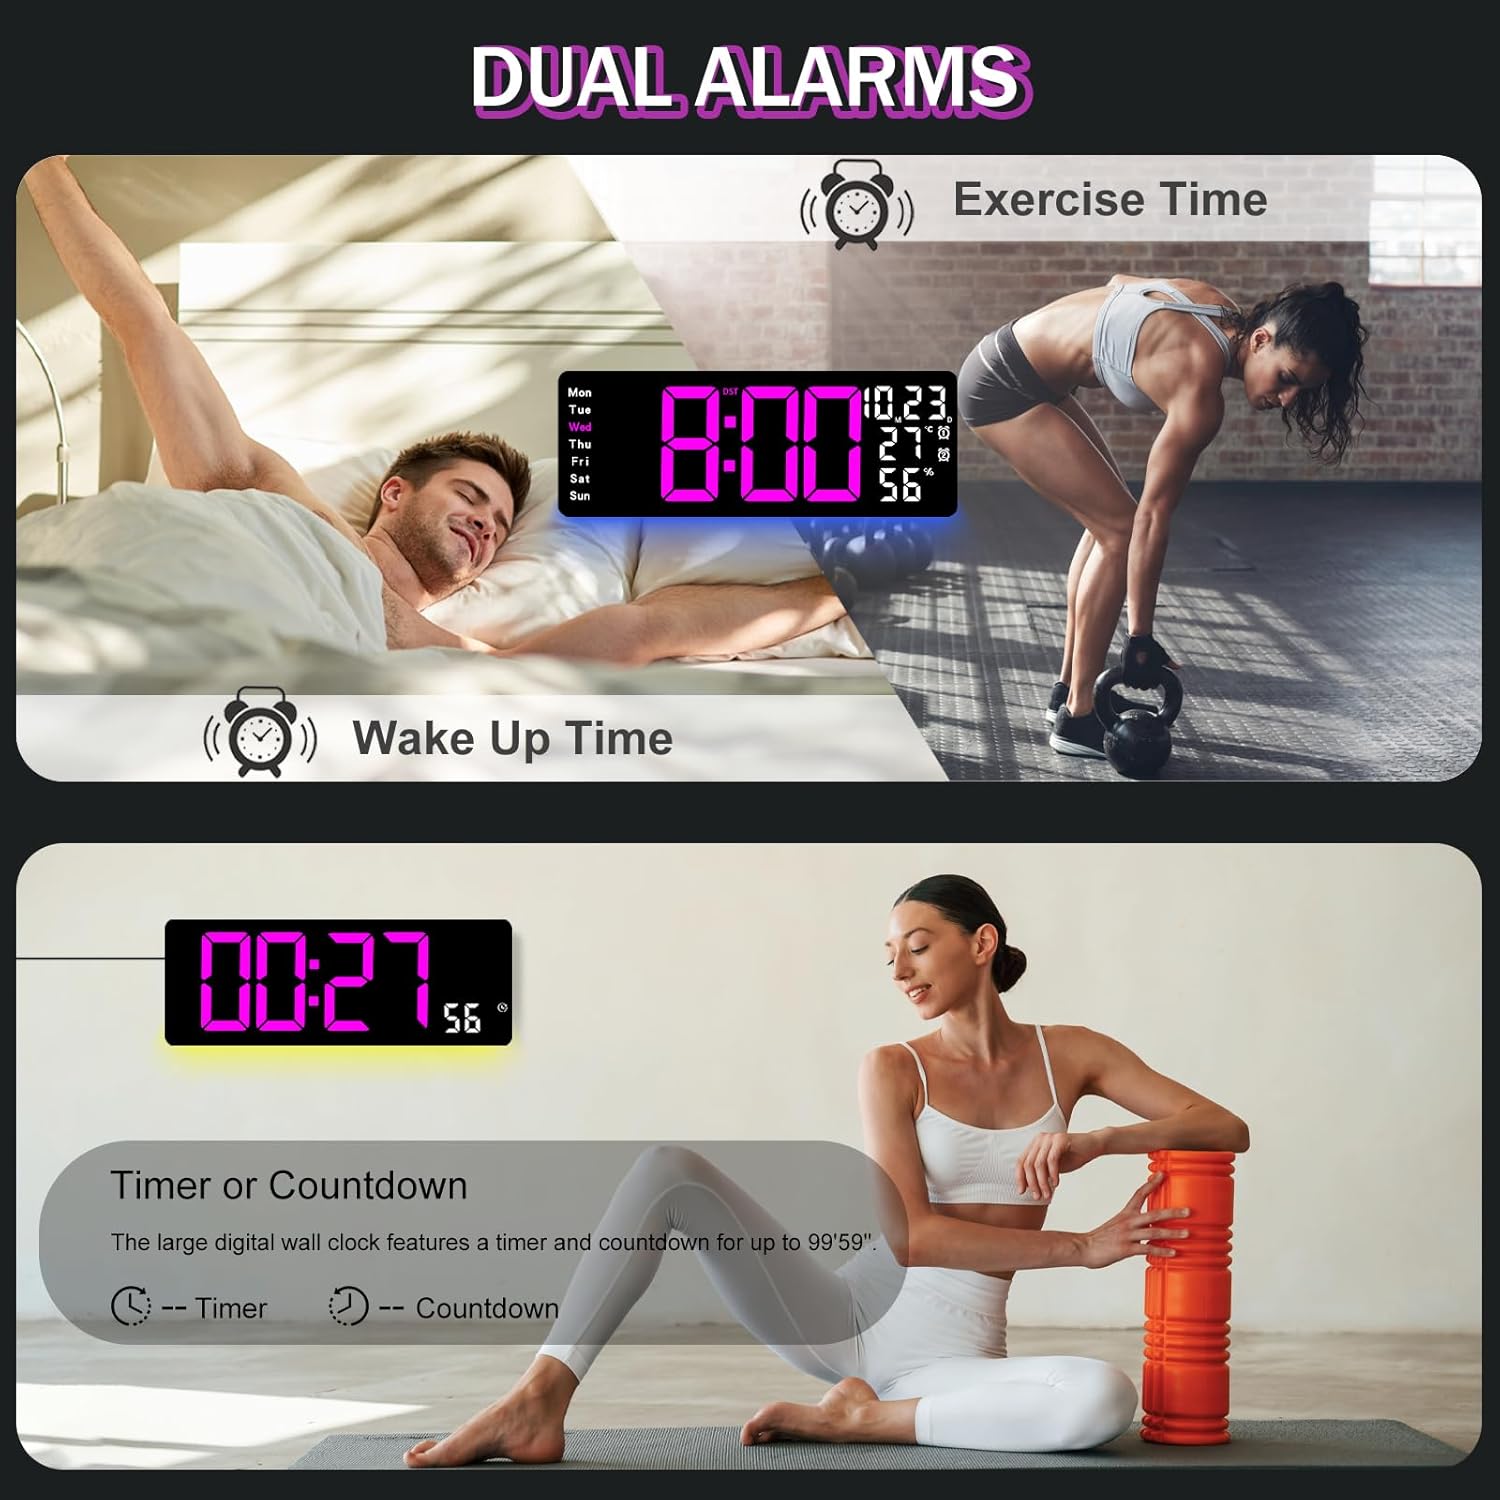
Figure 6.2: Dual alarm and timer functions.
การปรับความสว่าง 6.5 ระดับ
The clock offers 10 levels of brightness, adjustable manually or automatically.
- ความสว่างอัตโนมัติ: The built-in light sensor adjusts brightness based on ambient light. Activate this mode by pressing the ออโต้ ปุ่มบนรีโมต
- ปรับความสว่างด้วยตนเอง: กดปุ่ม ความสว่าง button on the remote, then use + และ - to select one of the 10 levels.

Figure 6.3: Custom and auto-brightness settings.

Figure 6.4: Brightness regulator illustration.
6.6 Ambient Light Features
The clock includes a night light feature at the bottom with multiple color options.
- กดปุ่ม แสงสว่าง button on the remote control or the back of the clock to cycle through 8 fixed colors and 1 multi-color mode.
- In multi-color mode, the colors automatically convert. Press OK to fix a favorite color.
- Adjust the brightness of the ambient light using the + และ - buttons when the ambient light is active.

Figure 6.5: Multiple ambient night light options.

Figure 6.6: 9 color ambient light options.
6.7 Timer and Countdown Function
The clock features a timer (count-up) and countdown function up to 99 minutes and 59 seconds.
- กดปุ่ม ตัวจับเวลา ปุ่มบนรีโมทคอนโทรล
- ใช้ + และ - to set the desired time for countdown.
- กด เริ่ม/หยุด to begin or pause the timer/countdown.
- กด รีเซ็ต เพื่อล้างตัวจับเวลา

Figure 6.7: Timing function (count-up/countdown).
Video 6.1: Demonstration of multi-functional features including night light change, brightness control, count-up, and countdown. This video also shows the time, date, day, alarm clock, temperature, and humidity displayed on the same screen, along with 12/24 hour conversion, Celsius/Fahrenheit conversion, and DST enablement. The back design and buttons are also briefly shown.
6.8 เวลาออมแสง (DST)
If DST is observed in your region, you can enable or disable it.
- กดค้างไว้ - button on the remote control to enable or disable DST. The DST indicator will appear/disappear on the display.

Figure 6.8: Enabling and disabling Daylight Saving Time.

Figure 6.9: Daylight Saving Time (DST) functionality.
6.9 การใช้งานรีโมทคอนโทรล
The remote control provides convenient access to all clock functions without needing to reach the clock directly.

Figure 6.10: Remote control and its functions.

รูปที่ 6.11: การใช้งานรีโมทคอนโทรล
- Ensure the remote control has 2 AAA batteries installed (not included).
- Point the remote control directly at the clock for optimal response.
- Each button on the remote corresponds to a specific function as described in this manual.
7. การบำรุงรักษา
- Clean the clock's display and body with a soft, dry cloth. Avoid abrasive cleaners or solvents.
- Ensure the power adapter and cord are free from damage.
- Replace the memory battery annually to ensure settings are retained during power interruptions.
8 การแก้ไขปัญหา
| ปัญหา | สาเหตุที่เป็นไปได้ | สารละลาย |
|---|---|---|
| หน้าจอแสดงเวลาปิดอยู่ | ไม่มีแหล่งจ่ายไฟ | Check if the power adapter is securely plugged into the clock and the outlet. Ensure the outlet is functional. |
| รีโมทคอนโทรลไม่ทำงาน | Low or dead batteries in remote; obstruction; remote out of range. | Replace remote batteries (2 AAA). Ensure no obstructions between remote and clock. Point directly at the clock within effective range. |
| การตั้งค่าจะหายไปหลังจากไฟดับtage. | No memory battery or dead memory battery. | Install a fresh 1.5V AAA battery in the memory compartment. |
| Incorrect temperature/humidity reading. | Sensor interference or placement. | Ensure the clock is not placed near heat sources, direct sunlight, or in areas with extreme drafts. Allow time for the sensor to stabilize. |
| Ambient light not changing colors. | Stuck in fixed color mode. | Press the LIGHT button on the remote to cycle through modes. If stuck on a fixed color, press the OK button to release it from fixed mode. |
9. ข้อมูลจำเพาะ
| คุณสมบัติ | รายละเอียด |
|---|---|
| ยี่ห้อ | โจฟอม |
| หมายเลขรุ่น | 6669 |
| ประเภทจอภาพ | ดิจิตอล LED |
| ขนาดจอแสดงผล | 17.3 นิ้ว |
| ขนาดสินค้า | กว้าง 16.5 นิ้ว x สูง 6.7 นิ้ว |
| แหล่งพลังงาน | ใช้ไฟฟ้าแบบมีสาย (มีอะแดปเตอร์ 5V/2A ให้มาด้วย) |
| แบตเตอรี่หน่วยความจำ | 1 x AAA (ไม่รวม) |
| ระดับความสว่าง | 10 (Auto/Manual) |
| สีของแสงโดยรอบ | 8 Fixed + 1 Multi-color |
| คุณสมบัติพิเศษ | Large Display, Adjustable Brightness, Temperature Display, Humidity Display, Dual Alarms, Timer, Countdown, DST, Remote Control |
| ประเภทการติดตั้ง | ติดผนัง |
| น้ำหนักสินค้า | 1.95 ปอนด์ |
10. การรับประกันและการสนับสนุน
JoFomp products are designed for reliability and performance. For warranty information or technical support, please refer to the contact details provided with your purchase or visit the official JoFomp webไซต์ โปรดเก็บใบเสร็จรับเงินไว้เป็นหลักฐานการซื้อ