
1. บทนำ
Thank you for choosing the ADE CK2406-2 Radio-Controlled Digital Projection Alarm Clock. This device offers precise timekeeping, temperature monitoring, and convenient projection features to enhance your daily routine. Please read this manual carefully to ensure proper setup and operation of your new alarm clock.
2. เนื้อหาบรรจุภัณฑ์
- ADE CK2406-2 Projection Alarm Clock
- External Wireless Sensor
- สายไฟ (อะแดปเตอร์ AC)
- 1 x CR2032 Battery (pre-installed for backup)
- 2 x AAA Batteries (for external sensor)
- คู่มือการใช้งาน (เอกสารนี้)
3. สินค้าหมดview
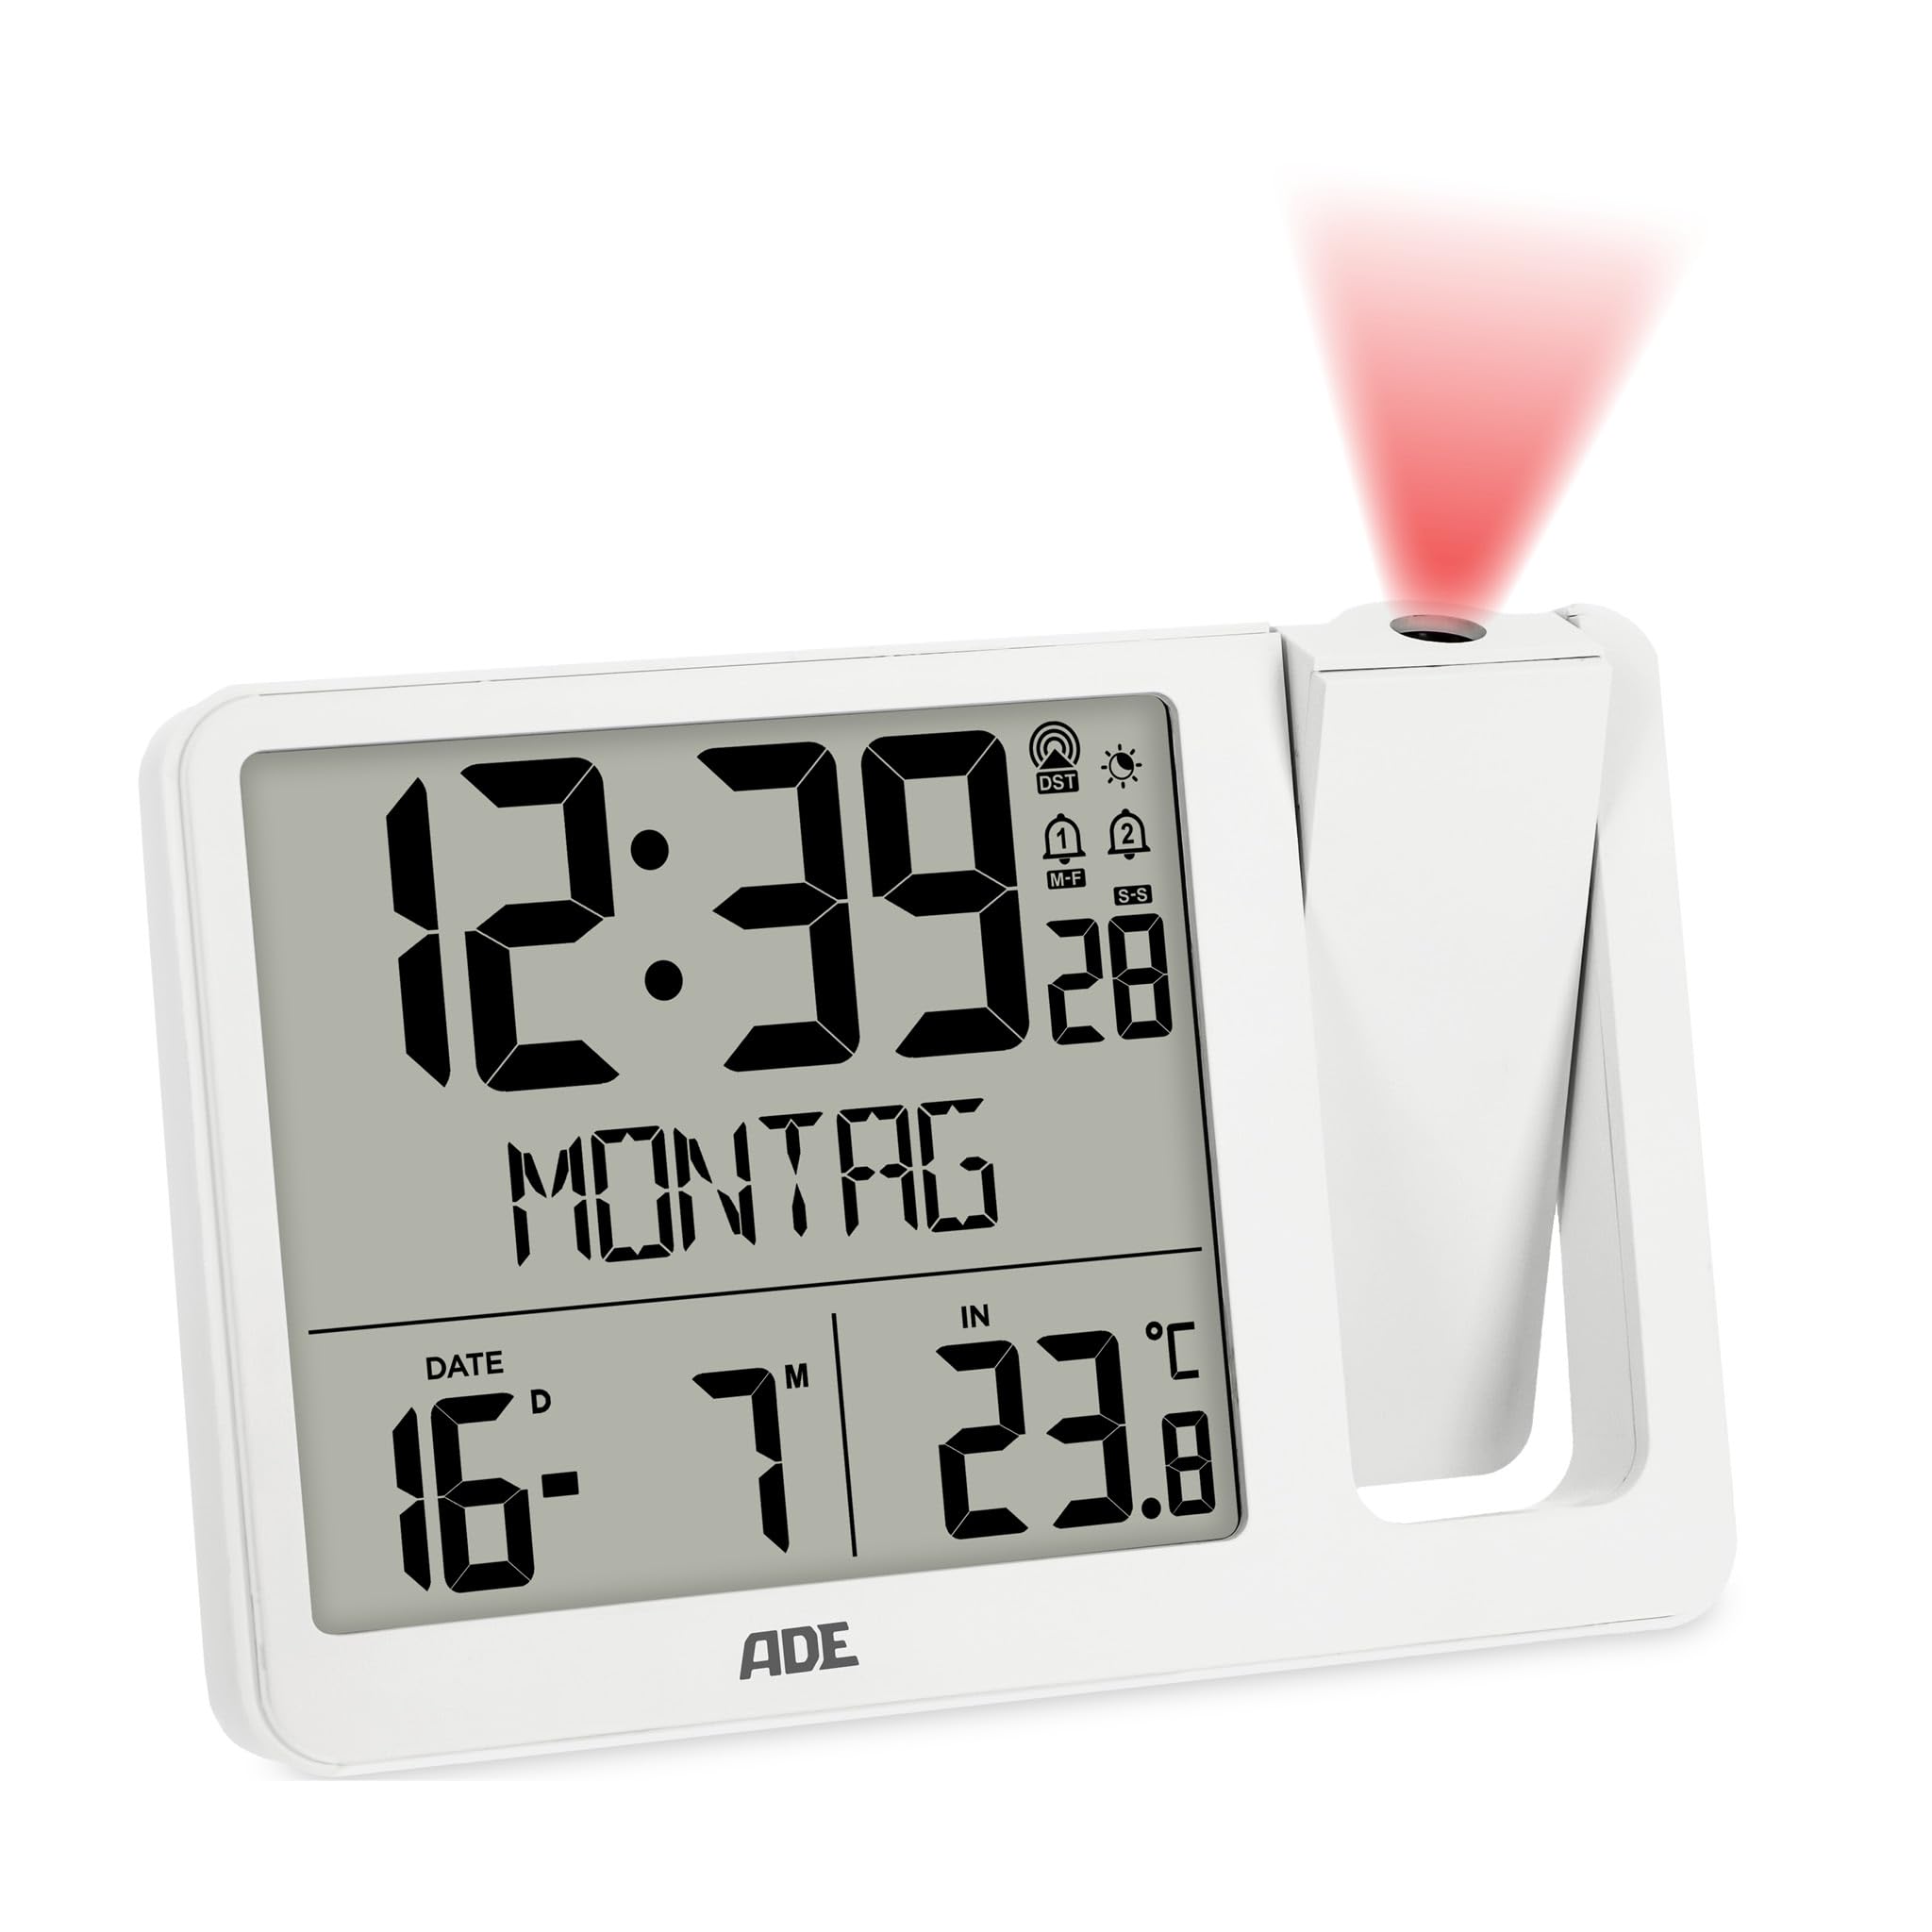
ภาพที่ 3.1: ด้านหน้า view of the ADE CK2406-2 Projection Alarm Clock, showing the main unit with its large LCD display and the separate external sensor.
3.1 หน่วยหลัก
- จอแสดงผล LCD: Large screen (9.4 x 8.2 cm) showing time, date, day of the week, and temperature.
- แขนฉายภาพ: Adjustable arm for projecting time and temperature onto a wall or ceiling. Can be rotated 180 degrees.
- ปุ่มควบคุม: Located on the unit for setting time, alarms, display brightness, and other functions.
- พอร์ตชาร์จ USB: สำหรับชาร์จอุปกรณ์พกพา
- กำลังไฟเข้า: สำหรับเชื่อมต่ออะแดปเตอร์ AC
- ช่องใส่แบตเตอรี่: For CR2032 backup battery.
3.2 เซ็นเซอร์ภายนอก
- เซ็นเซอร์อุณหภูมิ: Measures outdoor temperature.
- ช่องใส่แบตเตอรี่: For 2 x AAA batteries.
- ตัวบ่งชี้การส่งกำลัง: Light indicating data transmission.
4. การตั้งค่า
4.1 การจ่ายไฟให้กับตัวเครื่องหลัก
- Insert the pre-installed CR2032 battery into the main unit's battery compartment. This battery serves as a backup for time settings during power outagใช่
- Connect the provided power cable to the DC input port on the alarm clock and then plug it into a standard electrical outlet.
- The display will light up, and the clock will begin searching for the DCF radio signal to set the time automatically. This process may take several minutes.
4.2 Installing and Pairing the External Sensor
- Open the battery compartment of the external sensor.
- Insert the 2 x AAA batteries, ensuring correct polarity (+/-).
- Close the battery compartment. The sensor will automatically attempt to pair with the main unit.
- Place the external sensor in a sheltered outdoor location, away from direct sunlight and rain, to ensure accurate temperature readings.
- The main unit will display the outdoor temperature once successfully paired. If pairing fails, refer to the troubleshooting section.
5. คู่มือการใช้งาน
5.1 การตั้งค่าเวลาและวันที่
The clock automatically sets the time via the DCF radio signal. If manual adjustment is needed:
- กดปุ่ม 'SET' ค้างไว้เพื่อเข้าสู่โหมดตั้งเวลา
- Use the '+' or '-' buttons to adjust hours, minutes, year, month, and day.
- กดปุ่ม 'SET' อีกครั้งเพื่อยืนยันการตั้งค่าแต่ละรายการ แล้วจึงไปยังการตั้งค่าถัดไป
- The day of the week will automatically update based on the date. The day of the week can be displayed in 7 languages.
5.2 Alarm Settings (Alarm 1 & Alarm 2)
The device features two independent alarm times.
- Press the 'ALARM' button to select Alarm 1 or Alarm 2.
- Press and hold the 'ALARM' button to enter alarm setting mode for the selected alarm.
- Use the '+' or '-' buttons to set the desired alarm hour and minute.
- กดปุ่ม 'ALARM' เพื่อยืนยัน
- To activate/deactivate an alarm, press the 'ALARM' button repeatedly until the alarm icon appears/disappears on the display.
5.3 ฟังก์ชั่นเลื่อนซ้ำ
When an alarm sounds, press the 'SNOOZE' button (usually a large button on top) to temporarily silence the alarm. The alarm will sound again after a few minutes (default snooze time is typically 5-10 minutes).
5.4 ฟังก์ชันการฉายภาพ
- Adjust the projection arm to direct the projection onto a wall or ceiling.
- Rotate the projection lens to adjust the focus and clarity of the projected image.
- The projection can be rotated 180 degrees for optimal viewการไอเอ็นจี
- Press the 'PROJECTION' button (or similar) to toggle the projection on/off or to switch between displaying time, indoor temperature, or outdoor temperature.
5.5 ความสว่างของจอภาพ
The LCD display has automatic brightness control and three manual brightness levels.
- ความสว่างอัตโนมัติ: The display brightness adjusts automatically based on ambient light conditions.
- ปรับความสว่างด้วยตนเอง: Press the 'BRIGHTNESS' button (or similar) to cycle through three manual brightness levels.
5.6 การแสดงอุณหภูมิ
The clock displays both indoor and outdoor temperatures.
- Press the 'TEMP' button (or similar) to switch between indoor and outdoor temperature display on the main screen.
- The device records daily minimum and maximum temperature values, which reset at midnight.
5.7 การชาร์จ USB
Connect your mobile device to the USB charging port on the alarm clock to charge it. Note that this port is for charging only and does not transfer data.
6. การบำรุงรักษา
- Clean the alarm clock and external sensor with a soft, dry cloth. Do not use abrasive cleaners or solvents.
- Avoid exposing the main unit to direct sunlight, extreme temperatures, or high humidity.
- Ensure the external sensor is placed in a location protected from direct weather elements.
- Replace batteries in the external sensor (2 x AAA) and the main unit's backup (1 x CR2032) as needed.
7 การแก้ไขปัญหา
- No Display / Power: Ensure the power cable is securely connected to both the alarm clock and the power outlet. Check the outlet for power.
- เวลาไม่ถูกต้อง: Ensure the clock is receiving a clear DCF radio signal. Place the unit near a window if possible. Manual time setting is also available.
- External Sensor Not Displaying Temperature: Check if the external sensor batteries are correctly installed and not depleted. Ensure the sensor is within range of the main unit and free from obstructions. Re-pair the sensor if necessary (refer to setup section).
- การคาดการณ์ไม่ชัดเจน: Adjust the focus ring on the projection arm. Ensure the projection arm is correctly angled towards the desired surface.
- สัญญาณเตือนไม่ส่งเสียง: Verify that the alarm is activated (alarm icon visible on display) and the volume is not set to minimum (if adjustable).
8. ข้อมูลจำเพาะ
| คุณสมบัติ | รายละเอียด |
|---|---|
| ยี่ห้อ | เอดีอี |
| หมายเลขรุ่น | CK2406-2 |
| สี | สีขาว |
| ขนาดสินค้า (กว้าง x ยาว x สูง) | 15.4 x 3.81 x 10.4 ซม. |
| น้ำหนัก | 410 กรัม |
| วัสดุ | อะคริโลไนไตรล์ บิวทาไดอีน สไตรีน (ABS) |
| ประเภทจอภาพ | จอ LCD ระบบดิจิตอล |
| แหล่งพลังงาน | สายไฟ (อะแดปเตอร์ AC) |
| แบตเตอรี่สำรอง | 1 x CR2032 (รวมอยู่ด้วย) |
| External Sensor Batteries | 2 x AAA (รวมอยู่ด้วย) |
| คุณสมบัติพิเศษ | Temperature display, Calendar display, Dual Alarms, Snooze, Summer time, USB Charging Port, Radio-controlled time, Projection |
9. การรับประกันและการสนับสนุน
For warranty information or technical support, please refer to the documentation provided with your purchase or contact ADE customer service through the retailer where the product was purchased. Please retain your proof of purchase for any warranty claims.