
ScopeAround SA200S
คู่มือผู้ใช้ กล้องส่องตรวจหูแบบดิจิทัล ScopeAround SA200S พร้อมหน้าจอ IPS ขนาด 1.85 นิ้ว
Model: SA200S | Brand: ScopeAround
1. บทนำ
This manual provides detailed instructions for the safe and effective use of your ScopeAround SA200S Digital Otoscope. This device is designed for visual inspection of the ear canal and eardrum, featuring an integrated 1.85-inch IPS screen, a 720p HD camera, and adjustable LED lighting. It also supports photo and video capture for documentation.
โปรดอ่านคู่มือนี้อย่างละเอียดก่อนใช้งานอุปกรณ์และเก็บคู่มือนี้ไว้เพื่อใช้อ้างอิงในอนาคต
2. ข้อมูลด้านความปลอดภัย
- Do not insert the otoscope too deeply into the ear canal to avoid injury.
- Always use the provided specula to prevent direct contact with the ear canal.
- Clean the lens and accessories thoroughly before and after each use to prevent cross-contamination. Refer to the "Maintenance and Cleaning" section.
- Keep the device out of reach of children. Adult supervision is required if used on children.
- Do not use the device if you experience pain or discomfort. Consult a medical professional.
- หลีกเลี่ยงการสัมผัสอุปกรณ์กับอุณหภูมิที่สูงหรือต่ำเกินไป แสงแดดโดยตรง หรือความชื้น
- อย่าพยายามถอดประกอบหรือซ่อมแซมอุปกรณ์ด้วยตนเอง ติดต่อฝ่ายสนับสนุนลูกค้าเพื่อขอความช่วยเหลือ
- The built-in battery pack is non-removable.

Figure 2.1: Safe and Dangerous Ear Canal Insertion
3. เนื้อหาบรรจุภัณฑ์
ตรวจสอบว่ามีรายการทั้งหมดอยู่ในแพ็คเกจ:
- SA200S Digital Otoscope with Screen
- Ear Picks (x4)
- Specula (x5)
- แผ่นแอลกอฮอล์
- คิวทิป
- การ์ดหน่วยความจำ 8GB
- สาย USB (ประเภท-C)
- คู่มือการใช้งาน

รูปที่ 3.1: สิ่งของในบรรจุภัณฑ์
4. สินค้าหมดview
The ScopeAround SA200S Digital Otoscope is an all-in-one device designed for convenient ear examination. It features a high-resolution camera and an integrated display for direct viewการไอเอ็นจี

Figure 4.1: ScopeAround SA200S Digital Otoscope
4.1 ส่วนประกอบของอุปกรณ์

Figure 4.2: Labeled Components of the Otoscope
- Navigation Buttons UP: Used to navigate menus or adjust settings.
- Navigation Buttons Down: Used to navigate menus or adjust settings.
- ช่องเสียบการ์ดหน่วยความจำ: For inserting the 8GB memory card (included).
- Photo / Video Button: กดเพื่อถ่ายภาพนิ่งหรือเริ่ม/หยุดบันทึกวิดีโอ
- Power Button / LED Light Adjustment: Long press to power on/off. Short press to cycle through LED brightness levels.
- หน้าจอ LCD IPS ขนาด 1.85 นิ้ว: Integrated display for real-time viewการไอเอ็นจี
- ปุ่มการตั้งค่า: เข้าถึงการตั้งค่าอุปกรณ์
- ปุ่มตกลง: Confirm selections in menus.
- Otoscope Camera: The camera probe for ear canal inspection.
- พอร์ต Type-C: สำหรับการชาร์จและถ่ายโอนข้อมูล
5. การตั้งค่า
5.1 การชาร์จอุปกรณ์
Before first use, fully charge the otoscope. Connect the provided USB Type-C cable to the device's Type-C port and a compatible USB power adapter (not included). The charging indicator will show the charging status. A full charge provides approximately 3 hours of working time.
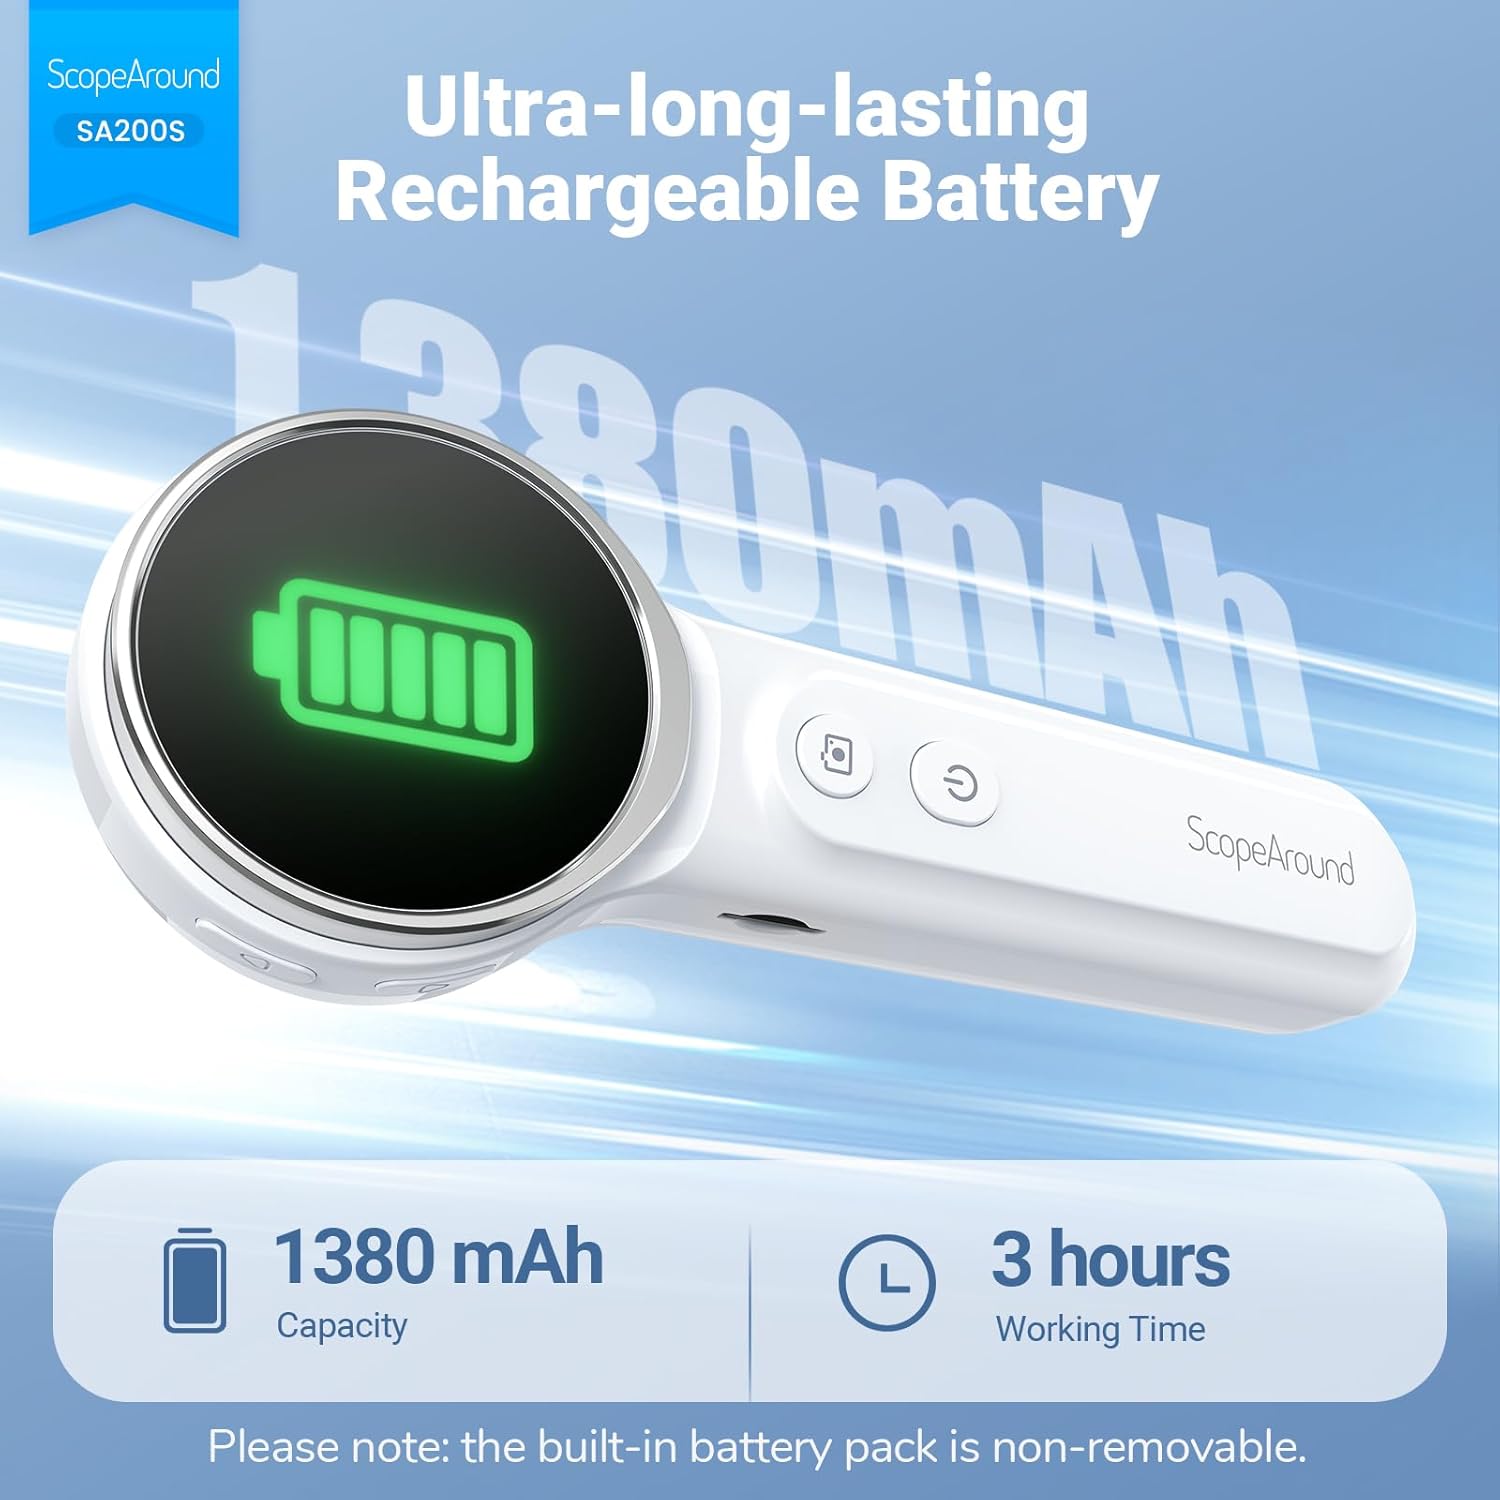
รูปที่ 5.1: การชาร์จและอายุการใช้งานแบตเตอรี่
5.2 การติดอุปกรณ์เสริม
Select an appropriate speculum and ear pick. Gently attach the chosen speculum to the tip of the otoscope camera. If using an ear pick, ensure it is securely fitted over the camera tip, inside the speculum, before insertion into the ear.
5.3 การเปิด/ปิดเครื่อง
- To power on: Long press the ปุ่มเปิดปิด (5) until the screen illuminates.
- To power off: Long press the ปุ่มเปิดปิด (5) again until the screen turns off.
5.4 การเชื่อมต่อกับแอปพลิเคชัน (ไม่บังคับ)
For additional features and a larger viewing experience, you can connect the otoscope to your smartphone or tablet via Wi-Fi.
- ดาวน์โหลดแอป: Scan the QR code provided in the manual or on the device packaging, or search for "Smart Otoscope" in the Apple App Store or Google Play Store. You can also visit gto.so/smart-otoscope.
- เปิดใช้งานเครื่องตรวจหู: Long press the power button on the otoscope to turn it on.
- เชื่อมต่อ Wi-Fi: On your smartphone or tablet, go to Wi-Fi settings and connect to the network named "Smart Otoscope_XXX". The default password is 55556666.
- เปิดแอป: Open the "Smart Otoscope" app. The live view from the otoscope camera should appear.

Figure 5.2: Wi-Fi Connection Steps
Note: Once connected to the app, you can operate the device and view the feed on your phone.
6. คู่มือการใช้งาน
6.1 Basic Ear Examination
- Ensure a clean speculum is attached to the otoscope camera.
- Gently pull the outer ear up and back to straighten the ear canal.
- Carefully insert the speculum tip into the ear canal while observing the integrated 1.85-inch IPS screen. Do not force the device.
- ค่อยๆ ปรับมุมและระดับความลึกเพื่อให้ได้ภาพที่ชัดเจน view ของช่องหูและเยื่อแก้วหู

Figure 6.1: Self-Examination with Integrated Screen
6.2 Adjusting LED Lights and Brightness
The otoscope features 6 adjustable LED lights with 3 brightness settings for optimal visibility.
- กดสั้น ๆ ปุ่มเปิดปิด (5) to cycle through the 3 brightness levels.

Figure 6.2: Camera Specifications and Brightness Settings
6.3 Magnification Levels
The device supports 3 levels of magnification (1.0x, 1.3x, 1.5x) for detailed viewing. Use the Navigation Buttons UP/DOWN (1, 2) to adjust magnification.

Figure 6.3: Adjustable Magnification and Image Rotation
6.4 การจับภาพและวิดีโอ
The otoscope allows you to capture images and record videos directly to the included 8GB memory card.
- To take a photo: Press the ปุ่มรูปภาพ / วิดีโอ (4) ครั้งหนึ่ง.
- To record a video: Long press the ปุ่มรูปภาพ / วิดีโอ (4) to start recording. Long press again to stop recording.
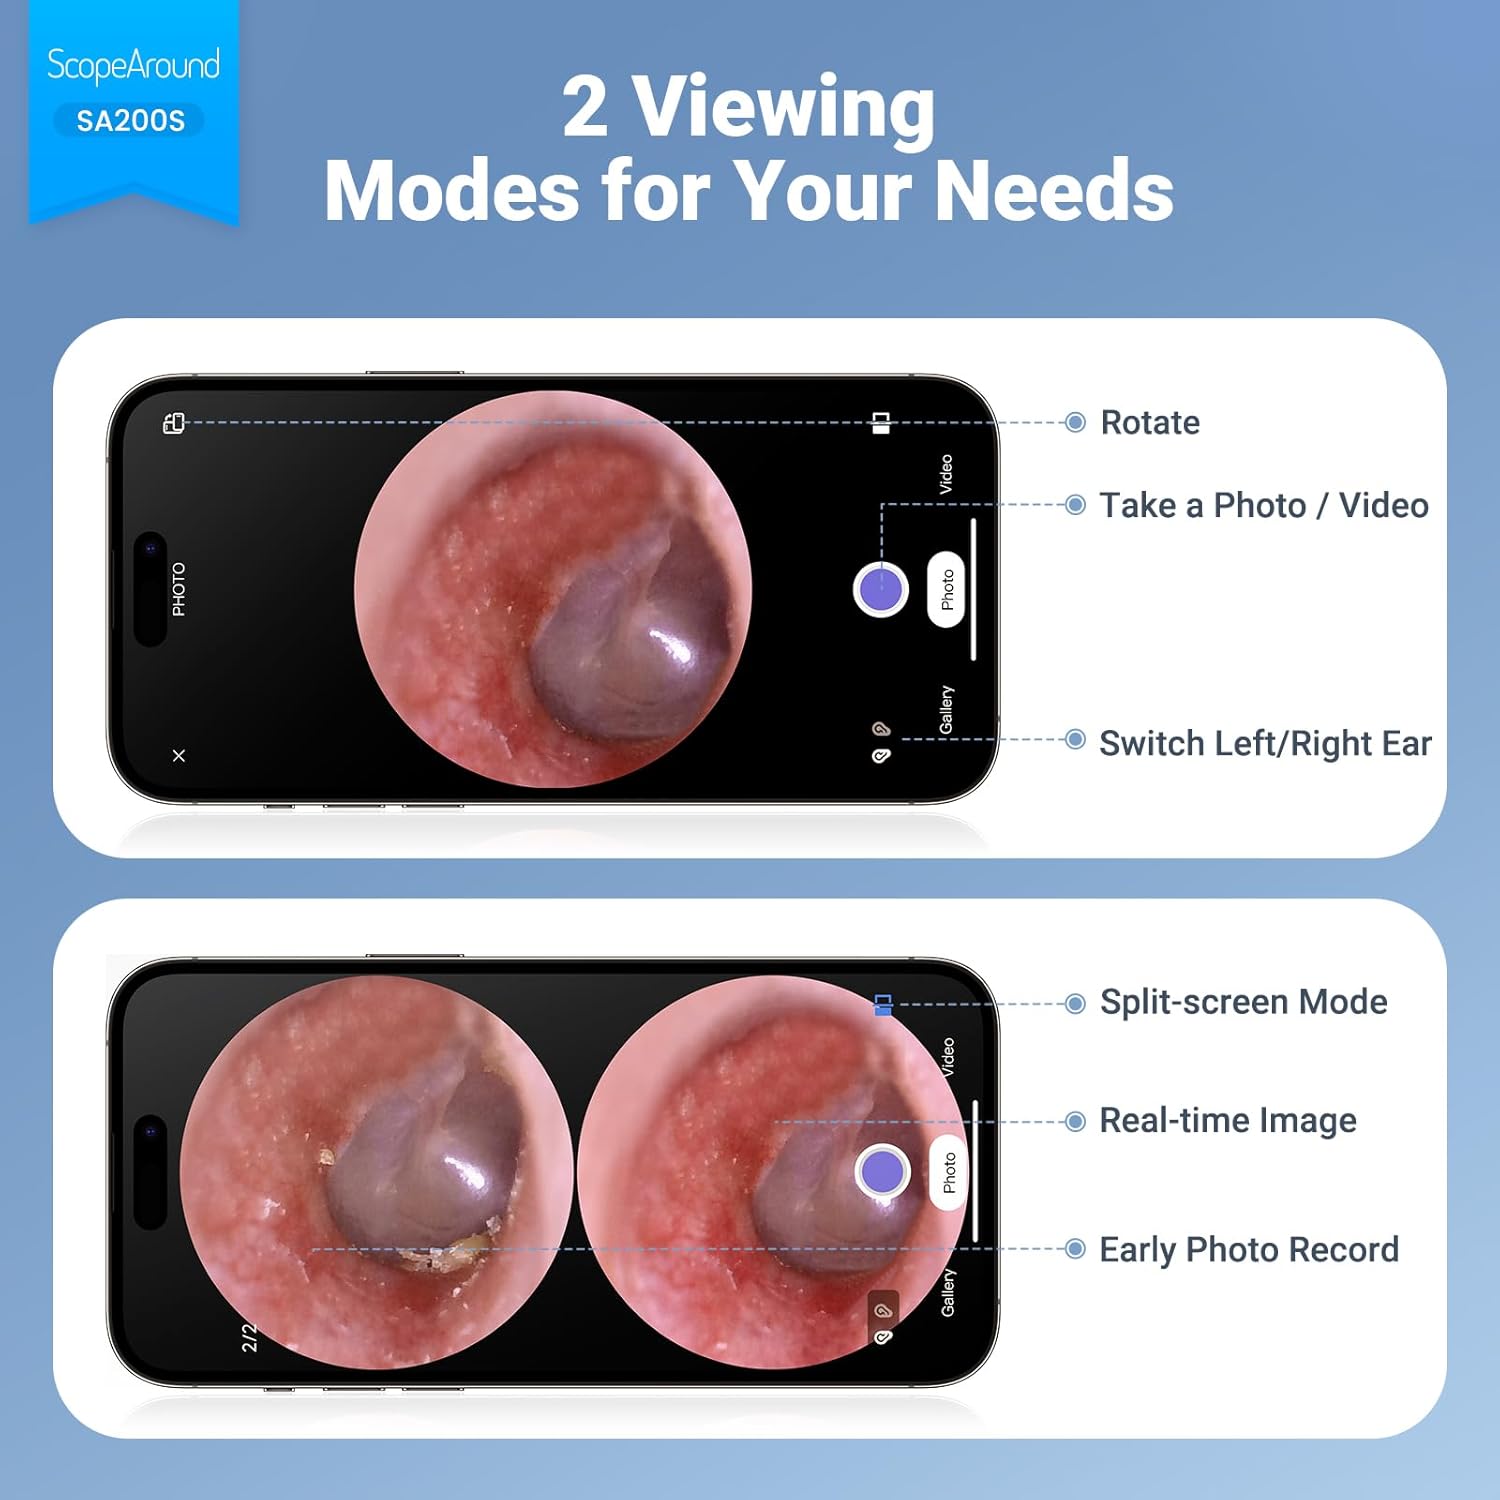
Figure 6.4: Photo and Video Capture Interface (App View)
6.5 การโอนย้าย Files
To transfer captured photos and videos to a computer:
- Connect the otoscope to your computer using the provided USB Type-C cable.
- The device should appear as a removable storage device. You can then access the files on the 8GB memory card.
- Alternatively, remove the 8GB memory card from the slot (3) and insert it into a compatible card reader connected to your computer.

รูปที่ 6.5: File Transfer for Sharing Insights
7. การบำรุงรักษาและการทำความสะอาด
Proper maintenance ensures the longevity and hygiene of your otoscope.
- การทำความสะอาดเลนส์: Use the provided Q-tips and alcohol pads to gently clean the camera lens before and after each use. Ensure no residue remains.
- อุปกรณ์ทำความสะอาด: Wash the reusable ear picks and specula with soap and water, then sterilize them with alcohol pads. Allow them to dry completely before storage or reuse.
- ตัวอุปกรณ์: Wipe the main body of the otoscope with a soft, dry cloth. Do not immerse the device in water.
- พื้นที่จัดเก็บ: เก็บอุปกรณ์ไว้ในที่แห้งและเย็น หลีกเลี่ยงแสงแดดโดยตรงและอุณหภูมิที่สูงหรือต่ำเกินไป

Figure 7.1: Cleaning the Otoscope Lens
8 การแก้ไขปัญหา
| ปัญหา | สาเหตุที่เป็นไปได้ | สารละลาย |
|---|---|---|
| อุปกรณ์ไม่เปิดเครื่อง | แบตเตอรี่อ่อน | ชาร์จอุปกรณ์ให้เต็มโดยใช้สาย USB ที่ให้มา |
| ไม่มีภาพปรากฏบนหน้าจอ | Device not powered on; Camera lens obstructed. | Ensure device is powered on. Check and clean the camera lens. |
| ภาพไม่ชัดหรือไม่คมชัด | Dirty lens; Incorrect focal distance; Magnification setting. | Clean the camera lens. Adjust the distance from the ear canal. Adjust magnification using navigation buttons. |
| ไม่สามารถเชื่อมต่อ Wi-Fi ได้ | Incorrect Wi-Fi password; Device not in pairing mode; App issue. | Ensure the otoscope is powered on. Verify the Wi-Fi password (55556666). Restart the otoscope and your phone/tablet. Reinstall the app if necessary. |
| ไม่สามารถบันทึกรูปภาพ/วิดีโอได้ | Memory card full or faulty; Memory card not inserted. | Check if the 8GB memory card is correctly inserted. Ensure there is sufficient space. Try formatting the card (if data is backed up) or using a different card. |
9. ข้อมูลจำเพาะ
| คุณสมบัติ | รายละเอียด |
|---|---|
| ชื่อรุ่น | SA200S |
| ขนาดหน้าจอ | จอ IPS ขนาด 1.85 นิ้ว |
| ความละเอียดของกล้อง | ความคมชัดระดับ HD 720p |
| เส้นผ่านศูนย์กลางเลนส์ | 3.9mm Ultra-thin Lens |
| แหล่งกำเนิดแสง | 6 LED Lights (3 brightness settings) |
| ระยะโฟกัส | 0.39 - 1.18 นิ้ว |
| มุมจริงของ View | 78 องศา |
| การขยายภาพ | Up to 1.5x (1.0x, 1.3x, 1.5x) |
| ความจุของแบตเตอรี่ | 1380mAh ลิเธียมโพลิเมอร์ |
| เวลาทำงาน | ประมาณ 3 ชั่วโมง |
| การเชื่อมต่อ | Wi-Fi (สำหรับการเชื่อมต่อแอป) |
| พื้นที่จัดเก็บ | การ์ดหน่วยความจำ 8GB (มีให้ในชุด) |
| พอร์ตชาร์จ | ประเภทซี |
| อุปกรณ์ที่รองรับ | Android/iPhone smartphones and tablets (Not compatible with Macbook & Windows PC) |
| น้ำหนักสินค้า | 12 ออนซ์ |
| ขนาด | 7.52 x 4.61 x 2.68 นิ้ว (บรรจุภัณฑ์) |
| วัสดุ | พลาสติก |
| สี | สีขาว |
10. การรับประกันและการสนับสนุน
ScopeAround is committed to providing high-quality products and customer satisfaction. For any questions, technical support, or warranty inquiries, please contact our US-based after-sales support team.
Contact information can typically be found on the product packaging, the official ScopeAround webไซต์หรือผ่านแพลตฟอร์มการซื้อของคุณ
Ask a question about this manual
Ask about setup, troubleshooting, compatibility, parts, safety, or missing instructions. Manuals+ will review the question and use this page’s manual context to help answer it.