
1. บทนำ
This manual provides comprehensive instructions for the installation, operation, and maintenance of your JMT H61M-I Mini ITX Motherboard. This motherboard is designed for desktop computers, featuring an LGA1155 CPU socket, two DDR3 RAM slots supporting up to 16GB dual-channel memory, and an M.2 slot compatible with NVMe/NGFF SSDs. Please read this manual carefully before proceeding with installation to ensure proper setup and optimal performance.
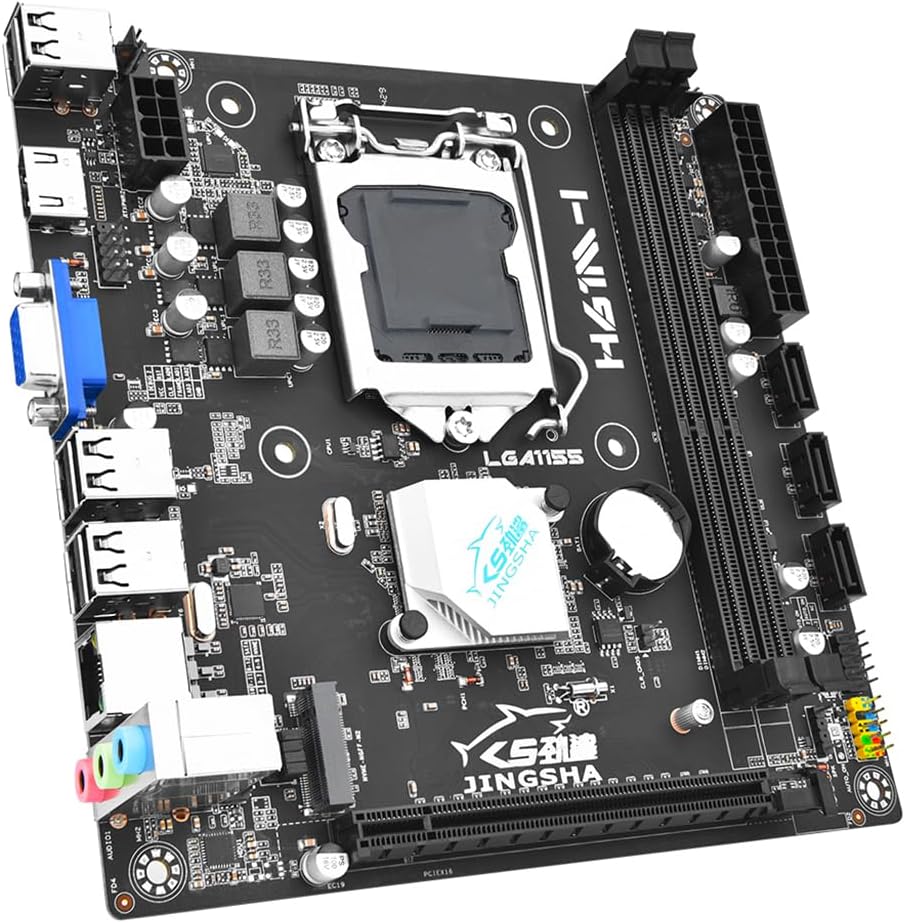
ภาพที่ 1.1: จบแล้วview of the JMT H61M-I Mini ITX Motherboard. This image displays the compact form factor and primary components including the CPU socket, RAM slots, and various connectors.
2. การตั้งค่าและการติดตั้ง
Follow these steps to correctly install your JMT H61M-I motherboard and its components.
2.1 เค้าโครงเมนบอร์ด
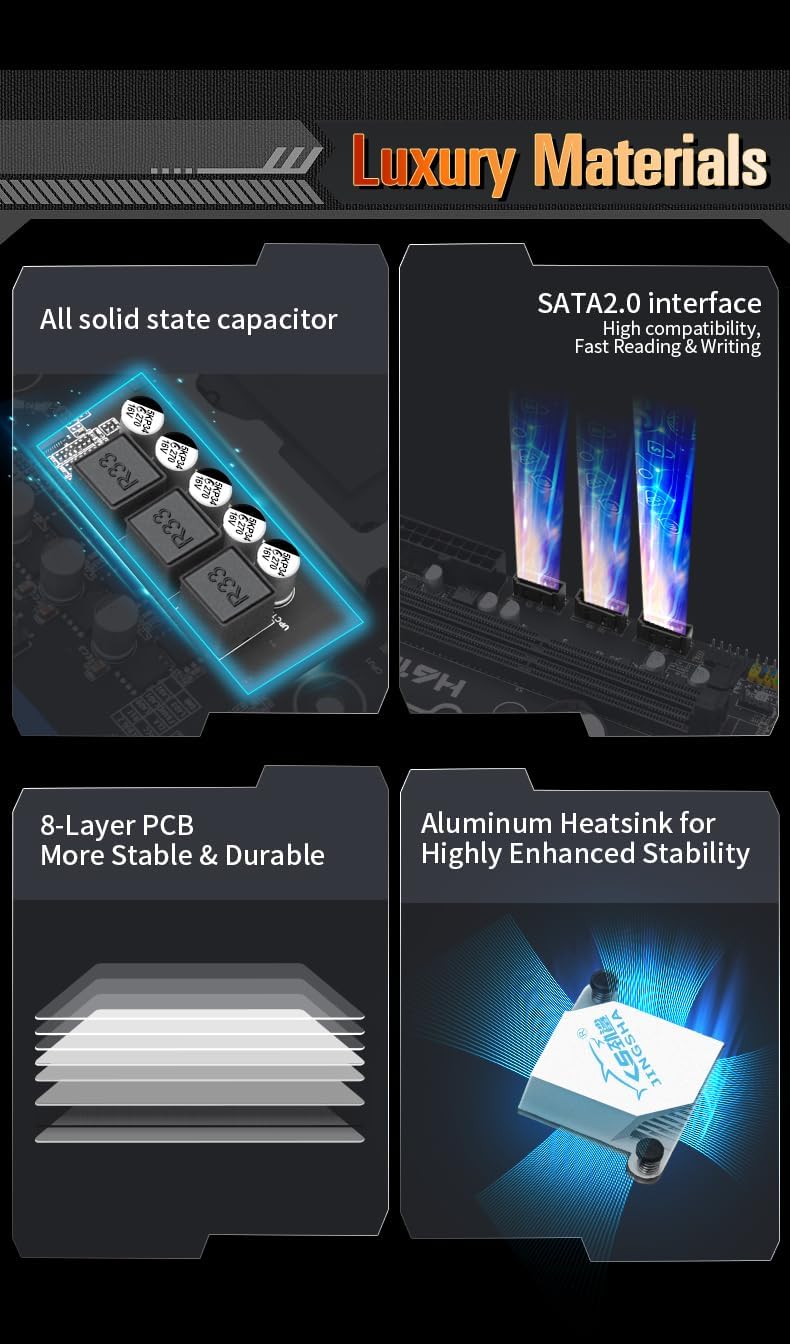
Image 2.1: Detailed layout of the H61M-I motherboard, indicating the location of key components and connectors such as the CPU socket, DDR3 slots, M.2 slot, SATA ports, and various headers.
- ซ็อกเก็ต CPU (LGA1155): Located centrally for Intel LGA1155 processors.
- DDR3 Slots: Two slots for DDR3 memory modules.
- ช่อง M.2: Supports NVMe/NGFF M.2 SSDs.
- สล็อต PCI-E X16: สำหรับการ์ดจอหรือการ์ดขยายอื่นๆ
- พอร์ต SATA 2.0: Three ports for connecting storage devices.
- หัวต่อ USB 2.0: สำหรับพอร์ต USB ที่แผงด้านหน้า
- ขั้วต่อสายไฟ: 24-pin ATX and 8-pin ATX_12V for power supply.
- ส่วนหัวแผงด้านหน้า: For power button, reset button, HDD LED, power LED, and front audio.
- แผง I/O: Includes HD, VGA, USB 2.0, Gigabit Ethernet, and audio ports.
2.2 การติดตั้งส่วนประกอบ
- การติดตั้งซีพียู:
- เปิดคันโยกซ็อกเก็ต CPU
- Carefully align the CPU with the socket, ensuring the notches match.
- วาง CPU ลงในซ็อกเก็ตอย่างเบามือโดยไม่ต้องออกแรง
- ปิดคันโยกเพื่อยึดซีพียูให้แน่น
- ทาซิลิโคนระบายความร้อนและติดตั้งพัดลมระบายความร้อน CPU
- การติดตั้ง RAM:
- คลายคลิปที่ปลายทั้งสองด้านของช่องเสียบหน่วยความจำ DDR3
- จัดตำแหน่งโมดูลหน่วยความจำให้ตรงกับช่อง โดยให้แน่ใจว่ารอยบากบนโมดูลตรงกับกุญแจในช่อง
- กดปลายทั้งสองข้างของโมดูลหน่วยความจำให้แน่นจนกระทั่งคลิปล็อคเข้าที่
- การติดตั้ง M.2 SSD:
- ค้นหาสล็อต M.2 บนเมนบอร์ด
- ใส่ M.2 SSD เข้าไปในช่องที่มุม
- ค่อยๆ กด SSD ลงไป แล้วขันให้แน่นด้วยสกรูที่ให้มา
- Graphics Card Installation (Optional):
- Locate the PCI-E X16 slot.
- Align your graphics card with the slot and press down firmly until it is fully seated.
- ยึดการ์ดเข้ากับเคสคอมพิวเตอร์ด้วยสกรู
- SATA Device Connection:
- Connect SATA data cables from your storage devices (HDD/SSD) to the SATA 2.0 ports on the motherboard.
- Ensure power cables from the PSU are connected to your storage devices.
- การเชื่อมต่อแหล่งจ่ายไฟ:
- Connect the 24-pin ATX power connector from your power supply unit (PSU) to the main power socket on the motherboard.
- Connect the 8-pin ATX_12V power connector from your PSU to the CPU power socket.
- การเชื่อมต่อที่แผงด้านหน้า:
- Refer to the motherboard layout diagram (Image 2.1) and your PC case manual to connect the front panel headers (Power SW, Reset SW, HDD LED, Power LED, F_AUDIO, USB 2.0).
3. คู่มือการใช้งาน
เมื่อติดตั้งและเชื่อมต่อส่วนประกอบทั้งหมดแล้ว คุณสามารถเปิดระบบได้
- เปิดเครื่องครั้งแรก: After connecting all necessary cables, press the power button on your PC case. The system should initiate the Power-On Self-Test (POST).
- การเข้าถึง BIOS/UEFI: ในระหว่างขั้นตอนการบูตเริ่มต้น ให้กดปุ่มซ้ำๆ เดล or F2 key (common keys, may vary) to enter the BIOS/UEFI setup utility. Here you can configure boot order, system time, and other advanced settings.
- การติดตั้งระบบปฏิบัติการ: Insert your operating system installation media (USB drive or DVD) and follow the on-screen prompts to install your preferred operating system. Ensure the boot order in BIOS/UEFI is set to prioritize your installation media.
- การติดตั้งไดร์เวอร์: After installing the operating system, install the necessary drivers for the motherboard chipset, graphics card, audio, and network. These are typically provided on a CD/DVD with your components or can be downloaded from the manufacturer's webเว็บไซต์
4. การบำรุงรักษา
การบำรุงรักษาอย่างสม่ำเสมอจะช่วยให้เมนบอร์ดของคุณมีอายุการใช้งานยาวนานและทำงานได้อย่างเสถียร
- การกำจัดฝุ่น: ทำความสะอาดฝุ่นออกจากเมนบอร์ดและส่วนประกอบต่างๆ เป็นระยะโดยใช้ลมอัด ตรวจสอบให้แน่ใจว่าได้ปิดเครื่องและถอดปลั๊กออกก่อนทำความสะอาด
- อัปเดต BIOS/UEFI: Check the JMT website for any available BIOS/UEFI updates. Updates can improve compatibility, stability, and performance. Follow the manufacturer's instructions carefully when performing updates.
- การอัปเดตไดรเวอร์: หมั่นอัปเดตไดรเวอร์ระบบของคุณอยู่เสมอ ไดรเวอร์ที่ล้าสมัยอาจทำให้เกิดปัญหาด้านประสิทธิภาพหรือความไม่เสถียรได้
- การจัดการสายเคเบิล: Ensure all cables are neatly routed to improve airflow and prevent accidental disconnections.
5 การแก้ไขปัญหา
หากพบปัญหา โปรดดูขั้นตอนการแก้ไขปัญหาทั่วไปต่อไปนี้
- ไม่มีไฟฟ้า:
- Verify that the 24-pin ATX and 8-pin ATX_12V power connectors are securely seated.
- Check if the power supply unit (PSU) is switched on and functioning correctly.
- ตรวจสอบให้แน่ใจว่าสายเคเบิลปุ่มเปิดปิดด้านหน้าเชื่อมต่อกับหัวต่อบนเมนบอร์ดอย่างถูกต้อง
- No Display/No POST (Power-On Self-Test):
- Ensure the monitor is connected to the correct display output (motherboard integrated graphics or discrete graphics card).
- Reseat the RAM modules. Try booting with one RAM module at a time if you have multiple.
- Reseat the CPU and check for bent pins in the socket.
- If using a discrete graphics card, reseat it in the PCI-E slot.
- Clear the CMOS (Complementary Metal-Oxide-Semiconductor) by removing the CMOS battery for a few minutes or using the CLR_CMOS header if available (refer to Image 2.1 for location).
- ความไม่เสถียรของระบบ/การขัดข้อง:
- ตรวจสอบอุณหภูมิ CPU และ GPU เพื่อให้แน่ใจว่าอยู่ในขีดจำกัดการทำงานที่ปลอดภัย
- ตรวจสอบให้แน่ใจว่าไดรเวอร์ทั้งหมดได้รับการอัปเดตแล้ว
- เรียกใช้เครื่องมือวินิจฉัยหน่วยความจำเพื่อตรวจหา RAM ที่ผิดพลาด
- Ensure the power supply is sufficient for all installed components.
- ระบบปฏิบัติการไม่บูต:
- Check the boot order in BIOS/UEFI to ensure the correct drive is selected.
- Verify that the operating system drive (HDD/SSD) is properly connected and detected by the BIOS/UEFI.
6. ข้อมูลจำเพาะ
Detailed technical specifications for the JMT H61M-I Motherboard.
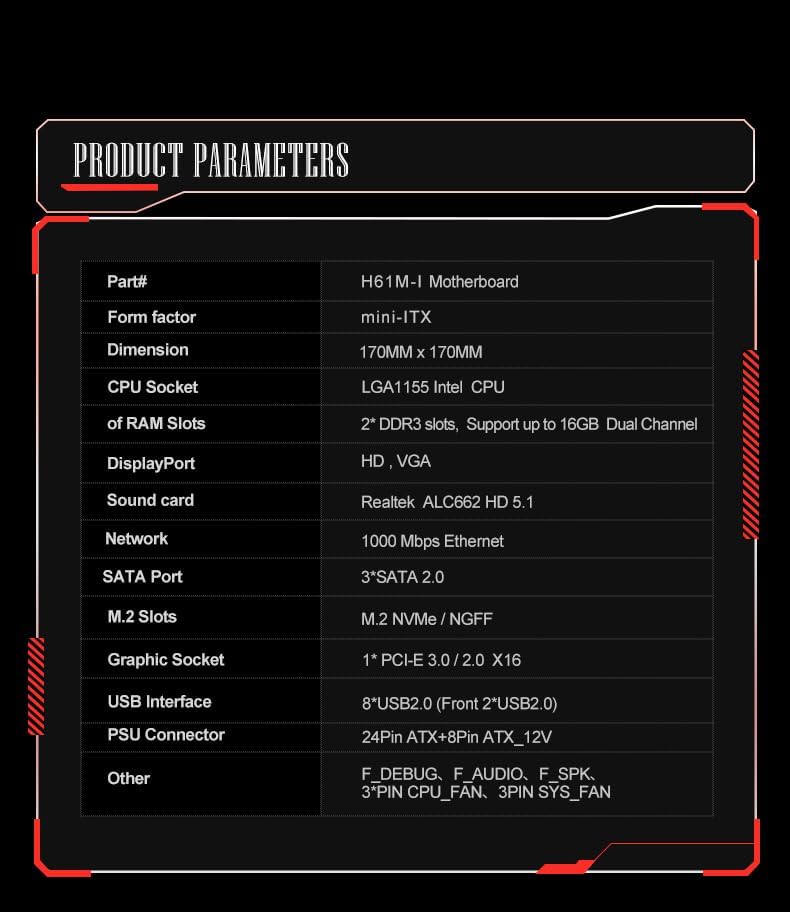
Image 6.1: Official product parameters table for the H61M-I motherboard, detailing various technical specifications.
| คุณสมบัติ | ข้อมูลจำเพาะ |
|---|---|
| หมายเลขชิ้นส่วน | เมนบอร์ด H61M-I |
| ฟอร์มแฟกเตอร์ | มินิ-ITX |
| มิติ | 170มม. x 170มม |
| ซ็อคเก็ตซีพียู | LGA1155 CPU (Intel LGA1155 Chipset Type) |
| ช่องเสียบ RAM | 2* DDR3 slots, Support up to 16GB Dual Channel |
| พอร์ตแสดงผล | HD, VGA |
| การ์ดเสียง | ALC662 HD 5.1 |
| เครือข่าย | 1000 Mbps อีเธอร์เน็ต |
| พอร์ต SATA | 3 * ซาต้า 2.0 |
| สล็อต M.2 | M.2 NVMe / NGFF |
| Graphic Socket | 1*PCI-E 3.0/2.0 X16 |
| อินเทอร์เฟซ USB | 8*USB2.0 (Front 2*USB2.0) |
| ขั้วต่อ PSU | 24Pin ATX + 8Pin ATX_12V |
| ส่วนหัวอื่น ๆ | F_DEBUG, F_AUDIO, F_SPK, 3*PIN CPU_FAN, 3PIN SYS_FAN |
| ขนาดแพ็คเกจ | 7.87 x 4.72 x 3.94 นิ้ว |
| น้ำหนักสินค้า | 1.39 ปอนด์ |
| ผู้ผลิต | JMT |
| วันที่พร้อมใช้งานครั้งแรก | วันที่ 16 กันยายน 2024 |
| อุปกรณ์ที่รองรับ | เดสก์ท็อป |
| เทคโนโลยีหน่วยความจำ RAM | DDR3 |
| โปรเซสเซอร์ที่เข้ากันได้ | 1 (LGA1155) |
| ความเร็วสัญญาณนาฬิกาหน่วยความจำ | 16.0 (likely 1600MHz for DDR3) |
| แพลตฟอร์ม | วินโดวส์ 10 |
| มีช่องหน่วยความจำให้เลือก | 2 |
7. การรับประกันและการสนับสนุน
For warranty information and technical support, please refer to the official JMT webเว็บไซต์หรือติดต่อร้านค้าปลีกของคุณ
- การรับประกัน: Specific warranty terms and conditions may vary by region and retailer. Please retain your proof of purchase for warranty claims.
- การสนับสนุนด้านเทคนิค: For further assistance, driver downloads, or BIOS updates, visit the official JMT support page or the JMT Store on Amazon: JMT Store.