1. บทนำ
กล้องติดรถยนต์ Canyon DVR40 ออกแบบมาเพื่อบันทึกภาพขณะขับขี่tage. มาพร้อมเซ็นเซอร์ Sony Starvis 415 สำหรับบันทึกวิดีโอ 4K และมุมมองภาพกว้าง 140° viewและมีหน้าจอสัมผัสแบบ IPS ขนาด 3 นิ้ว อุปกรณ์นี้มีตัวเก็บประจุยิ่งยวดเพื่อการทำงานที่เชื่อถือได้ และรองรับการเชื่อมต่อ Wi-Fi สำหรับการควบคุมผ่านแอปพลิเคชันบนมือถือ

ภาพที่ 1.1: ด้านหน้า view ภาพจากกล้องติดรถยนต์ Canyon DVR40 แสดงให้เห็นเลนส์และโลโก้แบรนด์
2. เนื้อหาบรรจุภัณฑ์
ตรวจสอบว่ามีสิ่งของทั้งหมดที่ระบุไว้ด้านล่างอยู่ในบรรจุภัณฑ์ของผลิตภัณฑ์หรือไม่

ภาพที่ 2.1: อุปกรณ์ทั้งหมดที่รวมอยู่ในชุดกล้องติดรถยนต์ Canyon DVR40
- กล้องติดรถยนต์ Canyon DVR40
- คู่มือเริ่มต้นอย่างรวดเร็ว
- บัตรรับประกัน
- อุปกรณ์เสริมสำหรับการติดตั้งสายเคเบิล
- เครื่องอ่านการ์ด
- ที่ยึดแบบแม่เหล็กดูด พร้อมขั้วต่อ USB Type-C
- อะแดปเตอร์แปลงไฟรถยนต์ (ช่องต่อ USB Type-A 2 ช่อง)
- สาย USB Type-C (ความยาวสาย 3.6 เมตร)
- ตัวกรองซีพีแอล
- ผ้าสำหรับทำความสะอาดหน้าจอ
- กรณีสิ่งทอ
3. สินค้าหมดview
ศึกษาทำความเข้าใจส่วนประกอบหลักของกล้องติดรถยนต์ DVR40 ให้ดี

ภาพที่ 3.1: กล้องติดรถยนต์ Canyon DVR40 โดดเด่นด้วยดีไซน์ที่กะทัดรัด
คุณสมบัติหลัก:
- การบันทึกภาพ 4K UltraHD: บันทึกวิดีโอที่ 30 เฟรมต่อวินาทีเพื่อภาพที่คมชัดtage.
- เซ็นเซอร์ Sony Starvis 415: ช่วยเพิ่มประสิทธิภาพการทำงานในที่แสงน้อยด้วยโหมดมองเห็นในเวลากลางคืน
- สนาม 140° View: ให้การครอบคลุมพื้นที่ถนนอย่างกว้างขวาง
- หน้าจอสัมผัสแบบ IPS Capacitive ขนาด 3 นิ้ว: สำหรับการควบคุมและการเล่นโดยตรง
- ซุปเปอร์คาปาซิเตอร์: มีความทนทานและทนต่ออุณหภูมิได้ดีกว่าแบตเตอรี่แบบดั้งเดิม
- ตัวยึดแม่เหล็ก: ช่วยให้ติดตั้งและถอดออกได้ง่ายด้วยระบบจ่ายไฟในตัว
- การเชื่อมต่อ Wi-Fi: ช่วยให้สามารถควบคุมและ foo ได้tagการจัดการผ่านแอปพลิเคชันมือถือ Canyon Eye
- จีเซ็นเซอร์: ตรวจจับแรงกระแทกและล็อกวิดีโอโดยอัตโนมัติ fileเพื่อป้องกันการเขียนทับข้อมูล
4. การตั้งค่า
4.1 การติดตั้งกล้องติดรถยนต์
DVR40 ใช้ระบบยึดแม่เหล็กเพื่อติดตั้งกับกระจกหน้ารถอย่างแน่นหนา
- ทำความสะอาดบริเวณกระจกหน้ารถที่คุณต้องการติดตั้งกล้อง
- ติดที่ยึดแบบแม่เหล็กดูดเข้ากับกระจกหน้ารถ ตรวจสอบให้แน่ใจว่าอยู่ในตำแหน่งที่ไม่มีสิ่งกีดขวางการมองเห็น view ของถนน
- เชื่อมต่อสายไฟ USB Type-C เข้ากับฐานยึดแม่เหล็ก
- จัดวางกล้องติดรถยนต์ให้ตรงกับฐานยึดแม่เหล็ก กล้องจะล็อคเข้าที่และเชื่อมต่อแหล่งจ่ายไฟโดยอัตโนมัติ

ภาพที่ 4.1: ฐานยึดแม่เหล็กพร้อมแหล่งจ่ายไฟในตัวเพื่อการติดตั้งที่ง่ายดาย
4.2 การเชื่อมต่อสายไฟ
ใช้ตัวแปลงไฟในรถยนต์และสาย USB Type-C ที่ให้มาเพื่อจ่ายไฟให้กับกล้องติดรถยนต์
- เสียบอะแดปเตอร์แปลงไฟรถยนต์เข้ากับช่องเสียบไฟ 12V ของรถยนต์ (ช่องเสียบที่จุดบุหรี่)
- เชื่อมต่อสาย USB Type-C จากอะแดปเตอร์ไฟรถยนต์เข้ากับที่ยึดแม่เหล็ก
- เมื่อสตาร์ทเครื่องยนต์ กล้องติดหน้ารถจะเปิดใช้งานและเริ่มบันทึกโดยอัตโนมัติ
4.3 การตั้งค่าเริ่มต้นและการ์ด microSD
ก่อนใช้งานครั้งแรก โปรดใส่การ์ด MicroSD ที่ใช้งานร่วมกันได้ (ไม่ได้รวมอยู่ในชุด) และทำการฟอร์แมตการ์ด
- เสียบการ์ด MicroSD ความเร็วสูง (Class 10 หรือสูงกว่า แนะนำสูงสุด 128GB) ลงในช่องเสียบที่กำหนดไว้บนกล้องติดรถยนต์
- เปิดกล้อง
- เข้าถึงการตั้งค่ากล้องผ่านหน้าจอสัมผัสหรือแอปพลิเคชันบนมือถือ
- ค้นหาตัวเลือก "ฟอร์แมตการ์ด SD" และยืนยันการฟอร์แมตการ์ด การดำเนินการนี้จะเตรียมการ์ดสำหรับการบันทึกและรับประกันประสิทธิภาพสูงสุด
5. คู่มือการใช้งาน
5.1 การบันทึกพื้นฐาน
DVR40 จะเริ่มบันทึกแบบวนซ้ำโดยอัตโนมัติเมื่อเปิดเครื่อง
- การบันทึกแบบวนซ้ำ: กล้องบันทึกวิดีโอเป็นช่วงๆ (เช่น 1, 3 หรือ 5 นาที) เมื่อการ์ด MicroSD เต็ม ระบบจะบันทึกไฟล์ที่เก่าที่สุดที่ไม่มีการป้องกัน files ถูกเขียนทับ
- การบันทึกด้วยตนเอง: กดปุ่มบันทึกบนกล้อง (ถ้ามี) หรือใช้แอปพลิเคชันบนมือถือเพื่อเริ่ม/หยุดการบันทึกด้วยตนเอง
- คุณภาพวิดีโอ: กล้องบันทึกภาพในความละเอียด 4K UltraHD ที่ 30 เฟรมต่อวินาที

ภาพที่ 5.1: ภาพแสดงให้เห็นถึงความสามารถด้านวิดีโอคุณภาพสูงของ DVR40
5.2 เซ็นเซอร์ G สำหรับบันทึกอุบัติเหตุ
เซ็นเซอร์ G ในตัวจะตรวจจับแรงกระแทกฉับพลันหรือการเร่ง/ลดความเร็วอย่างรวดเร็ว
- เมื่อตรวจพบเหตุการณ์ใดๆ วิดีโอส่วนปัจจุบันจะถูกล็อกโดยอัตโนมัติและบันทึกไปยังโฟลเดอร์ที่ได้รับการป้องกันบนการ์ด MicroSD
- สิ่งเหล่านี้ได้รับการคุ้มครอง files จะไม่ถูกเขียนทับด้วยการบันทึกแบบวนซ้ำ
- หากจำเป็น ให้ปรับความไวของเซ็นเซอร์ G ในการตั้งค่ากล้อง

ภาพที่ 5.2: ภาพประกอบแสดงการทำงานของเซ็นเซอร์ G ในการบันทึกอุบัติเหตุ
5.3 หน้าจอสัมผัส
หน้าจอสัมผัสแบบ IPS capacitive ขนาด 3 นิ้ว ช่วยให้สามารถโต้ตอบกับกล้องได้โดยตรง
- นำทางเมนู ปรับการตั้งค่า และอื่นๆview บันทึกเสียงฟูtage โดยตรงบนอุปกรณ์
- จอแสดงผล IPS ให้มุมมองที่กว้าง viewมุมมองที่กว้างและทัศนวิสัยที่ชัดเจน

ภาพที่ 5.3: หน้าจอสัมผัสขณะใช้งานบนเครื่องบันทึกวิดีโอ DVR40
5.4 การควบคุมผ่าน Wi-Fi และแอปพลิเคชันบนมือถือ
เชื่อมต่อ DVR40 กับสมาร์ทโฟนของคุณผ่าน Wi-Fi โดยใช้แอปพลิเคชันมือถือ Canyon Eye
- ดาวน์โหลดแอปพลิเคชัน "Canyon Eye" จากแอปสโตร์ของสมาร์ทโฟนของคุณ
- เปิดใช้งาน Wi-Fi บน DVR40 ผ่านเมนูการตั้งค่า
- เชื่อมต่อกับเครือข่าย Wi-Fi ของ DVR40 ผ่านสมาร์ทโฟนของคุณ (ชื่อเครือข่าย (SSID) และรหัสผ่านจะแสดงบนหน้าจอของกล้อง)
- เปิดแอป Canyon Eye ตอนนี้คุณสามารถ... view อยู่ footagเช่น เข้าถึงวิดีโอที่บันทึกไว้ เปลี่ยนการตั้งค่า และดาวน์โหลด fileตรงไปยังโทรศัพท์ของคุณ
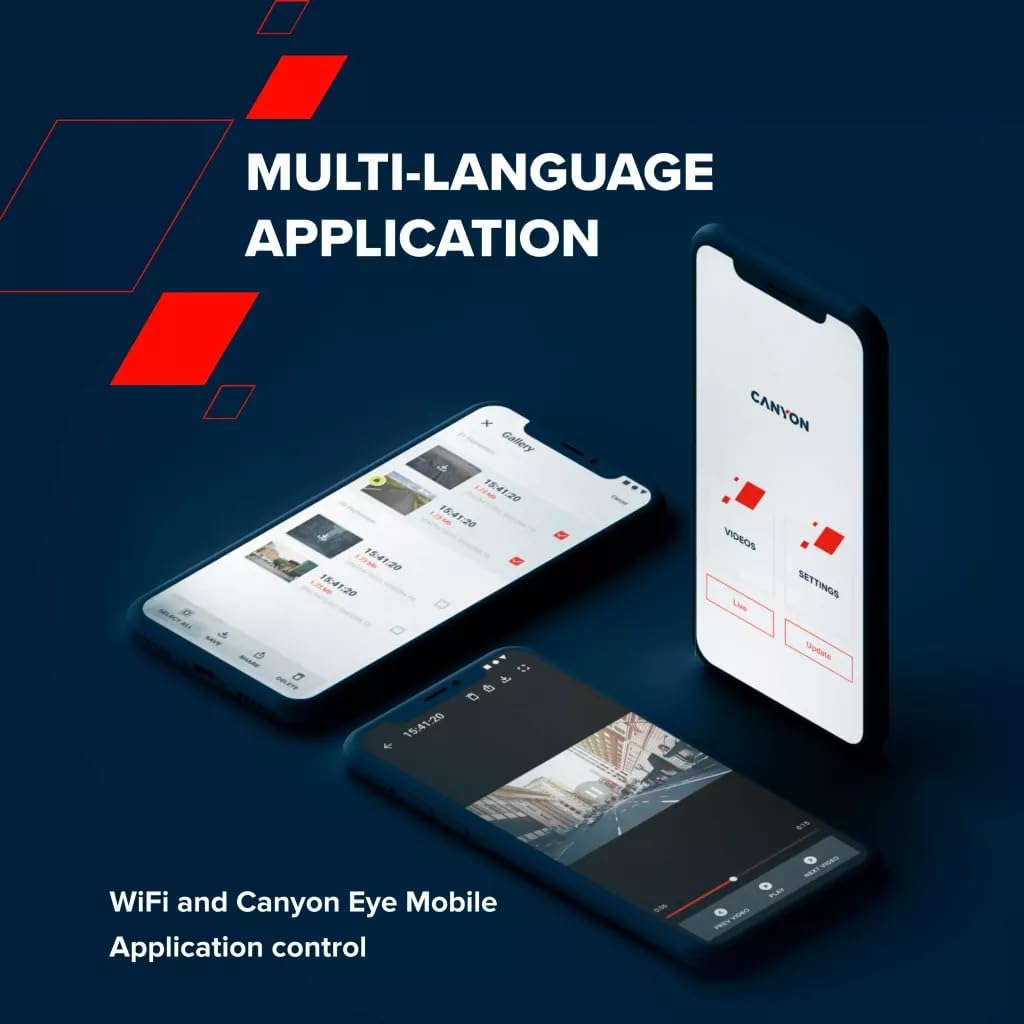
ภาพที่ 5.4: อินเทอร์เฟซแอปพลิเคชันมือถือ Canyon Eye สำหรับการควบคุมระยะไกลและ file การจัดการ.
6. การบำรุงรักษา
6.1 ซูเปอร์คาปาซิเตอร์
DVR40 ติดตั้งซูเปอร์คาปาซิเตอร์แทนแบตเตอรี่ลิเธียมไอออนแบบดั้งเดิม
- ซูเปอร์คาปาซิเตอร์มีความทนทานสูงกว่าและมีช่วงอุณหภูมิการทำงานที่กว้างกว่า (-30°C ถึง 80°C)
- แบตเตอรี่ชนิดนี้มีโอกาสร้อนเกินไปน้อยกว่าและมีอายุการใช้งานยาวนานกว่า จึงเหมาะสำหรับใช้งานในสภาพแวดล้อมยานยนต์
- ตัวเก็บประจุยิ่งยวดให้พลังงานเพียงพอที่จะบันทึกข้อมูลล่าสุดได้อย่างปลอดภัยเมื่อตัดการเชื่อมต่อแหล่งจ่ายไฟภายนอก

ภาพที่ 6.1: ตัวเก็บประจุยิ่งยวดของ DVR40 ช่วยให้การทำงานมีเสถียรภาพในช่วงอุณหภูมิที่กว้าง
6.2 การทำความสะอาดและการเก็บรักษา
- ใช้ผ้าทำความสะอาดที่ให้มาเช็ดหน้าจอและเลนส์เบาๆ หลีกเลี่ยงการใช้วัสดุที่มีฤทธิ์กัดกร่อนหรือน้ำยาทำความสะอาดที่มีสารเคมี
- ตรวจสอบให้แน่ใจว่ากล้องสะอาดและแห้งสนิทก่อนเก็บรักษา
- เมื่อไม่ได้ใช้งานเป็นเวลานาน ควรเก็บกล้องไว้ในที่แห้งและเย็น หลีกเลี่ยงแสงแดดโดยตรง
7 การแก้ไขปัญหา
โปรดดูตารางด้านล่างเพื่อดูปัญหาทั่วไปและวิธีแก้ไข
| ปัญหา | สาเหตุที่เป็นไปได้ | สารละลาย |
|---|---|---|
| กล้องไม่สามารถเปิดได้ | ไม่มีไฟเลี้ยง; สายเคเบิล/อะแดปเตอร์ชำรุด | ตรวจสอบการเชื่อมต่ออะแดปเตอร์ไฟรถยนต์ ตรวจสอบให้แน่ใจว่าสวิตช์กุญแจรถเปิดอยู่ ลองใช้พอร์ต USB หรืออะแดปเตอร์อื่นหากมี |
| การบันทึกหยุดโดยไม่คาดคิด | การ์ด MicroSD เต็มหรือเสียหาย; การ์ด MicroSD ความเร็วต่ำ | ฟอร์แมตการ์ด MicroSD แล้วเปลี่ยนเป็นการ์ด MicroSD ความเร็วสูง (Class 10 หรือ U3) |
| วิดีโอ footage ไม่ชัดเจนหรือไม่ชัดเจน | ฟิล์มป้องกันบนเลนส์; เลนส์สกปรก; สิ่งกีดขวางบนกระจกหน้ารถ | ลอกฟิล์มป้องกันออกให้หมด ทำความสะอาดเลนส์กล้องและกระจกหน้ารถ ตรวจสอบให้แน่ใจว่ากล้องติดตั้งแน่นสนิทแล้ว |
| ปัญหาการเชื่อมต่อ Wi-Fi | รหัสผ่าน Wi-Fi ไม่ถูกต้อง; Wi-Fi ของกล้องไม่ได้เปิดใช้งาน; แอปมีปัญหา | ตรวจสอบให้แน่ใจว่าได้เปิดใช้งาน Wi-Fi บนกล้องแล้ว ตรวจสอบรหัสผ่าน Wi-Fi อีกครั้ง รีสตาร์ททั้งกล้องและสมาร์ทโฟน ติดตั้งแอป Canyon Eye ใหม่ |
| G-Sensor ไวเกินไป/ไม่ไวพอ | การตั้งค่าความไวของ G-Sensor | ปรับระดับความไวของเซ็นเซอร์ G ในการตั้งค่ากล้อง |
8. ข้อมูลจำเพาะ
รายละเอียดคุณสมบัติทางเทคนิคของกล้องติดรถยนต์ Canyon DVR40
| คุณสมบัติ | ข้อมูลจำเพาะ |
|---|---|
| ยี่ห้อ | CANYON |
| ชื่อรุ่น | เครื่องบันทึกภาพ 40 |
| หมายเลขรุ่น | ซีเอ็นดี-ดีวีอาร์40 |
| สี | สีดำ |
| ความละเอียดในการบันทึกวิดีโอ | 2160p (4K UltraHD) |
| เฟรมต่อวินาที | 30 เฟรมต่อวินาที (ที่ความละเอียด 4K) |
| เทคโนโลยีเซ็นเซอร์ออปติคัล | CMOS (Sony Starvis 415) |
| ขนาดเซนเซอร์ภาพ | 1/2.86 นิ้ว |
| ทุ่งแห่ง View | 140° |
| คุณสมบัติพิเศษ | ตัวเก็บประจุยิ่งยวดในตัว, หน้าจอสัมผัส, โหมดมองกลางคืน, Wi-Fi, เซ็นเซอร์ G |
| แสดง | หน้าจอสัมผัสแบบ IPS Capacitive ขนาด 3 นิ้ว |
| ประเภทการติดตั้ง | แม่เหล็กติด |
| แหล่งพลังงาน | อะแดปเตอร์แปลงไฟรถยนต์ (USB Type-C) |
| ช่วงอุณหภูมิในการทำงาน | -30°C ถึง 80°C (เนื่องจากซูเปอร์คาปาซิเตอร์) |
| ส่วนประกอบที่รวมอยู่ | กล้องติดรถยนต์, ฐานยึดแม่เหล็ก, อะแดปเตอร์ไฟรถยนต์, สาย USB-C, เครื่องอ่านการ์ด, ฟิลเตอร์ CPL, ผ้าทำความสะอาด, กระเป๋าผ้า, คู่มือเริ่มต้นใช้งานอย่างรวดเร็ว, ใบรับประกัน, อุปกรณ์ติดตั้งสายเคเบิล |
| รวมแบตเตอรี่ | ไม่ (ใช้ซูเปอร์คาปาซิเตอร์) |
9. ข้อมูลด้านความปลอดภัย
- ห้ามใช้งานกล้องหรือปรับการตั้งค่าขณะขับรถ ควรจอดรถในที่ปลอดภัยเสมอ
- ตรวจสอบให้แน่ใจว่ากล้องติดตั้งอย่างแน่นหนาและไม่กีดขวางทางเดินของคุณ view ของถนน
- โปรดใช้เฉพาะอะแดปเตอร์แปลงไฟและสายเคเบิลที่ให้มาเท่านั้น เพื่อป้องกันความเสียหายต่ออุปกรณ์
- อย่าให้กล้องสัมผัสกับความชื้นหรือของเหลวในปริมาณมาก
- ห้ามถอดชิ้นส่วนอุปกรณ์ โปรดติดต่อช่างผู้ชำนาญการเพื่อทำการซ่อมแซม
- เก็บกล้องและอุปกรณ์เสริมให้พ้นมือเด็ก
10. การรับประกันและการสนับสนุน
สำหรับข้อมูลการรับประกันและการสนับสนุนทางเทคนิค โปรดดูบัตรรับประกันที่อยู่ในบรรจุภัณฑ์ของคุณ หรือเยี่ยมชมเว็บไซต์อย่างเป็นทางการของ Canyon webเว็บไซต์.
การสนับสนุนทางออนไลน์: https://canyon.eu/support/