
การแนะนำ
This manual provides essential information for the setup, operation, maintenance, and troubleshooting of your GIGABYTE MO34WQC2 34-inch QD-OLED Curved Gaming Monitor. Please read this manual thoroughly before using the product to ensure correct usage and optimal performance.
The GIGABYTE MO34WQC2 monitor features a 34-inch curved QD-OLED display, offering a 0.03ms GTG response time and a 240 Hz refresh rate for smooth visual experiences. It includes Type-C KVM functionality, allowing seamless switching between multiple devices.
คุณสมบัติหลัก:
- 3rd Gen QD-OLED Panel: Delivers high image quality and gaming performance.
- GIGABYTE OLED Care: AI-based algorithm to minimize burn-in risks with adjustable settings.
- อัตราการรีเฟรช 240Hz และเวลาตอบสนอง 0.03ms: Ensures ultra-smooth motion clarity and responsiveness.
- Life-Like Colors: Features 1.5M:1 contrast ratio, 99% DCI-P3 color gamut, and 10-bit color depth.
- VESA DisplayHDR True Black 400 & ClearMR 13000: Provides realistic contrast and top-tier motion clarity.
- AMD FreeSync พรีเมียมโปร: Reduces screen tearing and stuttering, especially in HDR content.
- คุณสมบัติเชิงยุทธวิธี: Includes Game Assist (timer, crosshairs, PIP/PBP), Black Equalizer 2.0, and Dashboard for enhanced gameplay.
- รับประกัน 3 ปี: Covers panel burn-in (terms may vary by region).
คำแนะนำการตั้งค่า
1. การแกะกล่องและการประกอบ
นำจอภาพและส่วนประกอบทั้งหมดออกจากบรรจุภัณฑ์อย่างระมัดระวัง วางจอภาพคว่ำหน้าลงบนพื้นผิวที่นุ่มและสะอาดเพื่อป้องกันรอยขีดข่วน

This image shows the GIGABYTE MO34WQC2 monitor with its stand, viewed from the front. The monitor is curved and displays a vibrant, colorful image.
การติดขาตั้ง:
- ยึดคอขาตั้งเข้ากับแผงจอภาพ ตรวจสอบให้แน่ใจว่าล็อคเข้าที่อย่างแน่นหนา
- ติดฐานขาตั้งเข้ากับส่วนคอของขาตั้ง แล้วขันสกรูที่ด้านล่างของฐานให้แน่น
Alternatively, the monitor supports VESA 100x100mm wall mounts. Refer to the image below for VESA mounting points.

This image illustrates the adjustable stand of the GIGABYTE MO34WQC2 monitor, showing its tilt range (-5° to +20°) and height adjustment (130mm). A close-up inset highlights the VESA 100x100mm mounting area on the back of the monitor.
2. การเชื่อมต่อสายเคเบิล
Connect the necessary cables to the monitor's I/O ports. Ensure all connections are firm.

This diagram shows the input/output ports on the back of the GIGABYTE MO34WQC2 monitor. Ports include HDMI 2.1 (in), DP 1.4 (in), USB Type-C (DP Alt), Mic, Headphone, USB 3.2 (Upstream), and USB 3.2 (Downstream).
- สายไฟ: ต่อสายไฟเข้ากับจอภาพและเต้ารับไฟฟ้า
- อินพุตวิดีโอ: Connect your PC or gaming console using an HDMI 2.1, DisplayPort 1.4, or USB Type-C cable.
- USB อัปสตรีม: For KVM functionality and USB hub use, connect a USB 3.2 Upstream cable from your PC to the monitor.
- เสียง: Connect headphones or external speakers to the Headphone jack if desired.
คำแนะนำการใช้งาน
1. เปิด/ปิดเครื่อง
กดปุ่มเปิด/ปิด ซึ่งโดยปกติจะอยู่ด้านหลังหรือด้านล่างของจอภาพ เพื่อเปิดหรือปิดเครื่อง ไฟแสดงสถานะจะสว่างขึ้นเมื่อจอภาพเปิดอยู่
2. การนำทางบนหน้าจอ (OSD)
The monitor features a joystick control for navigating the OSD menu. This joystick is typically located on the back of the monitor.
- กด: เข้าสู่เมนู OSD / ยืนยันการเลือก
- ขึ้นลง: นำทางตัวเลือกเมนู
- ซ้าย/ขวา: Adjust settings / Navigate sub-menus.
3. ฟังก์ชัน KVM
The built-in KVM (Keyboard, Video, Mouse) switch allows you to control multiple devices (e.g., a desktop PC and a laptop) with a single keyboard and mouse connected to the monitor. To use KVM, ensure both devices are connected to the monitor via video input (HDMI/DP/USB-C) and the USB Upstream cable from the primary device.

This image shows the GIGABYTE MO34WQC2 monitor connected to a desktop PC via HDMI/DP and a laptop via USB Type-C, illustrating how the Type-C KVM feature allows switching between devices with a single button press.
Switch between connected devices using the dedicated KVM button or through the OSD menu.
4. การตั้งค่าการแสดงผล
เข้าถึงเมนู OSD เพื่อปรับการตั้งค่าการแสดงผลต่างๆ:
- รูปภาพ: ความสว่าง, คอนทราสต์, ความคมชัด, อุณหภูมิสี
- สี: Gamma, Hue, Saturation.
- การเล่นเกม: Overdrive, FreeSync Premium Pro, Black Equalizer 2.0, Crosshair, Timer.
- ป้อนข้อมูล: Select input source (HDMI, DisplayPort, USB-C).
- ระบบ: Language, OSD Timeout, Power LED.
5. GIGABYTE OLED Care
The monitor includes AI-based OLED Care features to prevent burn-in. These settings can be accessed and adjusted via the OSD menu. It is recommended to keep these features enabled for optimal panel longevity.
การซ่อมบำรุง
1. การทำความสะอาดจอภาพ
- ปิดเครื่องจอภาพและถอดสายไฟออกทุกครั้งก่อนทำความสะอาด
- ใช้ผ้านุ่มไม่เป็นขุยค่อยๆ งampเคลือบด้วยน้ำหรือน้ำยาทำความสะอาดหน้าจอที่ไม่กัดกร่อน
- ห้ามฉีดน้ำยาทำความสะอาดลงบนหน้าจอโดยตรง
- หลีกเลี่ยงการใช้สารเคมีรุนแรง ตัวทำละลาย หรือวัสดุที่มีฤทธิ์กัดกร่อน
2. การดูแลรักษาแผง OLED
To prolong the life of your QD-OLED panel and minimize the risk of burn-in, utilize the GIGABYTE OLED Care features available in the OSD menu. These features include pixel shift, static image detection, and pixel refresh cycles. Regular use of these functions is recommended.
การแก้ไขปัญหา
หากคุณพบปัญหาเกี่ยวกับจอภาพของคุณ โปรดดูปัญหาทั่วไปและวิธีแก้ไขต่อไปนี้:
| ปัญหา | วิธีแก้ปัญหาที่เป็นไปได้ |
|---|---|
| ไม่มีภาพบนหน้าจอ | Ensure the power cable is securely connected and the monitor is powered on. Verify the video input cable (HDMI, DP, USB-C) is properly connected to both the monitor and the source device. Select the correct input source via the OSD menu. |
| ภาพสั่นไหวหรือบิดเบี้ยว | Check video cable connections. Ensure the graphics card drivers are up to date. Try a different video cable or port. Disable or adjust FreeSync Premium Pro settings in the OSD if experiencing issues. |
| สีที่ปรากฏไม่ถูกต้อง | Adjust color settings (brightness, contrast, color temperature) in the OSD menu. Ensure HDR is correctly configured on your source device and monitor. |
| Burn-in or image retention | Utilize the GIGABYTE OLED Care features in the OSD menu, such as Pixel Refresh or Static Image Detection, to mitigate these issues. Avoid displaying static images for extended periods. |
| KVM not switching devices | Ensure the USB Upstream cable is connected from the primary device to the monitor. Verify all video inputs are correctly connected. Check KVM settings in the OSD menu. |
ข้อมูลจำเพาะ
| คุณสมบัติ | รายละเอียด |
|---|---|
| ยี่ห้อ | กิกะไบต์ |
| หมายเลขรุ่น | MO34WQC2-SA |
| ขนาดหน้าจอ | 34 นิ้ว |
| ปณิธาน | ความละเอียด WQHD 3440 x 1440 |
| อัตราส่วนภาพ | 21:9 น. |
| ประเภทจอภาพ | โอแอลอีดี QD |
| อัตราการรีเฟรช | 240 เฮิรตซ์ |
| เวลาตอบสนอง | 0.03 Milliseconds (GtG) |
| อัตราส่วนคอนทราสต์ | 1,500,000:1 น. |
| ช่วงสี | 99% DCI-P3 |
| รองรับ HDR | VESA DisplayHDR True Black 400 |
| การซิงค์แบบปรับตัว | เอเอ็มดี FreeSync พรีเมียมโปร |
| การเชื่อมต่อ | 2x HDMI 2.1, 1x DisplayPort 1.4, 1x USB Type-C (DP Alt Mode), 2x USB 3.2 (Downstream), 1x USB 3.2 (Upstream), Headphone Jack |
| การปรับเปลี่ยน | Height, Tilt |
| แท่นยึด VESA | 100x100มม. |
| ขนาด (กว้าง x ลึก x สูง) | 31.96" x 9.65" x 23.42" (พร้อมขาตั้ง) |
| น้ำหนัก | 21.7 ปอนด์ |
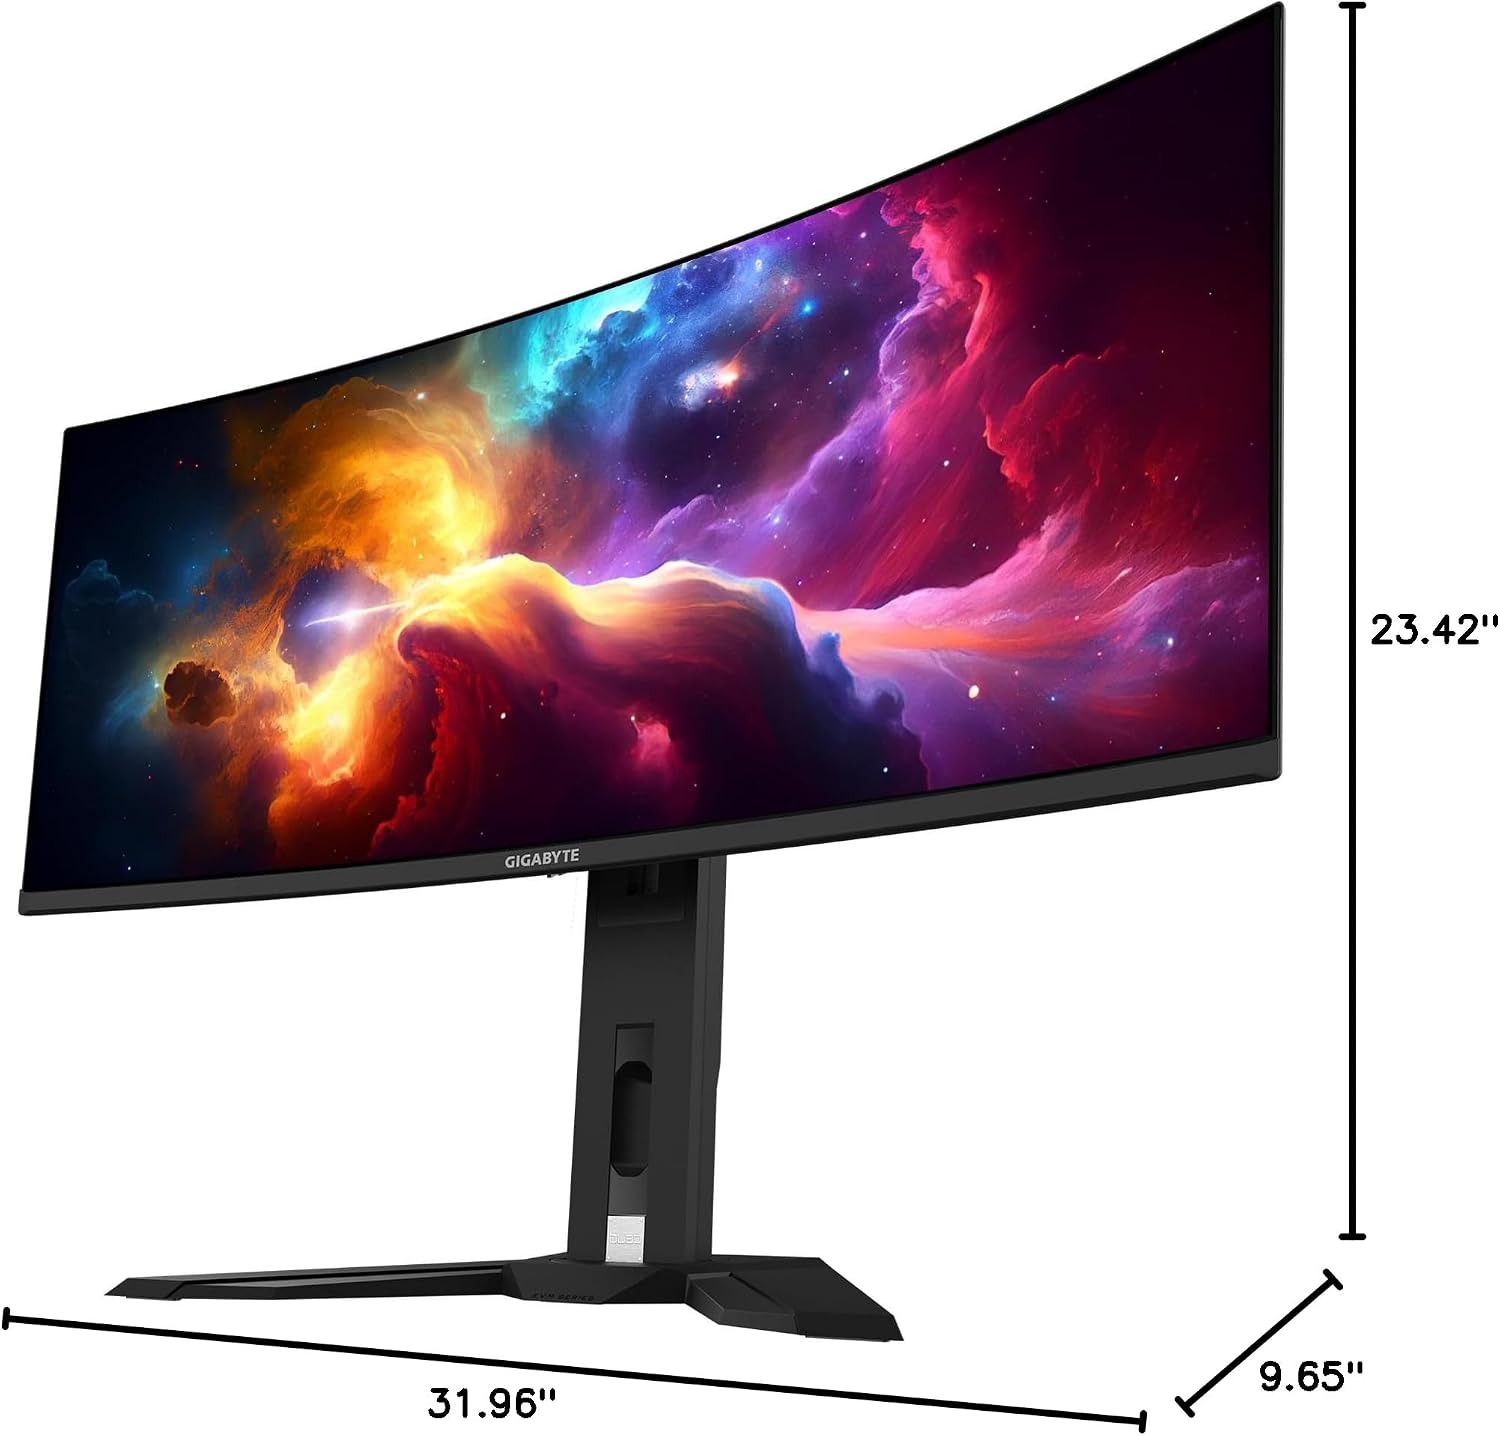
This image provides a diagram of the GIGABYTE MO34WQC2 monitor's dimensions, showing a width of 31.96 inches, a depth of 9.65 inches, and a height of 23.42 inches (including the stand).
การรับประกันและการสนับสนุน
ข้อมูลการรับประกัน
Your GIGABYTE MO34WQC2 monitor comes with an extended 3-year manufacturer warranty. This warranty includes coverage for panel burn-in, supported by the AI-based GIGABYTE OLED Care protection. Please note that warranty terms may vary by region.
การสนับสนุนลูกค้า
หากต้องการความช่วยเหลือด้านเทคนิค การเรียกร้องการรับประกัน หรือสอบถามข้อมูลเพิ่มเติม โปรดไปที่เว็บไซต์ฝ่ายสนับสนุนอย่างเป็นทางการของ GIGABYTE website or contact their customer service department. Refer to the product packaging or GIGABYTE's official website for specific contact details and support resources in your region.