1. บทนำ
This manual provides detailed instructions for the installation, operation, and maintenance of your BN-LINK U211A Countdown Timer Switch. This device is designed to automate the shut-off of lights and exhaust fans, contributing to energy savings and convenience. Please read this manual thoroughly before installation and use.
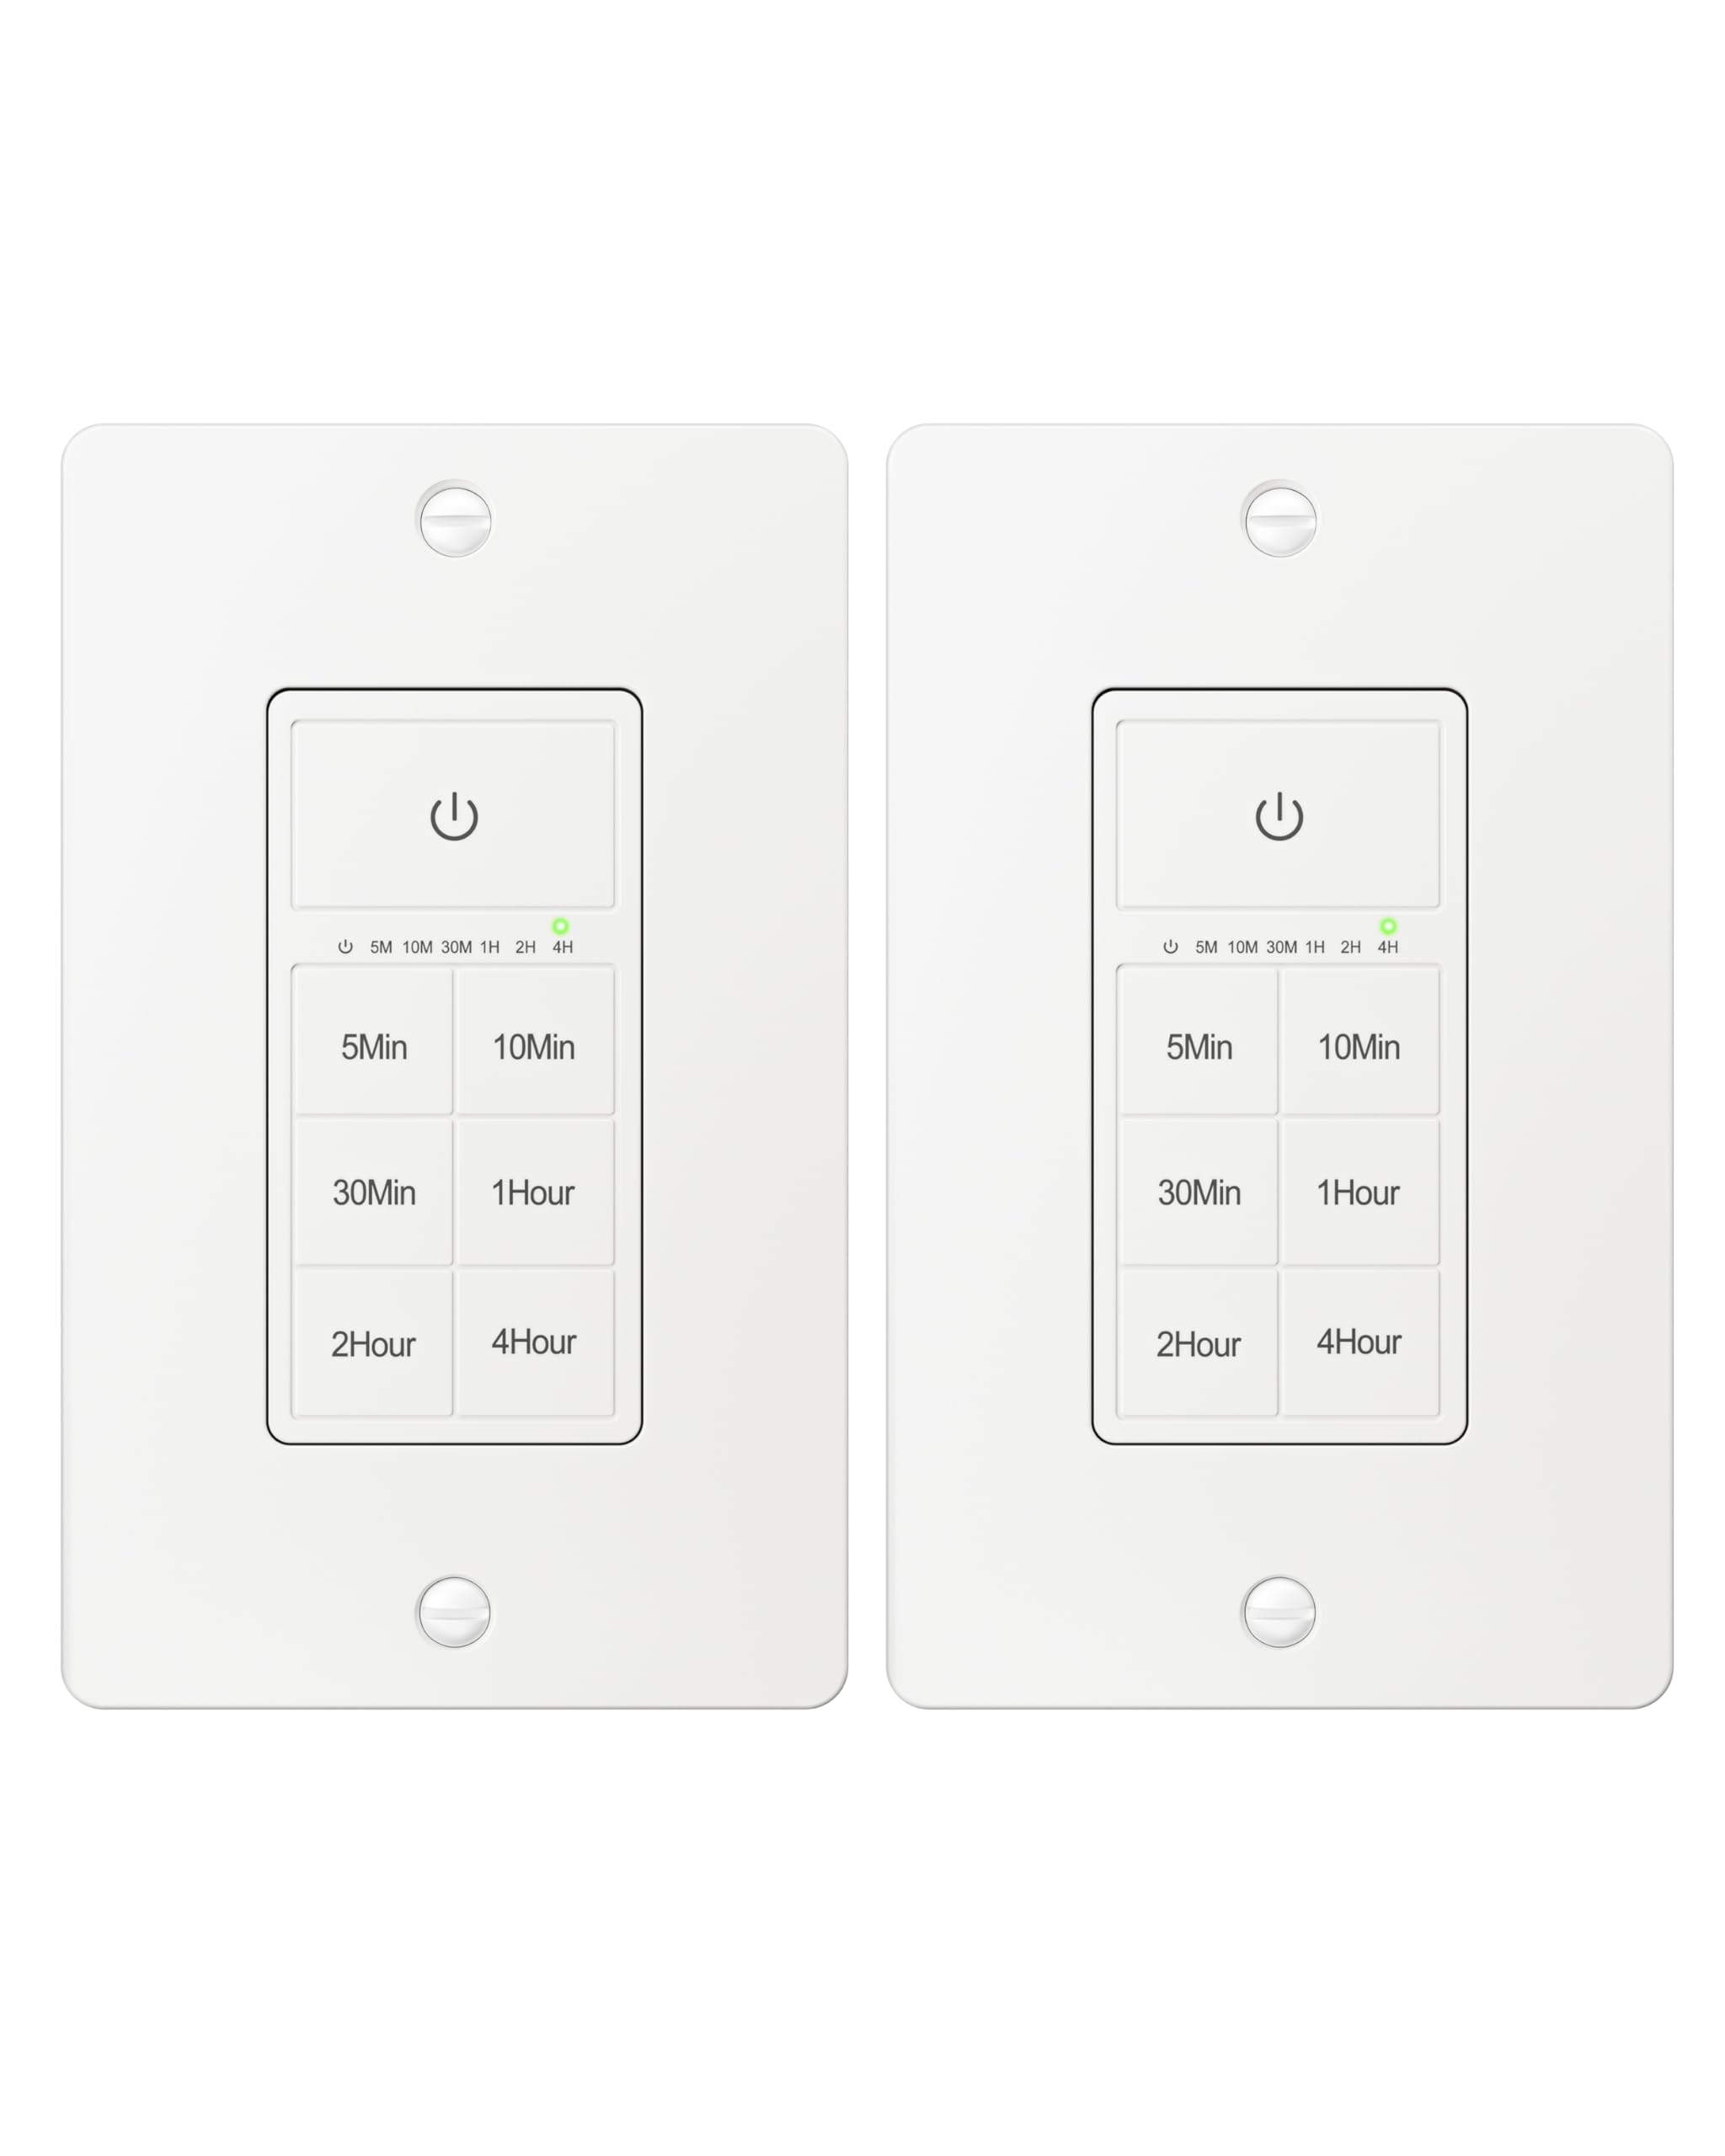
Figure 1: BN-LINK U211A Countdown Timer Switch
2. ข้อมูลด้านความปลอดภัย
- แนะนำการติดตั้งอย่างมืออาชีพ: For your safety, it is highly recommended to have a qualified electrician install this product.
- การตัดการเชื่อมต่อไฟฟ้า: Always cut off power at the circuit breaker before attempting any installation, wiring, or maintenance to prevent electric shock.
- ต้องการลวดเป็นกลาง: This timer switch requires a neutral wire for proper operation. Ensure your wall box has a neutral wire before proceeding with installation.
- ใช้ได้เฉพาะเสาเดี่ยวเท่านั้น: This switch is designed for single-pole applications only. It is not intended for use in 3-way applications where multiple switches control the same outlet.
- สำหรับใช้ภายในอาคารเท่านั้น: ผลิตภัณฑ์นี้สำหรับใช้ภายในอาคารเท่านั้น
- ความจุในการรับน้ำหนัก: Do not exceed the maximum load capacity: 15A/1875W Resistive or General Purpose, 10A/1250W Ballast or Tungsten, ½ HP. Exceeding these limits can cause damage to the switch and connected devices, and poses a fire hazard.
3. เนื้อหาบรรจุภัณฑ์
ตรวจสอบว่ามีรายการทั้งหมดอยู่ในแพ็คเกจของคุณ:
- BN-LINK U211A Countdown Timer Switch
- แผ่นติดผนัง
- สกรูยึด
- Wire Nuts (Orange Twist Connectors)

Figure 2: Included components and size details
4. การติดตั้ง
ปฏิบัติตามขั้นตอนเหล่านี้อย่างระมัดระวังเพื่อการติดตั้งที่ถูกต้อง:
- ตัดไฟ: Turn off the main power at the circuit breaker for the switch location you will be working on.
- Uninstall Current Switch: ถอดแผ่นผนังที่มีอยู่และสวิตช์ออกจากกล่องผนังอย่างระมัดระวัง
- ระบุสายไฟ: Identify the wires in your wall box: hot (line), load, neutral, and ground. A neutral wire is required.
- เชื่อมต่อสายไฟ: Use the included orange twist connectors to connect the wires from the wall box to the corresponding wires on the timer switch. Ensure connections are secure.
- เชื่อมต่อ สายสีขาว from the timer to the สายนิวทรัล ในกล่องติดผนัง
- เชื่อมต่อ สายสีดำ from the timer to the hot (line) wire ในกล่องติดผนัง
- เชื่อมต่อ สายสีแดง from the timer to the สายโหลด ในกล่องติดผนัง
- เชื่อมต่อ สายสีเขียว from the timer to the สายดิน ในกล่องติดผนัง
- สวิตช์ความปลอดภัย: Gently push all connected wires and the timer switch into the wall box. Secure the timer switch to the wall box using the provided mounting screws.
- ติดตั้งแผ่นผนัง: Attach the decorative wall plate over the installed timer switch.
- คืนค่าพลัง: เปิดไฟที่เบรกเกอร์อีกครั้ง
- เริ่มต้น: The timer will initialize. Wait for all indicator lights to go out, signaling that initialization is complete.

รูปที่ 3: แผนภาพการเดินสายไฟ
Video 1: BN-LINK Countdown Timer Switch Installation and Operation Guide. This video demonstrates the installation process and how to use the timer's countdown functions.
5. การดำเนินการ
The BN-LINK U211A Countdown Timer Switch features a touch ON/OFF button and multiple preset countdown options.

Figure 4: Timer Switch Features
Setting a Countdown Timer
- Press the button corresponding to your desired countdown duration (5 min, 10 min, 30 min, 60 min, 2 hours, or 4 hours).
- An LED indicator above the selected time will illuminate, confirming the countdown is active. The connected device (light or fan) will remain on for the selected duration and then automatically turn off.
- If you select a different countdown option while one is already active, the timer will reset to the newly selected duration.
- Pressing the same countdown button while it is active will not restart the countdown. To restart, first press the power button to turn the unit off, then press the desired countdown option again.
Manual ON/OFF and Always ON Mode
- To turn ON (Always ON Mode): If the unit is off, press the main power button (with the power symbol) once. The connected device will turn on and stay on indefinitely.
- วิธีปิด: If the unit is in Always ON mode or a countdown is running, press the main power button once to turn the connected device off.
- Override Countdown: If a countdown is active, pressing the main power button once will turn the device off. Pressing it again will enter Always ON mode.
6. ข้อมูลจำเพาะ
| คุณสมบัติ | ข้อมูลจำเพาะ |
|---|---|
| แบบอย่าง | ยู211เอ |
| โหมดการทำงาน | อัตโนมัติ |
| คะแนนปัจจุบัน | 15 Amps |
| ปฏิบัติการฉบับที่tage | 125 โวลต์ |
| วัดtage | 1875 วัตต์ |
| วิธีการควบคุม | สัมผัส |
| ประเภทสวิตซ์ | Toggle (Push Button Actuator) |
| ประเภทวงจร | 1 ทาง |
| ประเภทการติดตั้ง | ติดผนัง |
| ขนาด (กว้าง x ยาว x สูง) | 4.2 x 1.8 x 2 นิ้ว |
| วัสดุ | Plastic (body), Copper, Brass (contacts) |
| สี | สีขาว |
| คะแนนอุณหภูมิ | 5°F ถึง 122°F |
| การรับรอง | รายชื่อ ETL |
7 การแก้ไขปัญหา
If you encounter issues with your BN-LINK U211A Countdown Timer Switch, refer to the following common solutions:
- สวิตช์ไม่ตอบสนอง:
- ตรวจสอบให้แน่ใจว่าได้ต่อกระแสไฟฟ้ากลับเข้าที่เบรกเกอร์แล้ว
- Verify all wire connections are secure and correct according to the installation instructions.
- Check if the connected load exceeds the maximum wattagอีหรือ ampเร่าร้อน
- Countdown Not Starting/Resetting:
- To restart a countdown, first press the main power button to turn the unit off, then select your desired countdown time again.
- If switching between countdowns, the new countdown will start from its full duration.
- Lights/Fan Remain On Indefinitely:
- The switch might be in "Always ON" mode. Press the main power button once to turn it off, or select a countdown duration.
- การทำงานเป็นระยะ:
- Ensure the neutral wire connection is solid. A loose neutral wire can cause erratic behavior.
- Confirm the switch is not installed in a 3-way circuit.
หากต้องการความช่วยเหลือเพิ่มเติม โปรดติดต่อฝ่ายบริการลูกค้าของ BN-LINK
8. การรับประกันและการสนับสนุน
BN-LINK products are designed for ease of use and quality. This product is ETL Listed, ensuring it meets recognized safety standards.
For information regarding product warranty, returns, or technical support, please refer to the documentation included with your purchase or visit the official BN-LINK website. You may also contact BN-LINK customer service directly for assistance.
นโยบายการคืนสินค้า: The buybox winner offers a 30-day return policy for refund or replacement.