
1. บทนำ
Thank you for choosing the i-aplus LED Nightstand. This nightstand is designed to provide functional storage and ambient lighting for your bedroom or living space. Featuring two spacious drawers, a convenient charging station, and customizable LED lighting, this unit combines modern design with practical utility. Please read this manual thoroughly before assembly and use to ensure proper installation and safe operation.
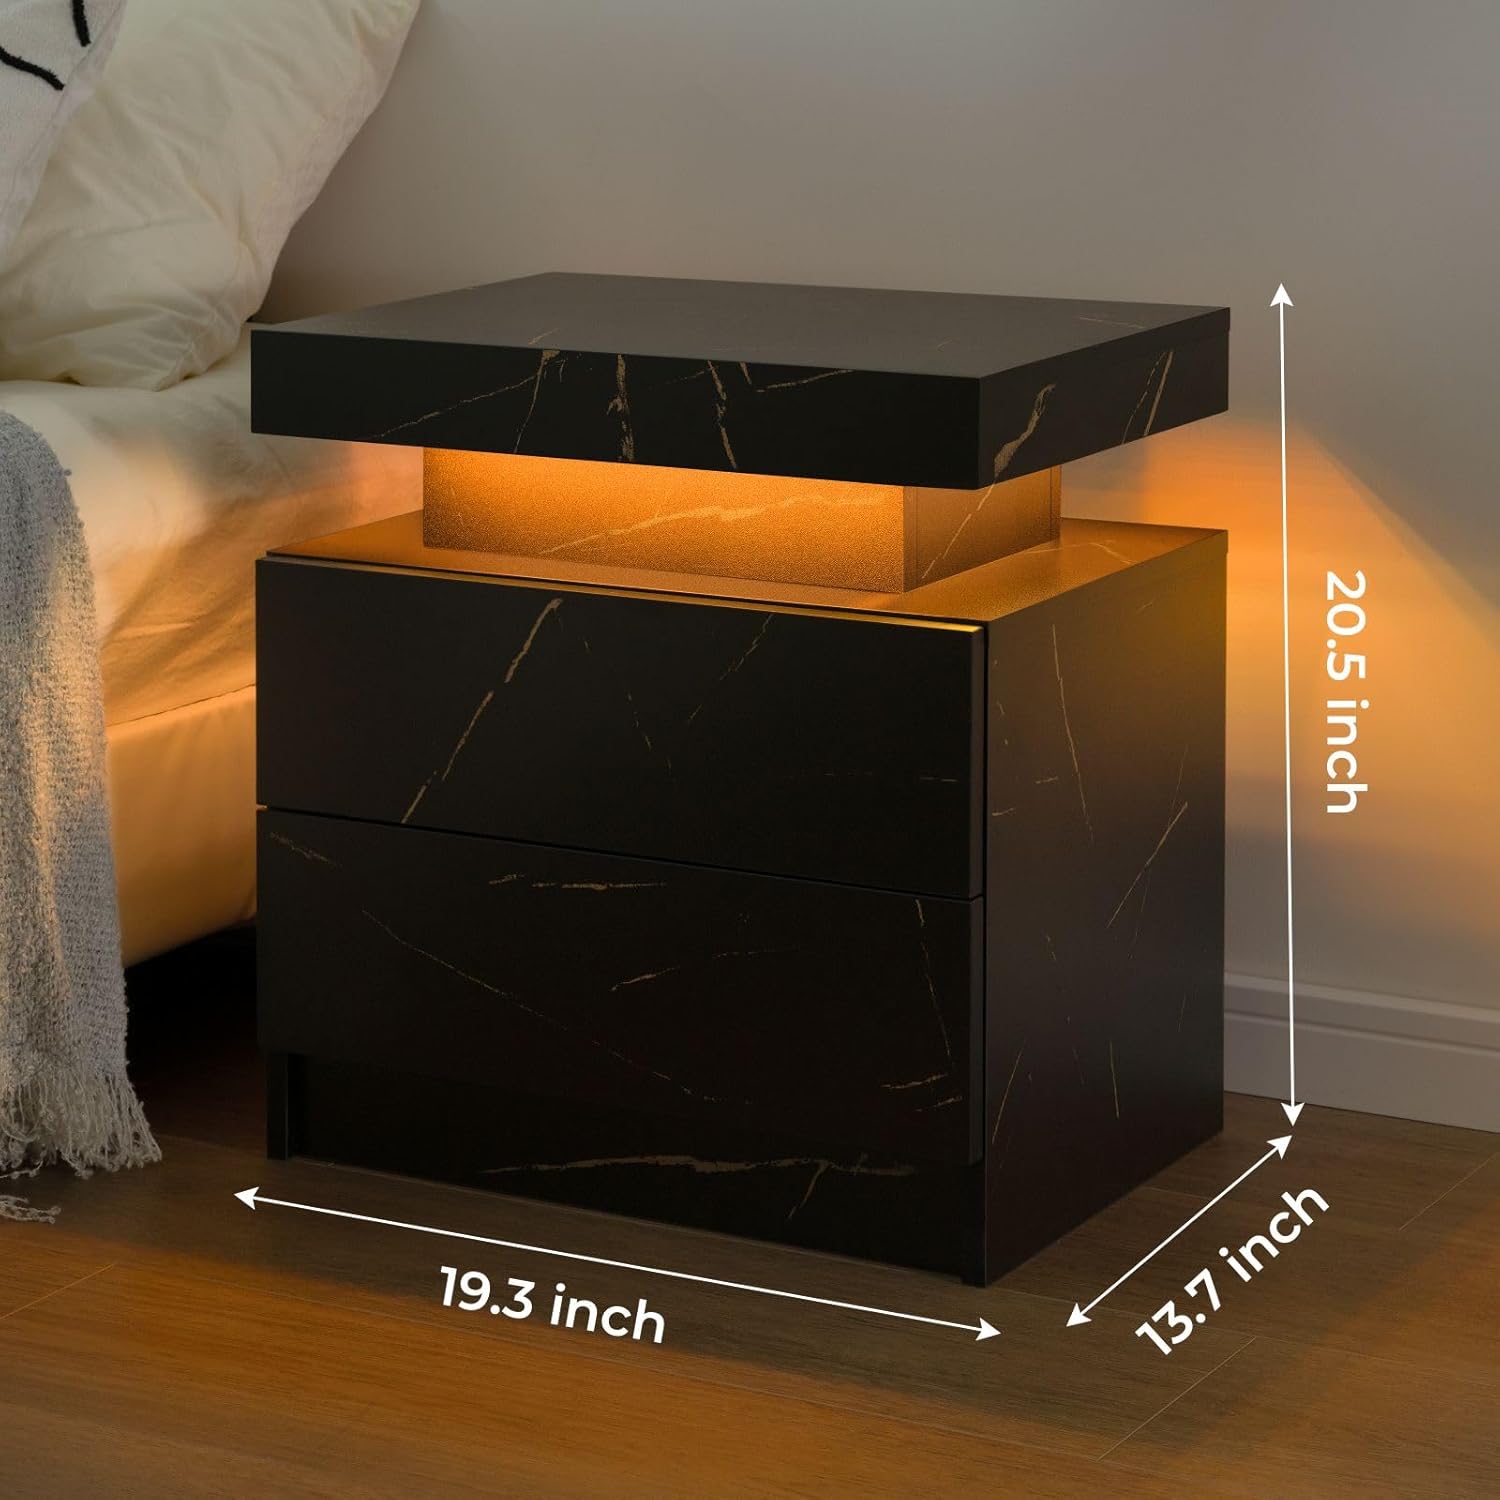
The i-aplus LED Nightstand provides both functional storage and ambient lighting.
2. ข้อมูลด้านความปลอดภัย
- ความจุน้ำหนัก: Do not exceed the maximum weight recommendation of 50 pounds on the top surface.
- ความเสถียร: Ensure all fasteners are securely tightened during assembly to prevent wobbling or instability.
- การยึด: For added safety, especially in homes with children or pets, consider anchoring the nightstand to the wall using appropriate hardware (not included).
- ความปลอดภัยทางไฟฟ้า: Only use the integrated charging station with compatible devices. Do not overload the power sockets. Keep liquids away from electrical components.
- การประกอบ: Follow all assembly instructions carefully. It is recommended that two people assemble this unit.
3. เนื้อหาบรรจุภัณฑ์
ก่อนเริ่มประกอบ โปรดตรวจสอบให้แน่ใจว่าชิ้นส่วนและอุปกรณ์ทั้งหมดที่ระบุไว้ด้านล่างครบถ้วนและไม่เสียหาย หากมีชิ้นส่วนใดขาดหายหรือเสียหาย โปรดติดต่อฝ่ายบริการลูกค้า
แผงไม้
- A (Top Panel)
- A2 (Bottom Panel)
- B (Side Panel)
- C (Side Panel)
- D (Back Panel)
- E (Drawer Side)
- F (Drawer Side)
- G (Drawer Front)
- H (Drawer Back)
- I (Drawer Bottom)
- J (Drawer Front)
- K (Drawer Back)
- L (Drawer Bottom)
- L2 (Drawer Side)
- M (Drawer Side)
- N (Drawer Bottom)
ฮาร์ดแวร์และอุปกรณ์เสริม
- Guide Rails (x4)
- Cam Bolts (x64)
- Cam Locks (x64)
- เดือยไม้ (x18)
- สกรู (x20)
- มือจับ (x2)
- Plastic Caps (x4)
- คู่มือการประกอบ
- เครื่องมือติดตั้ง (ไขควง)
4. การติดตั้งและการประกอบ
Follow these step-by-step instructions for assembling your i-aplus LED Nightstand. It is recommended to have a second person assist with assembly.
วิดีโอแนะนำการประกอบ
Official HNEBC Nightstand Installation Video (Duration: 10:13)
คำแนะนำทีละขั้นตอน
- เตรียมแผงควบคุม: Carefully remove the protective film from all panels before installation to avoid difficult removal later.
- Attach Cam Bolts: Screw cam bolts (1) into panels A and A2 as indicated in the diagram.
- Install Guide Rails: Pull out the guide rail sections and screw them onto panels A and A2 using screws (4).
- ประกอบแผงด้านข้าง: Attach side panels B and C to panel A using cam locks (2) and wooden dowels (3).
- ติดตั้งแผงด้านหลัง: Secure back panels D to the assembled structure using cam locks (2).
- Complete Main Frame: Attach panel A2 to the structure, securing it with cam locks (2) and cam bolts (1).
- ประกอบลิ้นชัก: For each drawer, attach the side panels (L, L2, M, N) to the front (G) and back (H) panels using cam bolts (1) and cam locks (2). Slide the drawer bottom (I) into the grooves.
- ติดตั้งมือจับลิ้นชัก: Secure the handles (5) to the front of each drawer using the provided screws.
- ติดตั้งลิ้นชัก: Carefully align the drawer rails with the guide rails on the nightstand frame and slide the drawers into place until they click securely.
- รายละเอียดสุดท้าย: Insert plastic caps (6) into any visible screw holes for a clean finish.
5. คู่มือการใช้งาน
5.1. ไฟ LED
The i-aplus LED Nightstand features integrated LED lighting with 16 RGB colors to enhance your room's ambiance.

The LED lighting offers multiple colors and control options.
- ควบคุม: Use the included remote control or a compatible mobile application to manage the LED lights.
- การเลือกสี: Choose from 16 different RGB colors to match your mood or decor.
- การปรับความสว่าง: Adjust the brightness level of the lights to your preference.
- โหมด: Explore various lighting modes, including static colors, dynamic changes, and music rhythm mode (if supported by the app).
- ตัวจับเวลา: Utilize the timer switch feature to set specific operating times for the lights.
5.2. สถานีชาร์จ
The nightstand includes a built-in charging station located within the top sliding compartment for convenient access to power.
- เข้าถึง: Gently slide the top panel of the nightstand to reveal the charging station.
- พอร์ต: The charging station is equipped with 2 USB ports and 2 standard power sockets.
- การใช้งาน: Plug in your electronic devices such as phones, tablets, or laptops for charging.
- สวิตช์ไฟ: Use the integrated power switch to turn the charging station on or off as needed.
6. การบำรุงรักษา
- การทำความสะอาด: To clean the nightstand, wipe surfaces with a soft, damp cloth. Avoid using harsh chemicals or abrasive cleaners that may damage the finish.
- การรั่วไหล: Promptly wipe up any spills to prevent staining, as the material is not stain-resistant.
- การดูแลลิ้นชัก: Periodically check drawer slides for smooth operation. If needed, clean any dust or debris from the tracks.

เช็ดพื้นผิวด้วยโฆษณาamp ผ้าสำหรับทำความสะอาด
7 การแก้ไขปัญหา
- ไฟ LED ไม่ทำงาน:
- Check if the power cable for the LED lights is securely plugged into a working outlet.
- ตรวจสอบให้แน่ใจว่าแบตเตอรี่ของรีโมทคอนโทรลใช้งานได้
- If using a mobile app, verify Bluetooth connection and app settings.
- ลิ้นชักเลื่อนไม่ราบรื่น:
- Inspect the drawer slides for any obstructions or debris.
- Ensure all screws attaching the slides to the drawer and frame are tight.
- Verify that the drawers are correctly aligned on their tracks.
- Nightstand is Wobbly:
- Check and tighten all cam bolts and screws throughout the entire assembly.
- Ensure the nightstand is placed on a flat, even surface.
8. ข้อมูลจำเพาะ
| คุณสมบัติ | รายละเอียด |
|---|---|
| ยี่ห้อ | ไอ-เอพลัส |
| ชื่อรุ่น | เอ02 |
| ขนาดสินค้า (ลึก x กว้าง x สูง) | ลึก 16 นิ้ว x กว้าง 19 นิ้ว x สูง 24 นิ้ว |
| น้ำหนักสินค้า | 34 ปอนด์ |
| คำแนะนำน้ำหนักสูงสุด | 50 ปอนด์ |
| วัสดุกรอบ | ไม้ |
| ประเภทวัสดุยอดนิยม | ไม้แปรรูป |
| จำนวนลิ้นชัก | 2 |
| จำนวนชั้นวาง | 1 |
| สี | ทองคำดำ |
| วัสดุที่ใช้ทำด้ามจับ | Metal or Alloy Steel |
| การประกอบที่จำเป็น | ใช่ |
| จำนวนคนที่แนะนำให้เข้าร่วมการชุมนุม | 2 |
| คำแนะนำการดูแลผลิตภัณฑ์ | เช็ดด้วย Damp ผ้า |
9. การรับประกันและการสนับสนุน
For warranty information or customer support, please refer to the documentation included with your purchase or contact the retailer directly. Keep your proof of purchase for any warranty claims.