
1. บทนำ
This manual provides essential instructions for the proper setup, operation, maintenance, and troubleshooting of your KOORUI 22 Inch Full HD 120Hz Computer Monitor, model E2212H. Please read this manual thoroughly before using the product to ensure optimal performance and safety.
2. ข้อมูลด้านความปลอดภัย
ปฏิบัติตามข้อควรระวังด้านความปลอดภัยต่อไปนี้เพื่อป้องกันความเสียหายต่อจอภาพและเพื่อความปลอดภัยของผู้ใช้:
- อย่าวางจอภาพไว้ในที่ที่มีฝนหรือความชื้น เพื่อหลีกเลี่ยงอันตรายจากไฟไหม้หรือไฟฟ้าช็อต
- อย่าเปิดจอภาพcasinก. ไม่มีชิ้นส่วนใดที่ผู้ใช้สามารถซ่อมบำรุงเองได้ภายใน แนะนำให้ช่างผู้ชำนาญการซ่อมบำรุงนำชิ้นส่วนทั้งหมดไปซ่อม
- วางจอภาพบนพื้นผิวที่มั่นคงและเรียบเพื่อป้องกันไม่ให้ตก
- ตรวจสอบให้แน่ใจว่ามีการระบายอากาศที่เหมาะสมรอบ ๆ จอภาพ อย่าปิดกั้นช่องระบายอากาศ
- ใช้เฉพาะอะแดปเตอร์ไฟฟ้าที่ให้มาพร้อมกับจอภาพเท่านั้น
- หากไม่ได้ใช้งานจอภาพเป็นเวลานาน ควรถอดสายไฟออกจากเต้ารับที่ผนัง
3. เนื้อหาบรรจุภัณฑ์
ตรวจสอบว่ามีรายการทั้งหมดอยู่ในแพ็คเกจ:
- KOORUI 22 Inch Monitor (E2212H)
- Monitor Stand (Column and Bottom Base)
- สายไฟ
- อะแดปเตอร์แปลงไฟ
- สาย HDMI 1.4
- คู่มือการใช้งาน

Image: Contents of the KOORUI monitor package, illustrating the monitor, stand components, power cord, adapter, HDMI cable, and user manual.
4. การตั้งค่า
4.1. การประกอบขาตั้ง
The monitor features a tool-free installation process for the stand. Follow these steps:
- Attach the column to the bottom base.
- Secure the assembled stand to the back of the monitor until it clicks into place.
4.2. การเชื่อมต่อจอภาพ
The monitor is equipped with HDMI, VGA, and audio output ports for versatile connectivity. Ensure all connections are secure.
- การเชื่อมต่อไฟฟ้า: ต่ออะแดปเตอร์แปลงไฟเข้ากับพอร์ตอินพุต DC ของจอภาพ จากนั้นเสียบสายไฟเข้ากับเต้ารับที่ผนัง
- การเชื่อมต่อวิดีโอ:
- For digital video, connect one end of the provided HDMI 1.4 cable to the monitor's HDMI port and the other end to your computer's HDMI output.
- For analog video, connect a VGA cable (not included) to the monitor's VGA port and your computer's VGA output.
- การเชื่อมต่อเสียง: If desired, connect external speakers or headphones to the monitor's audio output port.
Note: For devices with USB-C / Thunderbolt ports (e.g., MacBook, iMac), a USB-C to HDMI adapter is required and not included.

ภาพ: ด้านหลัง view of the monitor highlighting the HDMI, VGA (D-Sub), Audio, and DC power input ports, and the 100x100mm VESA mounting points.
5. การใช้งานจอภาพ
5.1. เปิด/ปิดเครื่อง
Press the power button, typically located on the underside of the monitor, to turn the display on or off.
5.2. การใช้งานเมนูแสดงผลบนหน้าจอ (OSD)
The OSD menu allows you to adjust various display settings. The control buttons are located on the underside of the monitor. Refer to the on-screen prompts for navigation.
5.3. การตั้งค่าการแสดงผล
ปรับการตั้งค่าต่อไปนี้ผ่านเมนู OSD เพื่อให้ได้ประสิทธิภาพสูงสุด viewการลง:
- ความสว่าง: Adjust the overall luminance of the screen. The monitor has a typical brightness of 250 cd/m².
- ตัดกัน: Modify the difference between the brightest and darkest areas of the image. The monitor features a 3000:1 contrast ratio.
- การตั้งค่าสี: Fine-tune color temperature, hue, and saturation. The monitor offers 99% sRGB color gamut.
- แหล่งสัญญาณเข้า: เลือกแหล่งอินพุตระหว่าง HDMI และ VGA ด้วยตนเอง

Image: Visual comparison demonstrating the clarity of Full HD (1920x1080) resolution.

Image: The monitor displaying vivid colors, emphasizing 99% sRGB color coverage.

Image: A city scene on the monitor, illustrating brilliant brightness and deep black levels.
5.4. อัตราการรีเฟรชและการซิงค์แบบปรับได้
The monitor supports a 120Hz refresh rate for smoother visuals and Adaptive Sync (FreeSync) technology to reduce screen tearing and stuttering.
- อัตราการรีเฟรช: The 120Hz refresh rate provides a fluid visual experience, especially beneficial for fast-moving content.
- การซิงโครไนซ์แบบปรับได้: Enable Adaptive Sync in the monitor's OSD menu and ensure your graphics card supports FreeSync for a tear-free and smoother gaming experience.

Image: Comparison illustrating sharper text and clearer motion at 120Hz versus 75Hz.

Image: Adaptive Sync ON/OFF comparison, demonstrating how Adaptive Sync eliminates screen tearing and stuttering for smoother visuals.
5.5. คุณสมบัติการดูแลดวงตา
The monitor is TÜV Rheinland certified for eye-care excellence, incorporating features to reduce eye strain during extended use.
- การกรองแสงสีฟ้า: Reduces harmful blue light emissions. Activate this feature in the OSD menu.
- เทคโนโลยีปราศจากการสั่นไหว: Eliminates screen flickering, which can cause eye fatigue and dryness. This feature is always active.
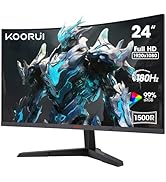
Image: Comparison of Eyecare mode OFF and ON, demonstrating the reduction of blue light for eye comfort.
5.6. Ergonomic Adjustability
The monitor stand allows for tilt adjustment to achieve a comfortable viewมุมอิง
- การปรับเอียง: The screen can be tilted from -5° to 15°. Gently adjust the top or bottom edge of the monitor to your preferred angle.
- การติดตั้ง VESA: The monitor supports VESA 100x100mm mounting, allowing for alternative mounting solutions (e.g., wall mount, monitor arm) not included with the product.

Image: Monitor flexibility, showing tilt adjustment range and VESA mount compatibility.
6. การบำรุงรักษา
To maintain the monitor's performance and appearance, follow these cleaning guidelines:
- ปิดเครื่องจอภาพและถอดสายไฟออกทุกครั้งก่อนทำความสะอาด
- ใช้ผ้านุ่มไม่เป็นขุยเช็ดเล็กน้อยampเคลือบด้วยน้ำหรือน้ำยาทำความสะอาดหน้าจอชนิดอ่อนที่ไม่กัดกร่อน
- อย่าฉีดน้ำยาทำความสะอาดลงบนหน้าจอโดยตรงหรือasing.
- Avoid using harsh chemicals, abrasive pads, or solvents (e.g., alcohol, ammonia, benzene) as they can damage the screen surface or casing.
- เช็ดหน้าจอเบาๆ เพื่อขจัดฝุ่นและคราบต่างๆ
7 การแก้ไขปัญหา
หากคุณพบปัญหาเกี่ยวกับจอภาพของคุณ โปรดดูขั้นตอนการแก้ไขปัญหาทั่วไปต่อไปนี้:
| ปัญหา | สาเหตุที่เป็นไปได้ | สารละลาย |
|---|---|---|
| ไม่มีภาพบนหน้าจอ | สายไฟหลุด; สายวิดีโอหลุดหรือหลวม; เลือกแหล่งสัญญาณเข้าไม่ถูกต้อง | ตรวจสอบให้แน่ใจว่าสายไฟเชื่อมต่อแน่นดีแล้ว ตรวจสอบการเชื่อมต่อสายวิดีโอ (HDMI/VGA) เลือกแหล่งสัญญาณเข้าที่ถูกต้องผ่านเมนู OSD |
| ภาพเบลอหรือบิดเบี้ยว | Incorrect resolution setting; Faulty video cable; Graphics card driver issue. | Set display resolution to 1920 x 1080. Try a different video cable. Update graphics card drivers. |
| หน้าจอกะพริบ | Flicker-Free technology is built-in, but external interference or faulty cable can cause issues. | Ensure video cable is secure. Test with a different cable. Check for strong electromagnetic interference sources nearby. |
| Monitor wobbles on stand | Stand not fully secured; Unstable desk surface. | Ensure the stand is correctly assembled and firmly attached to the monitor. Place the monitor on a stable, level surface. |
| No audio from monitor's audio out | ลำโพง/หูฟังภายนอกไม่ได้เชื่อมต่อ; ระดับเสียงเบาเกินไป; ไม่ได้เลือกเอาต์พุตเสียงบนพีซี | Ensure external audio device is connected and powered. Adjust volume. Select monitor as audio output device in PC settings. |
8. ข้อมูลจำเพาะ
Detailed technical specifications for the KOORUI E2212H monitor:
| คุณสมบัติ | รายละเอียด |
|---|---|
| หมายเลขรุ่น | E2212H |
| ขนาดหน้าจอ | 22 inches (21.45" measured diagonally) |
| ปณิธาน | FHD 1920 x 1080 พิกเซล |
| อัตราส่วนภาพ | 16:9 น. |
| อัตราการรีเฟรช | 120 เฮิรตซ์ |
| เทคโนโลยีการแสดงผล | VA Panel, LCD |
| อัตราส่วนคอนทราสต์ | 3000:1 น. |
| ความสว่าง | 250 candela/square meter |
| ช่วงสี | 99% sRGB |
| Viewอิงแองเกิล | 178 องศา |
| พื้นผิวหน้าจอ | แมทต์ |
| การเชื่อมต่อ | 1x HDMI 1.4, 1x VGA (D-Sub), 1x 3.5mm Audio Out |
| การซิงค์แบบปรับตัว | ฟรีซิงค์ |
| คุณสมบัติการดูแลดวงตา | ฟิลเตอร์แสงสีฟ้า ป้องกันการกระพริบ |
| ความสามารถในการปรับเปลี่ยนได้ | การเอียง (-5° ถึง 15°) |
| ความเข้ากันได้ของ VESA | 100 x 100 มม. |
| ขนาดสินค้า (ลึก x กว้าง x สูง) | 18.5D x 49.5W x 38.8H เซนติเมตร |
| น้ำหนัก | 3.02 กก. |
| สี | สีดำ |
| ประเทศต้นกำเนิด | จีน |
Image: Summary of key monitor specifications.
9. ข้อมูลการรับประกัน
Your KOORUI E2212H monitor comes with a manufacturer's warranty:
- Monitor Warranty: การรับประกันแบบจำกัดของผู้ผลิต 1 ปี
- อุปกรณ์เสริมการรับประกัน: 3 ปีการรับประกันแบบ จำกัด
โปรดเก็บหลักฐานการซื้อไว้เพื่อใช้ในการเคลมประกัน การรับประกันครอบคลุมถึงข้อบกพร่องในวัสดุและฝีมือการผลิตภายใต้การใช้งานปกติ
10. การสนับสนุนลูกค้า
For technical assistance, warranty inquiries, or other support needs, please contact KOORUI customer service:
- อีเมล: NA.support@koorui.net
When contacting support, please provide your monitor's model number (E2212H) and a detailed description of the issue.


