
1. บทนำ
The MakerHawk TC818 is a versatile plug-in digital thermostat temperature controller designed for precise temperature management in a wide range of applications. It features both heating and cooling control modes, a clock function with three time periods for customized temperature settings, and an alarm system for temperature deviations. This manual provides detailed instructions for the safe and effective operation of your TC818 controller.
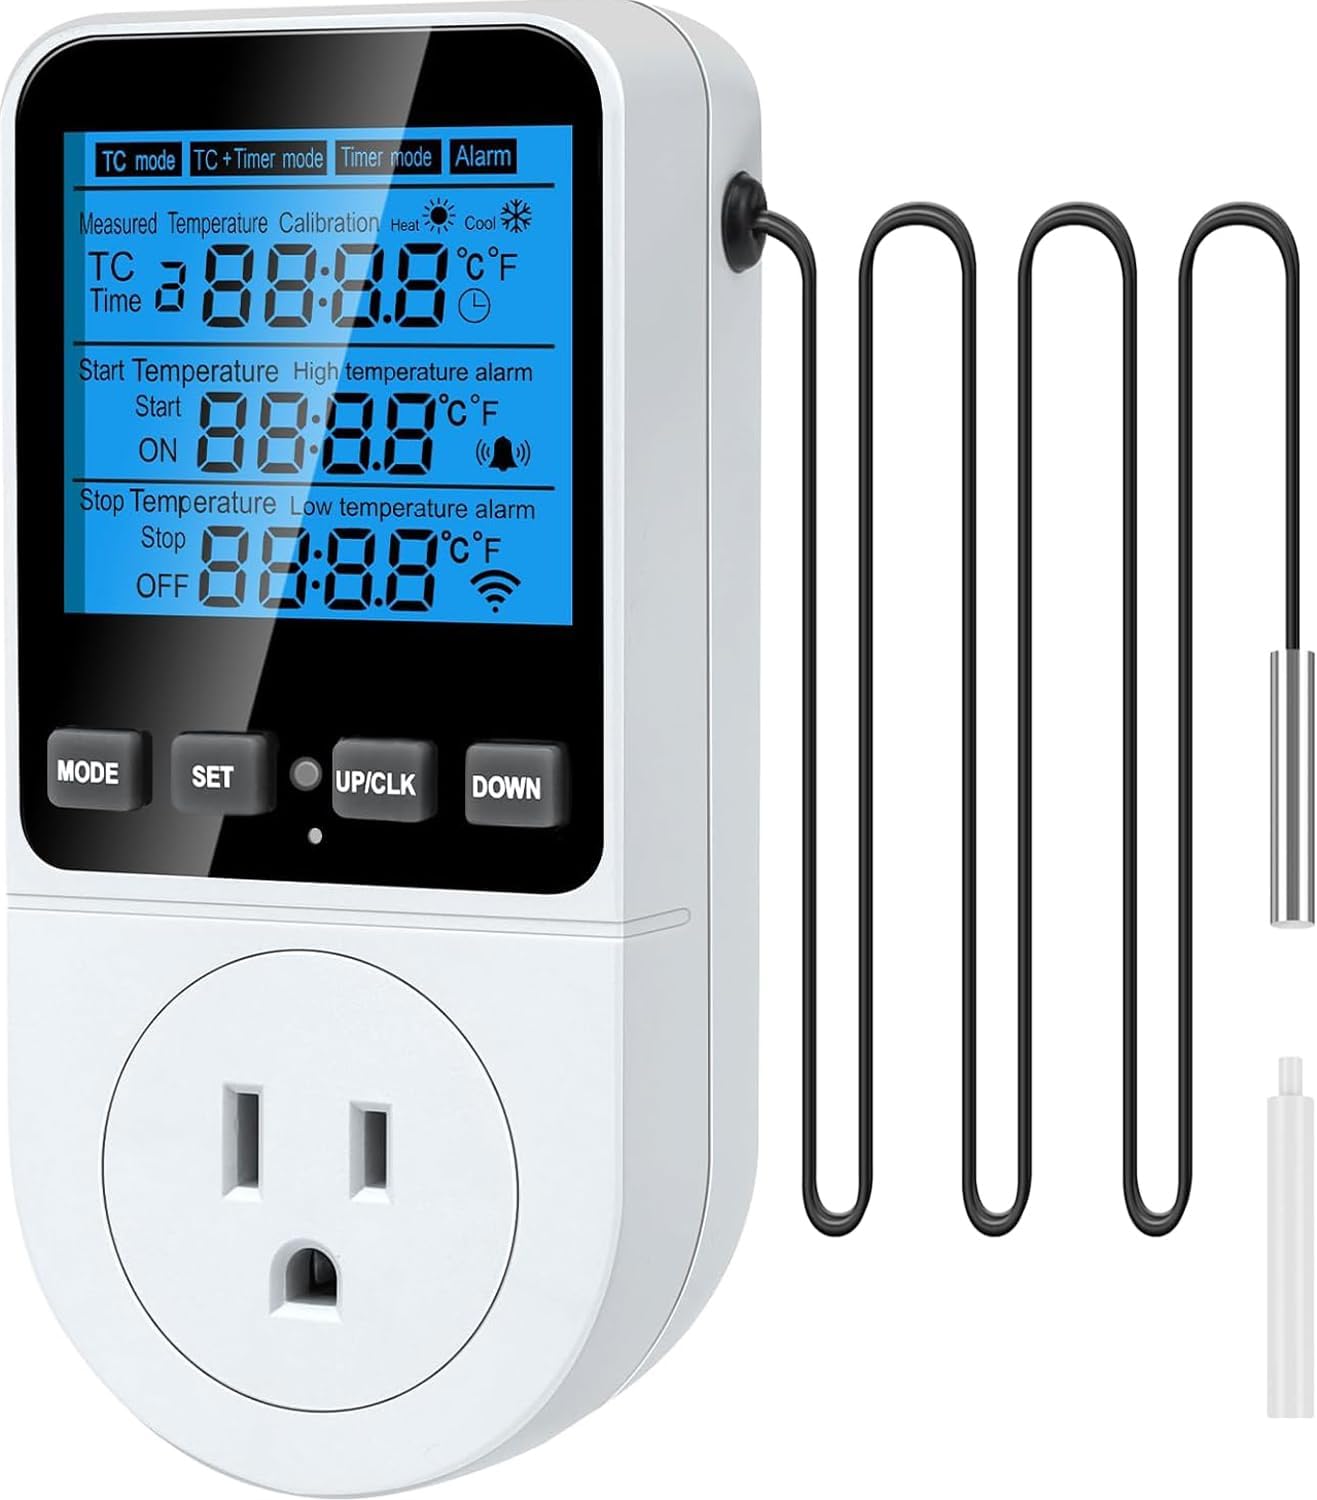
รูปที่ 1.1: The MakerHawk TC818 Digital Thermostat Temperature Controller. This image displays the front of the device, showing the LCD screen, control buttons (MODE, SET, UP/CLK, DOWN), the power outlet, and the attached external temperature sensor probe.
2. ข้อมูลด้านความปลอดภัย
- อ่านคำแนะนำทั้งหมดอย่างละเอียดก่อนใช้งาน
- Ensure the power supply matches the device specifications (230V AC 50HZ).
- Do not exceed the maximum output load of 16A / 3680W.
- Do not immerse the device or its probe in water or other liquids.
- เก็บให้พ้นจากมือเด็ก
- ห้ามถอดประกอบหรือดัดแปลงอุปกรณ์
- Use only in dry, indoor environments unless otherwise specified for the application.
- ถอดสายไฟก่อนทำความสะอาดหรือบำรุงรักษา

รูปที่ 2.1: หลัง view of the TC818 controller highlighting safety features such as high conductivity copper plate and PC flame retardant material. This image shows the back of the device with its plug, emphasizing its robust construction for user safety.
3. เนื้อหาบรรจุภัณฑ์
กรุณาตรวจสอบสิ่งของภายในบรรจุภัณฑ์เมื่อเปิดออกเพื่อให้แน่ใจว่ามีสินค้าครบถ้วนและไม่ได้รับความเสียหาย:
- 1 x MakerHawk TC818 Digital Thermostat Temperature Controller
- 1 x External Temperature Sensor Probe
- 1 x Reset Tool (small plastic cylinder)
- 1 x คู่มือผู้ใช้
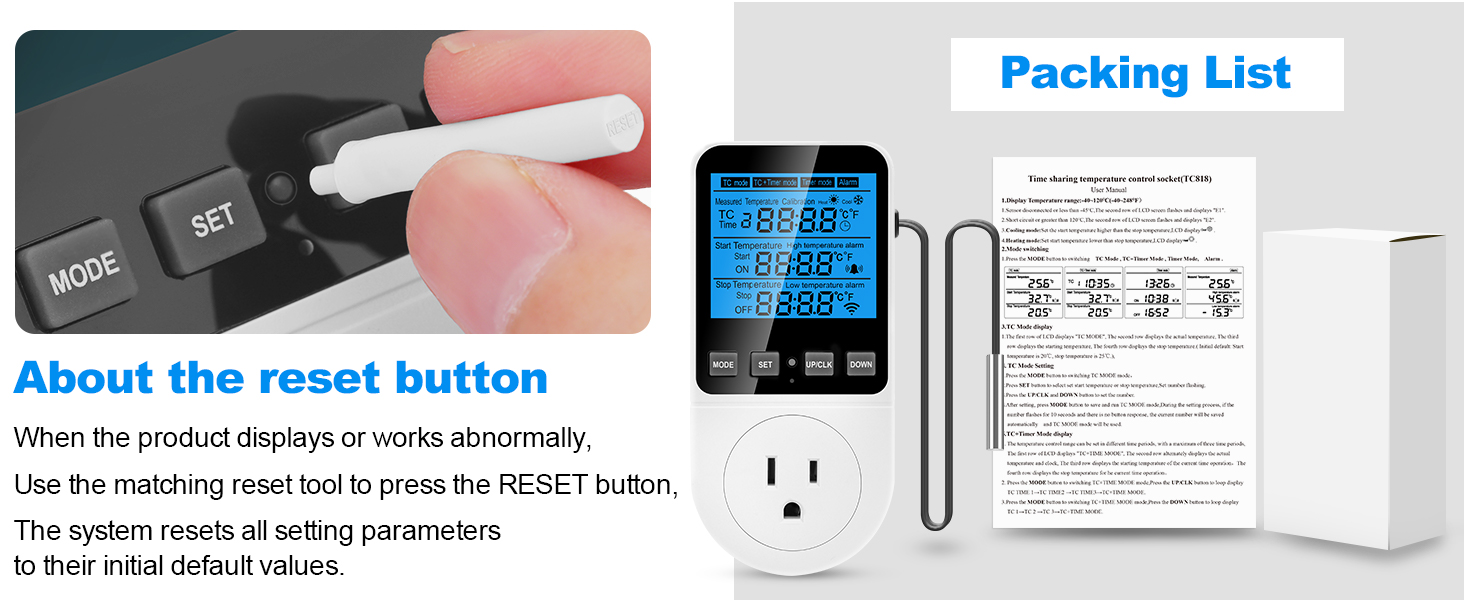
รูปที่ 3.1: The TC818 controller, its retail packaging, and the small reset tool. This image illustrates the complete package contents, including the device, its box, and the essential reset pin.
4. สินค้าหมดview
Familiarize yourself with the components and display of your TC818 controller:

รูปที่ 4.1: Product Introduction Diagram. This diagram labels key parts of the TC818, including the LCD screen (showing Measured Temperature, Initial Temperature, Stop Temperature), control buttons (MODE, SET, UP/CLK, DOWN), Indicator Light, US Plug, Safety Protection Door, and the Sensor Probe. It also indicates Heating Mode and Cooling Mode icons on the display.
4.1. ตัวบ่งชี้การแสดงผล
- อุณหภูมิที่วัดได้: Current temperature detected by the probe.
- อุณหภูมิเริ่มต้น (เปิด): The temperature at which the connected device will turn on.
- อุณหภูมิหยุด (ปิด): The temperature at which the connected device will turn off.
- Heating Mode Icon: Indicates the controller is operating in heating mode.
- Cooling Mode Icon: Indicates the controller is operating in cooling mode.
- ไอคอนปลุก: Appears when a temperature alarm is triggered.
- ไอคอนนาฬิกา: Indicates timer or clock function is active.
- °C/°F: Indicates the current temperature unit.
4.2. ปุ่มควบคุม
- เส้นทาง: Cycles through operating modes (TC, TC+TIME, TIME, ALARM) and confirms settings.
- SET: Enters setting mode for parameters.
- UP/CLK: Increases values, moves cursor up, or sets clock (long press).
- ลง: Decreases values, moves cursor down.

รูปที่ 4.2: Key functions of the TC818 controller. This image lists and illustrates various features including Heating/Refrigeration Function, Timing Function, 3-time periods timed temperature control mode, Temperature Calibration Function, Memory Function, Reset Function, Backup Memory, Lock Screen Protection, 2.7" enlarged backlit screen, and High Accuracy.
5. การตั้งค่าเริ่มต้น
- เชื่อมต่อเซ็นเซอร์: Ensure the external temperature sensor probe is securely plugged into the port on the side of the controller.
- เปิดเครื่อง: Plug the TC818 controller into a standard 230V AC 50HZ power outlet. The LCD screen will light up.
- Set Current Time (if applicable): If the clock function is used, long press the "UP/CLK" button for 3 seconds to enter time calibration mode. Use "UP/CLK" and "DOWN" to adjust hours and minutes, then press "MODE" to confirm.
- เลือกหน่วยอุณหภูมิ: To switch between Celsius (°C) and Fahrenheit (°F), press and hold the "SET" button for 3 seconds. The unit will toggle.
- Place Sensor: Position the temperature sensor probe in the area where you wish to monitor and control the temperature.
- เชื่อมต่ออุปกรณ์: Plug the appliance you wish to control (e.g., heater, fan, refrigerator) into the outlet on the front of the TC818 controller. Ensure the appliance's own thermostat is set to its highest or lowest setting (depending on heating/cooling) to allow the TC818 to take full control.
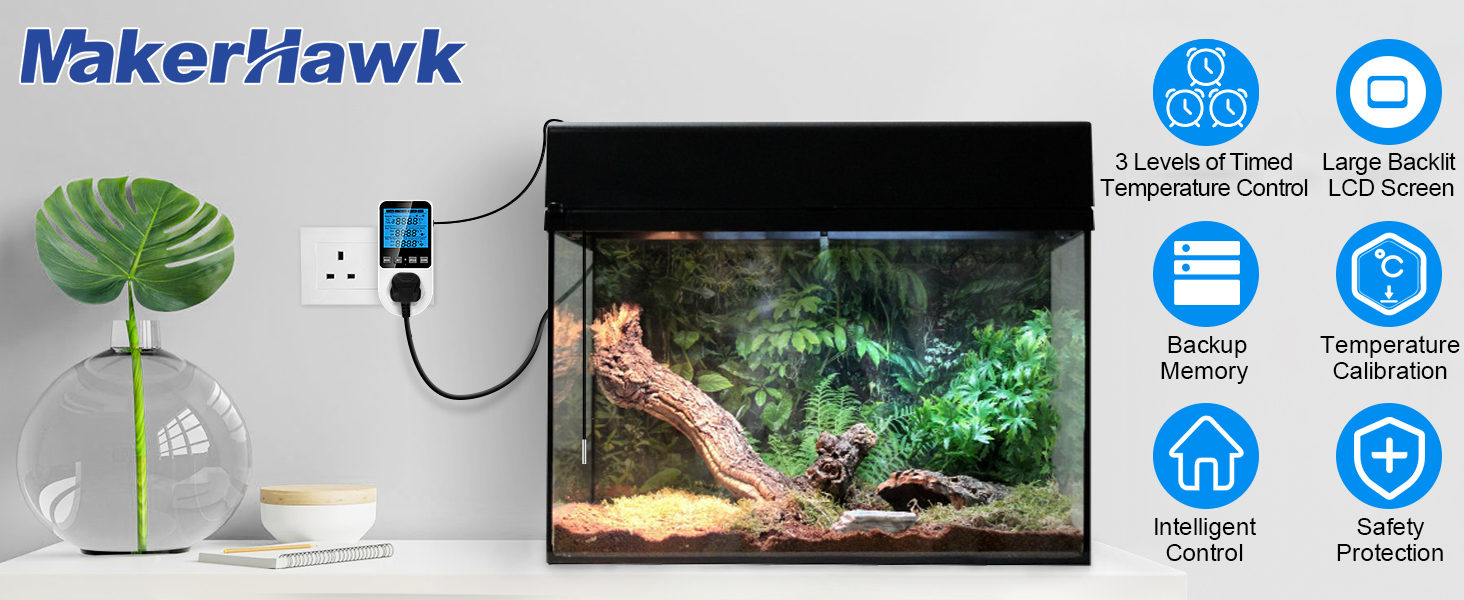
รูปที่ 5.1: The TC818 controller plugged into a wall outlet with its temperature sensor probe extended. This image demonstrates the basic physical setup of the device.
6. โหมดการทำงาน
The TC818 offers four distinct operating modes to suit various temperature control needs. Press the "MODE" button to cycle through them.
6.1. TC Mode (Temperature Control)
This is the basic temperature control mode. You set a start temperature (ON) and a stop temperature (OFF). The device will turn on/off the connected appliance to maintain the temperature within this range.
- บรรทัดที่ 2: อุณหภูมิปัจจุบัน
- บรรทัดที่ 3: Temperature to Start Adjusting (ON)
- บรรทัดที่ 4: Temperature to Stop Adjustment (OFF)
วิธีการตั้งค่า:
- Press "MODE" until "TC mode" is displayed.
- Press "SET". The "Start Temperature" (ON) value will flash.
- Use "UP/CLK" and "DOWN" to adjust the desired start temperature.
- Press "SET" again. The "Stop Temperature" (OFF) value will flash.
- Use "UP/CLK" and "DOWN" to adjust the desired stop temperature.
- Press "MODE" to confirm and exit settings.

รูปที่ 6.1: TC Mode display and setting instructions. This image illustrates the screen layout for TC mode, showing measured, start, and stop temperatures, along with a textual guide on how to set these parameters using the device buttons.
6.2. TC + Timer Mode (Temperature Control with Time Periods)
This mode combines temperature control with a clock function, allowing you to set different temperature ranges for up to three distinct time periods throughout the day.
- บรรทัดที่ 2: Current TC/Temperature/Time (displayed in turn)
- บรรทัดที่ 3: Current TC, Temperature to Start Adjusting
- บรรทัดที่ 4: Current TC, Temperature to Stop Adjustment
วิธีการตั้งค่า:
- Press "MODE" until "TC+Timer mode" is displayed.
- Press "SET". The setting content will flash.
- You will set parameters for three time periods (TC 1, TC 2, TC 3). For each period, you will set:
- เวลา: The start time for this period.
- อุณหภูมิเริ่มต้น: The temperature to turn on the appliance.
- อุณหภูมิหยุดทำงาน: The temperature to turn off the appliance.
- Use "UP/CLK" and "DOWN" to adjust values. Press "SET" to move to the next parameter.
- After setting all parameters for TC 1, press "MODE" to confirm and move to TC 2, and then TC 3.
- Press "MODE" after setting TC 3 to save all settings and exit.
Note: The start time of TC 2 is the end time of TC 1. The start time of TC 3 is the end time of TC 2. The start time of TC 1 is the end time of TC 3.

รูปที่ 6.2: TC+TIME mode examples. This image shows examples of setting times and temperature ranges for three distinct time periods (TC 1, TC 2, TC 3), illustrating how the device can manage temperature based on a daily schedule.

รูปที่ 6.3: TC + Timer Mode display and setting instructions. This image illustrates the screen layout for TC + Timer mode, showing current temperature/time, start/stop temperatures, and a textual guide on how to set these parameters for timed periods.

รูปที่ 6.4: Detailed TC+TIME mode setting method. This image provides a step-by-step guide on how to navigate the settings for the three time periods, explaining the use of MODE and SET buttons to adjust time and temperature parameters.
6.3. Timer Mode (Timer Only)
In this mode, the controller acts as a simple timer, turning the connected appliance on and off at specified times, without temperature control.
- บรรทัดที่ 2: เวลาปัจจุบัน
- บรรทัดที่ 3: Timing Start Time (ON)
- บรรทัดที่ 4: Timing Stop Time (OFF)
วิธีการตั้งค่า:
- Press "MODE" until "Timer mode" is displayed.
- Press "SET". The "Timing Start Time" (ON) will flash.
- Use "UP/CLK" and "DOWN" to adjust the desired ON time.
- Press "SET" again. The "Timing Stop Time" (OFF) will flash.
- Use "UP/CLK" and "DOWN" to adjust the desired OFF time.
- Press "MODE" to confirm and exit settings.

รูปที่ 6.5: Timer Mode display and setting instructions. This image illustrates the screen layout for Timer mode, showing current time, start time, and stop time, along with a textual guide on how to set these parameters.
6.4. Alarm Mode (High/Low Temperature Alarm)
This mode allows you to set high and low temperature alarm thresholds. If the measured temperature goes outside this range, an audible alarm will sound, and the screen backlight will flash.
- บรรทัดที่ 2: อุณหภูมิปัจจุบัน
- บรรทัดที่ 3: เกณฑ์การเตือนอุณหภูมิสูง
- บรรทัดที่ 4: เกณฑ์การเตือนอุณหภูมิต่ำ
วิธีการตั้งค่า:
- Press "MODE" until "Alarm" is displayed.
- Press "SET". The "High Temperature Alarm" value will flash.
- Use "UP/CLK" and "DOWN" to adjust the desired high alarm temperature.
- Press "SET" again. The "Low Temperature Alarm" value will flash.
- Use "UP/CLK" and "DOWN" to adjust the desired low alarm temperature.
- Press "MODE" to confirm and exit settings.

รูปที่ 6.6: Alarm Mode display and setting instructions. This image illustrates the screen layout for Alarm mode, showing current temperature, high temperature alarm, and low temperature alarm, along with a textual guide on how to set these parameters.
7. การสอบเทียบอุณหภูมิ
If you find the measured temperature is inaccurate, you can calibrate the sensor:
- Long press the "MODE" button for 4 seconds to enter temperature calibration mode. The second row of the LCD will show "CALIBRATION" and the actual temperature, while the third row will display the calibration value.
- Use "UP/CLK" and "DOWN" buttons to adjust the calibration value.
- Temperature Calibration Range: -9.9°C to 9.9°C.
- After correction, long press the "MODE" button for 4 seconds to save the current calibration and exit.

รูปที่ 7.1: Temperature Calibration process. This image visually guides the user through the steps of calibrating the temperature sensor, showing the display during calibration and the buttons to press.
8. ฟังก์ชั่นเพิ่มเติม
8.1. Alarm Mute Function
When an alarm occurs, press the "UP/CLK" button. The buzzer will turn off for 15 minutes. After 15 minutes, if the temperature is still in an alarm state, the alarm will resume.
8.2. ฟังก์ชั่นหน่วยความจำ
The device has a built-in backup memory. When the battery runs out of power or in case of a power outage, all data will be saved, except for the clock which may need to be reset.
8.3. รีเซ็ตฟังก์ชัน
If the product displays or works abnormally, use the matching reset tool (small plastic cylinder) to press the "RESET" button. This will reset all setting parameters to their initial default values.
9. ข้อมูลจำเพาะ
| คุณสมบัติ | ข้อมูลจำเพาะ |
|---|---|
| แบบอย่าง | JK-TC818 |
| แหล่งจ่ายไฟ | 230V AC 50HZ |
| โหลดเอาต์พุตสูงสุด | 16A/3680W |
| ประเภทการควบคุมอุณหภูมิ | เครื่องทำความร้อนและความเย็น |
| ช่วงอุณหภูมิ | -40°C ถึง 120°C (-40°F ถึง 248°F) |
| ความละเอียดการแสดงอุณหภูมิ | 0.1 องศาเซลเซียส |
| ประเภทจอภาพ | LCD พร้อม Backlight |
| Clock Difference | <2 นาที/เดือน |
| ขนาดสินค้า | 2.52 x 5.7 x 3.15 นิ้ว (6.4 x 14.5 x 8 ซม.) |
| น้ำหนักสินค้า | 7.4 ออนซ์ (0.21 กก.) |

รูปที่ 9.1: Comparison of TC818 specifications. This image provides a detailed table comparing the upgraded TC818 model with an older version, highlighting improvements in display size, specified load, and clock accuracy.

รูปที่ 9.2: Product dimensions of the TC818. This image provides a detailed diagram with measurements in both centimeters and inches for the controller and its sensor probe, indicating its compact size.
10 การแก้ไขปัญหา
| ปัญหา | สาเหตุที่เป็นไปได้ | สารละลาย |
|---|---|---|
| หน้าจอว่างเปล่าหรือไม่เปิดใช้งาน | ไม่มีไฟ การเชื่อมต่อหลวม | Ensure the controller is securely plugged into a live outlet. Check the power source. |
| การวัดอุณหภูมิไม่แม่นยำ | Sensor misplacement, need for calibration. | Relocate the sensor away from direct heat/cold sources or drafts. Perform temperature calibration (Section 7). |
| เครื่องใช้ไฟฟ้าไม่เปิด/ปิดตามที่คาดไว้ | Incorrect mode/settings, appliance's own thermostat interfering. | Verify the selected operating mode and ensure ON/OFF temperatures are correctly set. Set the connected appliance's thermostat to its extreme (max for heating, min for cooling). |
| เสียงเตือนดังขึ้นบ่อยครั้ง | Alarm thresholds set too narrow, environmental fluctuations. | Adjust high/low alarm thresholds to a wider range (Section 6.4). Consider environmental stability. |
| Device behaving erratically. | เกิดข้อผิดพลาดทางซอฟต์แวร์ ข้อผิดพลาดชั่วคราว | Perform a factory reset using the reset tool (Section 8.3). |
11. การบำรุงรักษา
- การทำความสะอาด: Disconnect the device from power before cleaning. Wipe the surface with a soft, dry cloth. Do not use abrasive cleaners or immerse in water.
- พื้นที่จัดเก็บ: เก็บตัวควบคุมไว้ในที่แห้งและเย็นเมื่อไม่ได้ใช้งาน
- การดูแลเซ็นเซอร์: Handle the temperature sensor probe carefully to avoid damage. Do not bend the cable excessively.
12. แอปพลิเคชันทั่วไป
The MakerHawk TC818 is suitable for a variety of temperature control applications, including but not limited to:
- เรือนกระจกและเต็นท์ปลูกพืช
- กรงและตู้เลี้ยงสัตว์เลื้อยคลาน
- ตู้ฟักไข่
- พิพิธภัณฑ์สัตว์น้ำ
- Freezers and refrigerators
- การทำเบียร์เองที่บ้านและการหมัก
- Animal breeding rooms
- แผ่นทำความร้อน

รูปที่ 12.1: Diverse applications of the TC818. This image displays a collage of scenarios where the thermostat can be used, including reptile habitats, aquariums, greenhouses, fermentation setups, refrigerators, and aquatic product storage, demonstrating its wide compatibility.
13. การรับประกันและการสนับสนุน
For warranty information or technical support, please contact MakerHawk customer service through the retailer where you purchased the product or visit the official MakerHawk website. Please have your model number (JK-TC818) and purchase details ready when contacting support.