1. บทนำ
This manual provides detailed instructions for the installation, operation, and maintenance of your ELUSH 100A MPPT Solar Charge Controller. This advanced controller is designed to efficiently manage power from your solar panels to your battery bank, ensuring optimal charging and system protection. It automatically recognizes 12V, 24V, 36V, and 48V systems and features dual USB 5V charging ports.
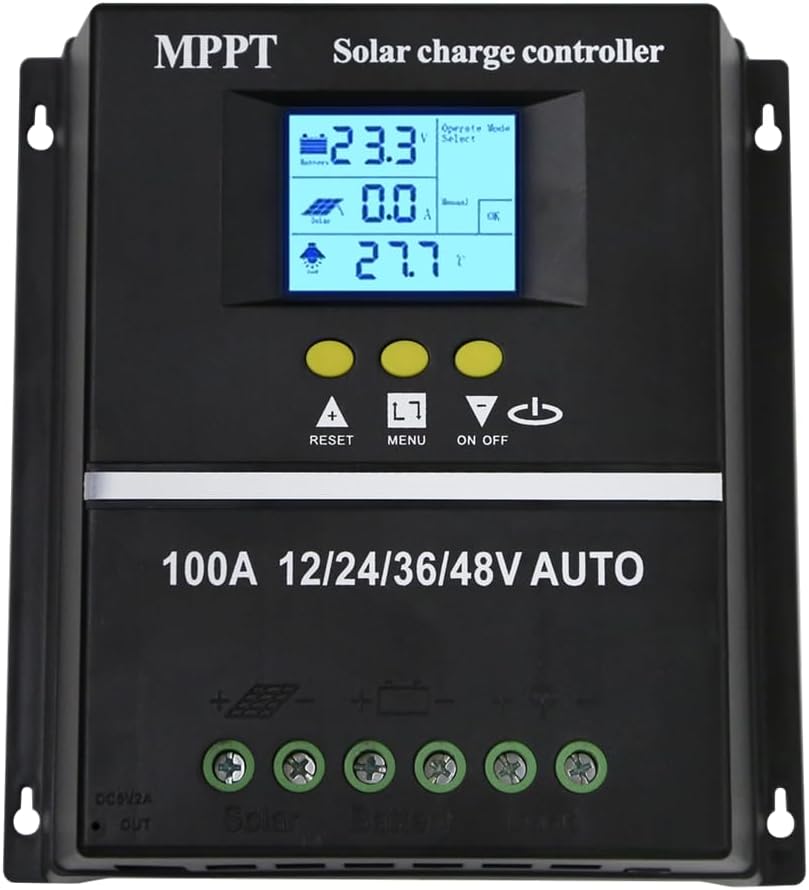
รูปที่ 1.1 : ด้านหน้า view of the ELUSH 100A MPPT Solar Charge Controller.
2. คำแนะนำด้านความปลอดภัย
Please read all instructions carefully before installation and operation. Failure to follow these instructions may result in damage to the unit, personal injury, or property damage.
- ตรวจสอบให้แน่ใจว่าการเชื่อมต่อทั้งหมดแน่นหนาและถูกต้องก่อนเปิดระบบ
- ห้ามถอดประกอบหรือพยายามซ่อมแซมตัวควบคุมด้วยตนเอง โปรดติดต่อช่างผู้ชำนาญการเพื่อขอรับบริการ
- ติดตั้งตัวควบคุมในบริเวณที่มีอากาศถ่ายเทสะดวก ห่างจากวัสดุไวไฟและแสงแดดโดยตรง
- The controller provides comprehensive voltage protection, including safeguards against battery over-voltage, over-current, power failure, overcharge, deep discharge, reverse connection, and overheating.
- Device Startup Reminder: When connecting the equipment, first connect the rechargeable battery and ensure it has power. After successful startup, then connect the solar panel. This sequence ensures proper operation.
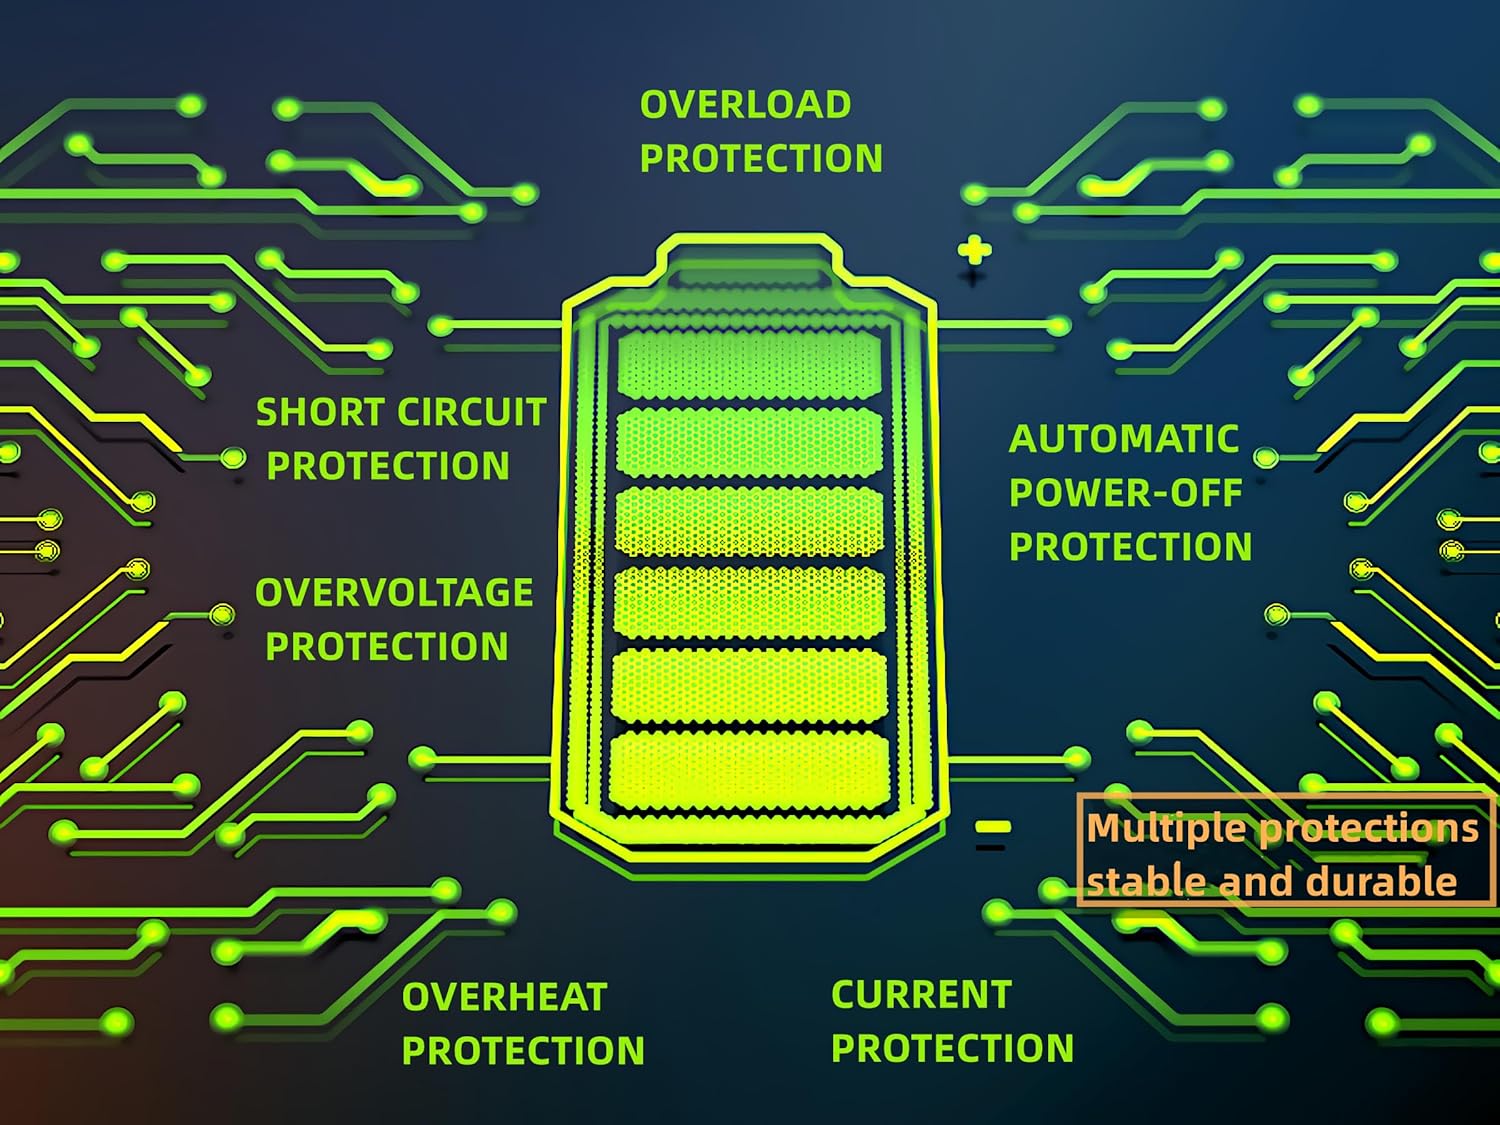
Figure 2.1: Built-in protection features for enhanced safety and durability.
3. คุณสมบัติของผลิตภัณฑ์
The ELUSH MPPT Solar Charge Controller offers a range of features designed for efficient and reliable solar power management:
- Superior MPPT Technology: Equipped with an advanced Maximum Power Point Tracking algorithm, ensuring tracking efficiency of no less than 99.5% for enhanced energy utilization.
- Automatic System Recognition: Automatically recognizes 12V, 24V, 36V, and 48V battery systems.
- โหมดการทำงานที่หลากหลาย: Features seven operating modes including charging mode, light control mode, light control + time delay control mode, universal control mode, manual control mode, and timing control mode.
- จอแสดงผล LCD มัลติฟังก์ชั่น: Dynamically displays operational data such as working mode, battery voltagเช่น กระแสไฟชาร์จ PV, กระแสไฟคายประจุแบตเตอรี่, อุณหภูมิการทำงานของผลิตภัณฑ์ และเวลาหน่วง
- พอร์ต USB คู่: Includes dual USB 5V charging ports for convenient device charging.
- รองรับแบตเตอรี่ได้หลากหลายรุ่น: Compatible with various battery types, including Sealed, GEL, Flooded, and LifePO4.
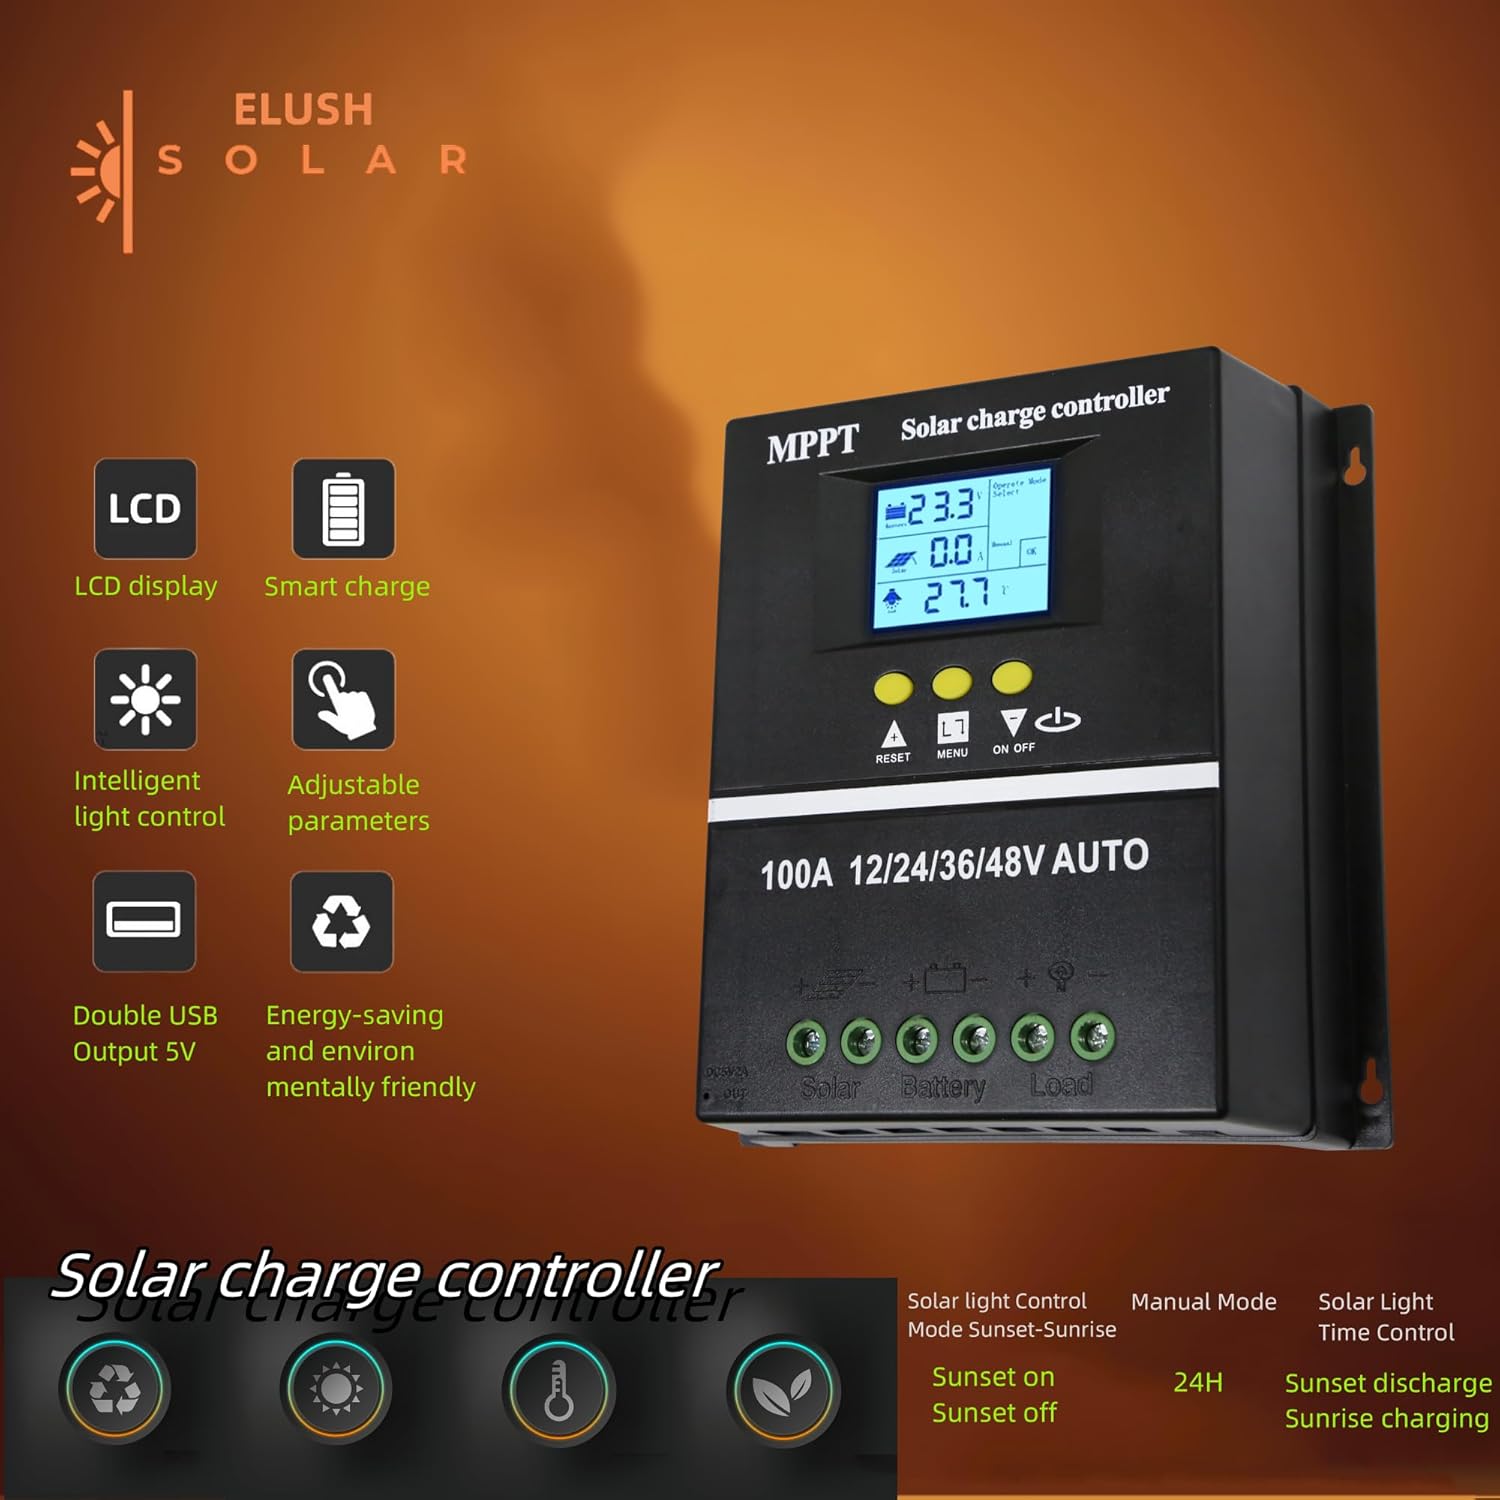
Figure 3.1: Key features of the ELUSH Solar Charge Controller.

รูปที่ 3.2: รายละเอียด view of connection ports and heat dissipation design.
4. การตั้งค่าและการติดตั้ง
โปรดทำตามขั้นตอนเหล่านี้เพื่อติดตั้งตัวควบคุมการชาร์จพลังงานแสงอาทิตย์อย่างถูกต้อง:
- เตรียมสถานที่ติดตั้ง: Choose a dry, well-ventilated area, protected from direct sunlight and moisture. Ensure there is enough space around the controller for proper heat dissipation.
- เชื่อมต่อแบตเตอรี่: First, connect the positive and negative terminals of your battery to the corresponding battery terminals on the controller. Ensure the battery has sufficient charge to power the controller's display.
- เชื่อมต่อแผงโซลาร์เซลล์: Next, connect the positive and negative terminals of your solar panel array to the corresponding solar panel terminals on the controller.
- เชื่อมต่อโหลด (ทางเลือก): If you are connecting a DC load directly to the controller, connect its positive and negative terminals to the load terminals on the controller.
- ตรวจสอบการเชื่อมต่อ: ตรวจสอบการเชื่อมต่อทั้งหมดอีกครั้งเพื่อให้แน่ใจว่าแน่นหนาและมีขั้วถูกต้อง

Figure 4.1: Typical connection diagram for the solar charge controller.
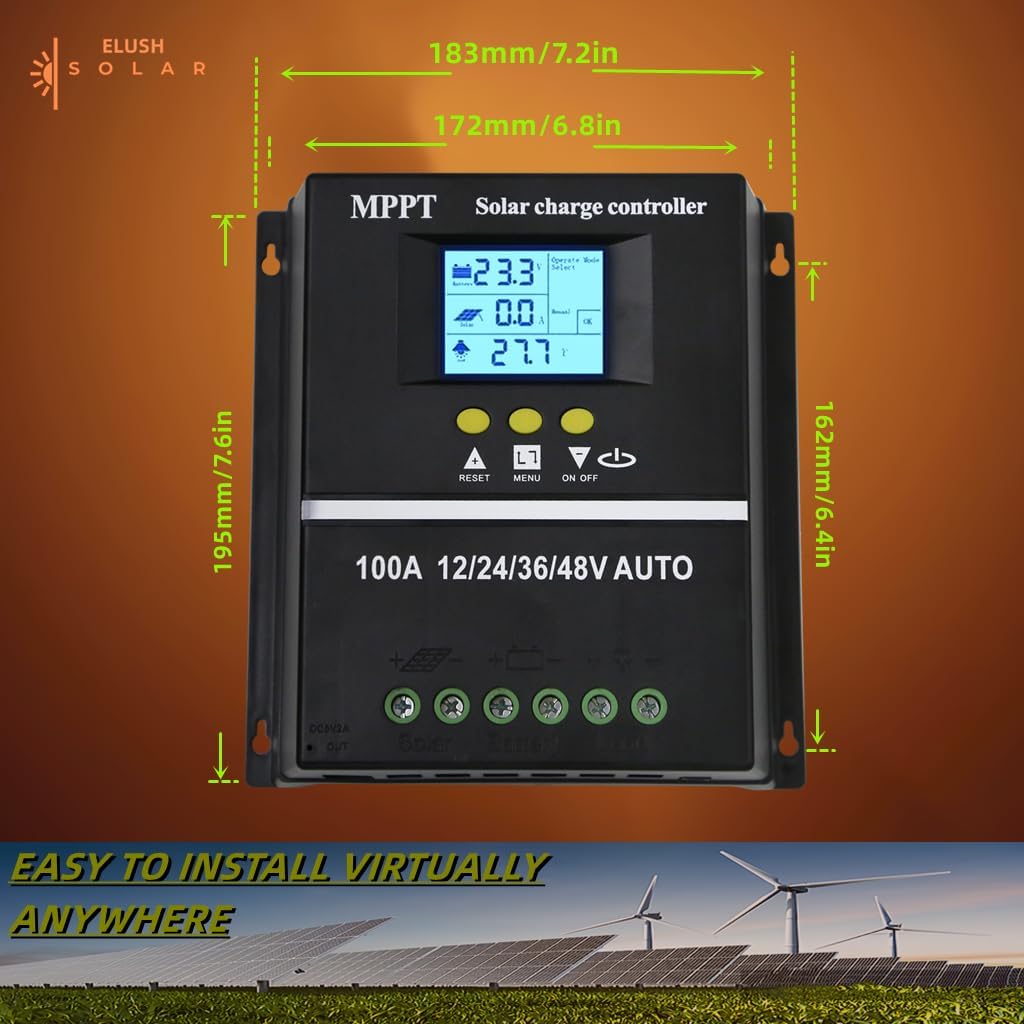
รูปที่ 4.2: ขนาดผลิตภัณฑ์สำหรับการวางแผนการติดตั้ง
5. คู่มือการใช้งาน
The controller's LCD display provides real-time information and allows for configuration of various settings.
จอแสดงผล LCD 5.1 และปุ่มต่างๆ
The LCD dynamically displays operational data. Use the buttons below the screen to navigate menus and adjust settings:
- รีเซ็ต: Resets certain parameters or enters settings mode.
- เมนู: Navigates through different display screens and settings.
- ลูกศรขึ้น/ลง: Adjust values or select options within menus.
- เปิด/ปิด: ควบคุมเอาต์พุตโหลด DC
5.2 โหมดการชาร์จ
The controller supports a rapid, efficient, and safe battery charging algorithm with four stagใช่:
- การเรียกเก็บเงินจำนวนมาก: เริ่มต้น stage where the battery receives maximum current.
- บูสต์ชาร์จ: ชาร์จแบตเตอรี่ให้มีแรงดันไฟฟ้าสูงขึ้นtage to ensure full charge.
- ค่าลอย: รักษาระดับแรงดันไฟฟ้าของแบตเตอรี่ให้คงที่tagเพื่อป้องกันการคิดค่าบริการเกิน
- ค่าปรับสมดุล: ชาร์จแบตเตอรี่เกินเป็นระยะเพื่อปรับสมดุลแรงดันไฟฟ้าของเซลล์tages (for certain battery types).

Figure 5.1: Four-stage battery charging process.
5.3 การเลือกประเภทแบตเตอรี่
The controller is compatible with Sealed, GEL, Flooded, and LifePO4 batteries. Ensure you select the correct battery type in the settings for optimal charging and battery longevity.

Figure 5.2: Compatible battery types.
5.4 สถานการณ์การสมัคร
The ELUSH MPPT Solar Charge Controller is suitable for various applications, including:
- Residential solar power systems
- RV and marine solar setups
- Off-grid cabins and remote power solutions
- Portable solar power kits
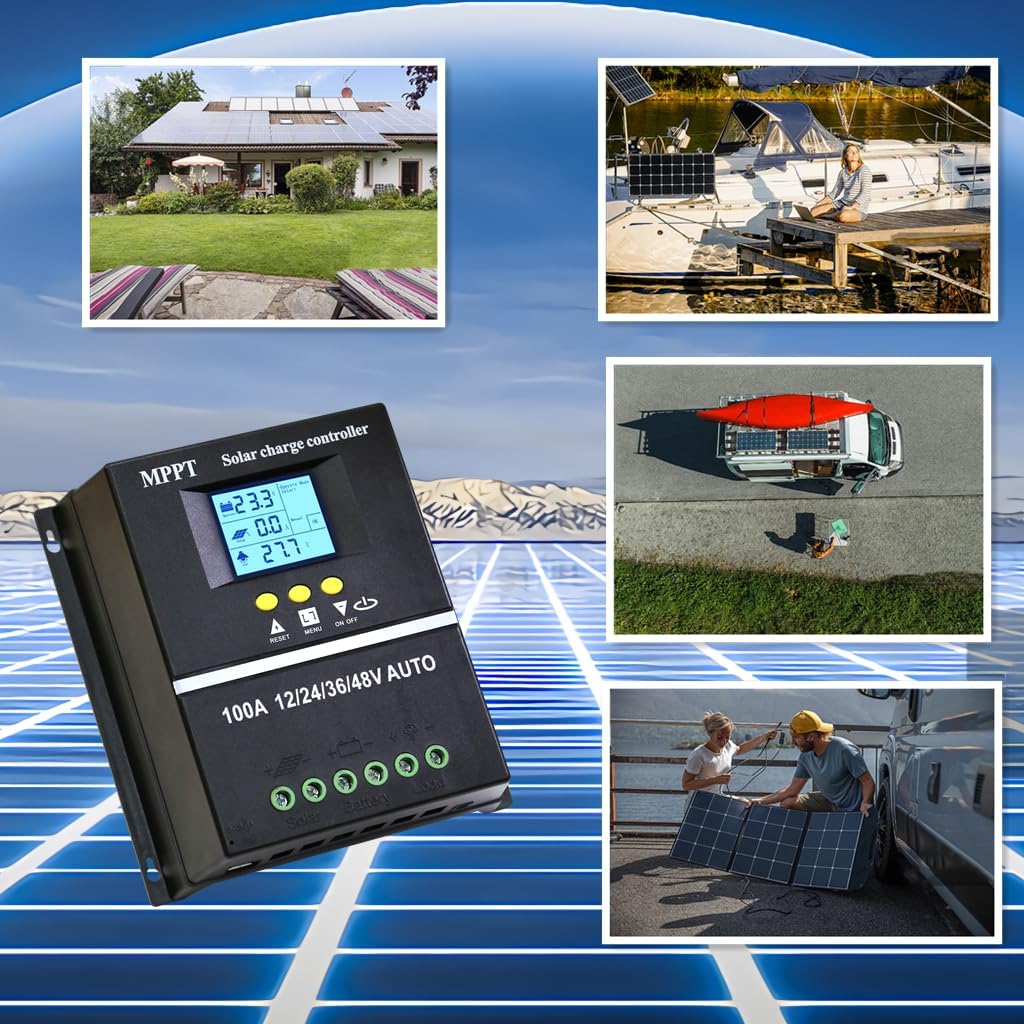
Figure 5.3: Diverse application scenarios for the solar charge controller.
6. การบำรุงรักษา
การบำรุงรักษาอย่างสม่ำเสมอจะช่วยให้ตัวควบคุมการชาร์จพลังงานแสงอาทิตย์ของคุณมีอายุการใช้งานยาวนานและทำงานได้อย่างมีประสิทธิภาพสูงสุด:
- ความสะอาด : รักษาตัวควบคุมให้สะอาด ปราศจากฝุ่นและสิ่งสกปรก ใช้ผ้าแห้งนุ่มๆ ในการทำความสะอาด
- การเชื่อมต่อ: ตรวจสอบการเชื่อมต่อสายไฟทั้งหมดเป็นระยะเพื่อให้แน่ใจว่าแน่นหนาและปราศจากการกัดกร่อน การเชื่อมต่อที่หลวมอาจทำให้ไฟฟ้าดับหรือเกิดความร้อนสูงเกินไป
- การระบายอากาศ : Ensure the installation area remains well-ventilated to prevent overheating, especially during peak operation.
- อัพเดตเฟิร์มแวร์: ตรวจสอบของผู้ผลิต webตรวจสอบเว็บไซต์เพื่อดูการอัปเดตเฟิร์มแวร์ที่มีให้ใช้งาน เพื่อให้แน่ใจว่าคอนโทรลเลอร์ของคุณมีคุณสมบัติล่าสุดและการแก้ไขข้อบกพร่องต่างๆ
7 การแก้ไขปัญหา
หากคุณพบปัญหาเกี่ยวกับตัวควบคุมการชาร์จพลังงานแสงอาทิตย์ โปรดดูปัญหาทั่วไปและวิธีแก้ไขต่อไปนี้:
| ปัญหา | สาเหตุที่เป็นไปได้ | สารละลาย |
|---|---|---|
| Controller not powering on / No display | Battery not connected or insufficient battery voltage. | Ensure battery is connected first and has adequate charge (minimum 9V for 12V systems). Charge battery externally if completely depleted. |
| No solar charging current | Solar panels not connected, insufficient sunlight, or panel issues. | Check solar panel connections. Ensure panels are receiving direct sunlight. Verify panel voltage. |
| แบตเตอรี่ไม่ชาร์จเต็ม | Incorrect battery type setting, insufficient solar input, or battery degradation. | Verify battery type setting on the controller. Increase solar panel capacity if needed. Test battery health. |
| โหลดไม่ทำงาน | Load output disabled, overload, or low battery voltage. | Check load output setting (ON/OFF button). Reduce load if overloaded. Charge battery. |
| ความร้อนสูงเกินไป | Poor ventilation or excessive load/charging current. | Ensure adequate airflow around the controller. Reduce load or check for short circuits. |
8. ข้อมูลจำเพาะ
Detailed technical specifications for the ELUSH 100A MPPT Solar Charge Controller:
| พารามิเตอร์ | ค่า |
|---|---|
| ปริมาณแบตเตอรี่tage | อัตโนมัติ 12V/24V/36V/48V |
| กระแสไฟชาร์จ | 100เอ |
| Max Solar Input (Voc) | 15-25V (12V Battery); 30-50V (24V Battery); 45-75V (36V Battery); 60-100V (48V Battery) |
| กำลังอินพุต PV สูงสุด | 1200W (12V Battery); 2400W (24V Battery); 3600W (36V Battery); 4800W (48V Battery) |
| พอร์ต USB | DC 5V/1.5A x 2 USB |
| อุณหภูมิในการทำงาน | -25°C ~ 55°C |
| ผู้ผลิต | ELUSH |
| น้ำหนักสินค้า | 1.79 ปอนด์ |
| ขนาดแพ็คเกจ | 8.11 x 8.03 x 2.91 นิ้ว |

Figure 8.1: Detailed specifications of the 100A model.
9. การรับประกันและการสนับสนุน
ELUSH offers a 1-year warranty for this product. For technical support or any issues you may encounter, please feel free to contact our team. Our engineers are available to provide advice and solutions.
For more information and products, visit the ELUSH Store.