
1. บทนำ
This manual provides essential instructions for the installation, operation, and maintenance of your Walfront 100A MPPT Solar Charge Controller. This advanced controller utilizes Maximum Power Point Tracking (MPPT) technology to efficiently manage power from your solar panels to charge various battery types, including Gel, Flooded, and LiFePO4 batteries. It automatically identifies 12V, 24V, 36V, and 48V systems and features dual USB 5V charging ports for added convenience.

รูปที่ 1 : ด้านหน้า view of the Walfront 100A MPPT Solar Charge Controller.
2. ข้อมูลด้านความปลอดภัย
Please read all safety instructions carefully before installation and operation to prevent injury or damage to the controller and connected equipment.
- ตรวจสอบให้แน่ใจว่ามีการระบายอากาศที่เหมาะสมรอบๆ ตัวควบคุมเพื่อป้องกันความร้อนสูงเกินไป
- Connect the battery first, then the solar panel, and finally the load. Disconnect in the reverse order.
- Verify correct polarity for all connections. Incorrect polarity can damage the controller.
- The controller includes built-in protections for battery overvoltage, overcurrent, power failure, overcharging, deep discharge, reverse connection, and overheating. However, always exercise caution.
- อย่าพยายามถอดประกอบหรือซ่อมแซมตัวควบคุมด้วยตนเอง โปรดติดต่อช่างผู้ชำนาญการเพื่อขอรับบริการ
- ควรเก็บตัวควบคุมให้ห่างจากน้ำ ก๊าซไวไฟ และสารกัดกร่อน
3. สินค้าหมดview
The Walfront 100A MPPT Solar Charge Controller features a robust design with an intuitive LCD display and multiple connection ports.

Figure 2: Controller dimensions (approximately 195mm x 172mm x 68mm).
3.1. ส่วนประกอบและการควบคุม
- จอแสดงผล LCD: Shows real-time operating data such as battery voltage, PV charging current, battery discharge current, operating temperature, and selected working mode.
- ปุ่มควบคุม: RESET, MENU, ON/OFF, and navigation buttons for setting parameters and selecting modes.
- ขั้วต่อการเชื่อมต่อ: Clearly labeled terminals for solar panel input, battery connection, and DC load output.
- พอร์ต USB คู่: Two 5V USB ports for charging external devices.
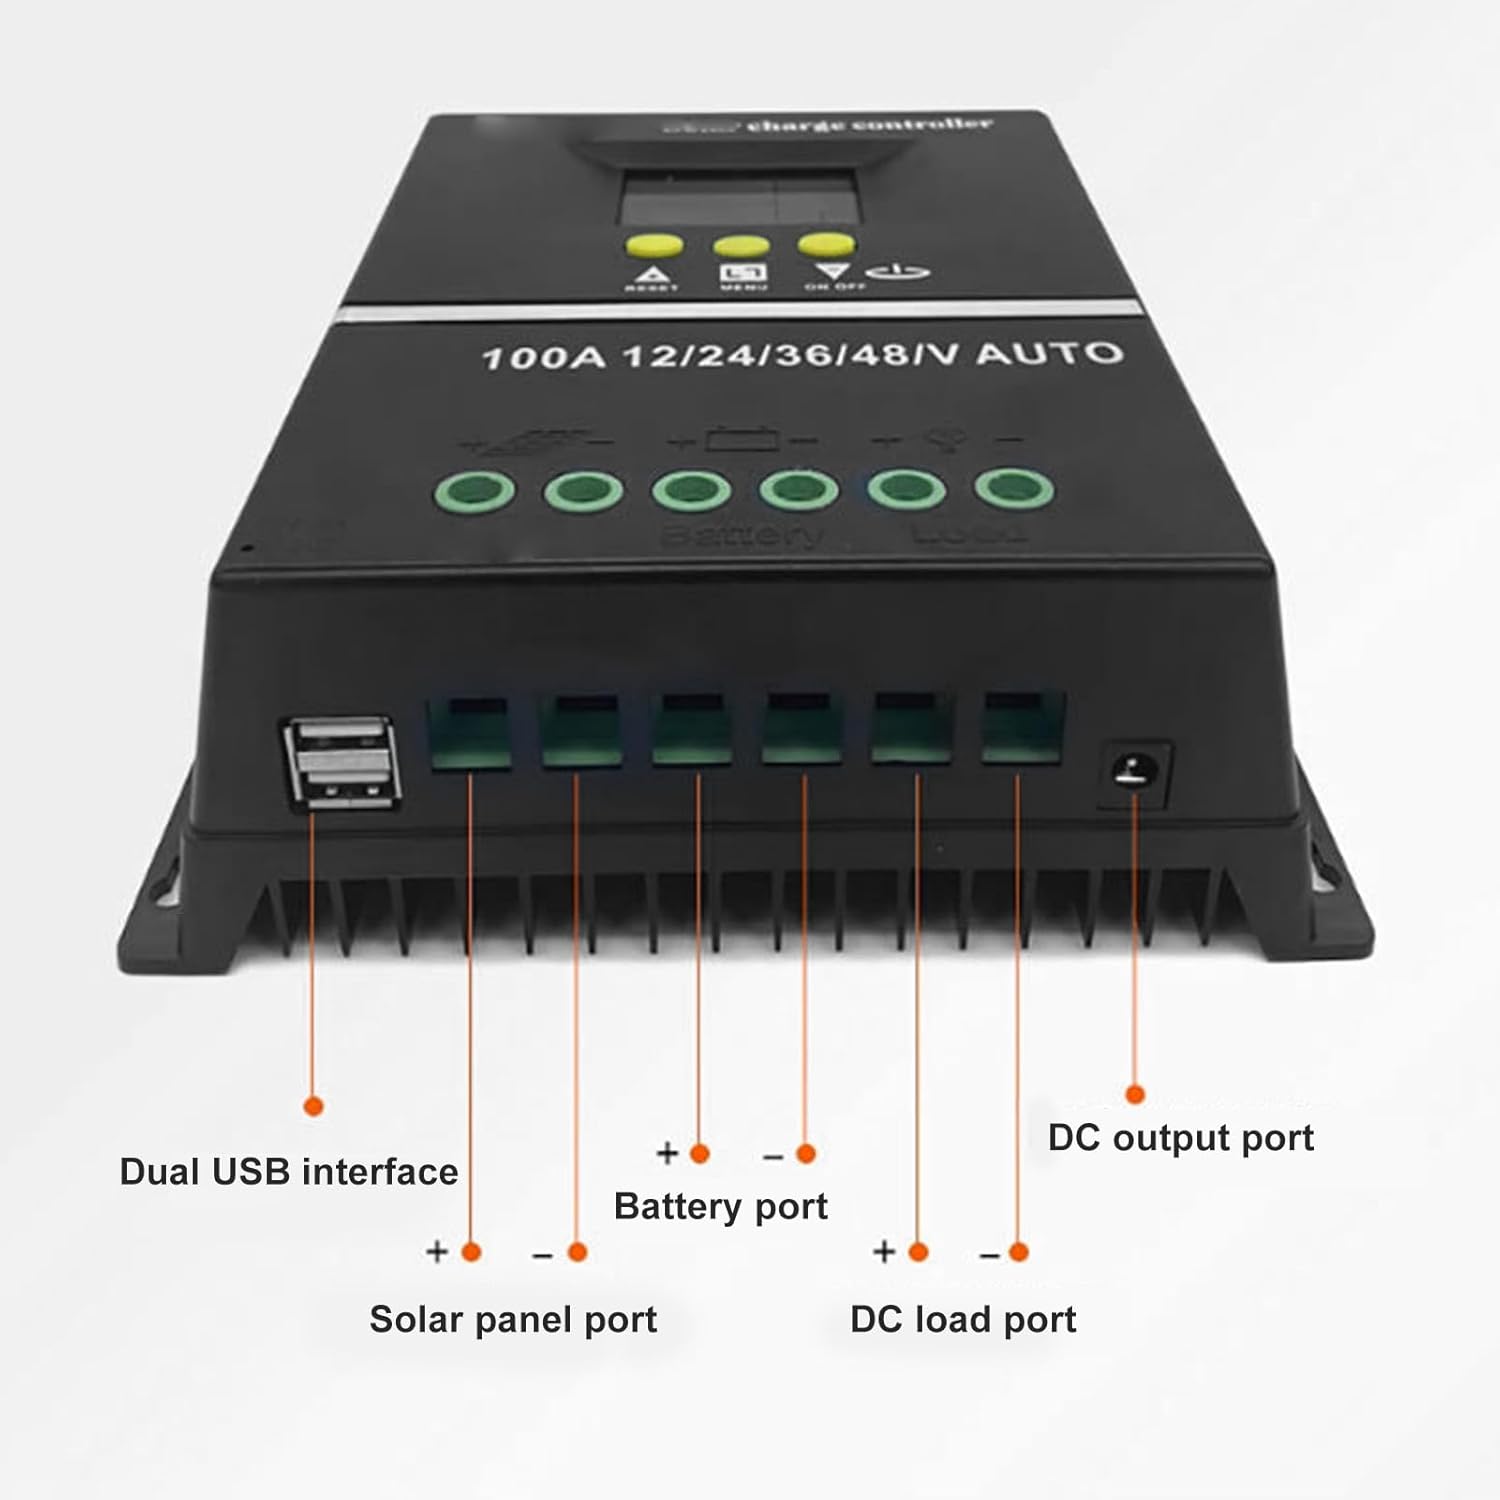
รูปที่ 3: ด้านล่าง view showing Dual USB interface, Solar panel port, Battery port, DC load port, and DC output port.

รูปที่ 4: รายละเอียด view of the LCD display areas.
4. การตั้งค่าและการติดตั้ง
Follow these steps for proper installation of the solar charge controller:
- เตรียมเดินสายไฟ: Ensure all wires are of appropriate gauge for the current and length, and that they are properly stripped.
- เชื่อมต่อแบตเตอรี่: Connect the battery to the controller's battery terminals (positive to positive, negative to negative). The controller will automatically detect the system voltage (12V/24V/36V/48V)
- เชื่อมต่อแผงโซล่าเซลล์: Connect the solar panel to the controller's solar panel terminals (positive to positive, negative to negative).
- Connect DC Load: Connect your DC loads to the controller's load terminals (positive to positive, negative to negative).
- การเชื่อมต่อที่ปลอดภัย: ตรวจสอบการเชื่อมต่อทั้งหมดอีกครั้งเพื่อให้แน่ใจว่าแน่นสนิทและขั้วถูกต้อง
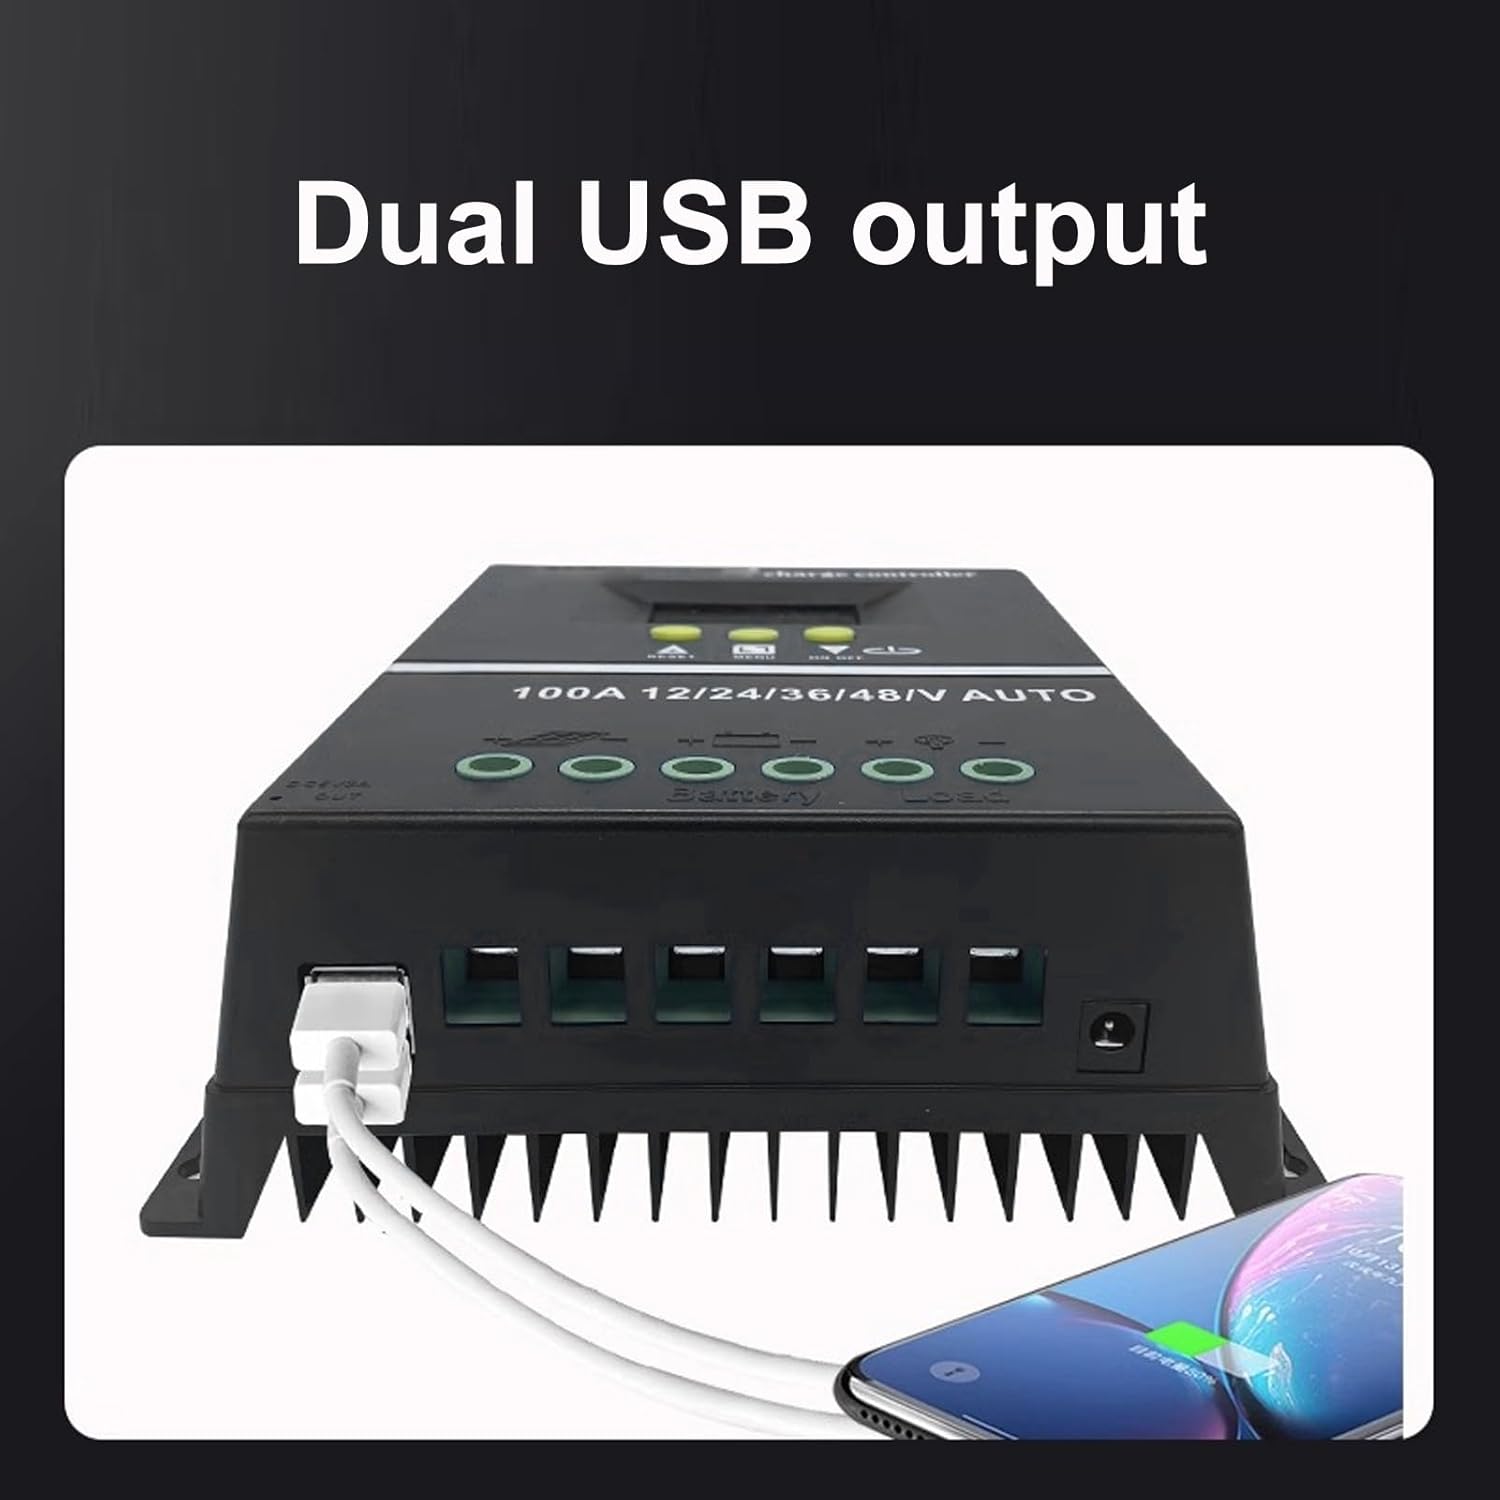
Figure 5: Connection diagram for the solar charge controller.
5. คู่มือการใช้งาน
The controller features a multifunctional LCD display and several working modes to suit various applications.
5.1. ฟังก์ชั่นจอแสดงผล LCD และปุ่มต่างๆ
The LCD dynamically displays operating data. Use the MENU button to navigate through display screens and settings. The UP/DOWN buttons (triangle symbols) adjust values or select options. The ON/OFF button controls the load output.
5.2. โหมดการทำงาน
The controller offers 7 working modes:
- โหมดการชาร์จ: Under no circumstances should discharge be allowed. This mode focuses solely on charging the battery.
- โหมดควบคุมแสง: The controller detects night, delays for ten minutes, and then starts discharging. When it detects daytime, it delays for ten minutes and stops discharging.
- Light and Delay Control Mode: When the controller detects night, it delays for ten minutes before starting to discharge and counts down (if the timer stops at 0), the discharge will stop. The maximum delay time is 23:59.
- Universal Control Mode: Always maintains discharge without any faults.
- โหมดควบคุมด้วยตนเอง: Use the '▼' button to check whether to discharge.
- Timing Control Mode: Regularly turns on or off the discharge based on set times.
- โหมดทดสอบ: Similar to lighting and delay control modes, but with only a ten-minute delay.
5.3. การชาร์จ USB
The dual USB 5V charging ports can be used to charge compatible electronic devices. Simply connect your device to one of the USB ports.
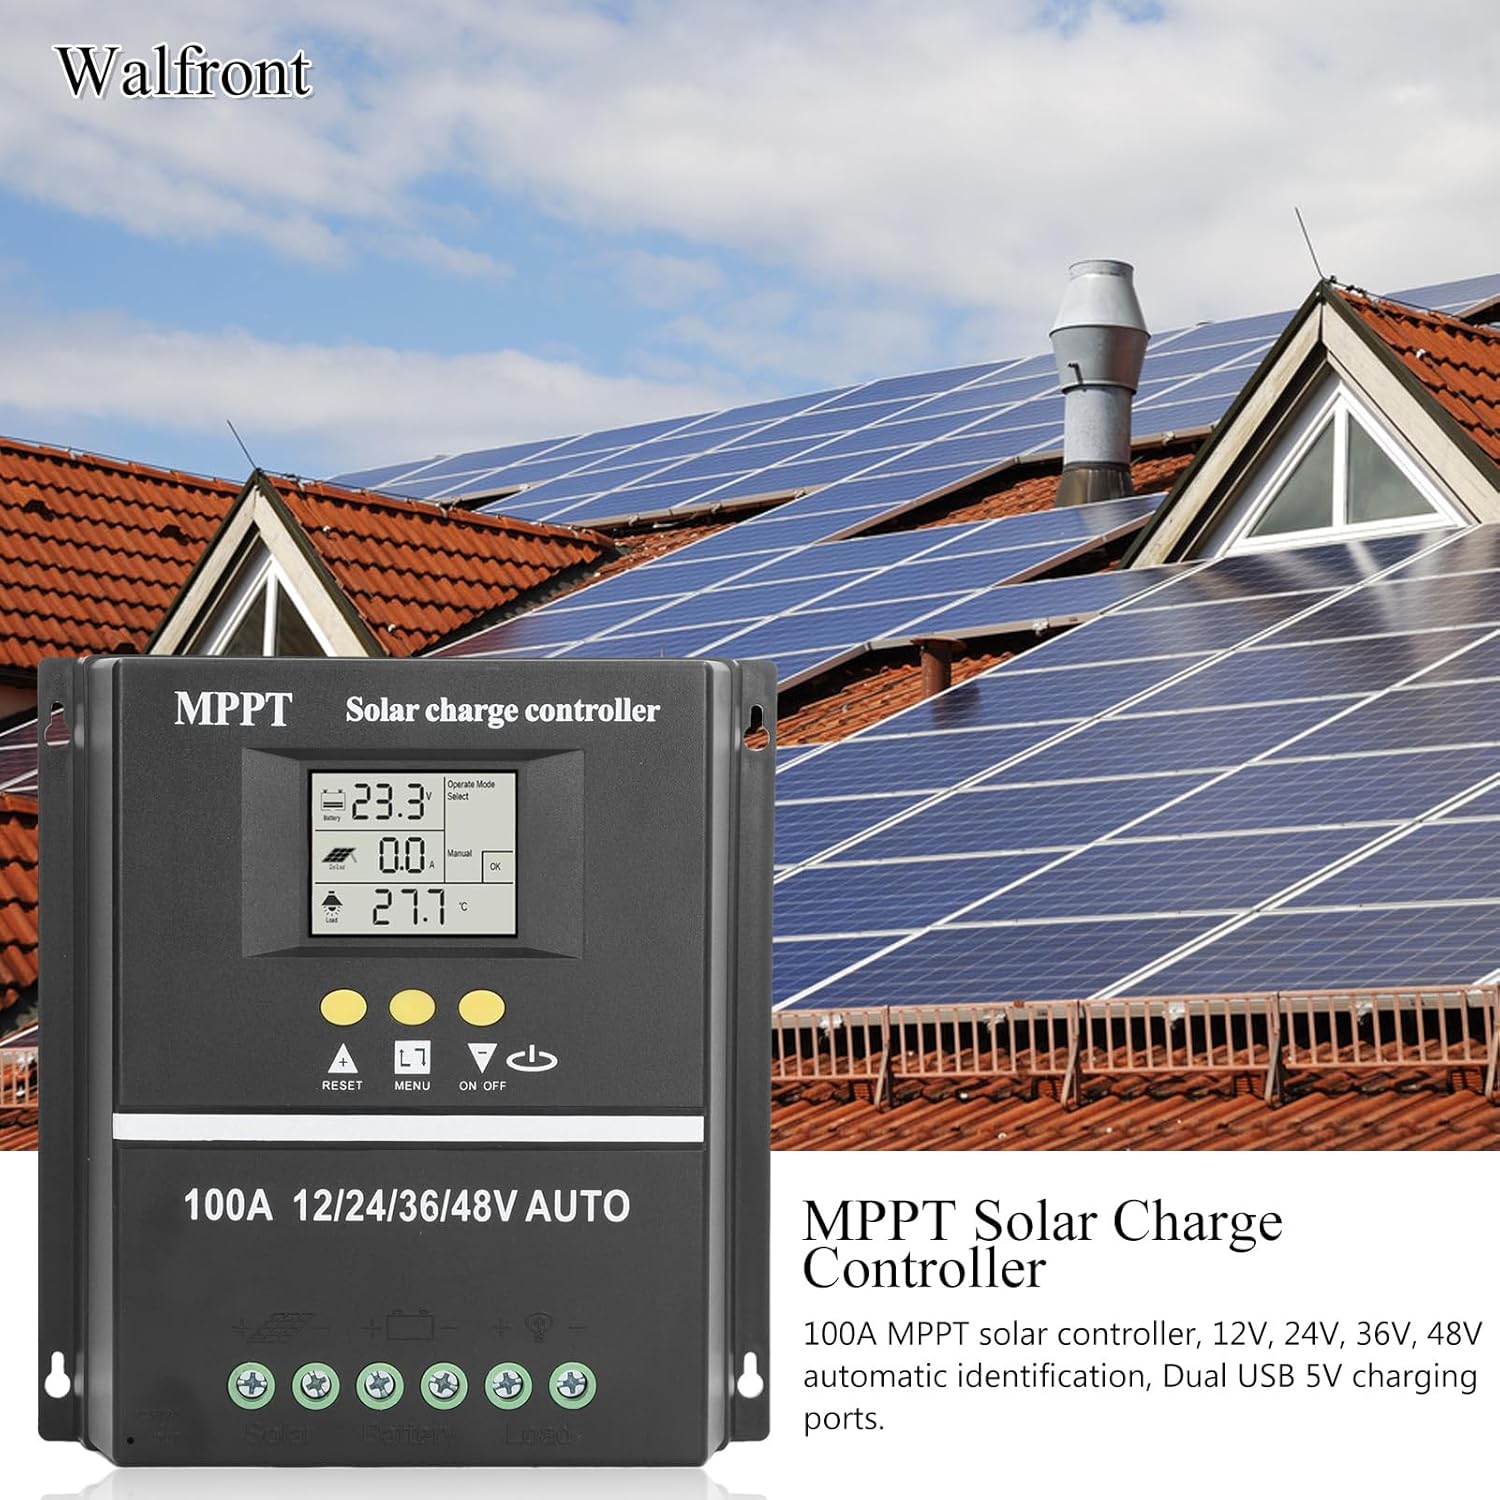
Figure 6: Using the dual USB output for charging.
6. การบำรุงรักษา
การบำรุงรักษาตามปกติจะช่วยให้ตัวควบคุมการชาร์จพลังงานแสงอาทิตย์ของคุณมีประสิทธิภาพสูงสุดและมีอายุการใช้งานยาวนาน
- ความสะอาด : รักษาตัวควบคุมให้สะอาด ปราศจากฝุ่นและเศษขยะ ใช้ผ้าแห้งเช็ดทำความสะอาด
- การเชื่อมต่อ: ตรวจสอบการเชื่อมต่อสายไฟทั้งหมดเป็นระยะๆ เพื่อให้แน่ใจว่ามีความปลอดภัยและไม่มีการกัดกร่อน
- การระบายอากาศ : ตรวจสอบให้แน่ใจว่าช่องระบายอากาศไม่ถูกปิดกั้น เพื่อให้ความร้อนระบายออกได้อย่างเหมาะสม
- การตรวจสอบแบตเตอรี่: Regularly inspect your battery for any signs of damage or leakage.
7 การแก้ไขปัญหา
หากคุณพบปัญหาเกี่ยวกับตัวควบคุมการชาร์จพลังงานแสงอาทิตย์ โปรดพิจารณาปัญหาและวิธีแก้ไขทั่วไปต่อไปนี้:
- ไม่มีจอแสดงผล/ไม่มีพลังงาน: Check battery connections and ensure the battery has sufficient charge. Verify all wiring is correct.
- แบตเตอรี่ไม่ชาร์จ: Check solar panel connections and ensure the panels are receiving adequate sunlight. Verify solar panel voltage อยู่ภายในช่วงอินพุตของตัวควบคุม
- โหลดไม่ทำงาน: Check load connections. Ensure the load is within the controller's rated capacity. Check if the load output is enabled (e.g., via ON/OFF button or selected working mode). The controller will stop discharge under low voltagการป้องกันอี
- รหัสข้อผิดพลาดบนจอแสดงผล: Refer to the specific error code displayed on the LCD. Consult the manufacturer's support for detailed explanations and solutions for specific codes.
- ความร้อนสูงเกินไป: Ensure the controller is installed in a well-ventilated area and not exposed to direct sunlight or excessive ambient temperatures.
หากมีปัญหาเกิดขึ้นอย่างต่อเนื่อง โปรดติดต่อฝ่ายสนับสนุนลูกค้า
8. ข้อมูลจำเพาะ
| คุณสมบัติ | ข้อมูลจำเพาะ |
|---|---|
| กระแสไฟฟ้าที่ได้รับการจัดอันดับ | 100เอ |
| เล่มระบบtage | 12V / 24V / 36V / 48V Auto Identification |
| Maximum Solar Input (Voc) | 15-23V (12V battery); 30-45V (24V battery); 45-69V (36V battery); 60-90V (48V battery) |
| Maximum Photovoltaic Input Power | 1200W (12V battery); 2400W (24V battery); 3600W (36V battery); 4800W (48V battery) |
| เอาท์พุต USB | Dual USB 5V |
| ประเภทจอภาพ | จอ LCD พร้อมไฟแบ็คไลท์ |
| ความเข้ากันได้ของแบตเตอรี่ | GEL, Flooded, LiFePO4 |
| อุณหภูมิในการทำงาน | สูงถึง 60°C |
| วัสดุ | เอบีเอส |
| น้ำหนักสินค้า | 1.81 ปอนด์ |
| ขนาดแพ็คเกจ | 8.03 x 7.99 x 2.83 นิ้ว |
9. การรับประกันและการสนับสนุน
For warranty information, technical support, or service inquiries, please refer to the product packaging or contact Walfront customer service through your purchase platform. Keep your purchase receipt as proof of purchase.